

Introduction
For many years I've wanted to have a traditional Finnish-style sauna. I got close back in 2022 and did all the usual sauna dreamer research:
- Bought the e-book from SaunaTimes
- Read every post on the Sauna Reddit
- Watched every YouTube video I could find on building a sauna
Finally, in March 2026 I decided to take the plunge and kick off the build. At a high level:
- I had a 8' x 16' shed delivered for an 8x8 changing room and an 8x8 sauna room. It has an extra 2' of height to allow tall benches and 9' interior ceilings.
- I insulated the building, build a divider wall, and installed electrical wiring.
- I tiled the floor with extra friction porcelain tile with no drain.
- I added pine car siding to the ceiling in the changing room and reclaimed barn planks on the walls.
- I added the door, foil vapor barrier, and cedar to the sauna room.
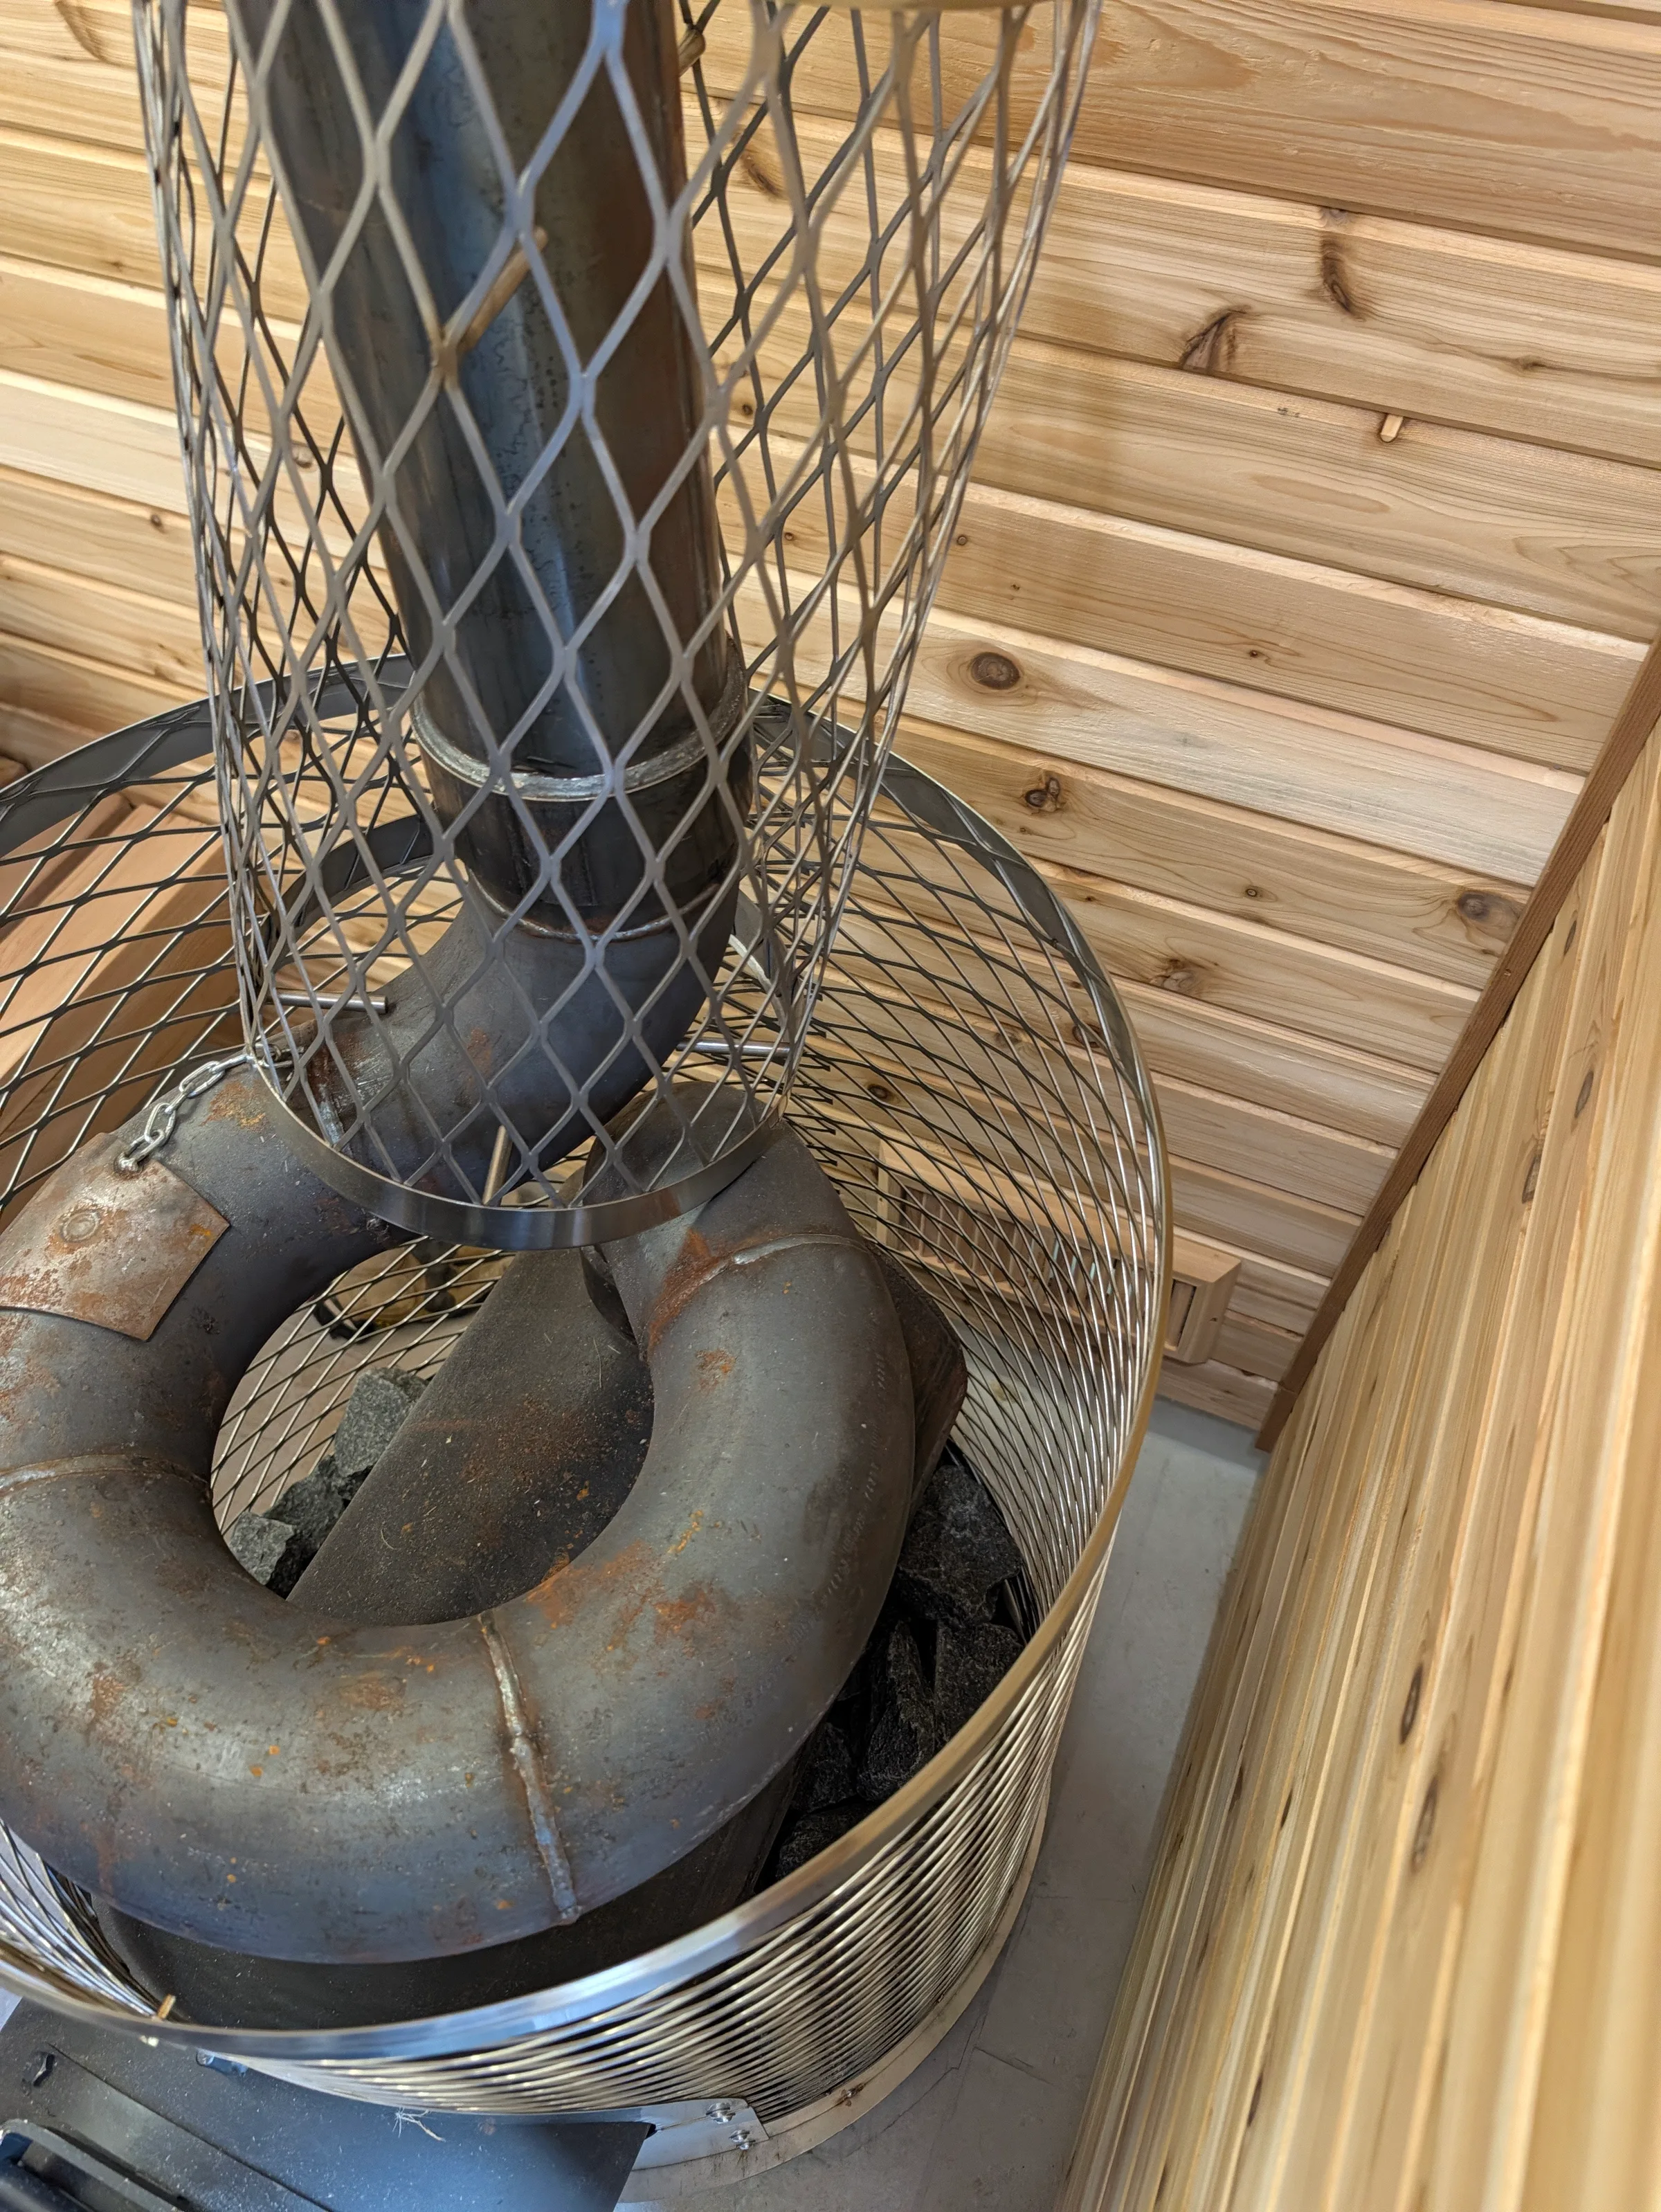
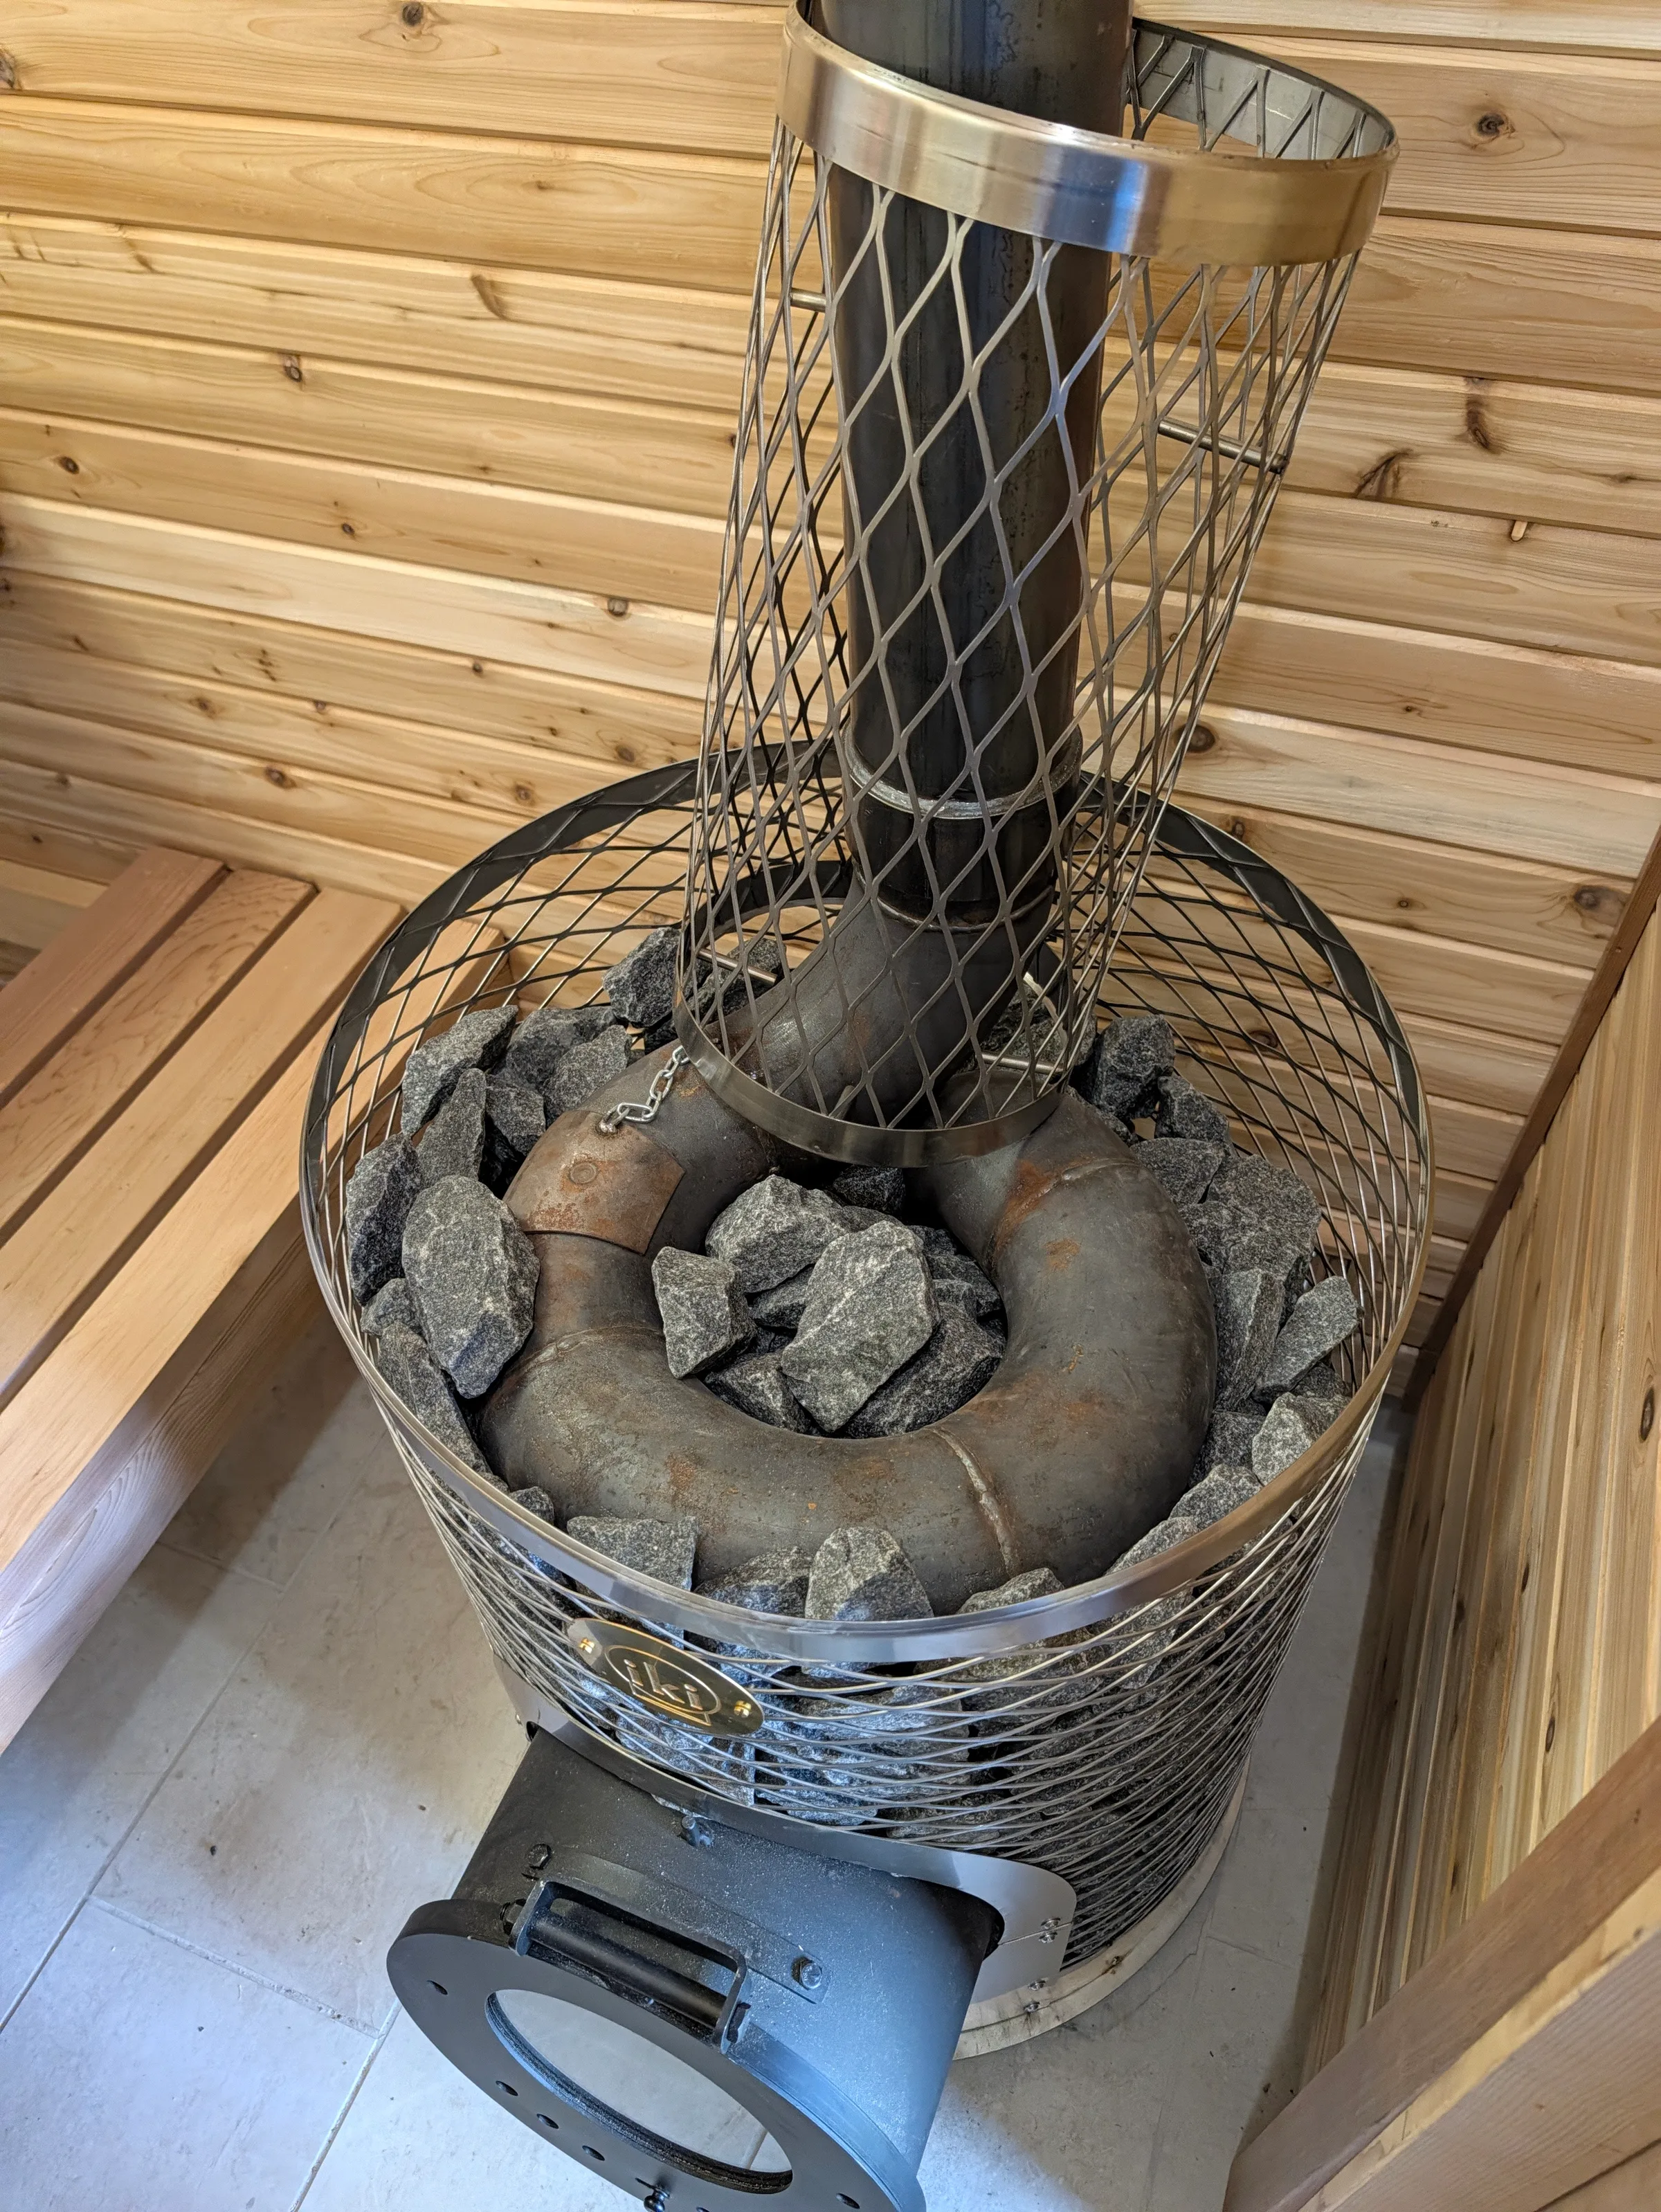
- I added the Iki Classic Plus wood burning stove and chimney through the roof.
- I built the benches from clear cedar and added backrests.
Follow along below as we go through each section of the process including costs, lessons learned, changes I might make if building again, and photos throughout the process.
Utility Shed
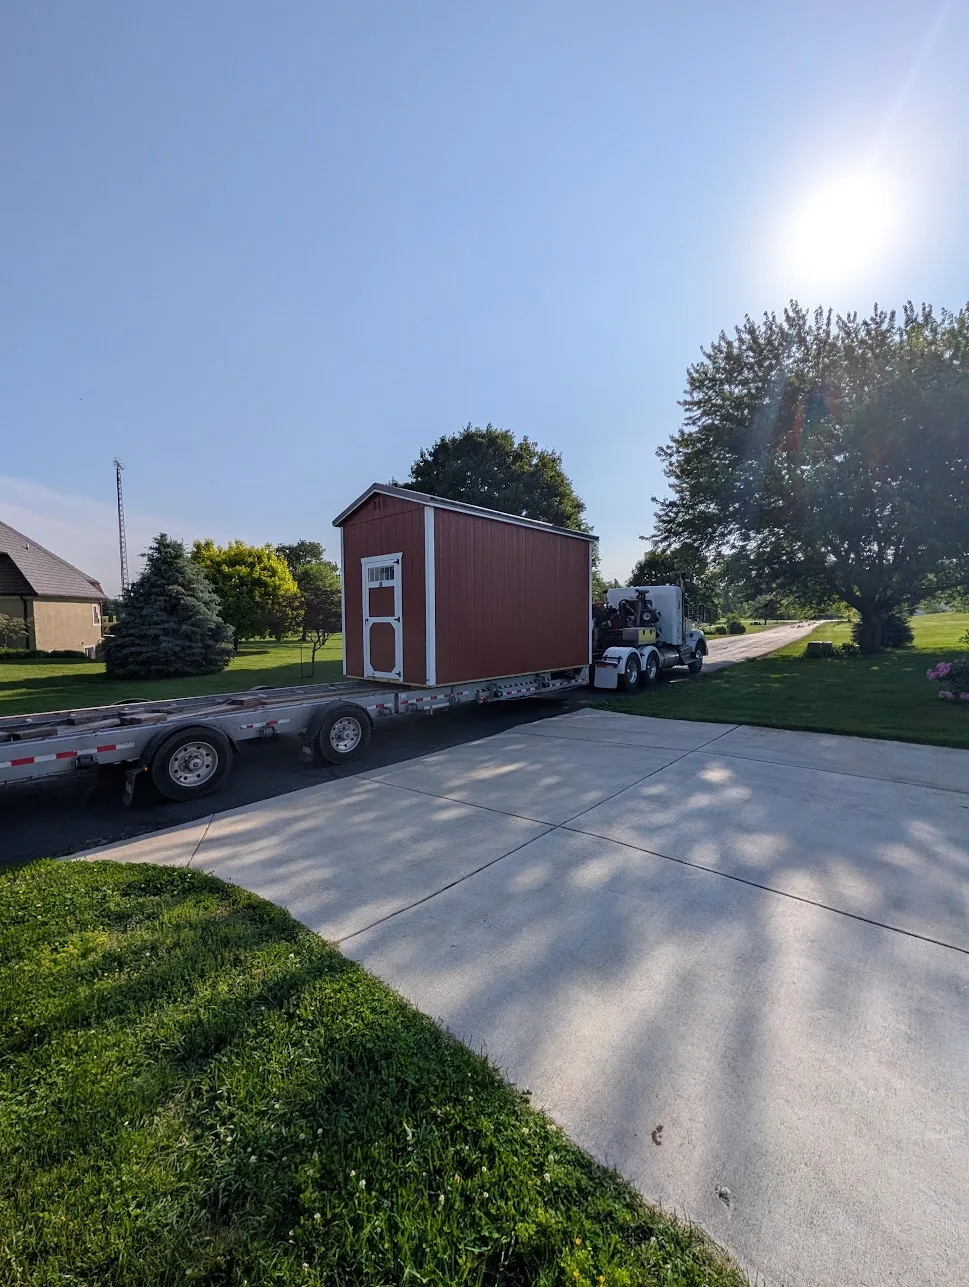
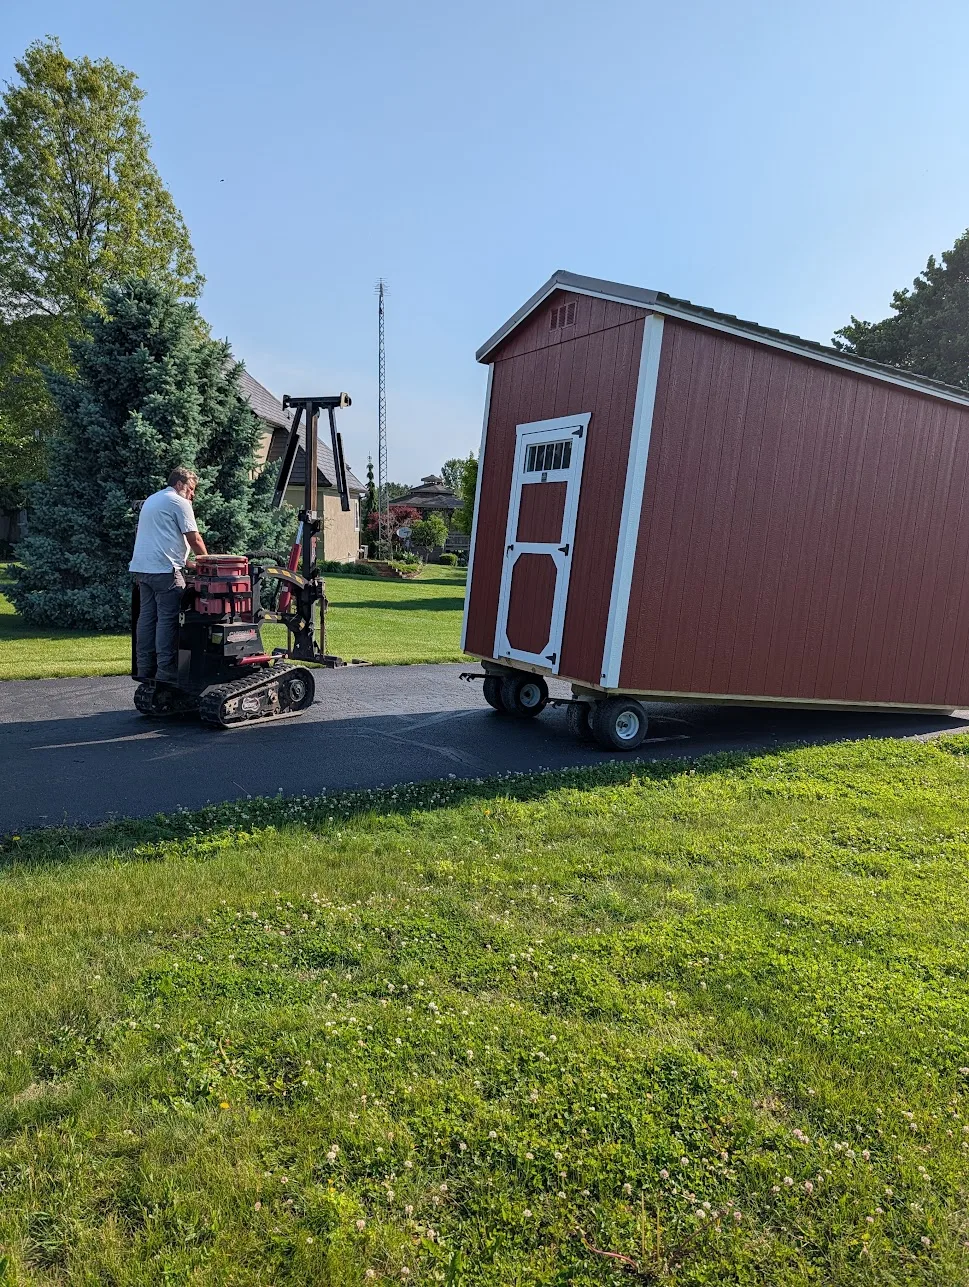
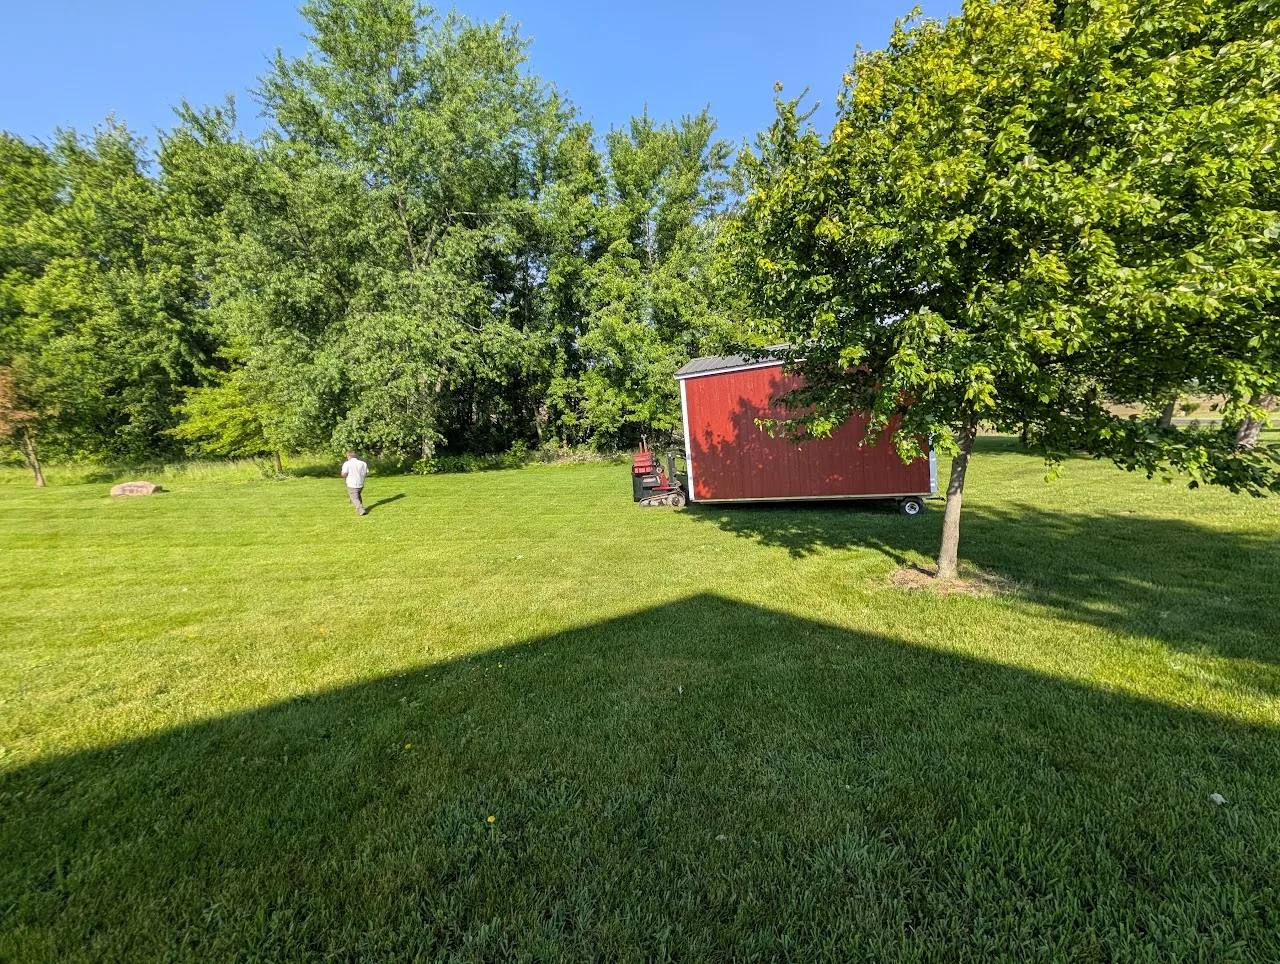
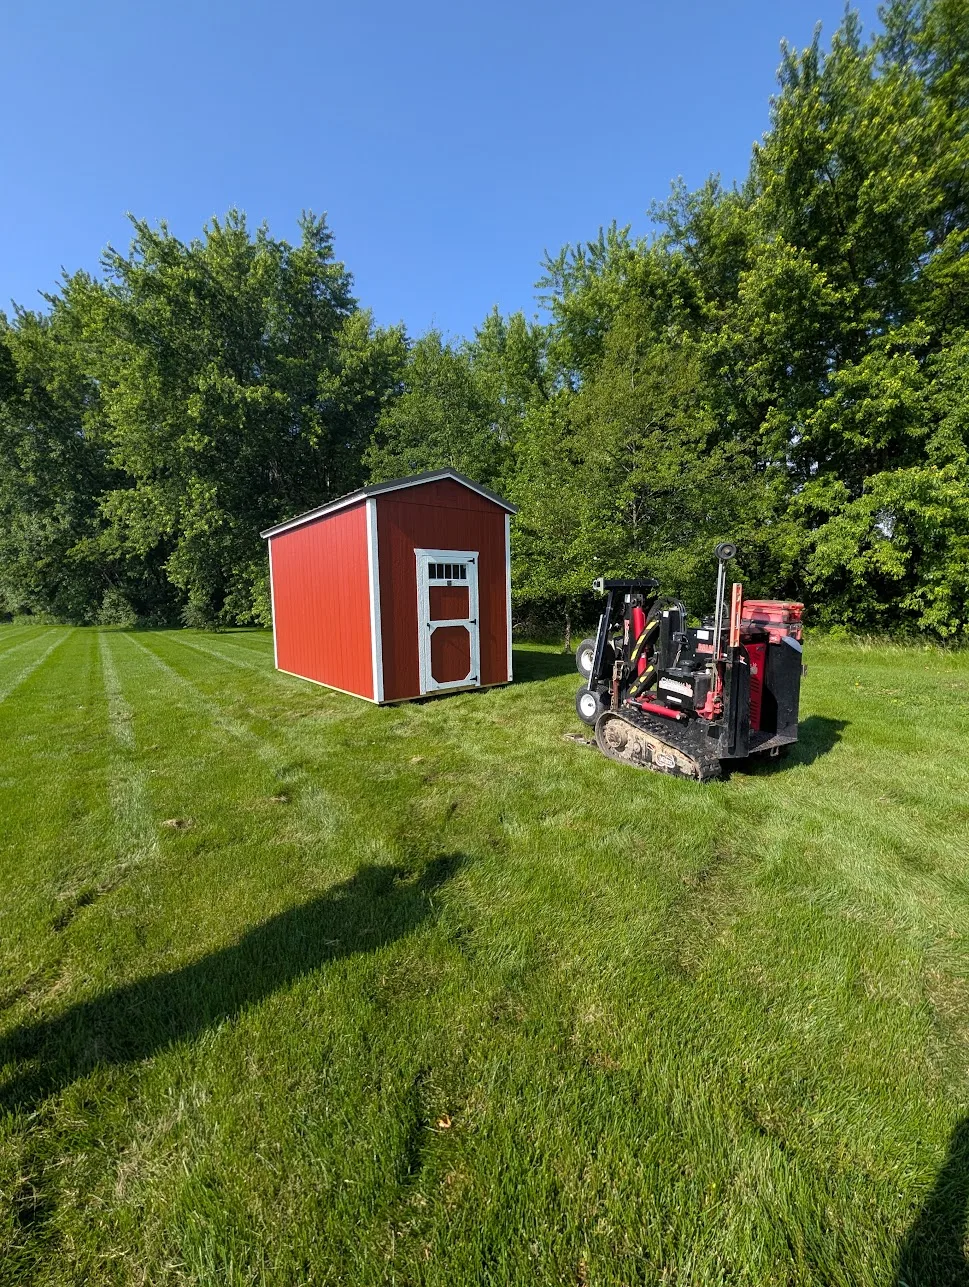
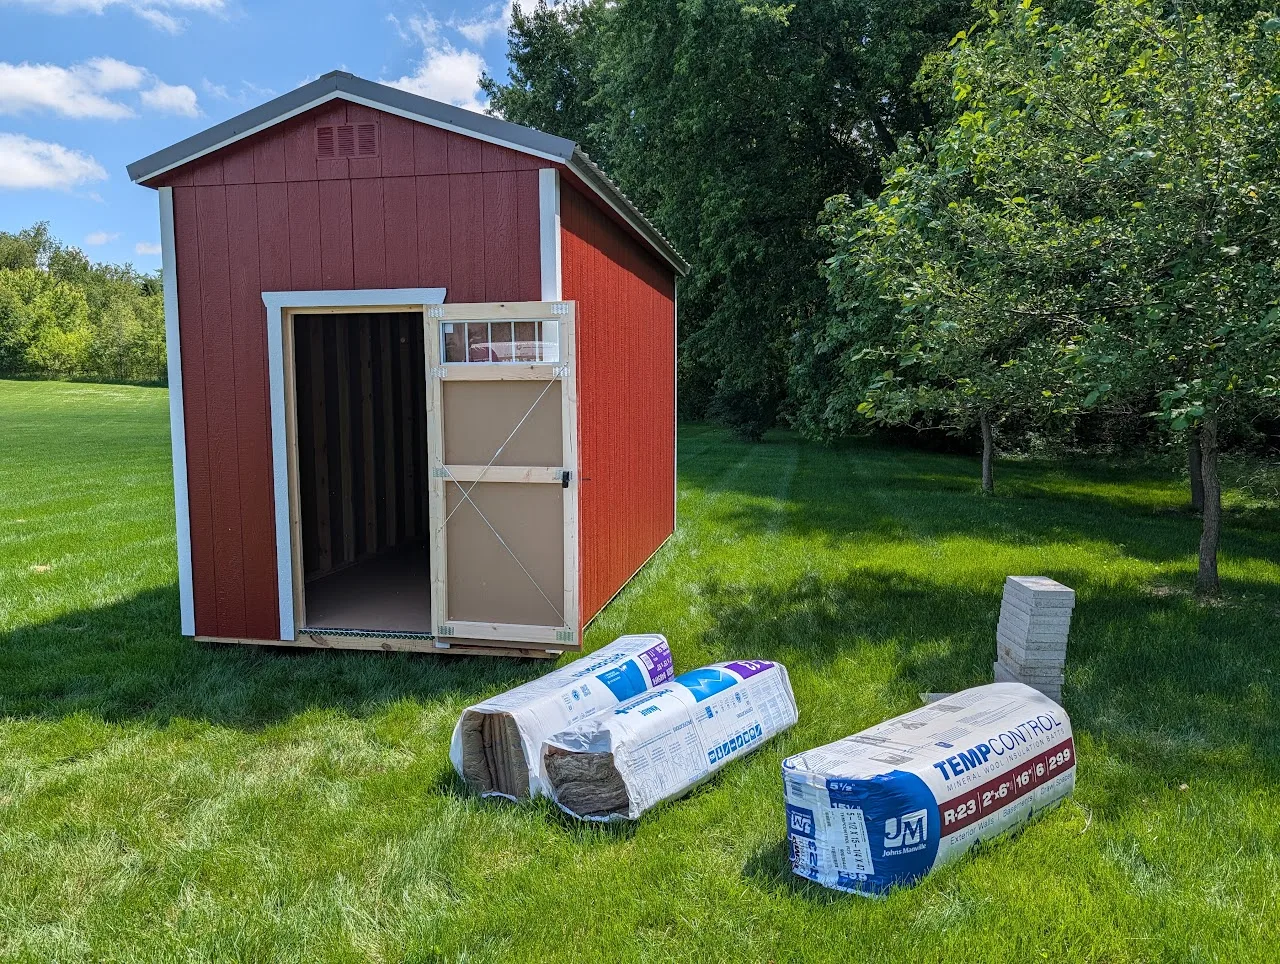
I went to a local shed dealer in town and ordered a standard 8' x 16' utility shed with no windows, a single door on the end, painted red with white trim. I had them add an extra 2' of height to the shed as I need ed the extra room for taller benches because I chose the Iki Classic Plus stove which is relatively tall. With the extra 2 feet, the interior ceiling height was 9' from the floor to the rafters.
The shed itself was about $4800 after taxes with $350 being the up-charge for the extra height.
Initial Interior Work
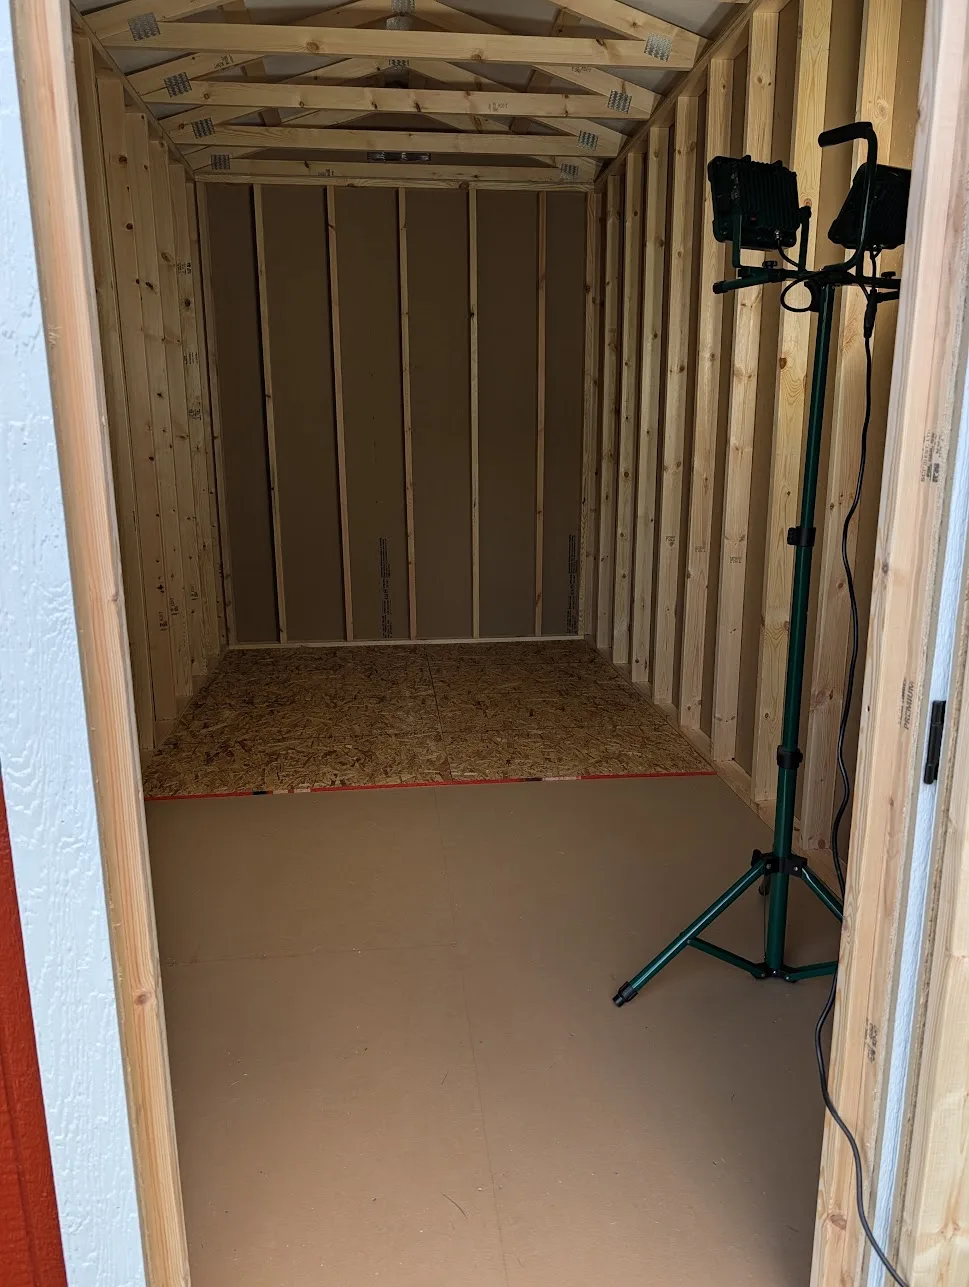
The first thing I did on the shed is install 3/4" OSB on the floor. The floor already had a painted/sealed OSB flooring, but I needed it thicker to support the tiles I was going to install later. I used a lot of screws to ensure it was secure.
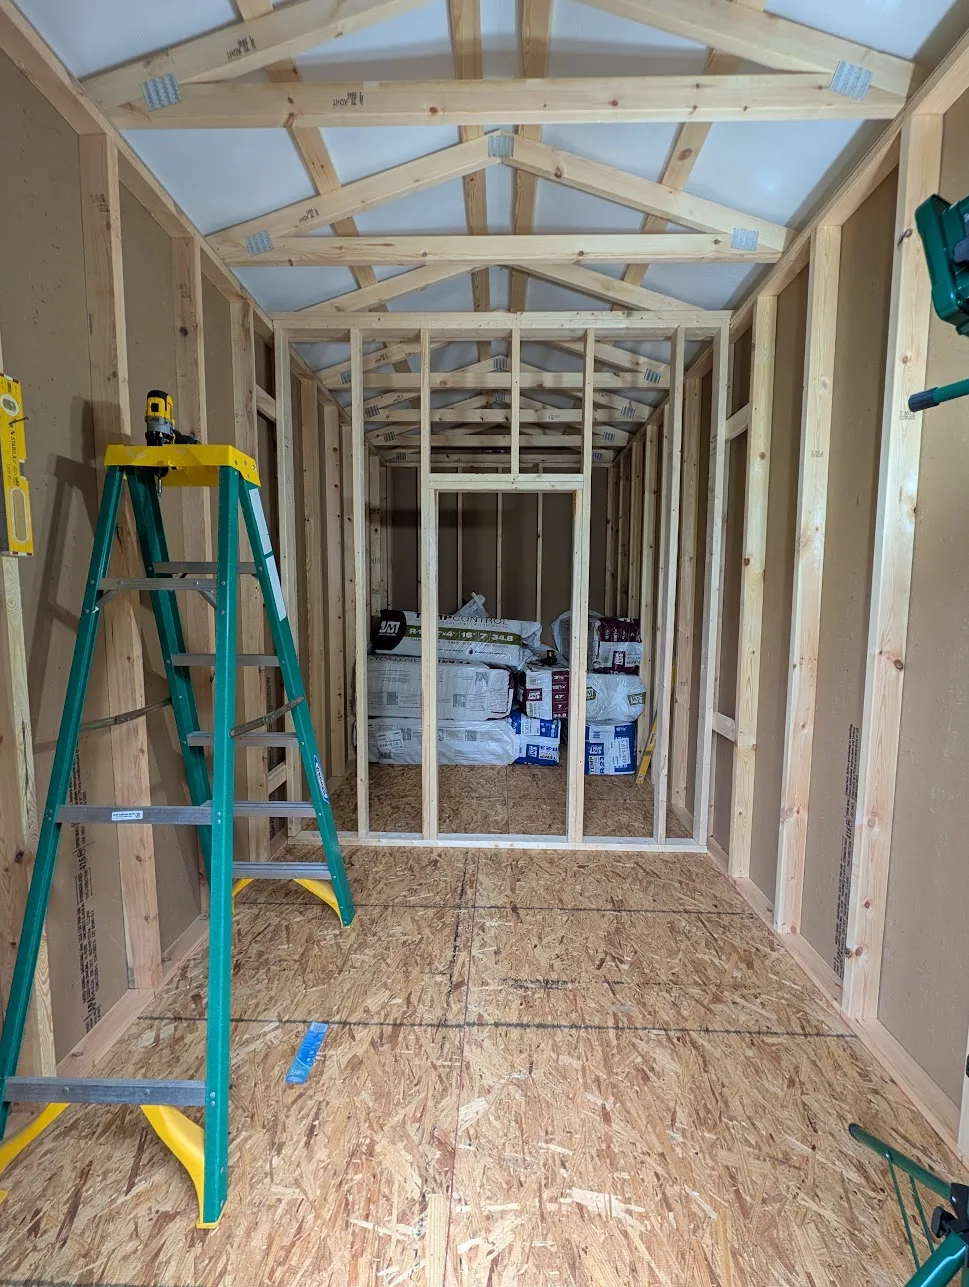
Next I build the divider wall between the changing room and sauna room. I used 2x4s for the studs and got the rough door opening from the retailer. I needed to have the door as close to the stove as possible to maximize the room for the benches later so the door is a little off-center. The studs and OSB were about $100 or so.
NOTE
Around this time I put in the order for all the cedar and the door, but I'll discuss that in the next section.
Insulation
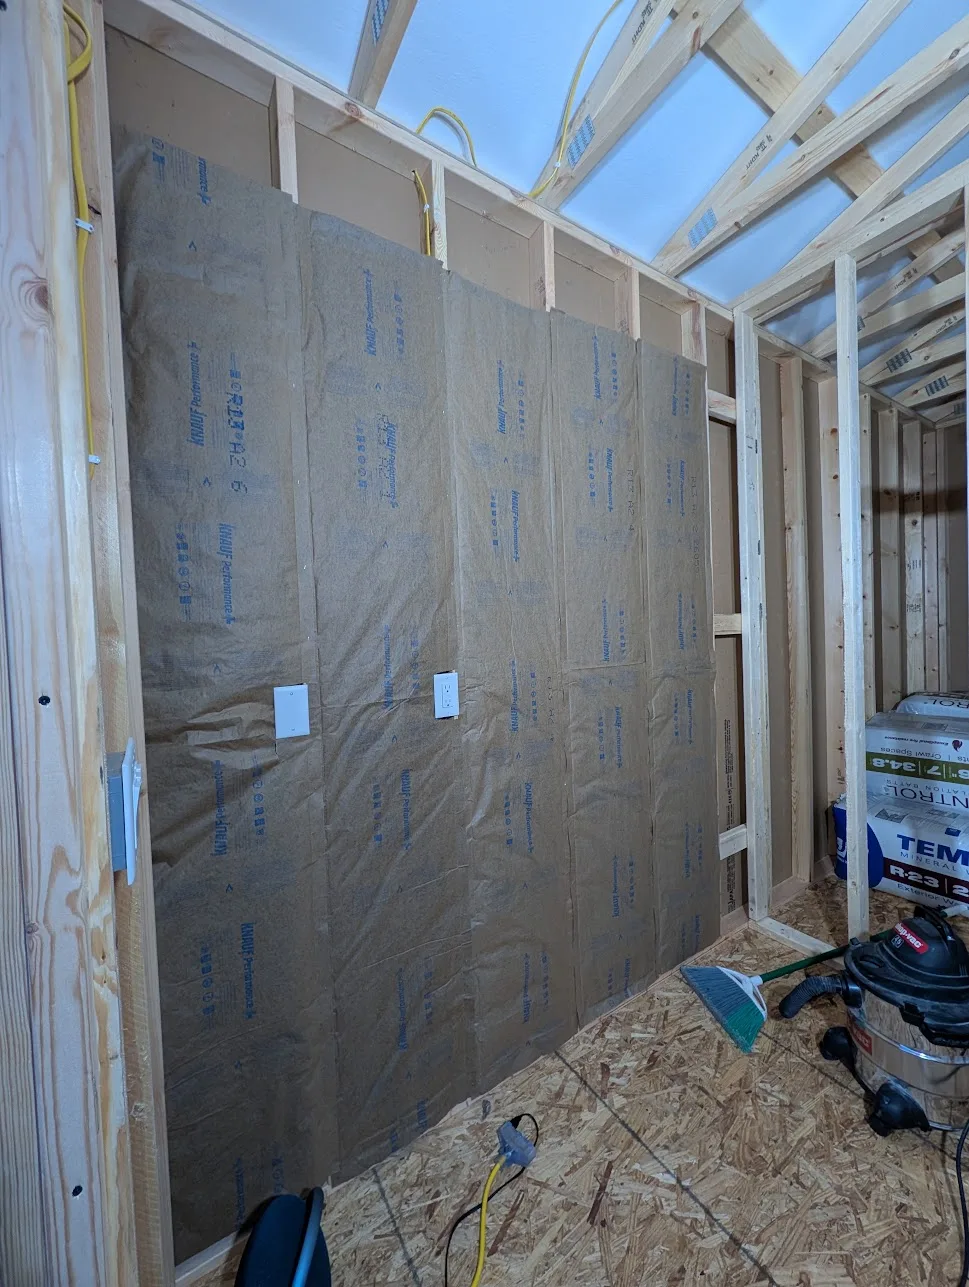
In alignment with the general consensus with the sauna community, I chose fiberglass batt insulation for the walls and ceiling in the changing room and mineral wool for the sauna room. I used 6" batts in the ceiling and normal 4" batts for the walls. Mostly this work was done as you would expect. The fiberglass batts had paper and I used staples. The mineral wool was very heavy, but was friction fit and just stayed in place in the walls.
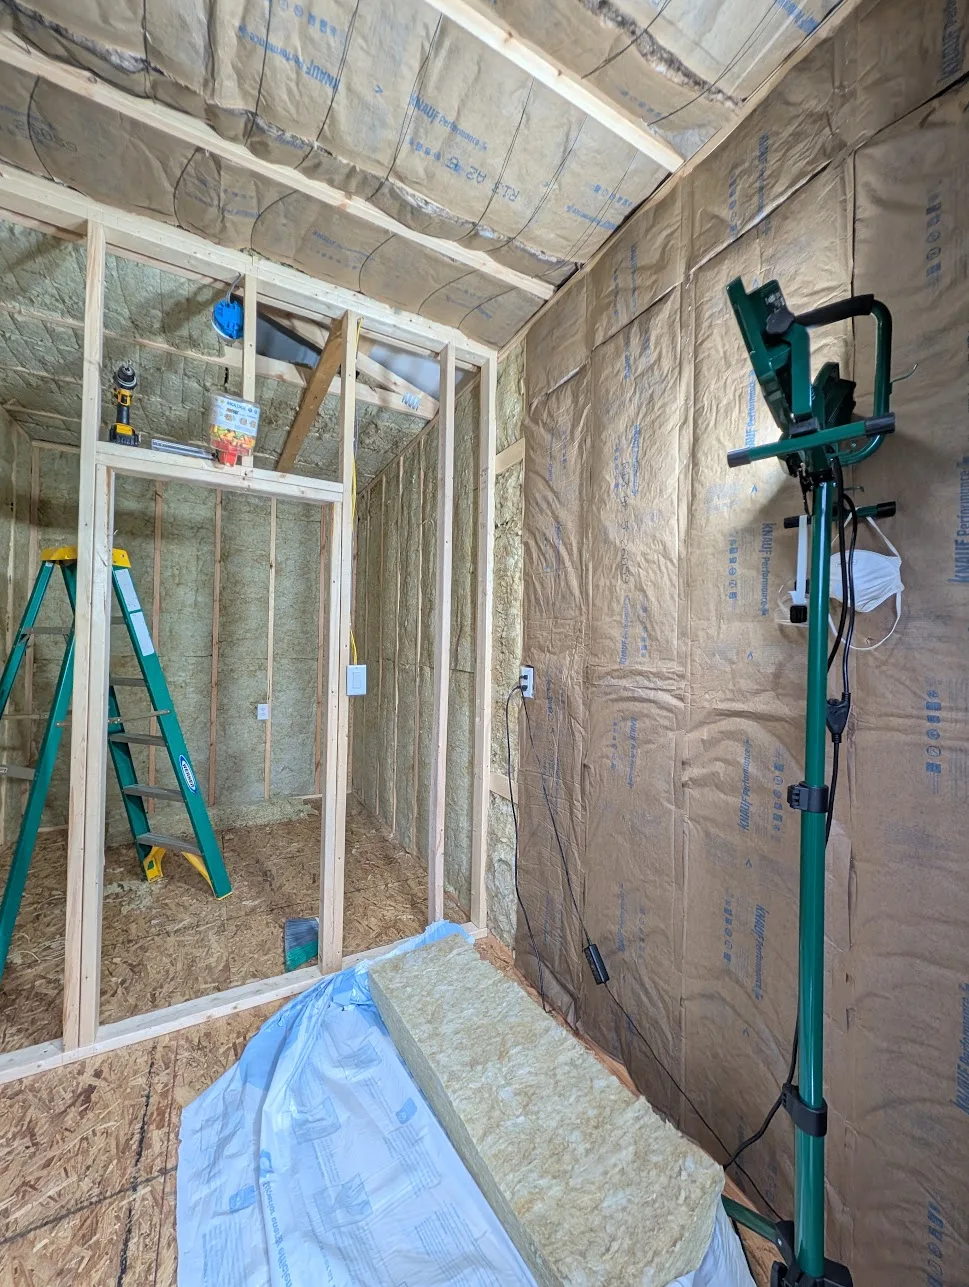
On the ceiling things got interesting. I ordered steel rods to hold the insulation in the ceiling. This worked okay for the fiberglass, although a couple times the whole row would fall and make a mess. I wouldn't use these again. They failed completely for the mineral wool. The rods were too thin and the mineral wool was too heavy.
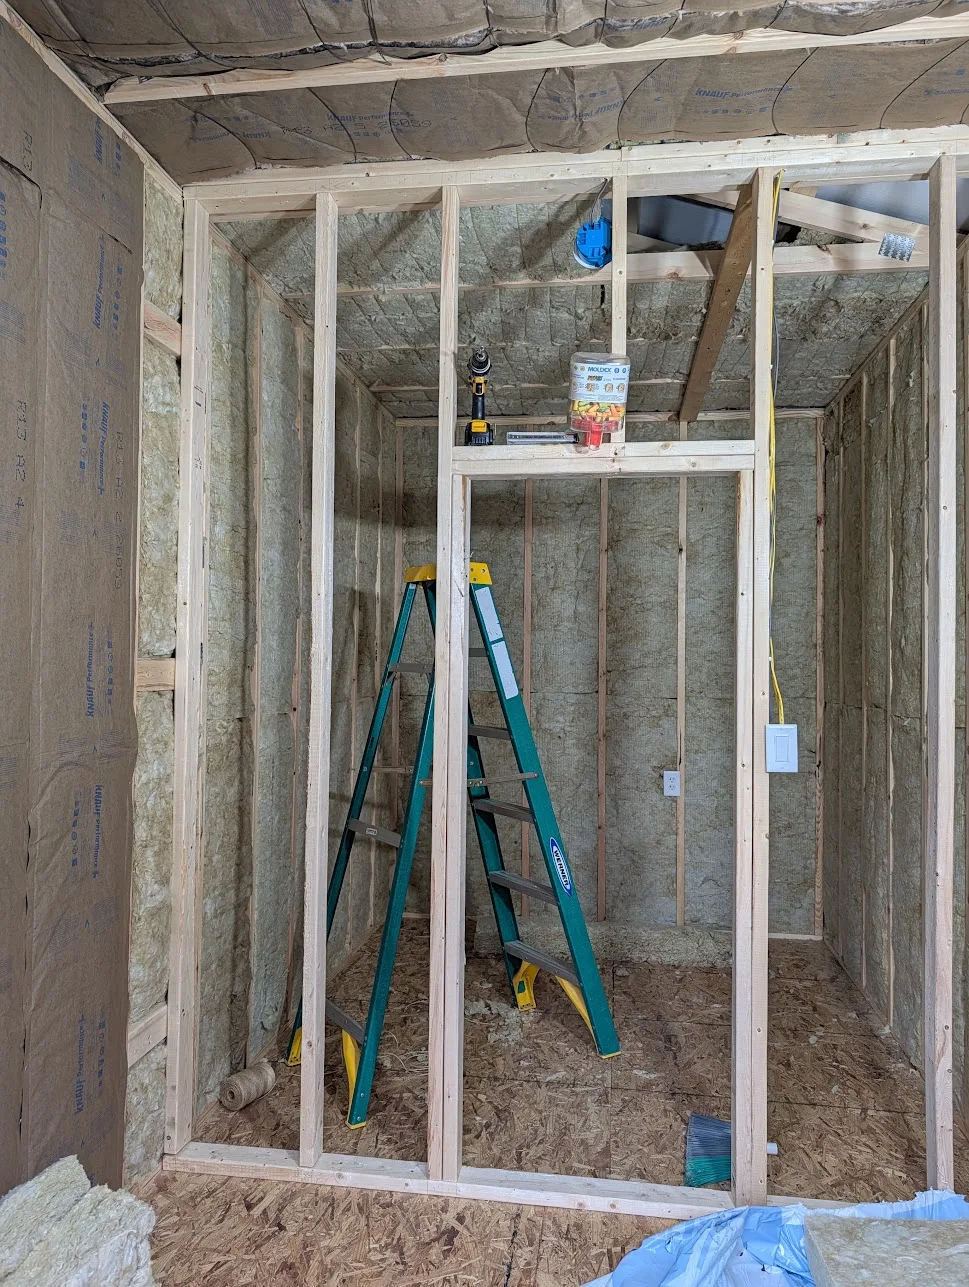
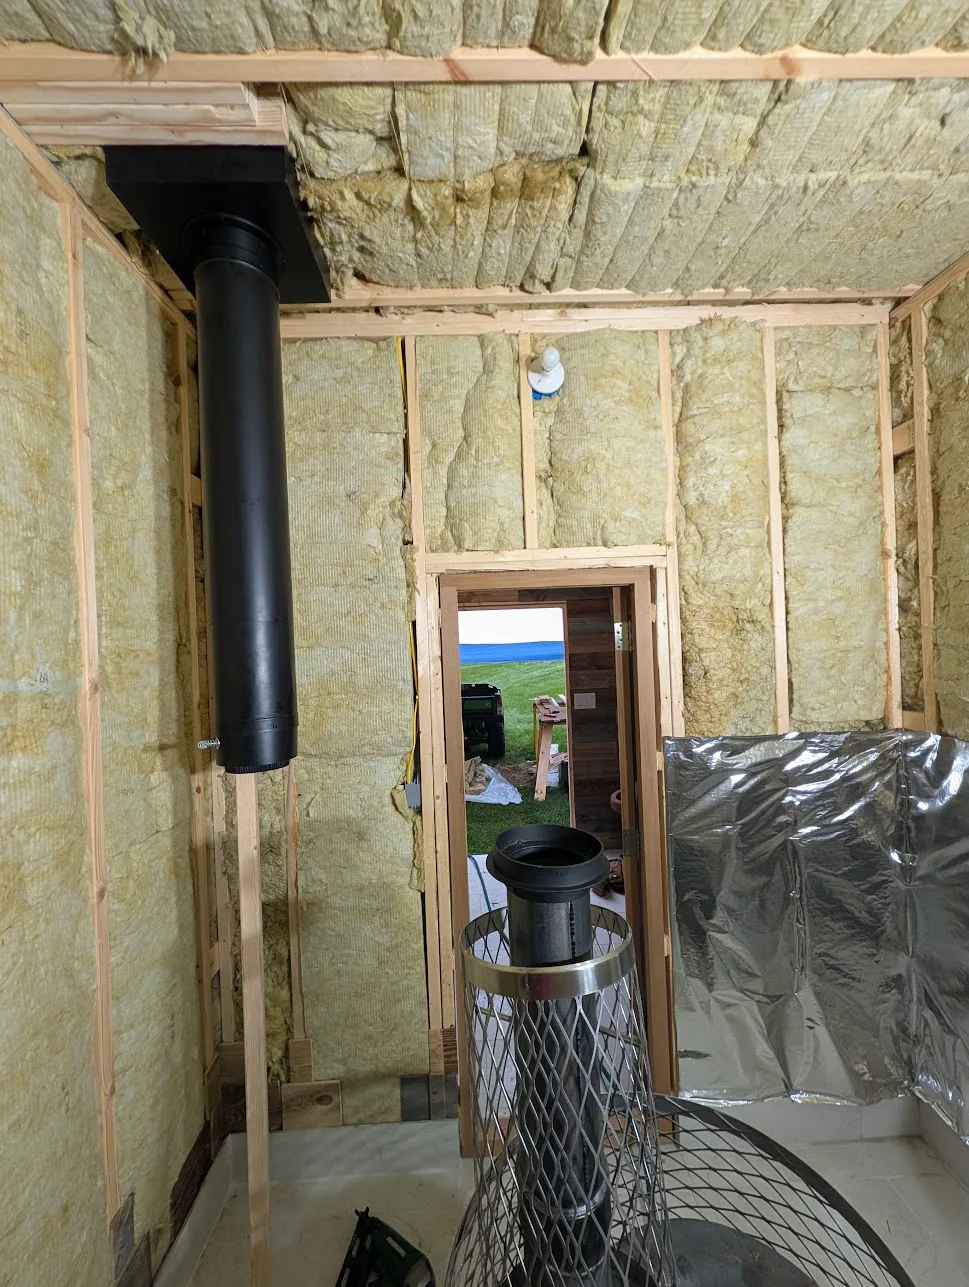
I ended up seeing a random post where someone said to use staples and twine. I tried this and it worked great. I used a staple gun to staple the twine to the ceiling joists in a zig-zag pattern, then stuffing the insulation above it. This worked perfectly and I would recommend this method for anyone else doing mineral wool in a ceiling.
In the second picture you can see the metal rods holding the fiberglass (barely). In the second and third picture below you can see the twine holding the mineral wool perfectly (at the top). All-in, the insulation was around $650.
Electrical
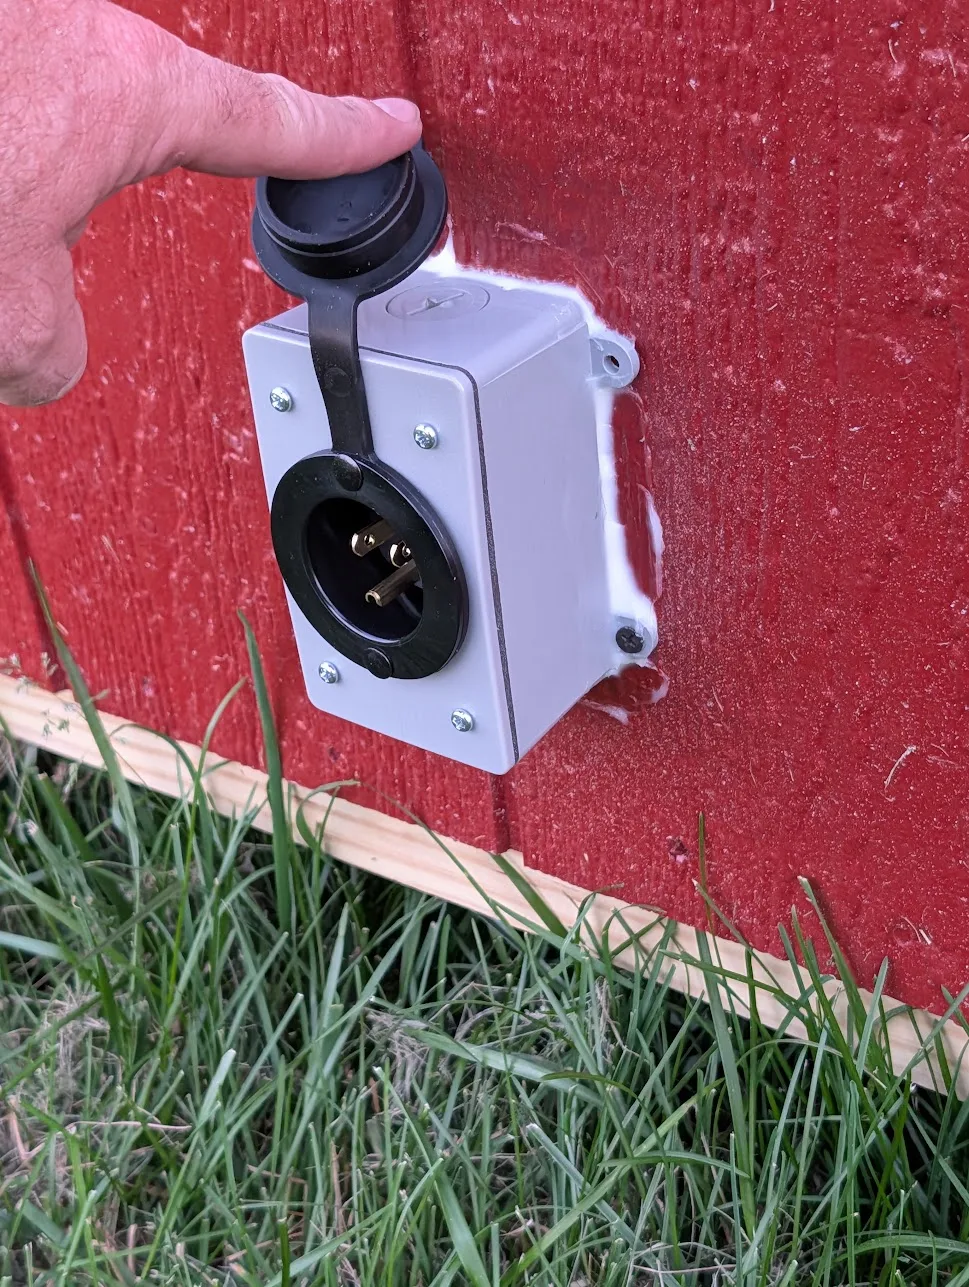
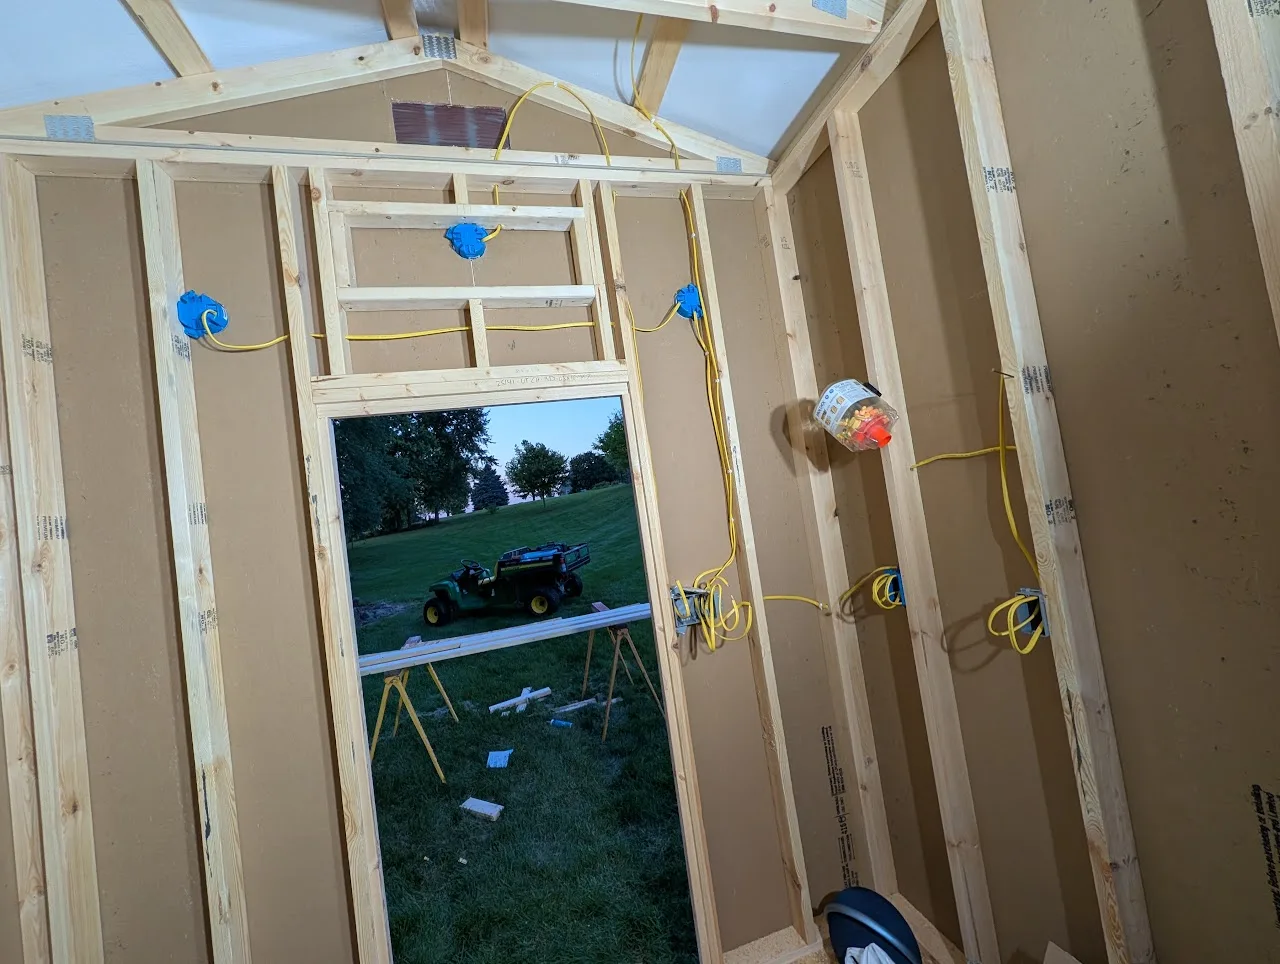
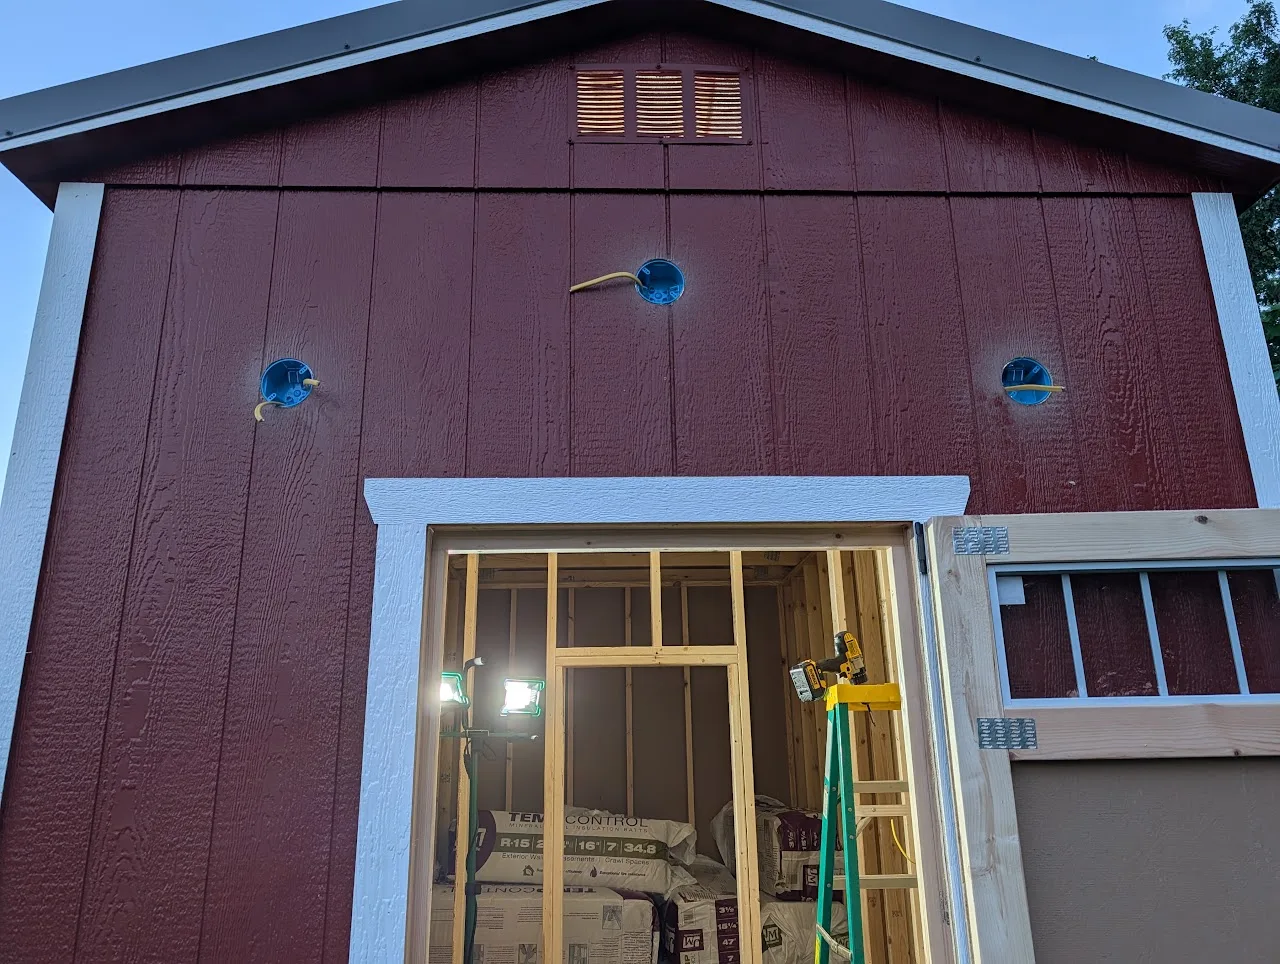
I took a lot of time considering how to do the electrical. The shed is located about 125' from my pool which has a separate circuit and GFCI protection. I decided, for now, to avoid trenching a new permanent line. Instead I used a shore inlet fixture so that I could plug in the building with an extension cord. I didn't want power to be required to use the sauna, but it is certainly nice for some things.
The 100' and 50' extension cords I bought were rated for 15 amp cold weather use so all the other electrical fixtures (outlets, switches) were rated for 15 amps as well. The circuit is already outdoor protected so I could skip that. I ran the power in from the inlet to a junction box with an access panel in case I ever wanted to re-wire to something more permanent. I then added:
- 2 outlets in the changing room (phone chargers, maybe a speaker)
- 3 switches
- overhead changing room light
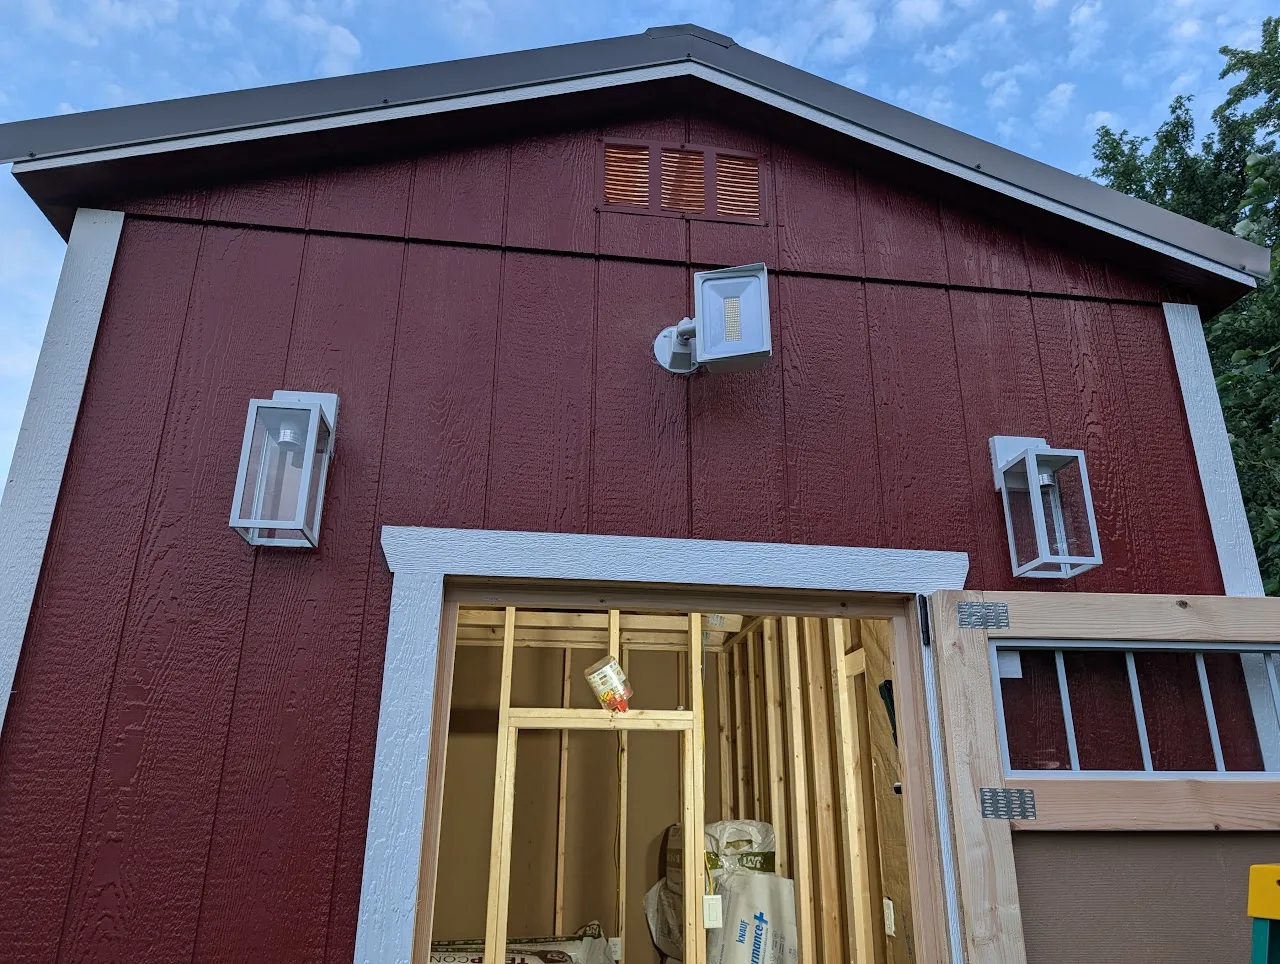
- outside porch lights
- outside bright spot-light to light the path from the house to the sauna
- 1 switch at the sauna door to control the sauna light
- 1 outlet in the sauna room under the bench in case I want to install LED sauna lights for underglow (this is also switched with the sauna light switch)
With this setup I think I'll have all the flexibility I'll need. Also, the sauna is out near our fire pit so the changing room can be a nice staging place where we could put a table, crock pots, or other things to support bonfire parties. In those cases the power will be handy.
In the winter when I'm not mowing, I can just leave the building plugged in. If we ever don't want to run power, we can simply bring a lantern with us and that plus the wood burning fire light should be plenty to use the sauna.
In the future I may choose to run permanent power or install solar power or something, but for now I've been happy with it. Having the power available for work lights and power tools during construction has been fantastic.
Sauna Kit Delivery
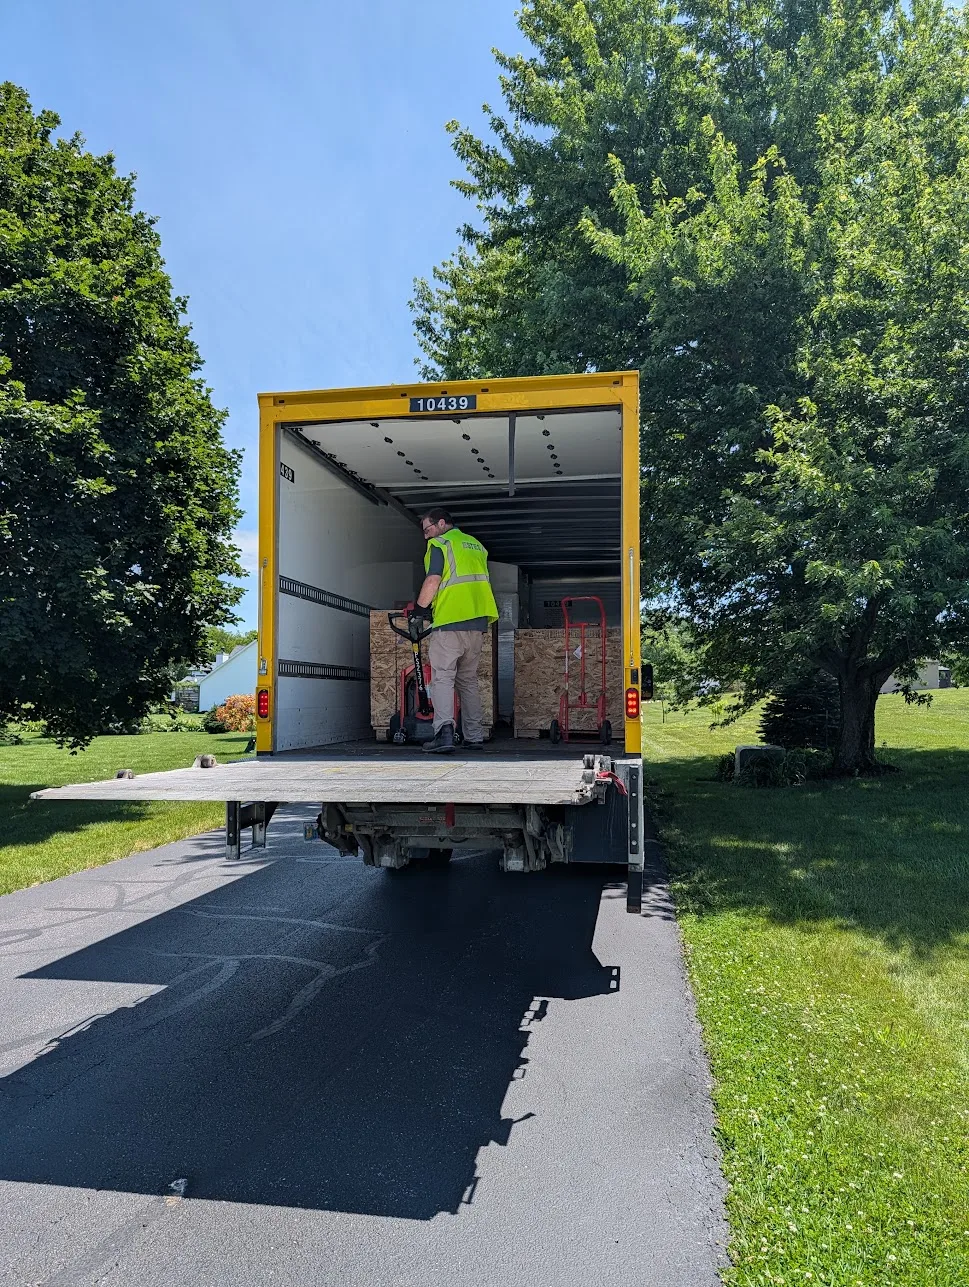
It was around this time my big sauna kit was delivered. I ended up working with Bsaunas USA for my kit. I talked with Demitri and Alex at different times and they were super helpful. I ended up ordering an 8' x 8' x 7' kit with additional upgrades and changes. I needed to extend the height to 9' to accommodate the extra interior height. I also wanted 3 rows of benches on the back wall and two rows on the left wall so that needed some changes. I got the Iki Classic Plus from them as well.
All in, with all the cedar, backrests, clear bench wood, Iki Plus stove, almost 600lbs of sauna stones, a sauna door, a couple lights, vents, a ladle, the kit came out to a little under $12k. This was the single largest expense. It shipped in about 3-4 weeks and came in two big boxes. One was a single pallet, one was a double pallet and they were both dropped off with a tailgate and brought into my garage on a pallet jack.
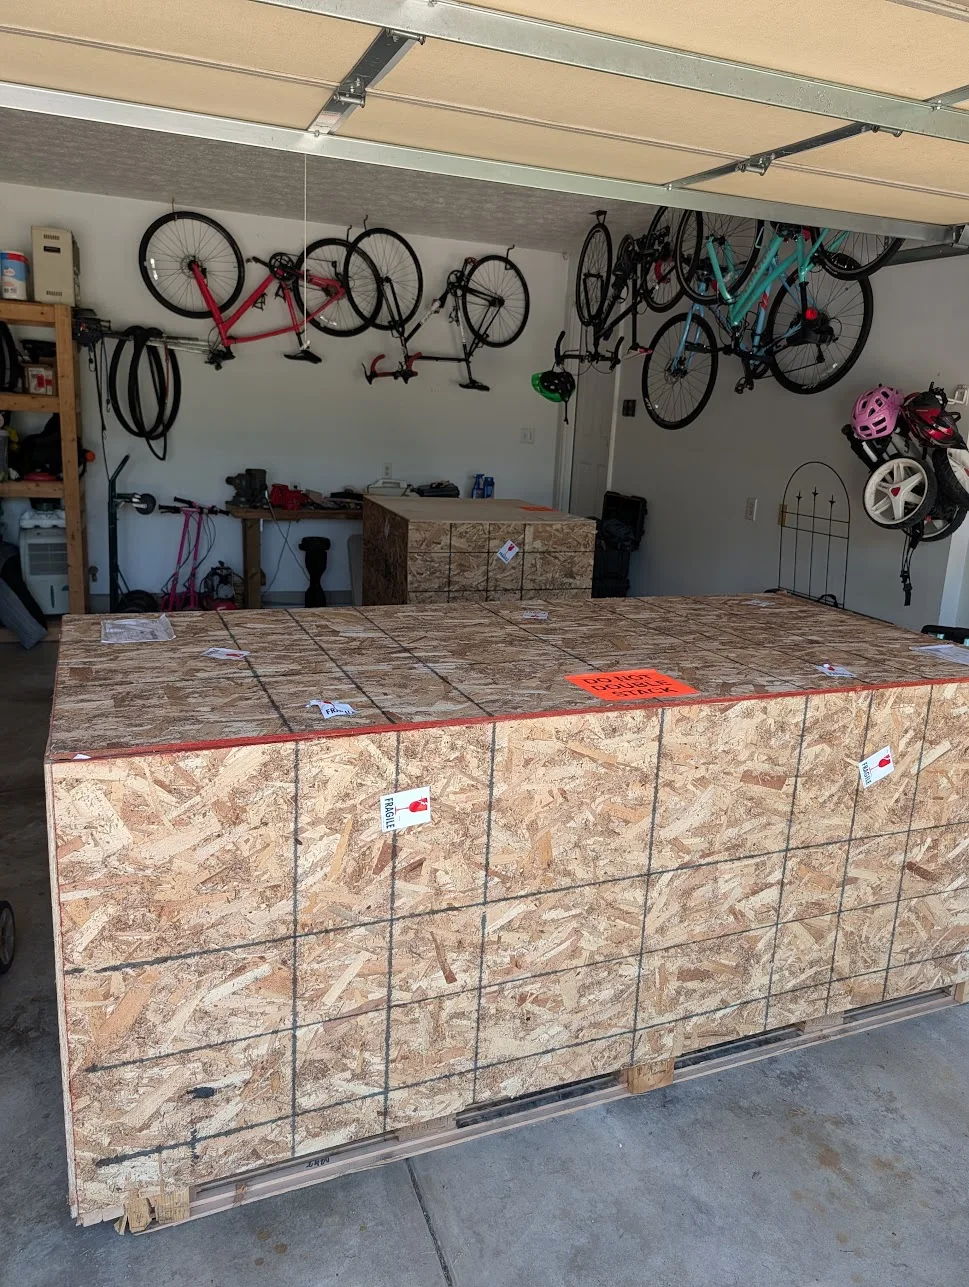
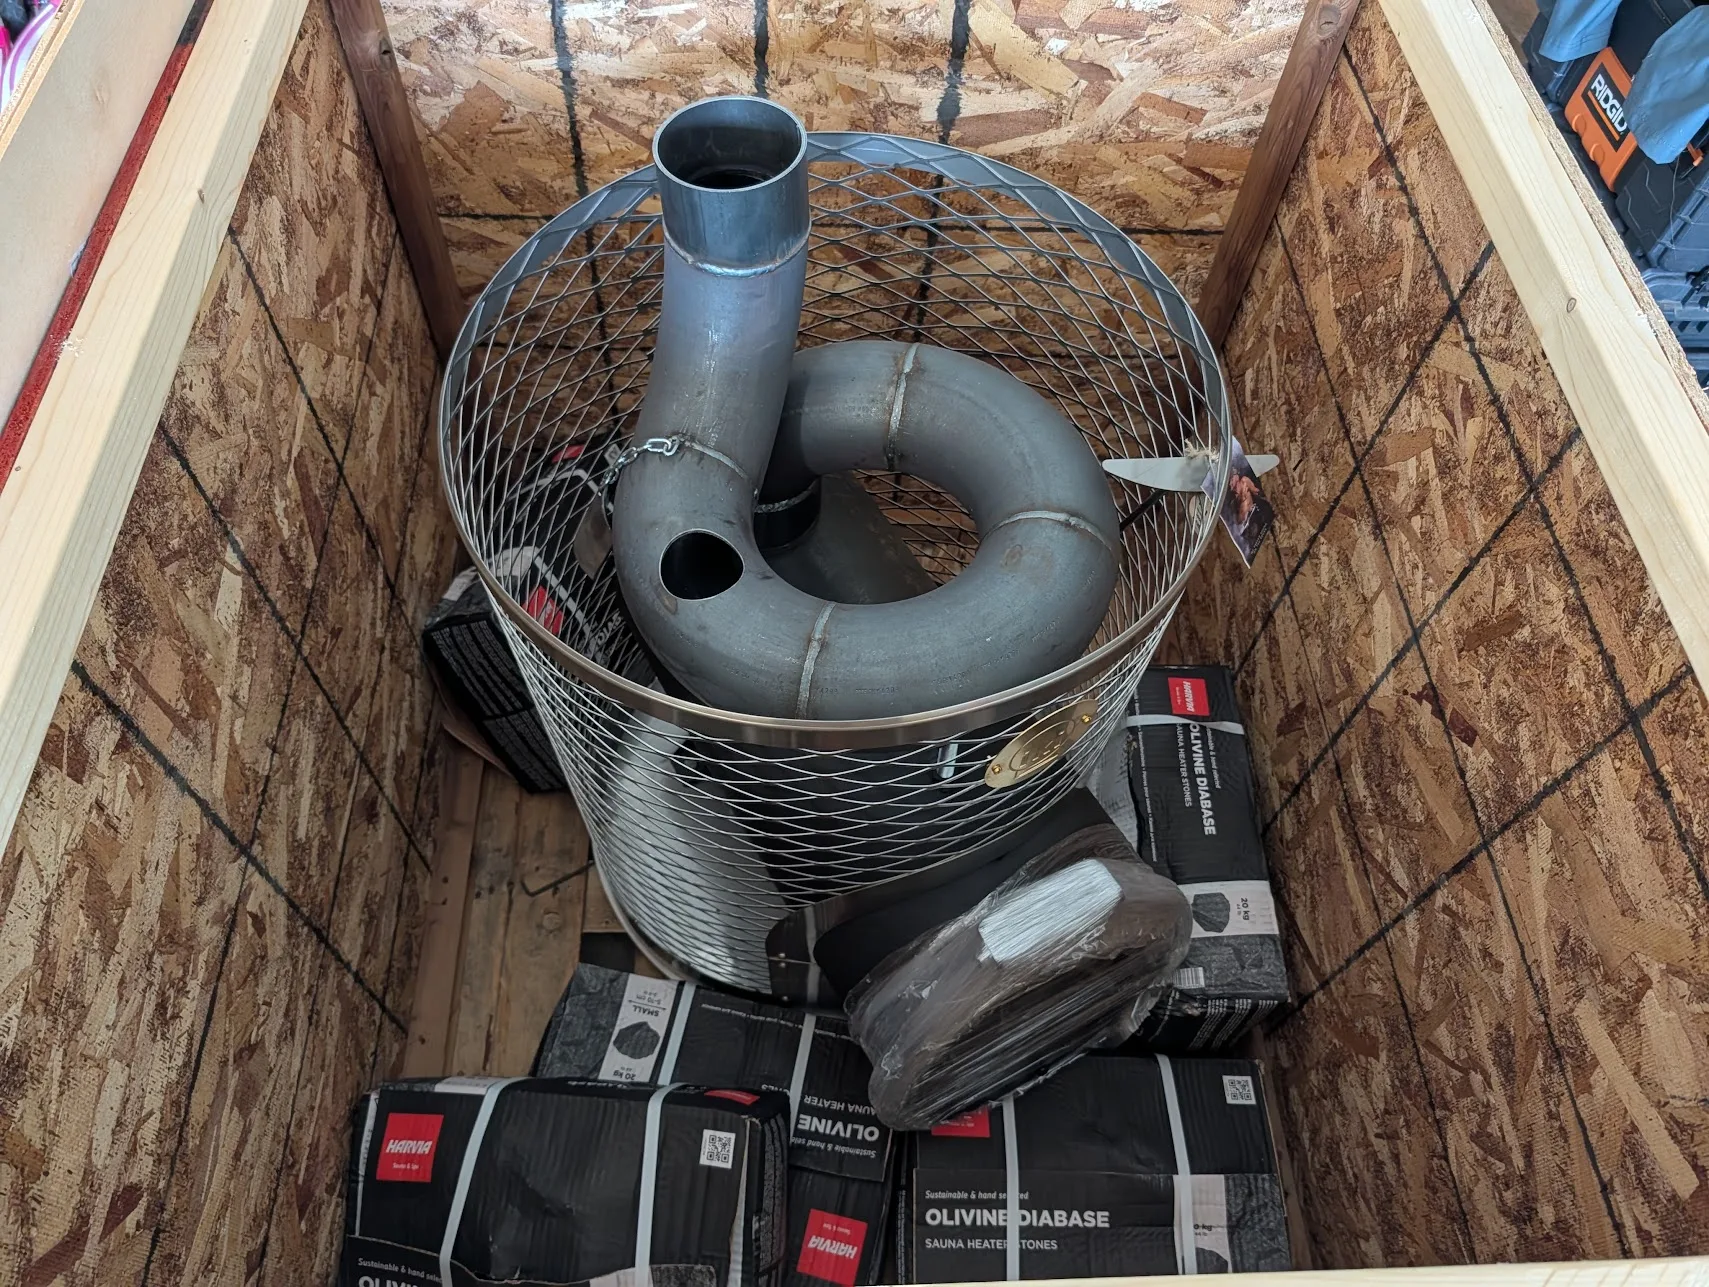
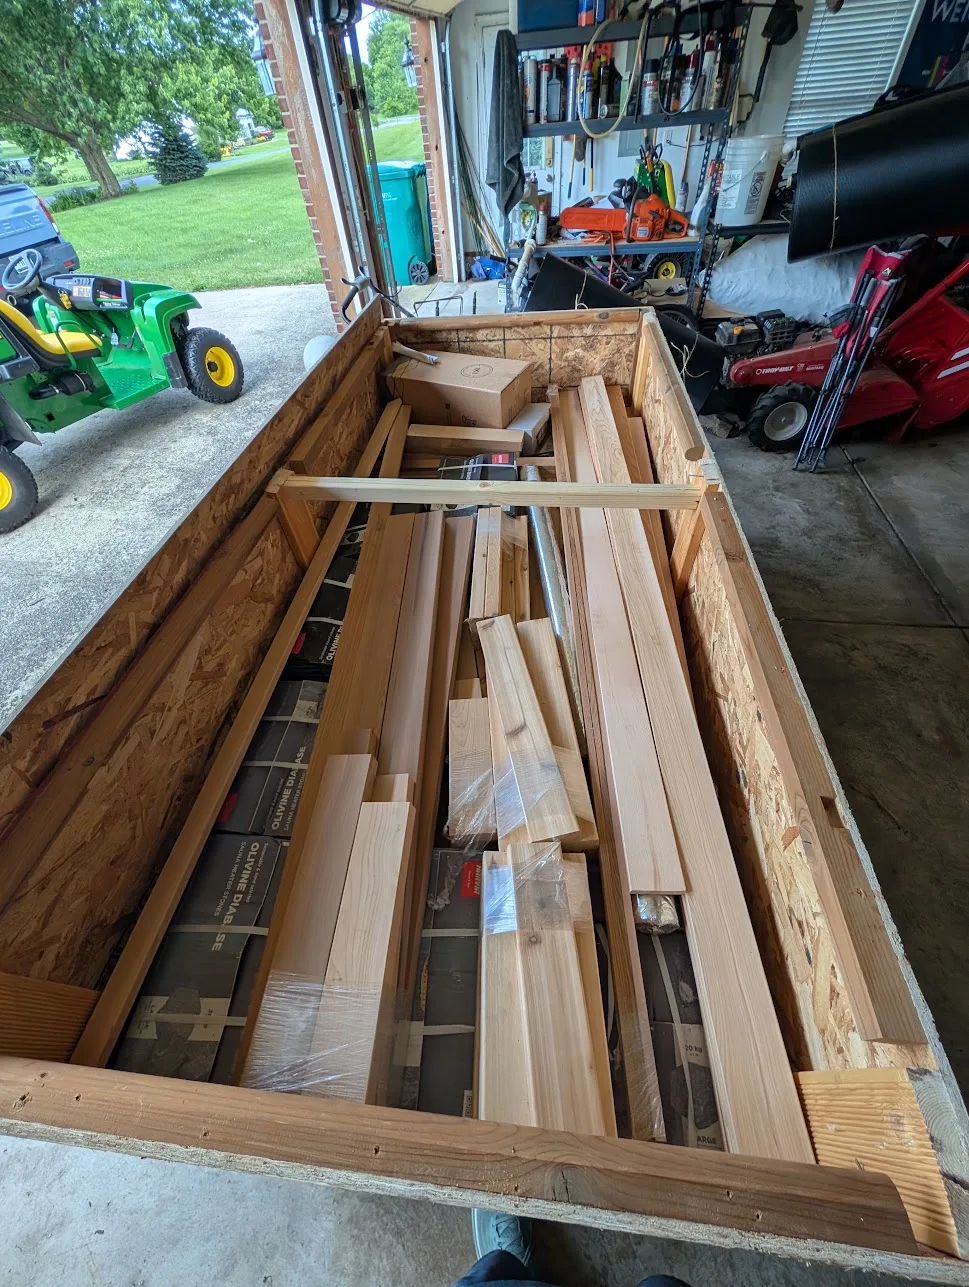
Tiling the Floor
This was the hardest (and scariest) part of the build for me. I had done a bunch on construction with my Dad when I was younger so most of this wasn't too big of a deal... I was rusty but I had seen it before. I had never done tile work before though and I was nervous about it. I watched a lot of YouTube videos and read a lot of articles to try and prepare.
Underlayment and Preparation
I had decided not to put in a drain. I plan to pour water on the stones, but not bathe or dump buckets in the sauna. I wanted some basic water protection in case we ever spill the water bucket and for things to stay protected until I could grab a mop. I also wanted the floor to be easy to clean and not too slippery.
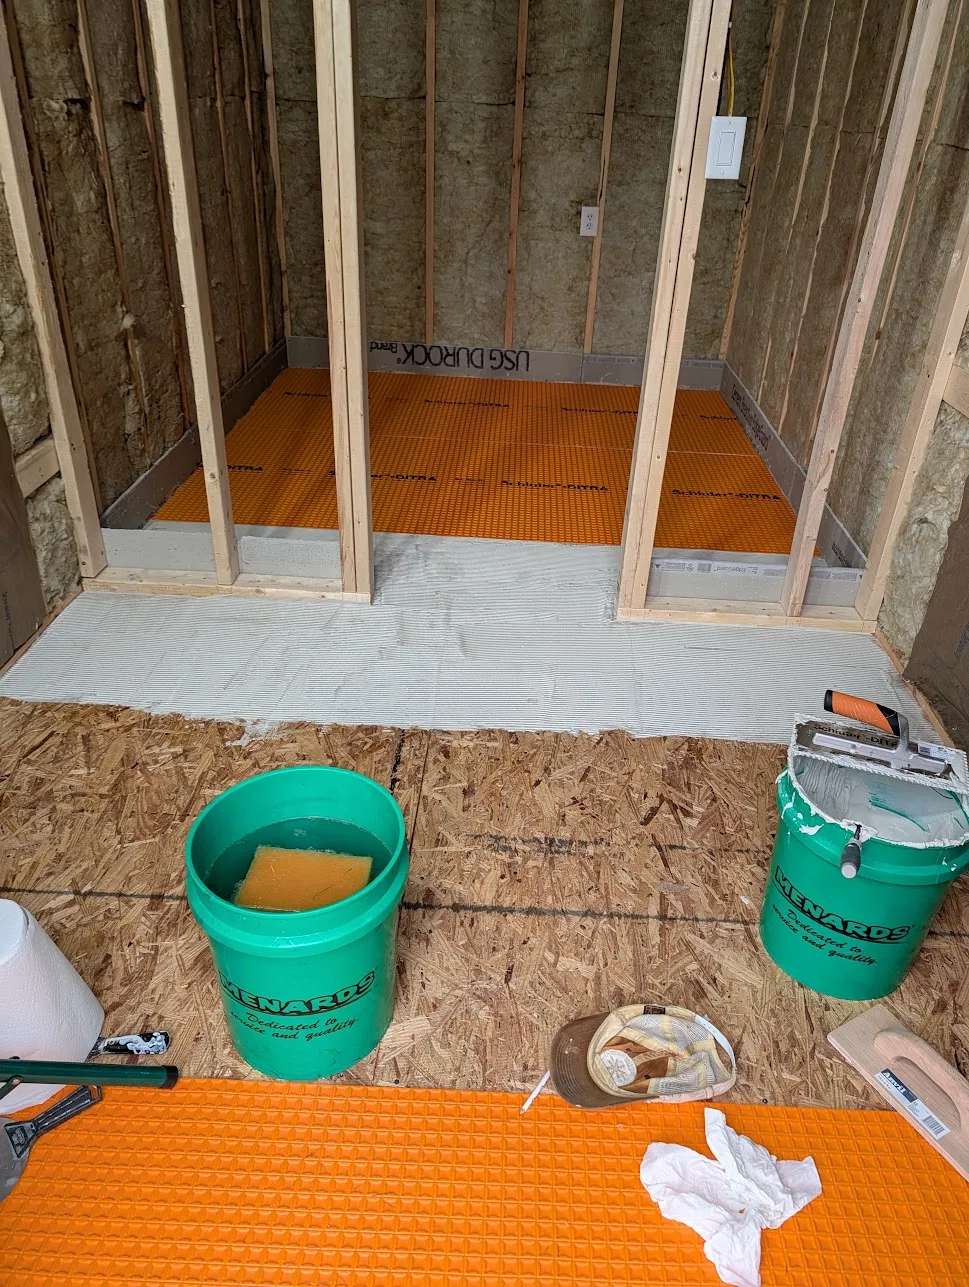
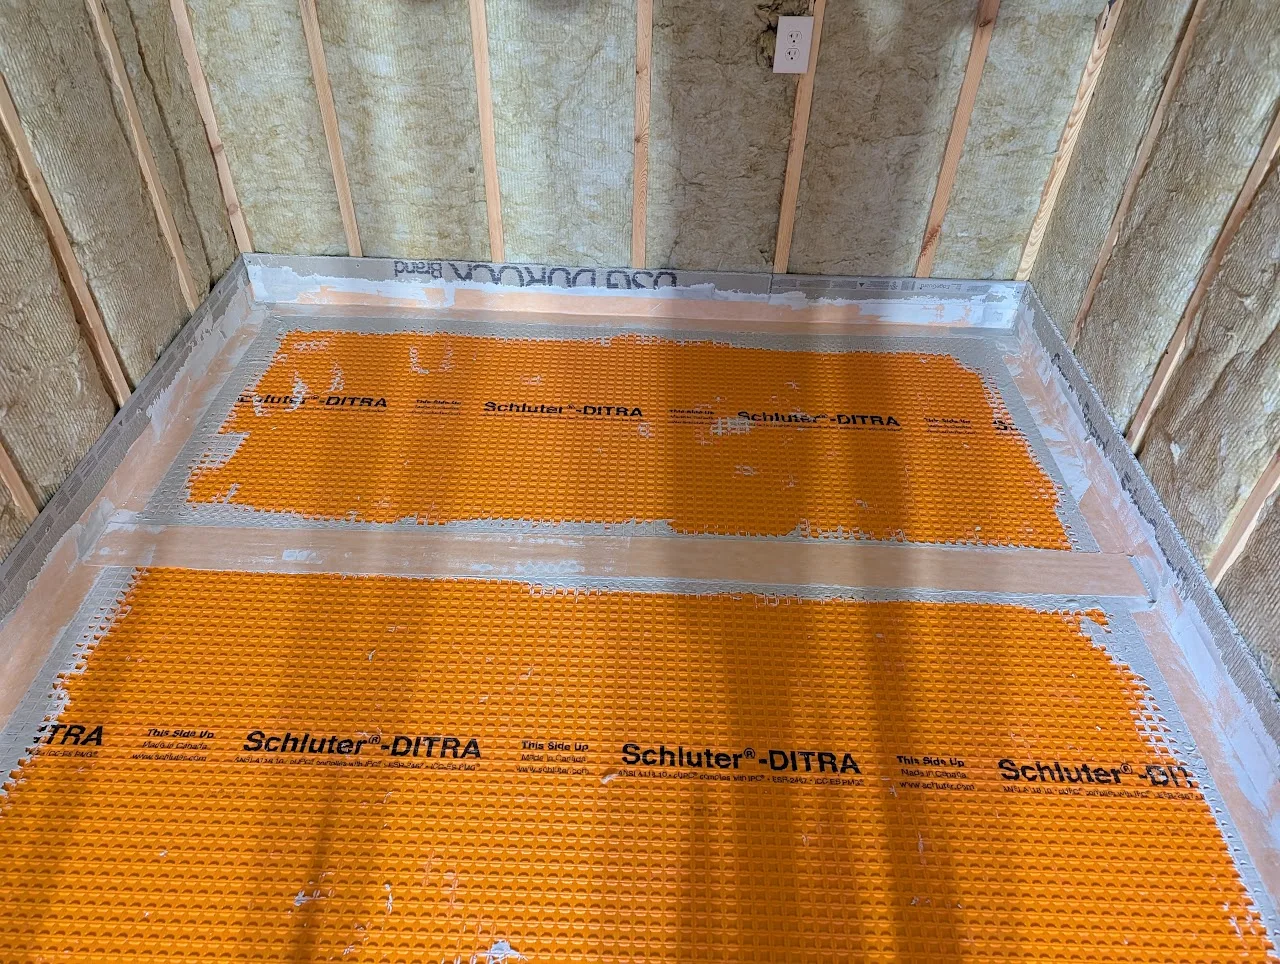
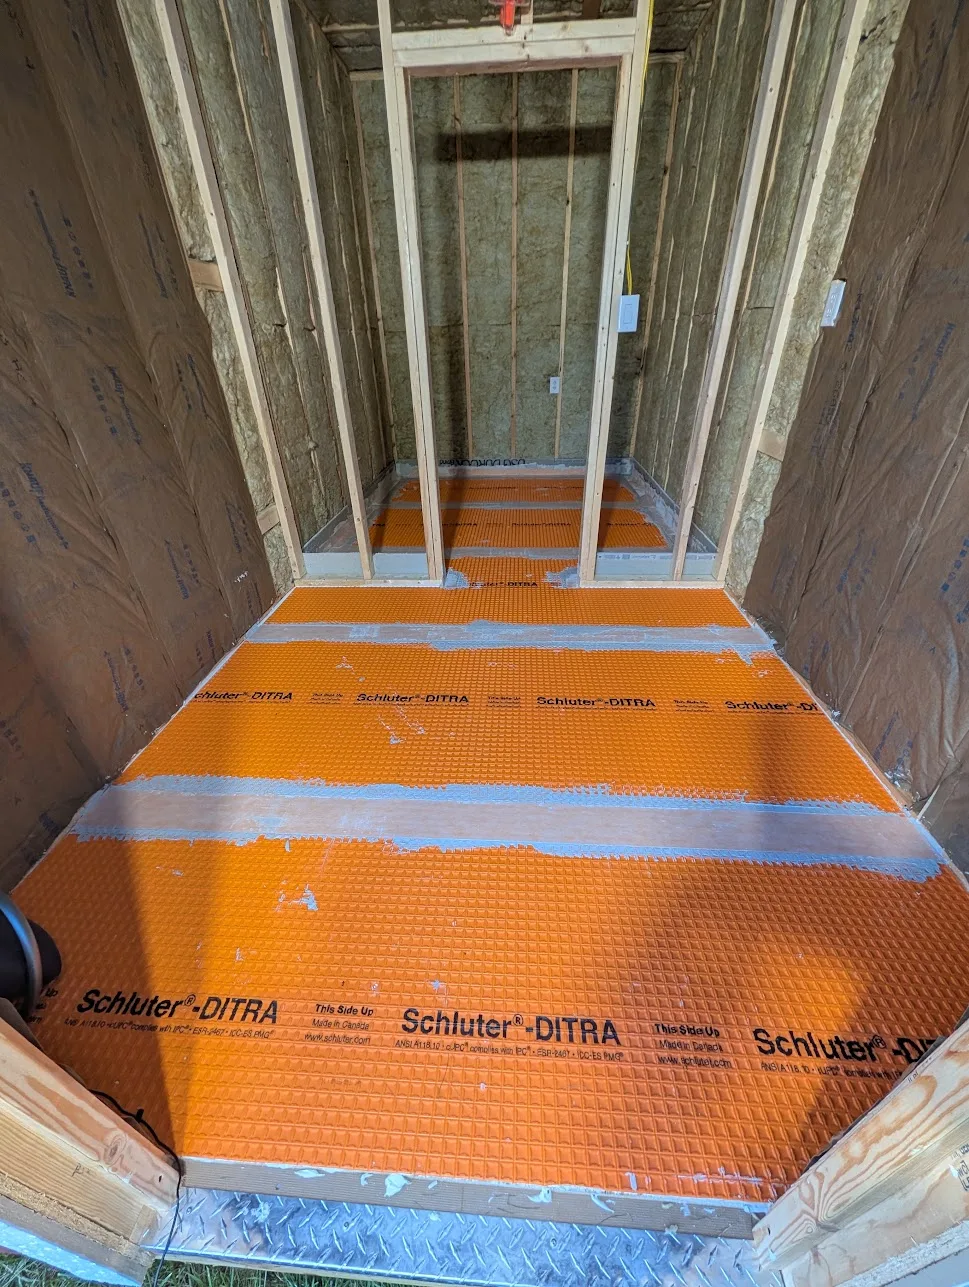
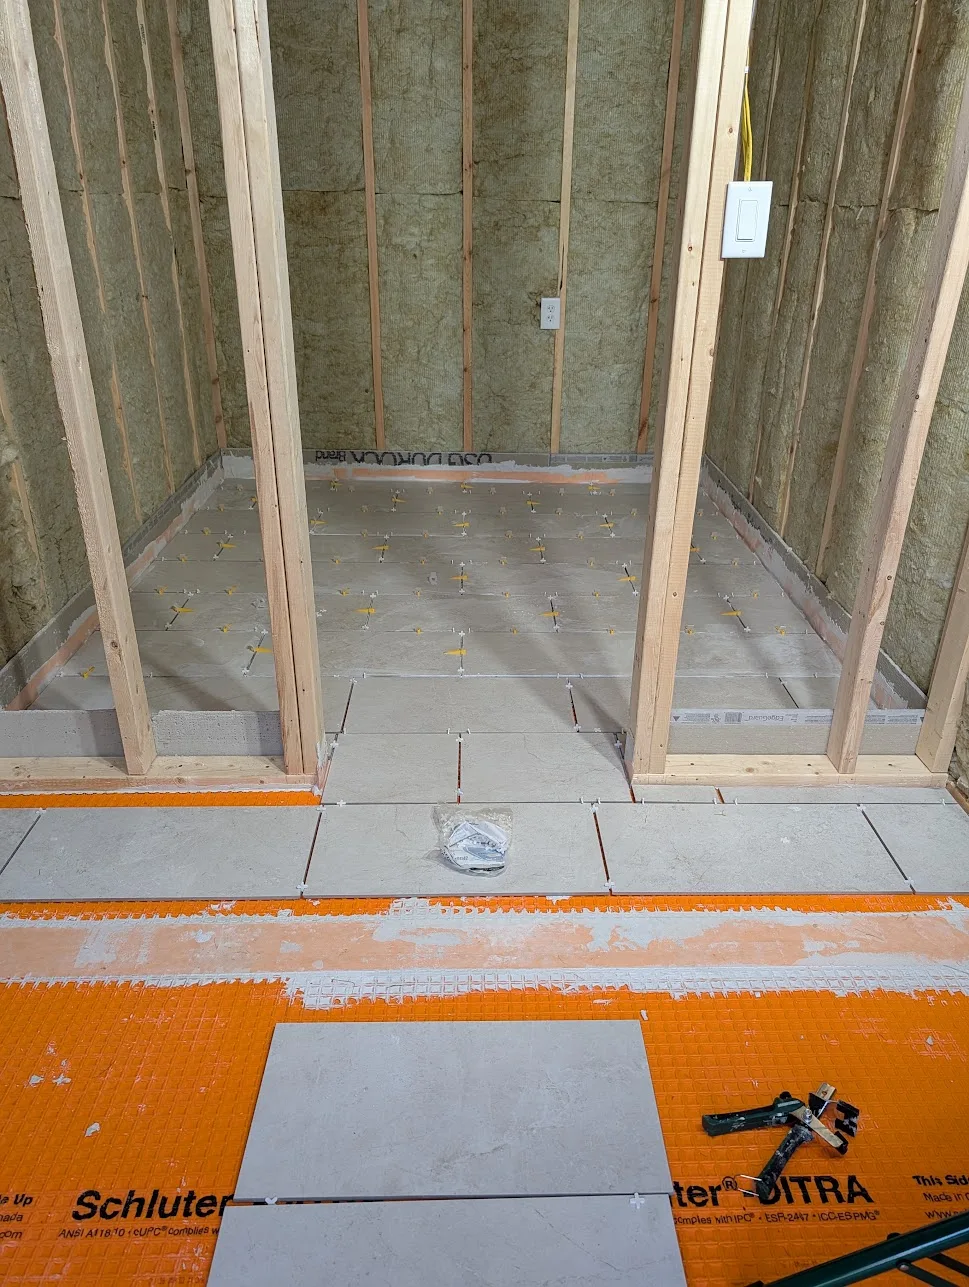
I put cement board 6" high on the walls in the sauna room so that I could make it almost a waterproof bathtub. To give the tile the best chance of not cracking or coming loose, I decided to use a decoupling membrane. I chose Schluter Ditra which is a 1/8" thick membrane that is installed with mortar and then the tile is installed on top of it. Specifically, this is suitable to go right over OSB or plywood so I didn't need to put down cement board. This product allows for some movement in the floor without cracking the tile. I also chose Schluter All-Set which is a modified thinset mortar that is designed to be used with the Ditra membrane. I then used Schluter Kerdi-Band to seal the corners and between pieces on the Ditra seams. I used a Schluter trowel to spread the mortar and a rubber float to press the membrane into the mortar.
This stuff wasn't cheap. A big roll of Ditra was about $320, two bags of All-Set was about $80, Kerdi corners were $60, and the Kerdi band was another $80 so the pre-tile flooring was about about $550 by itself. If it prevents the tiles from cracking after years of use it will all be worth it though.
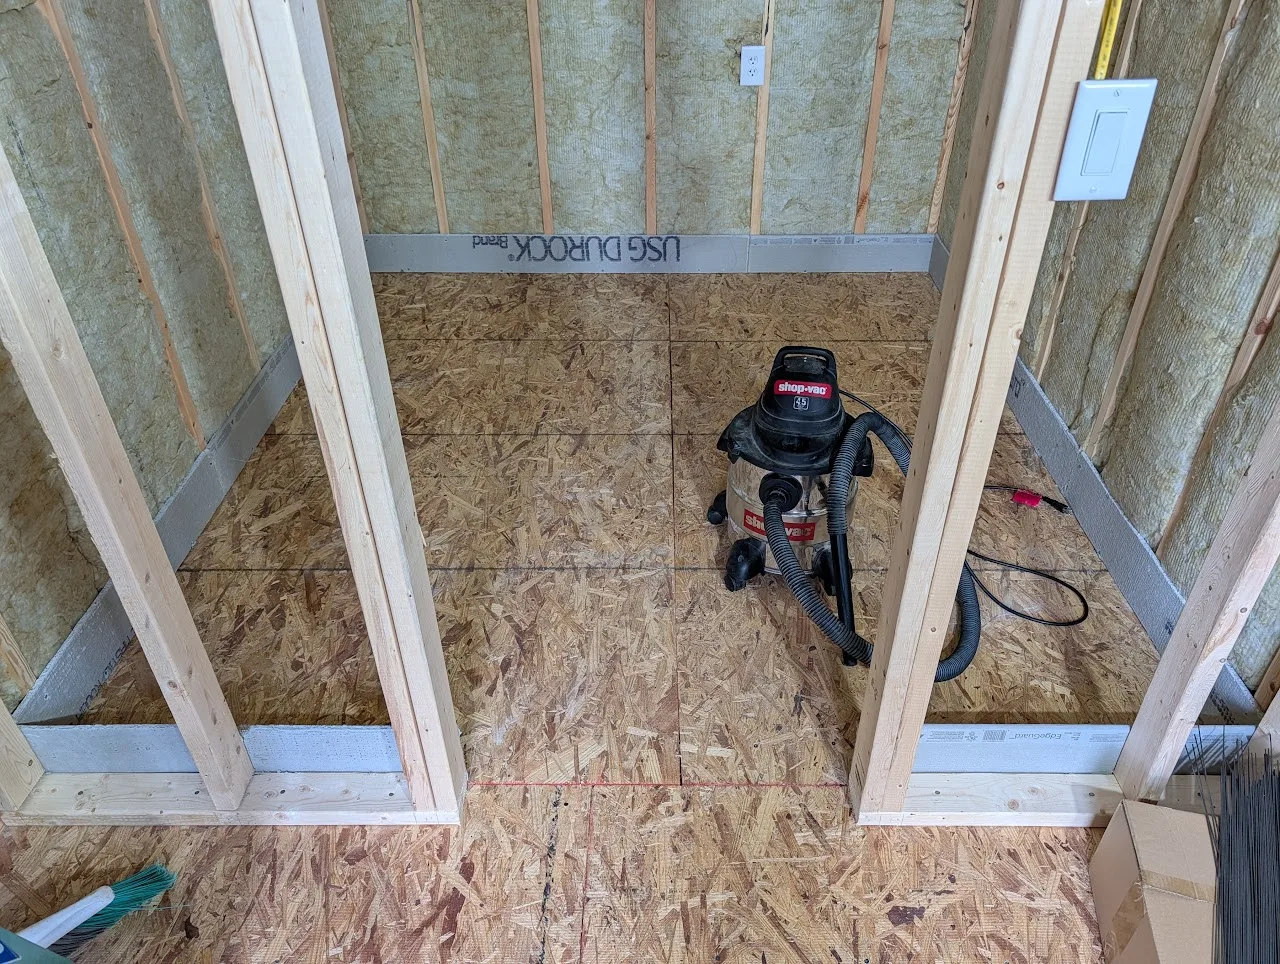
Tile Installation
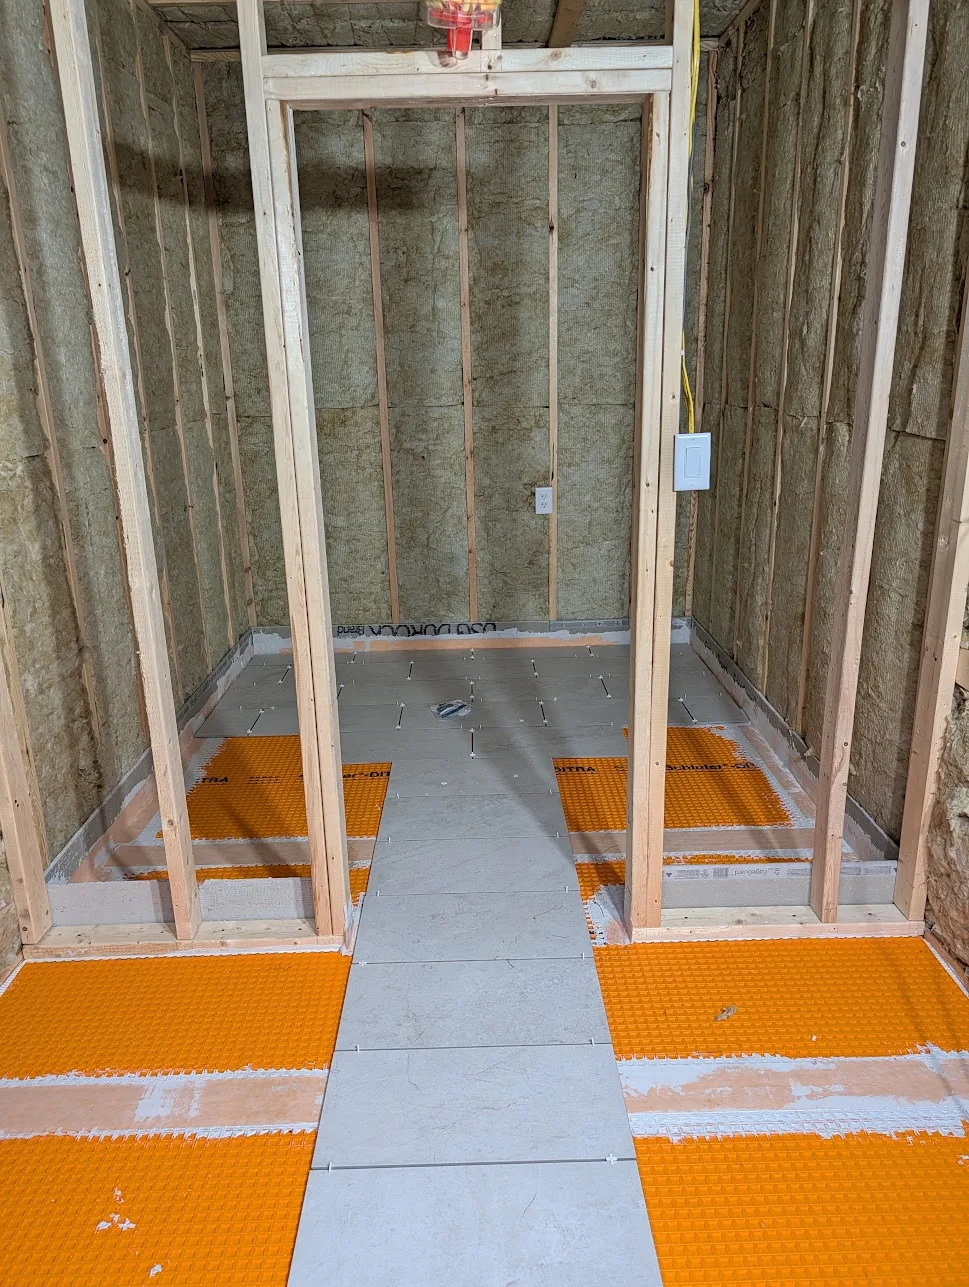
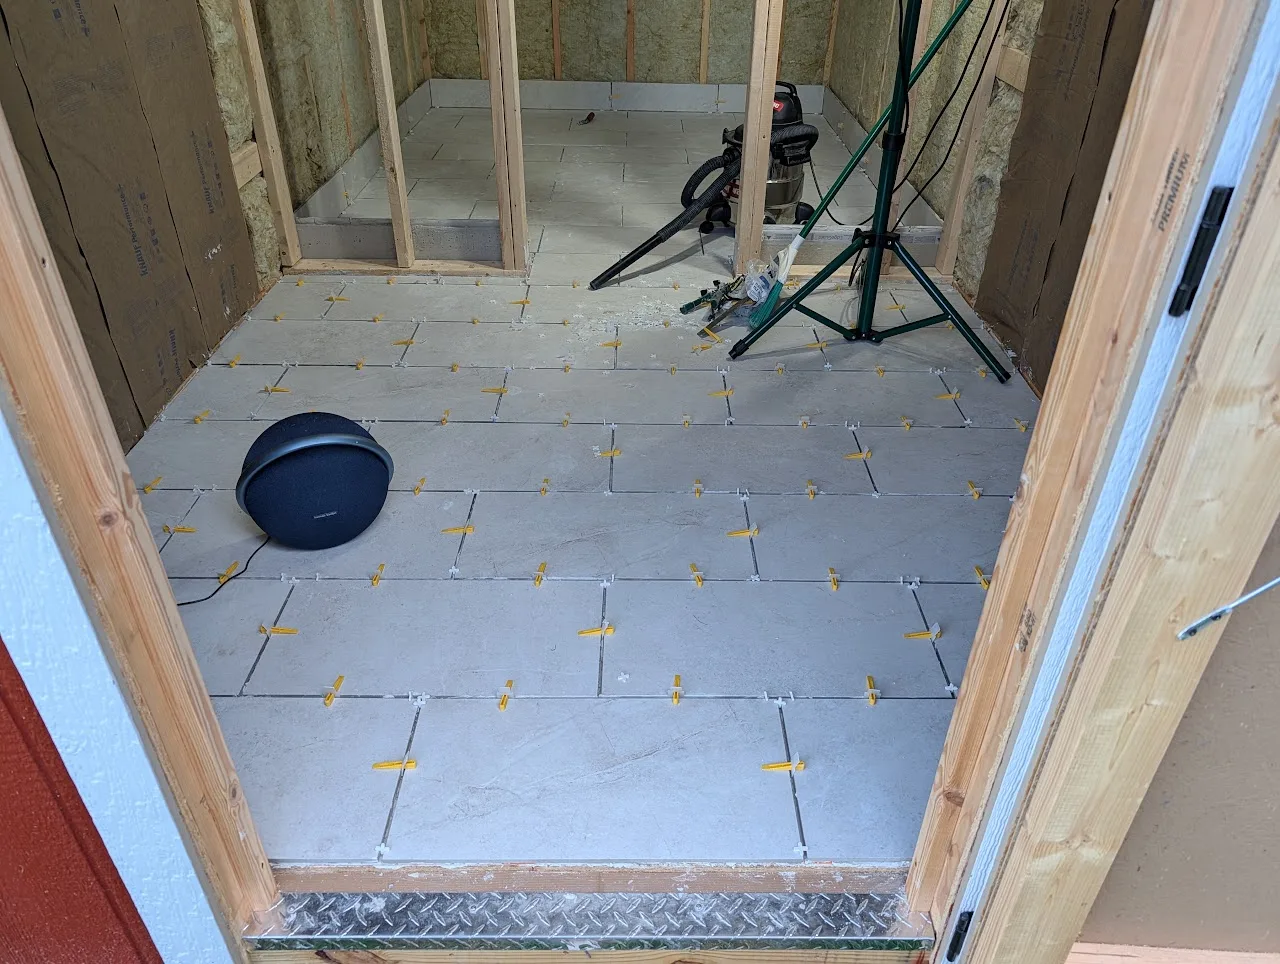
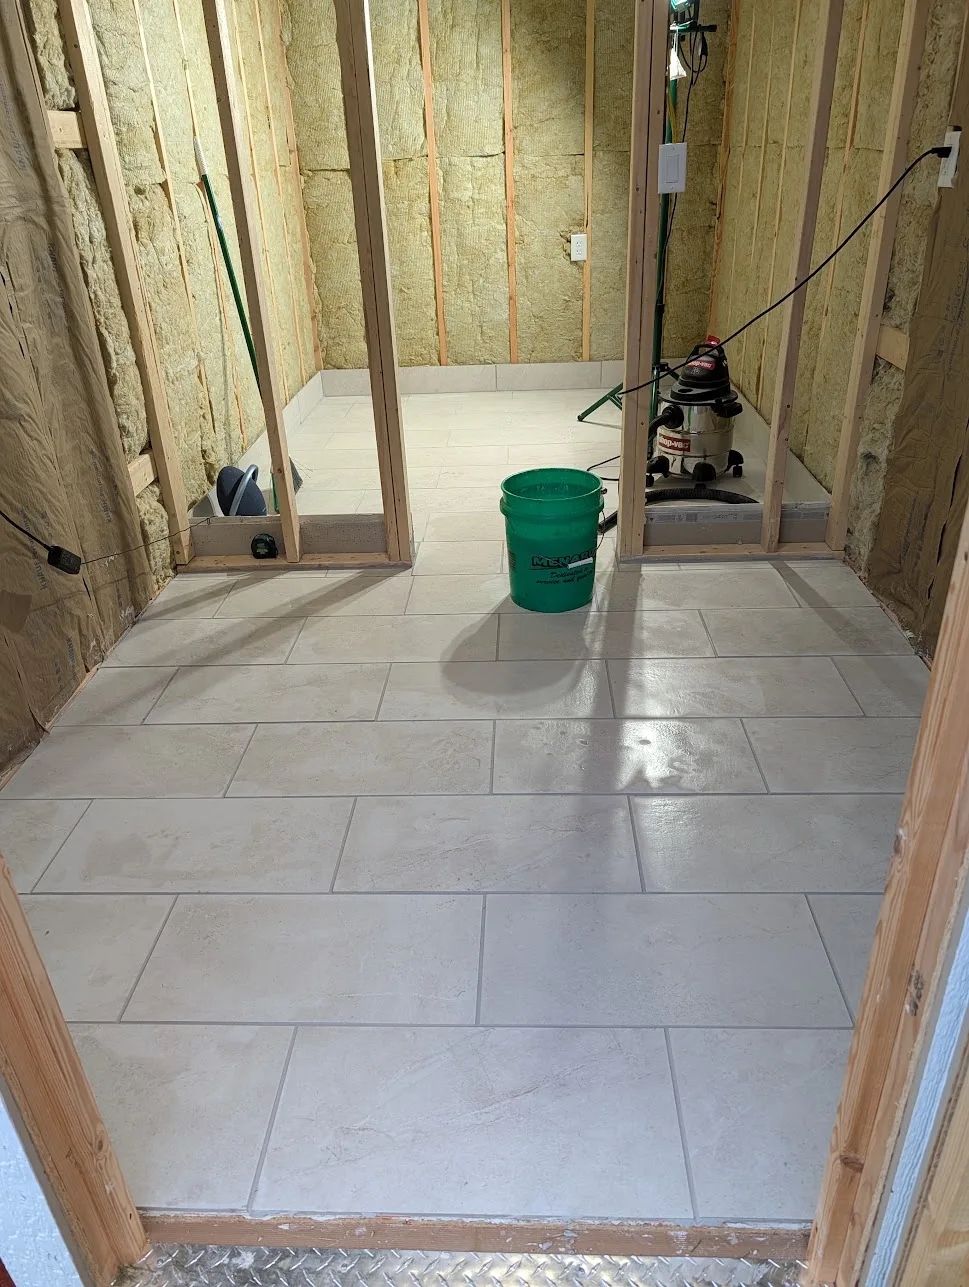
For the tile I ended up going with Mohawk StepSure in 12x24 in the light Divine color. This tile has additional grip and friction when wet which seemed great for a sauna. I got the grout color they had on the display which was Power Grout in Silverado. I used a standard tile scorer/breaker to cut the tiles. It was a learning experience and I mis-cut a few but mostly things went okay.
I used 3/8" tile spacers and a standard wedge brand of tile leveling system. I had a couple small mistakes, but nothing too major. I laid out the tiles with the spacers starting at the front door. This meant I had a partial tile in the back under the benches. It came out perfectly with the final row of tiles exactly at the front of the building with a small gap. I used a few mis-cut tiles for the wall under the benches, but you'd have to look hard to notice. Most of my mistakes were simply time cost.
In the first half the job I left too much mortar between the tiles which meant I had to grind it out with a grout saw. Later I figured that out so there wasn't much clean-up. I also had a few tiles that were slightly off-level, but nothing too bad. Overall I'm happy with the way it turned out and think it looks really nice with the darker wood on the walls and ceiling.
9 boxes of tile were about $450 and 3 bags of grout were $60 bringing the total tile cost to about $510. I also bought a tile cutter for about $100 and a few other small tools and supplies for about $50, although I'm not including tools in the total. I had some tools, but needed some new ones that were specific.
Door and Changing Room
Sauna Door
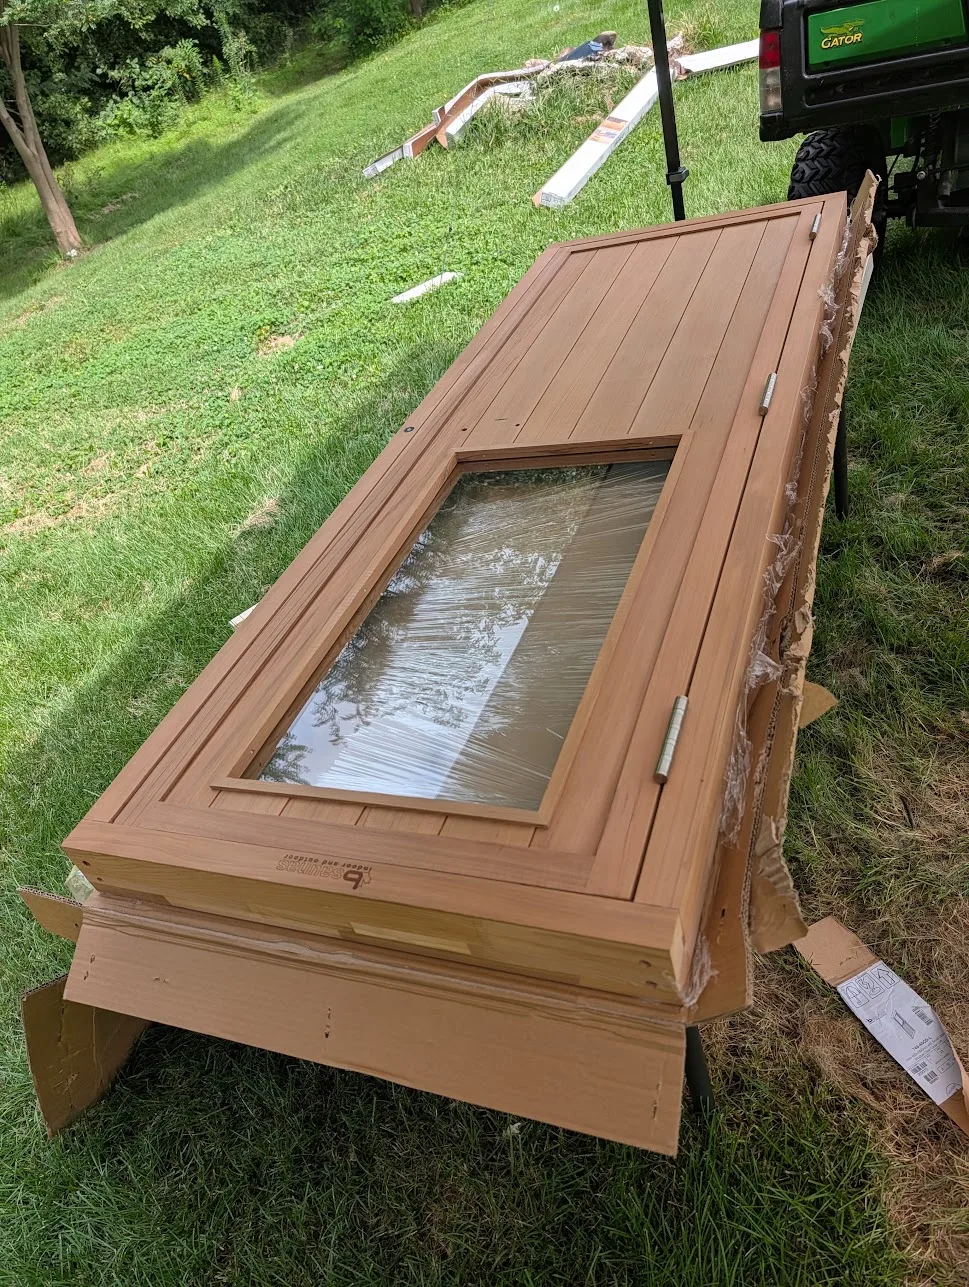
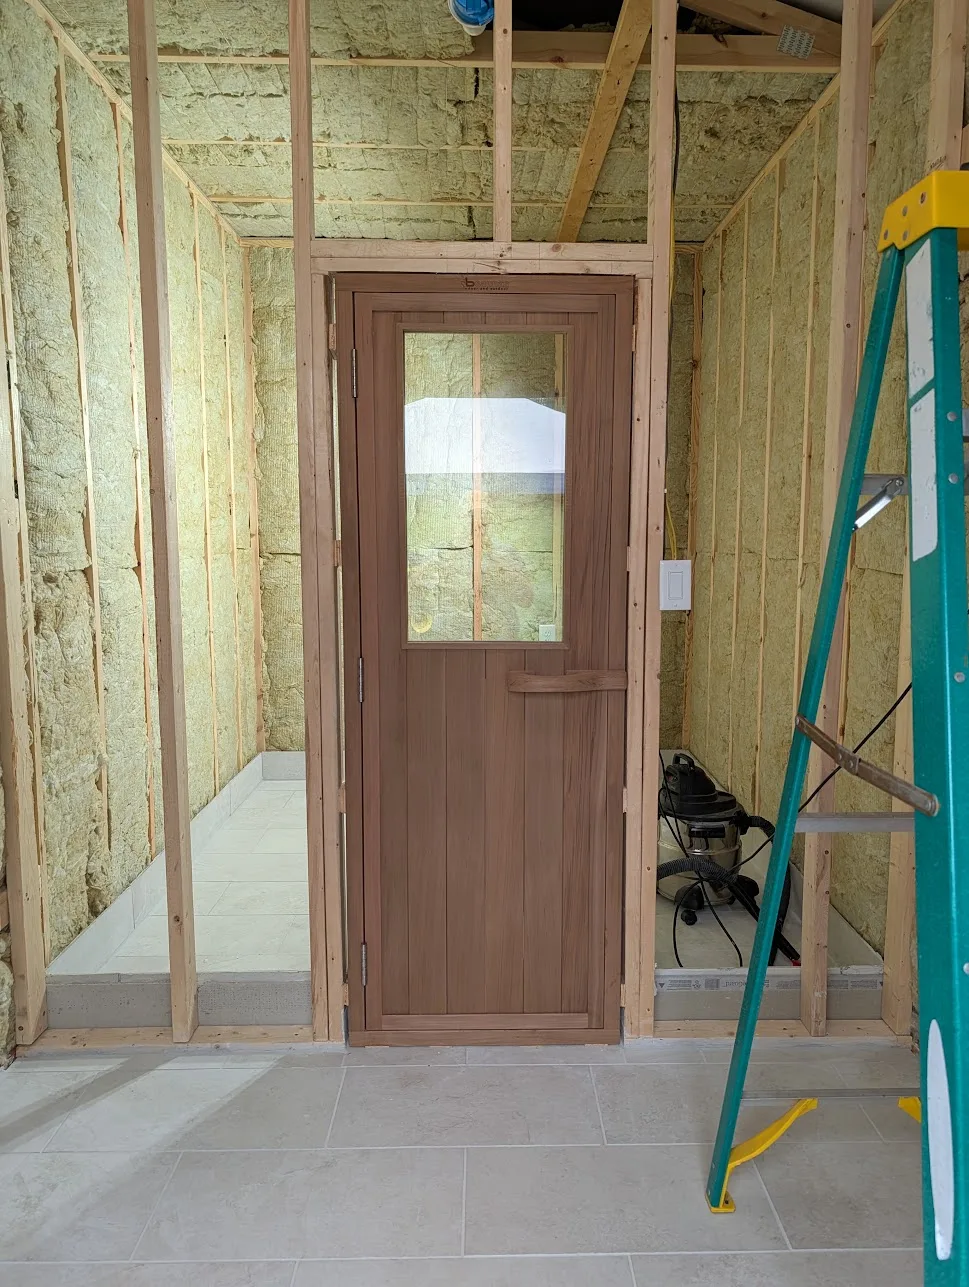
The door was buried near the bottom of the box of cedar and I was a little worried they forgot to include it. It was nicely protected and in great shape when I opened it though. I had to cut the rough opening a little larger as I forgot to consider the height of the underlayment, mortar, and tile in the rough opening (oops!). I put it in, shimmed it, and screwed it in place. It opens and closes really smoothly and even has a nice magnetic latch to keep it closed.
Changing Room Ceiling and Walls
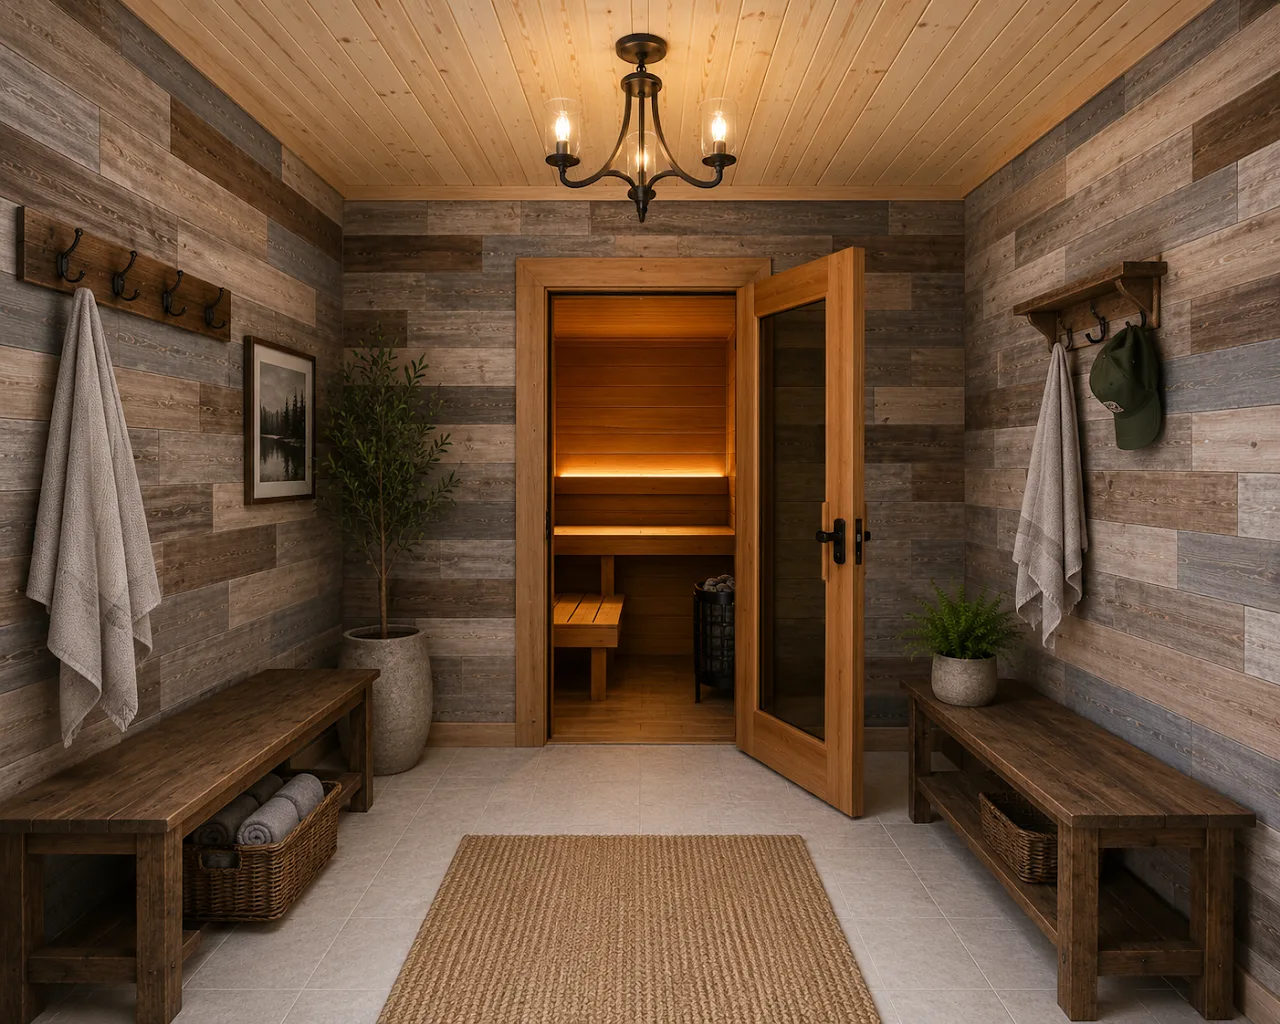
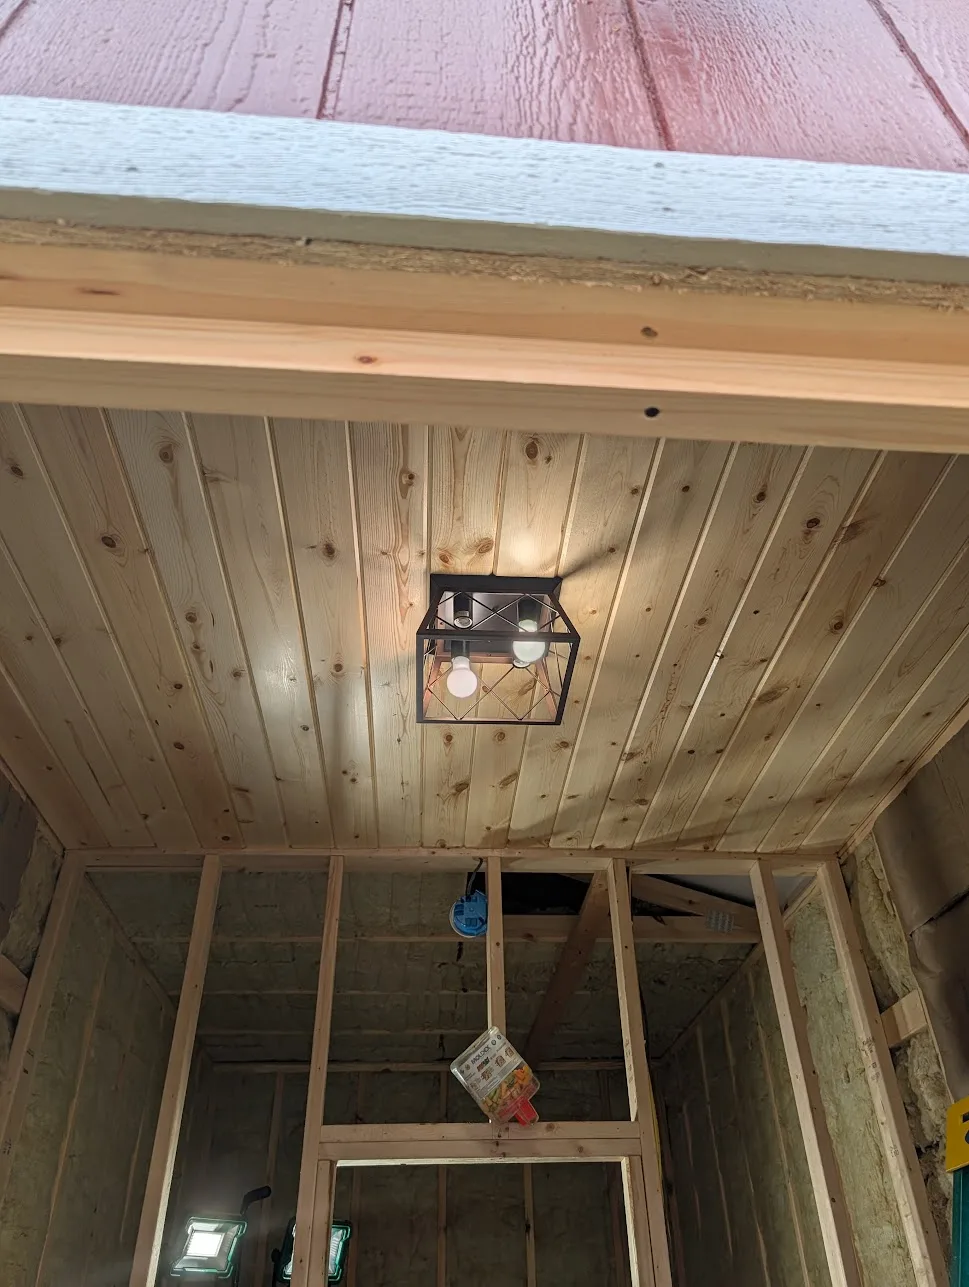
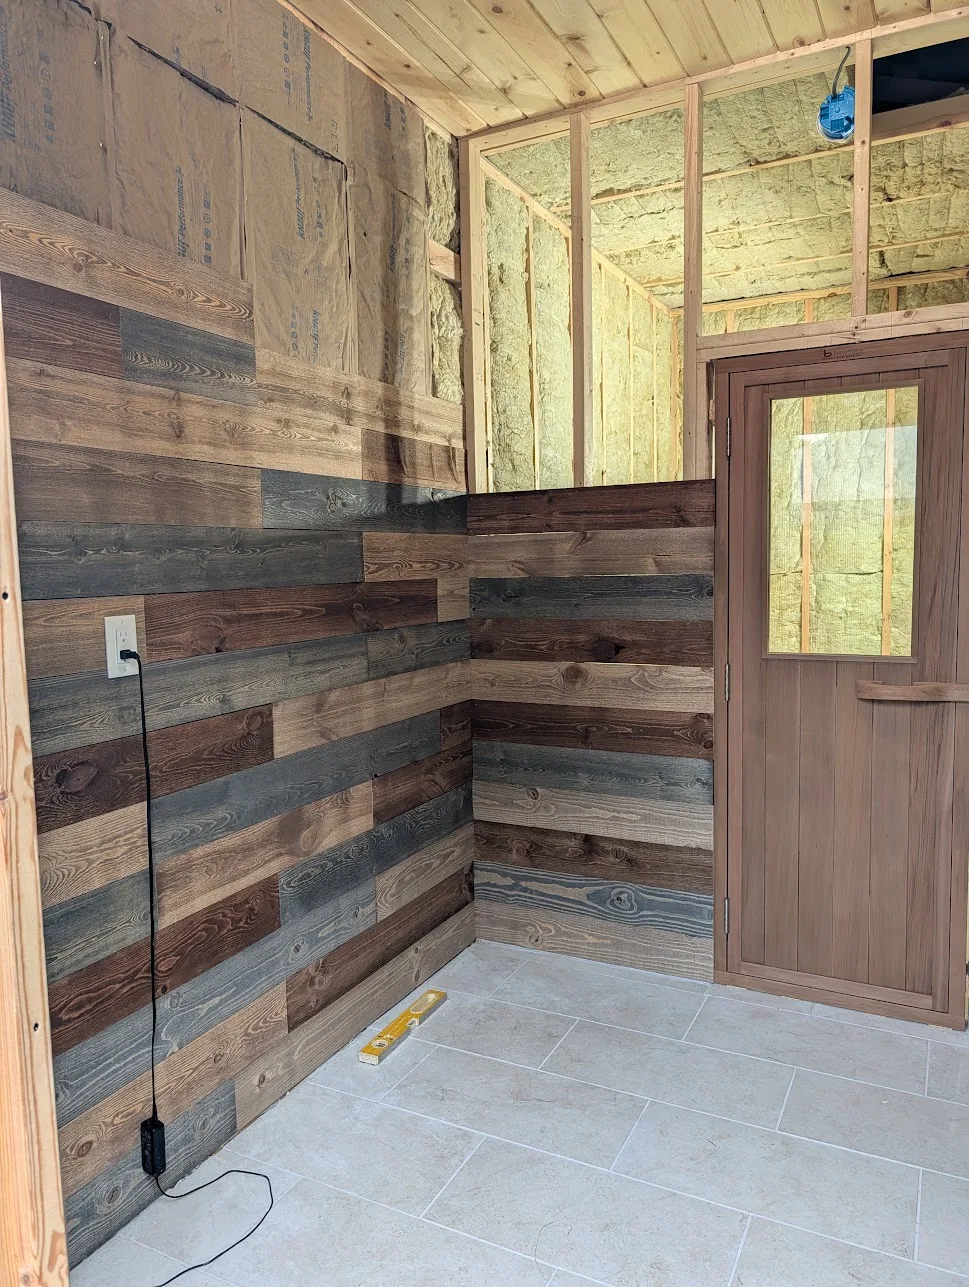
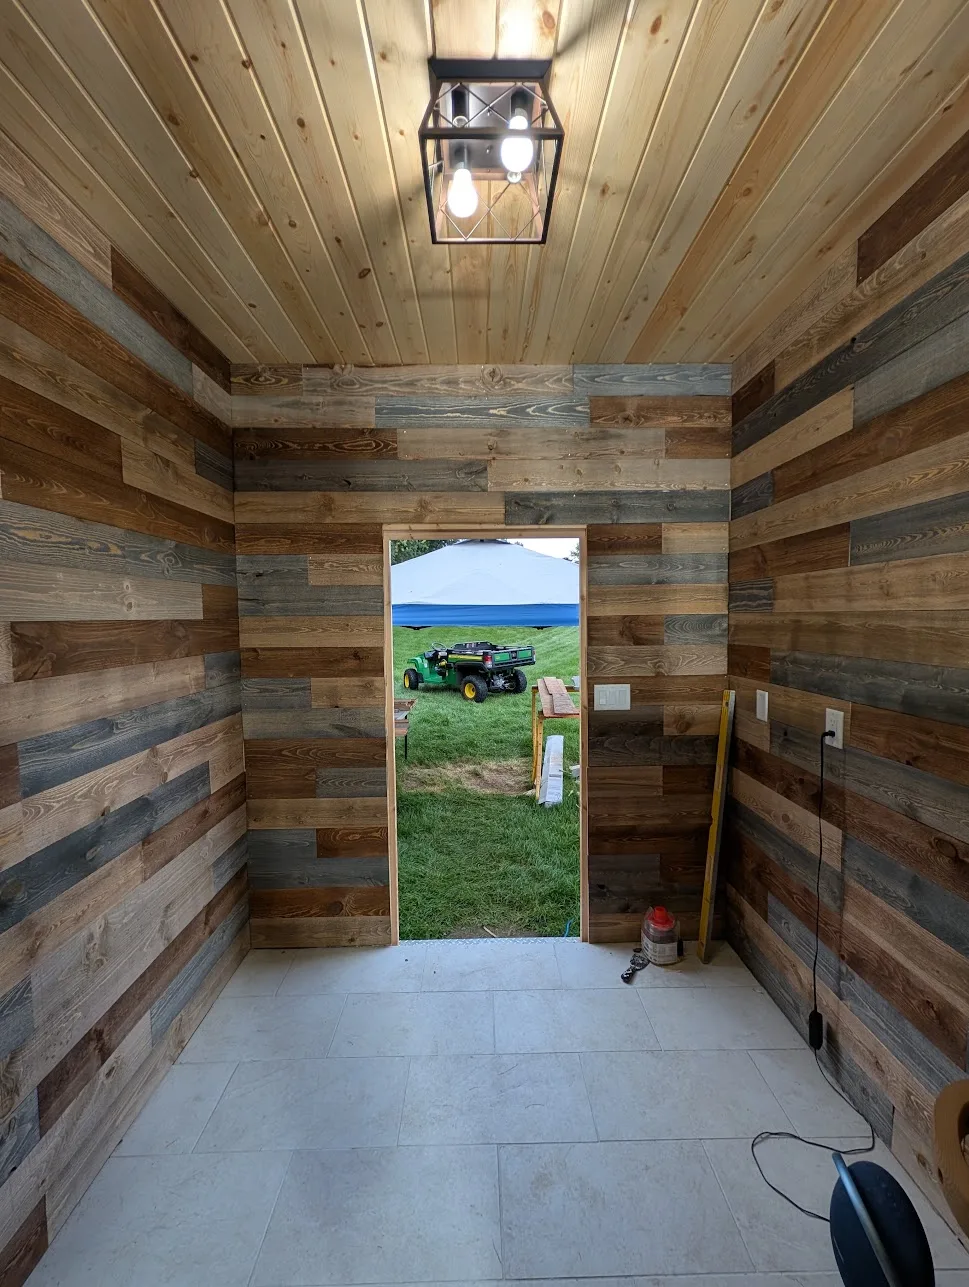
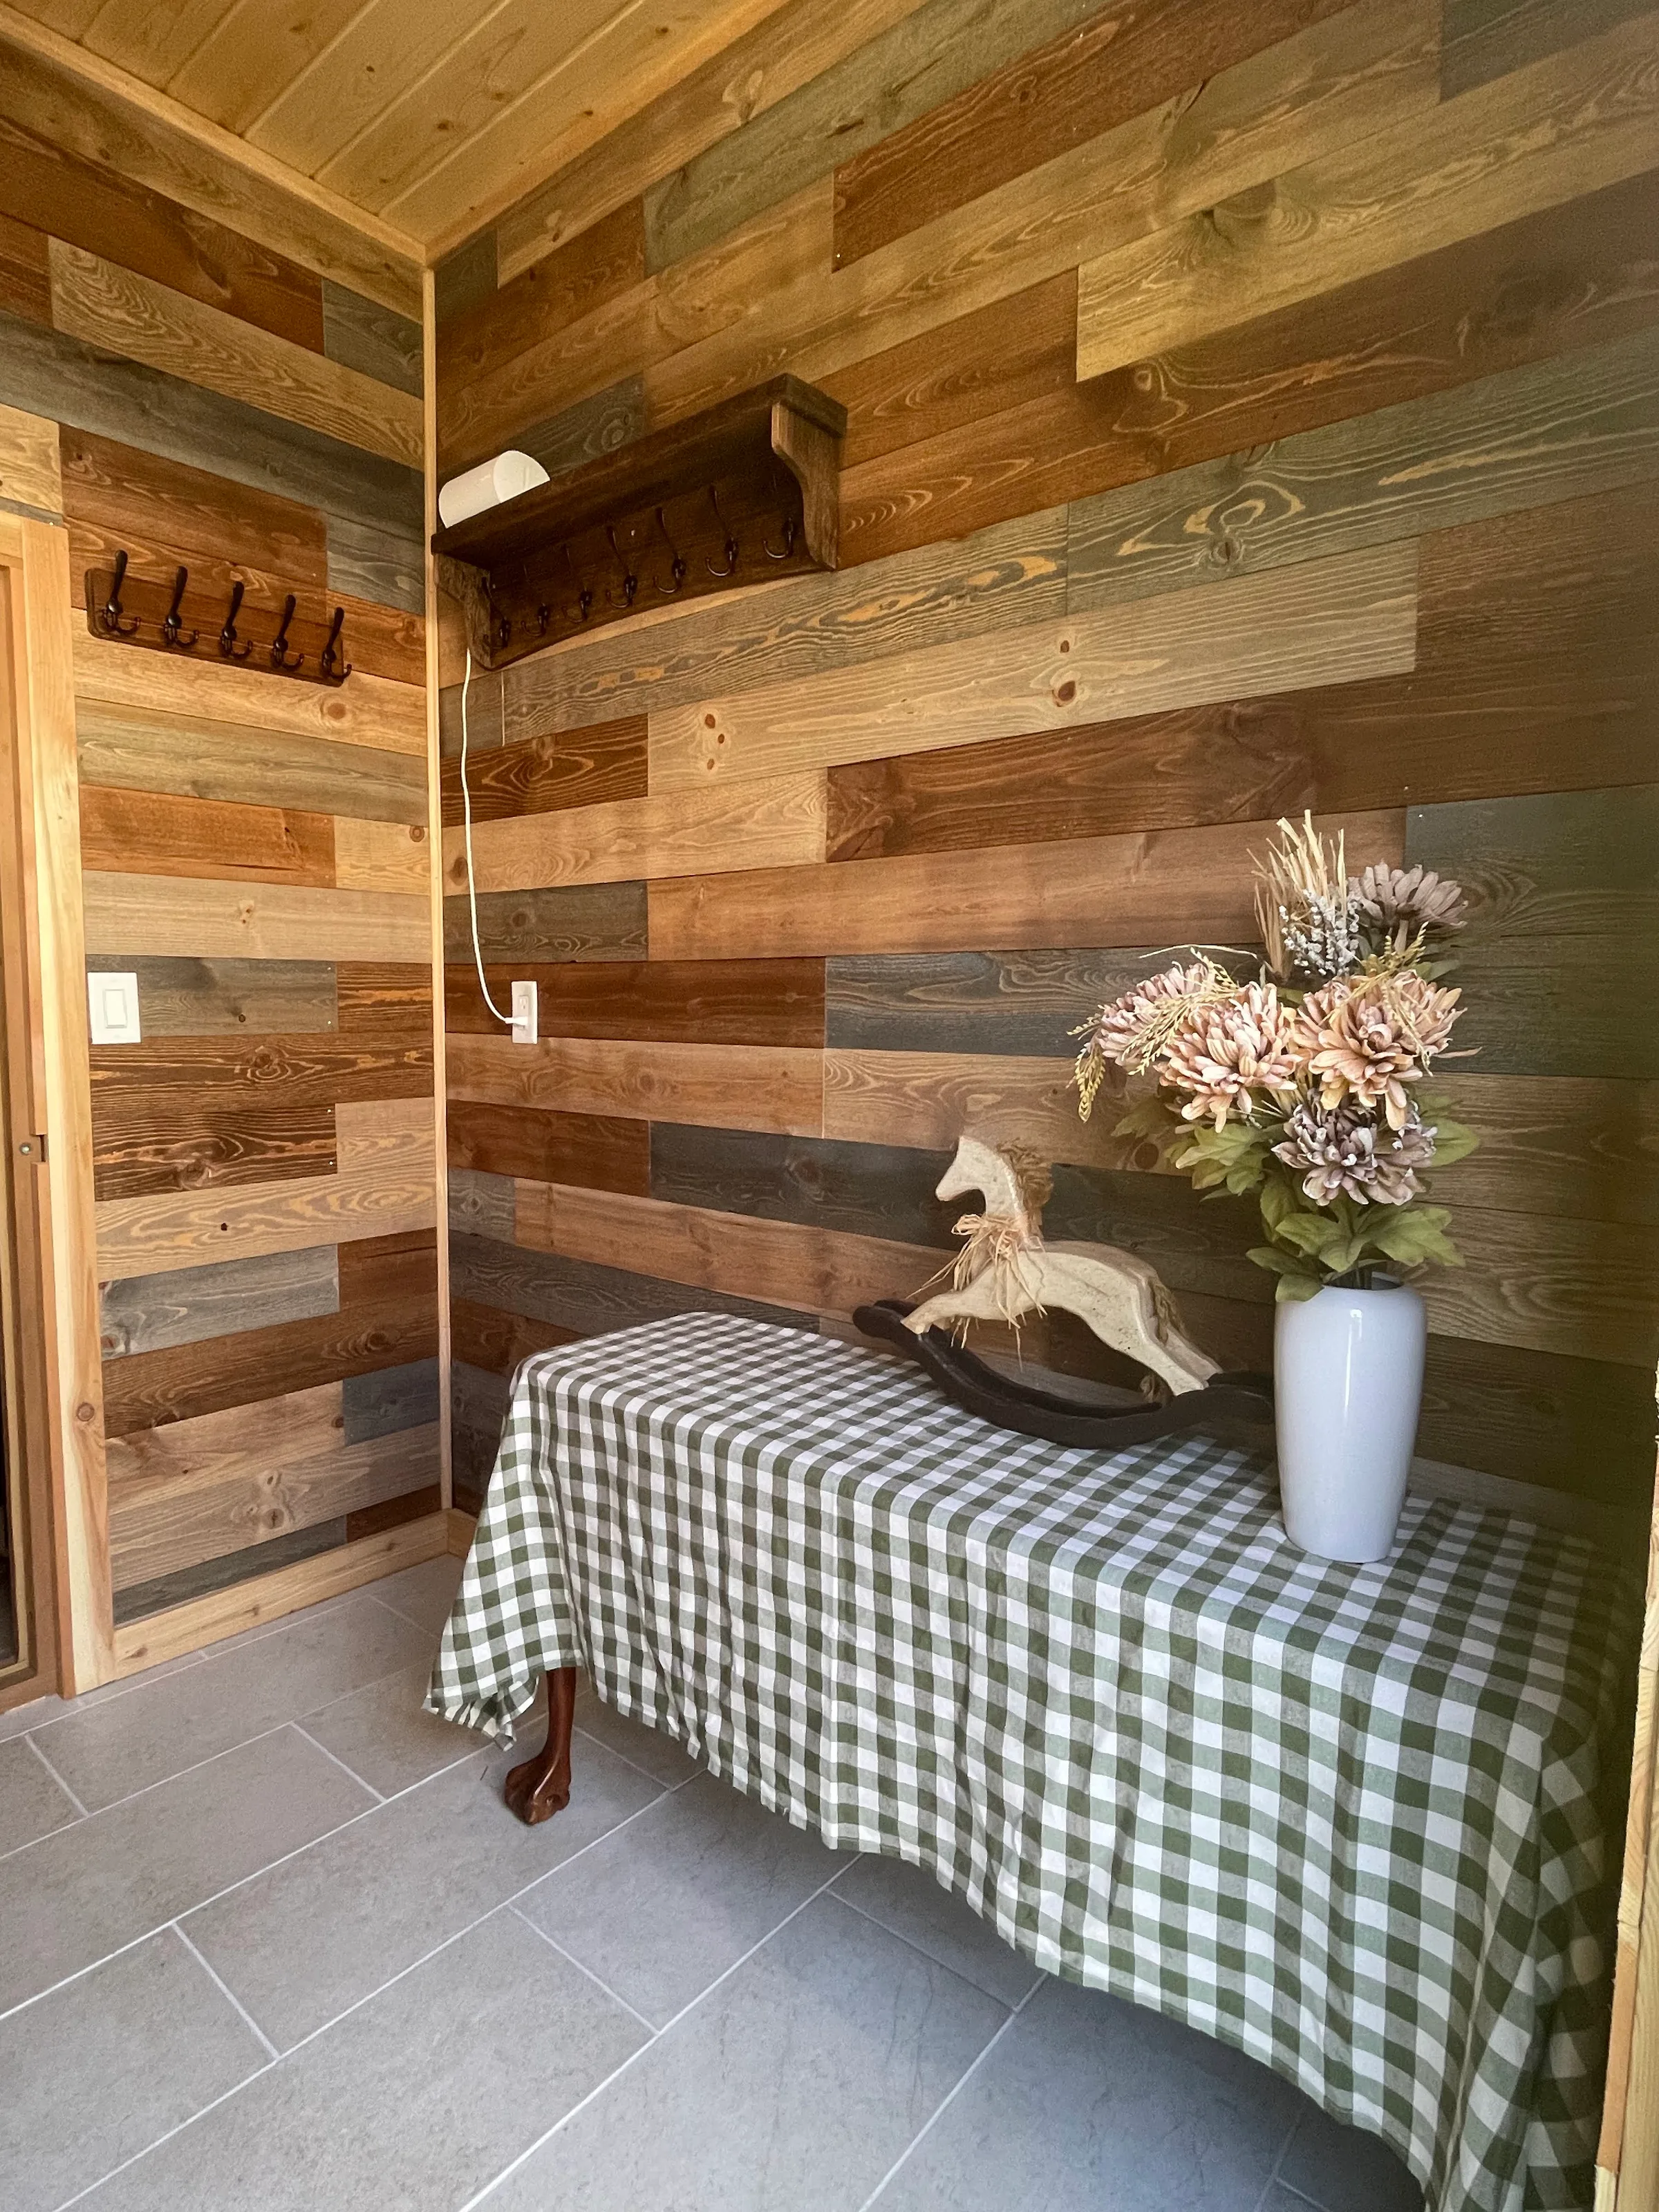
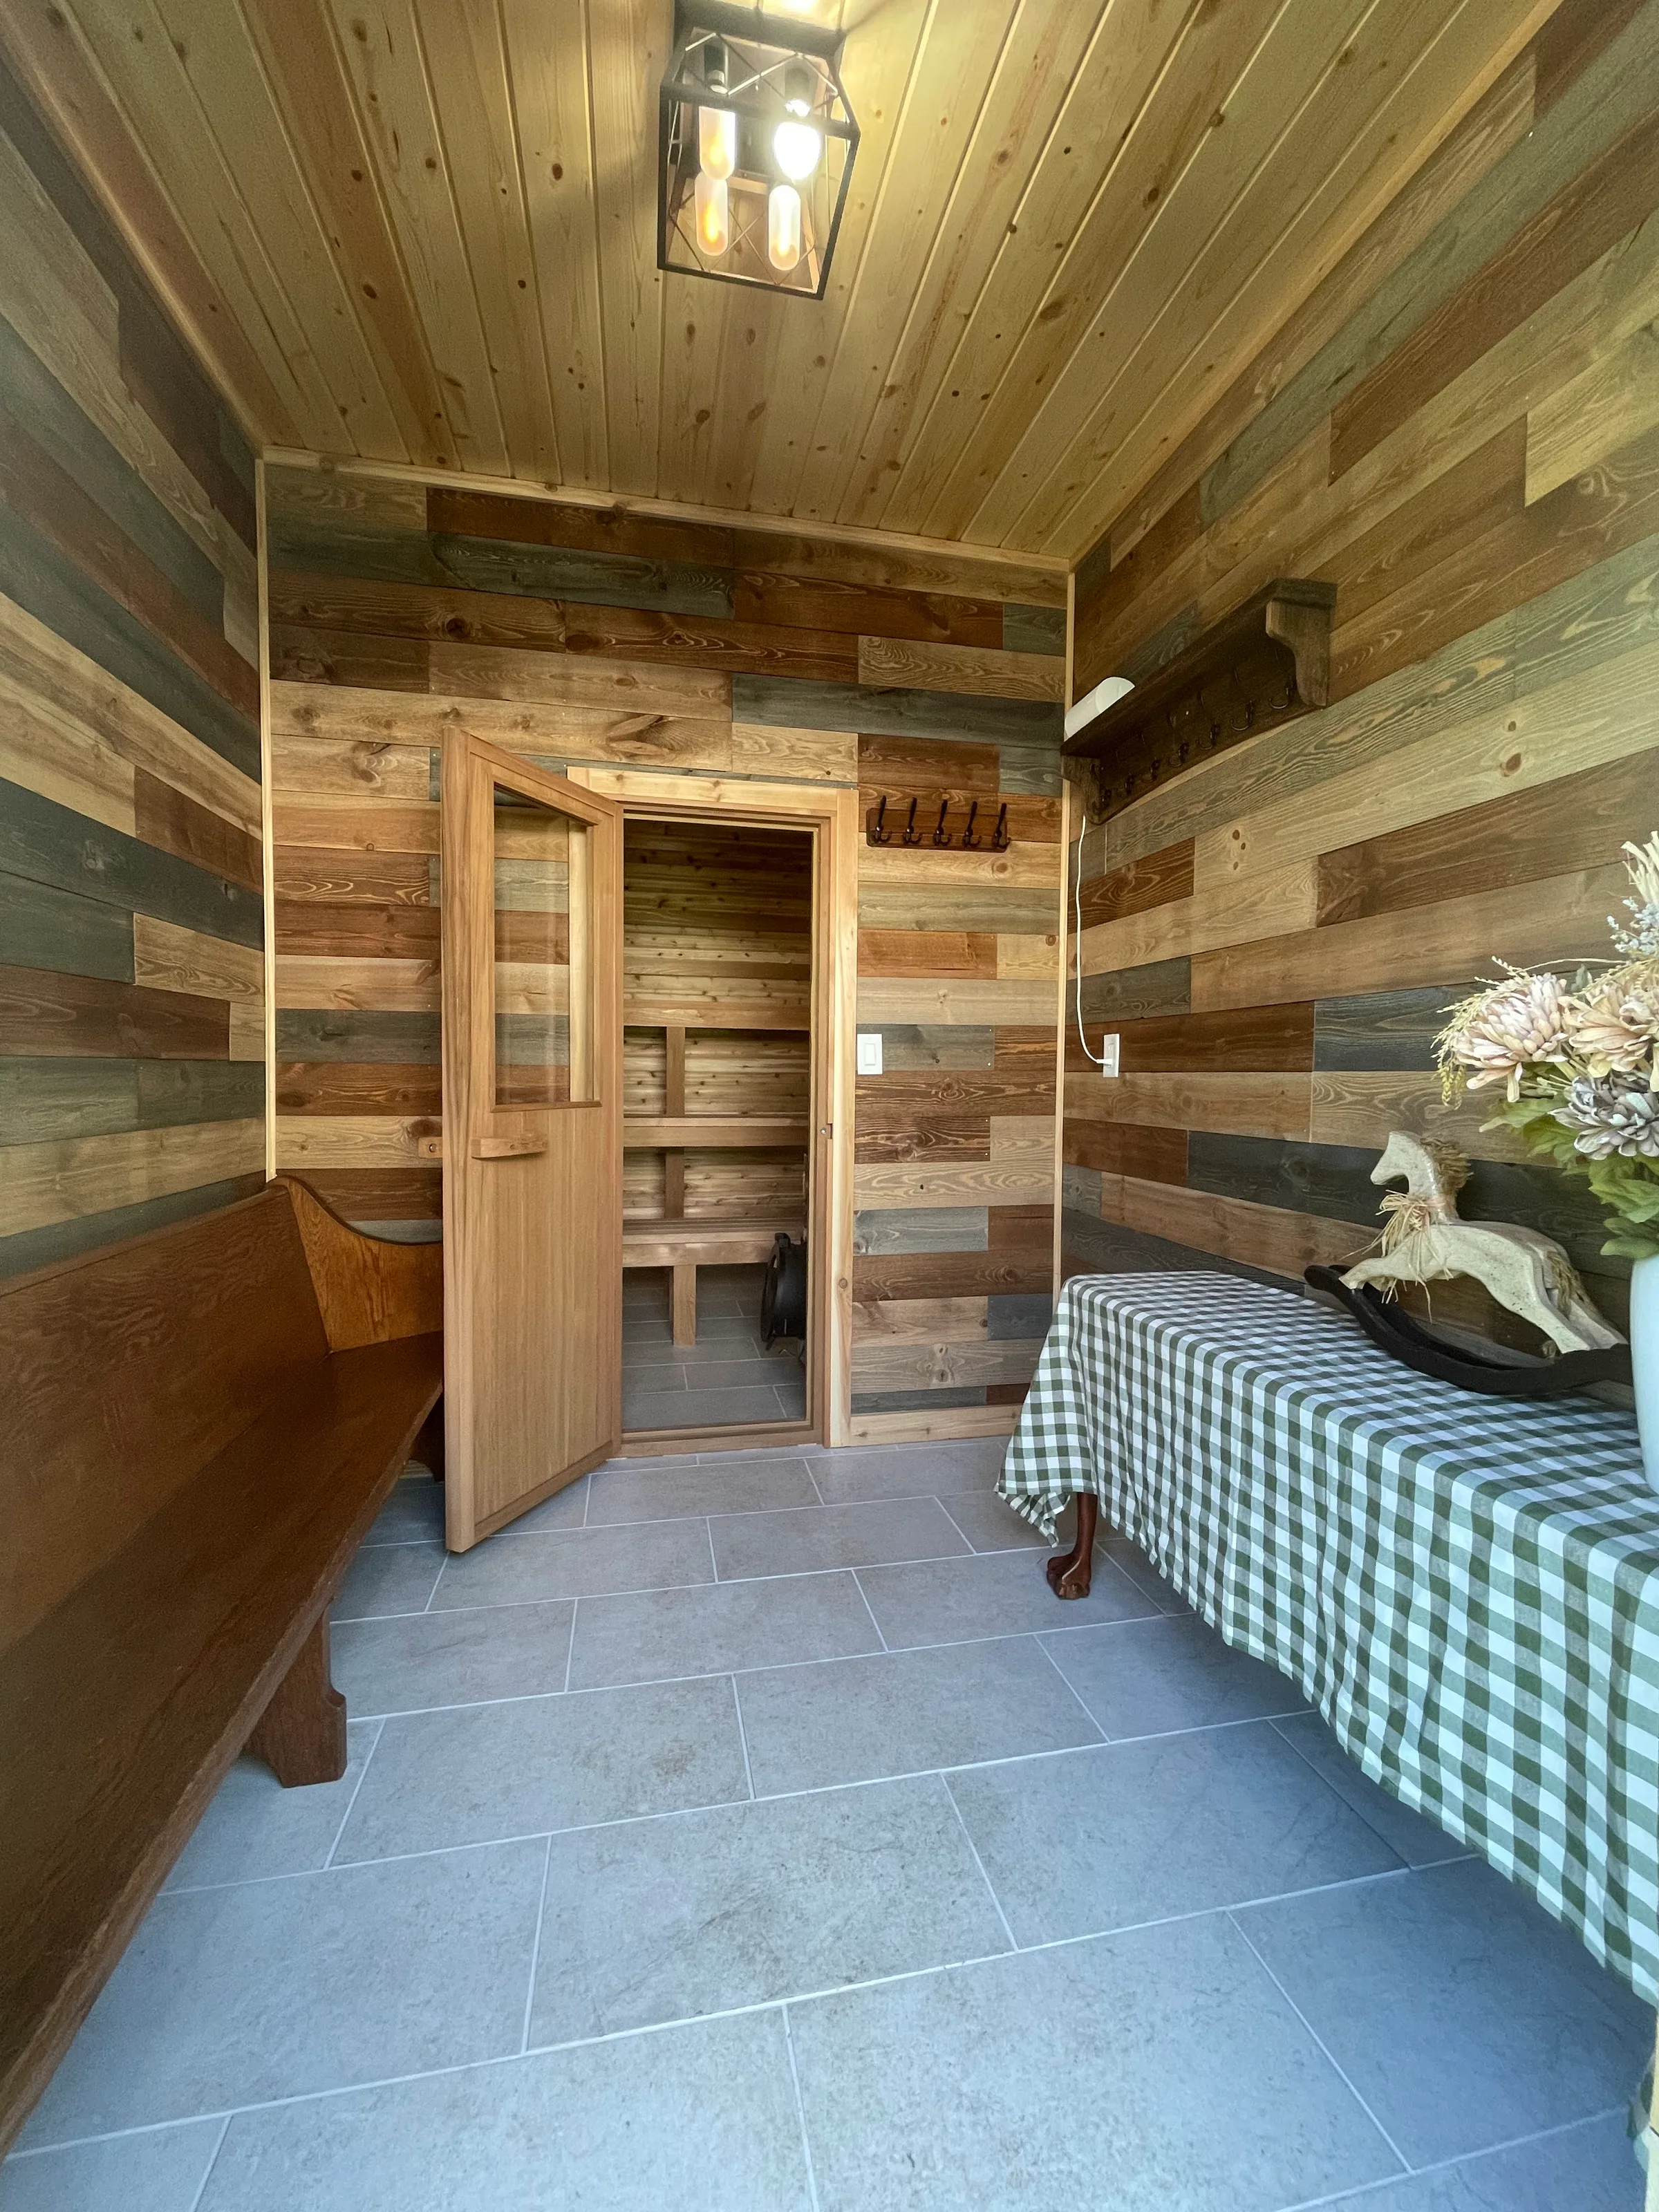
I chatted with ChatGPT on different ceiling and wall options for the changing room. Having it render alternatives based on images from Menards helped a lot. I ended up going with pre-finished pine tongue-and-groove carsiding for the ceiling and reclaimed barn planks for the walls. The carsiding was $250 and the planks were about $500.
The first image was the ChatGPT render and the rest are real.
Chimney and Stove
For the chimney I ordered everything from Home Depot online. My plan ended up being:
- Up from the stove into a damper
- From the damper into double wall chimney pipe which was telescoping to get the height right
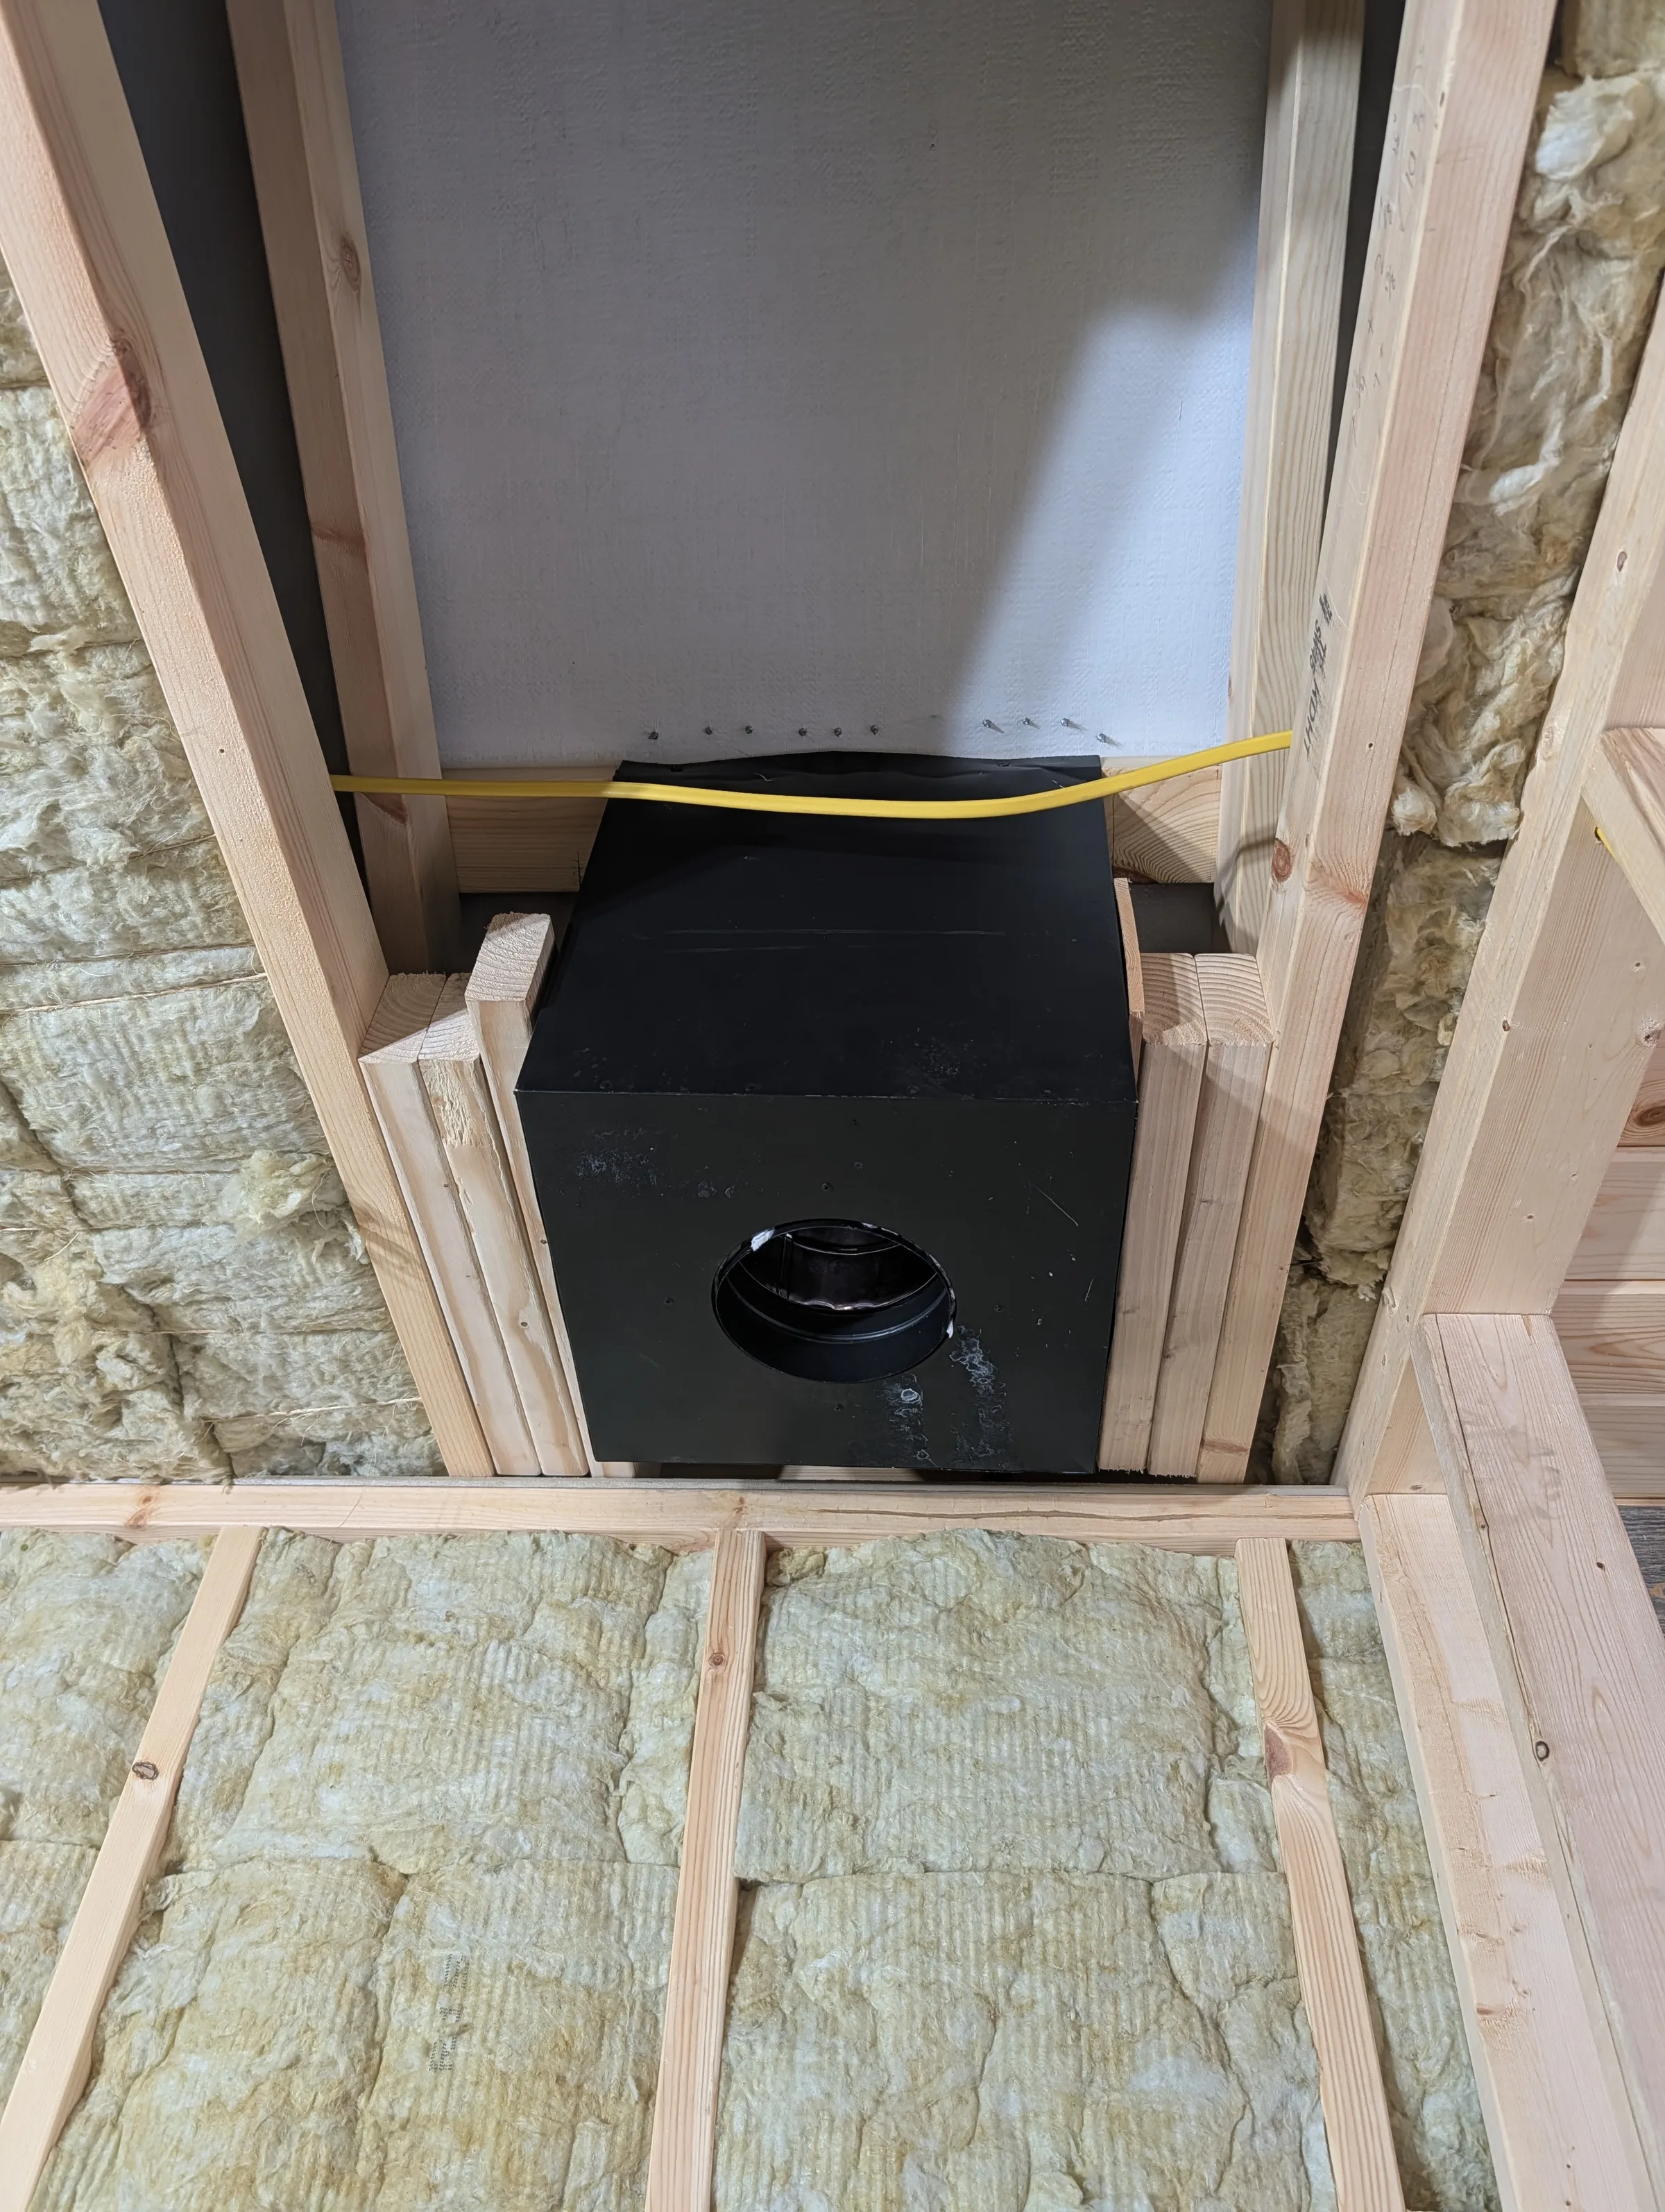
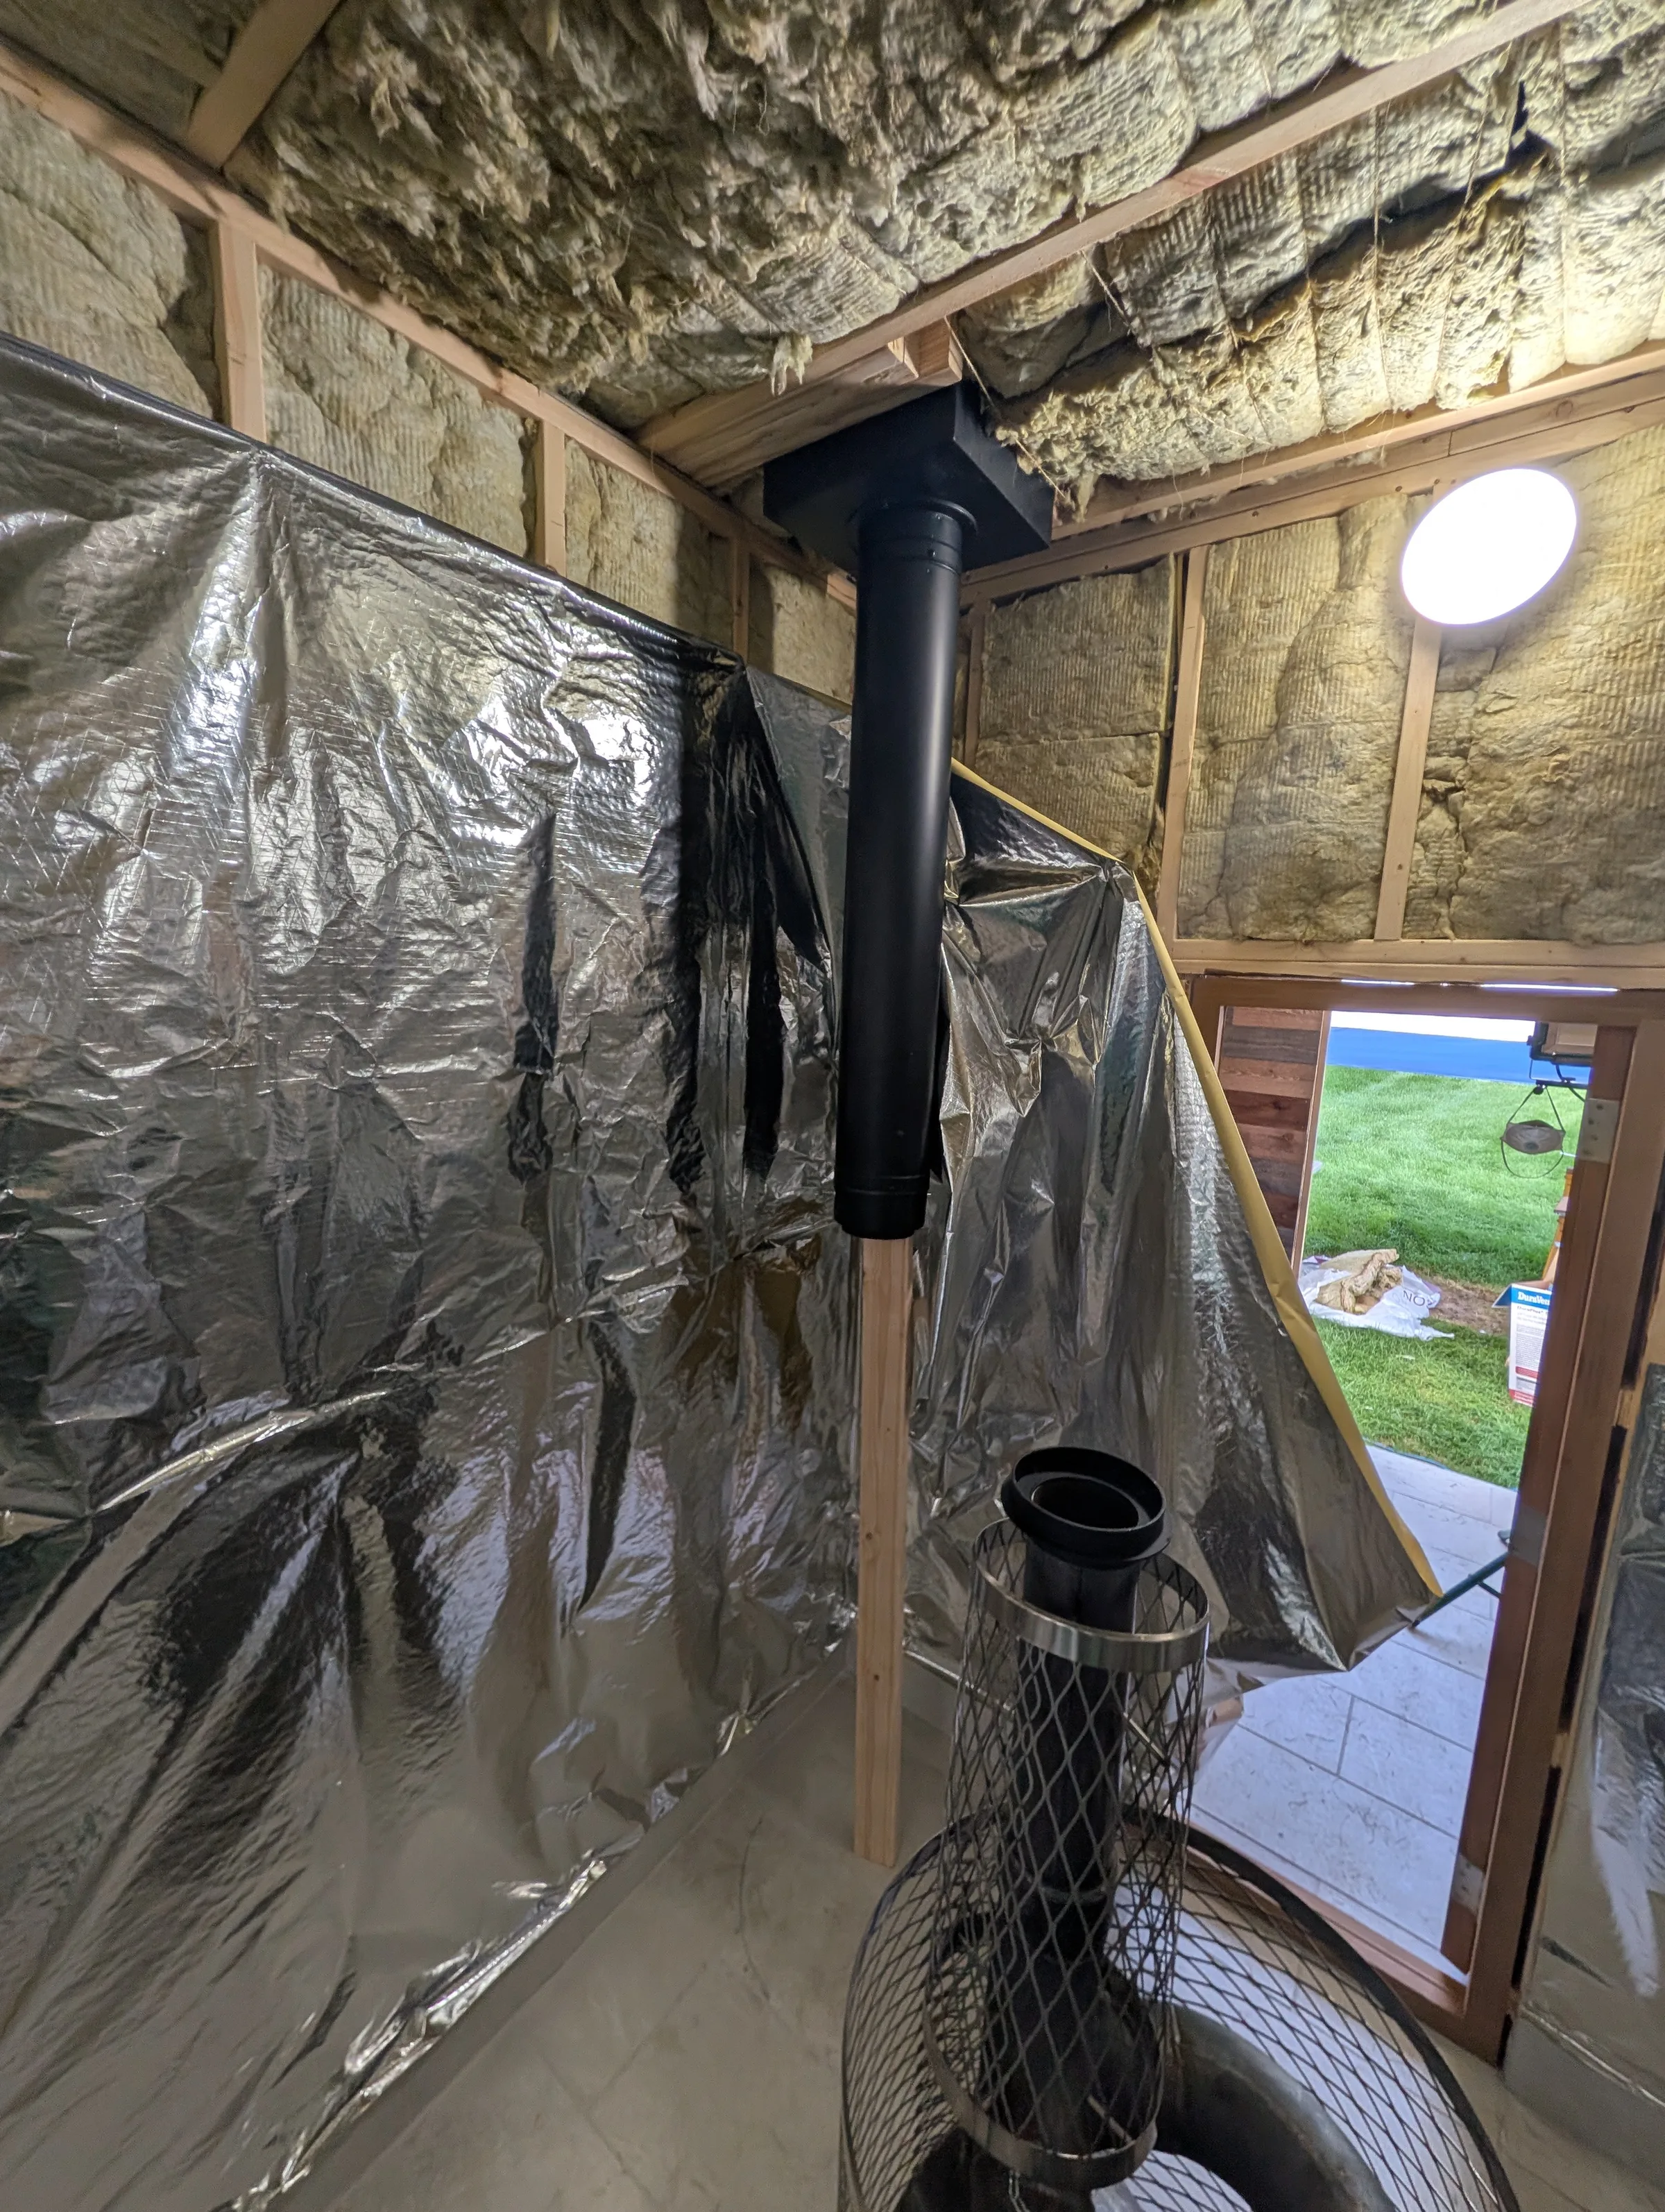
- Into the attic support box which was tight against the upper roof from the inside
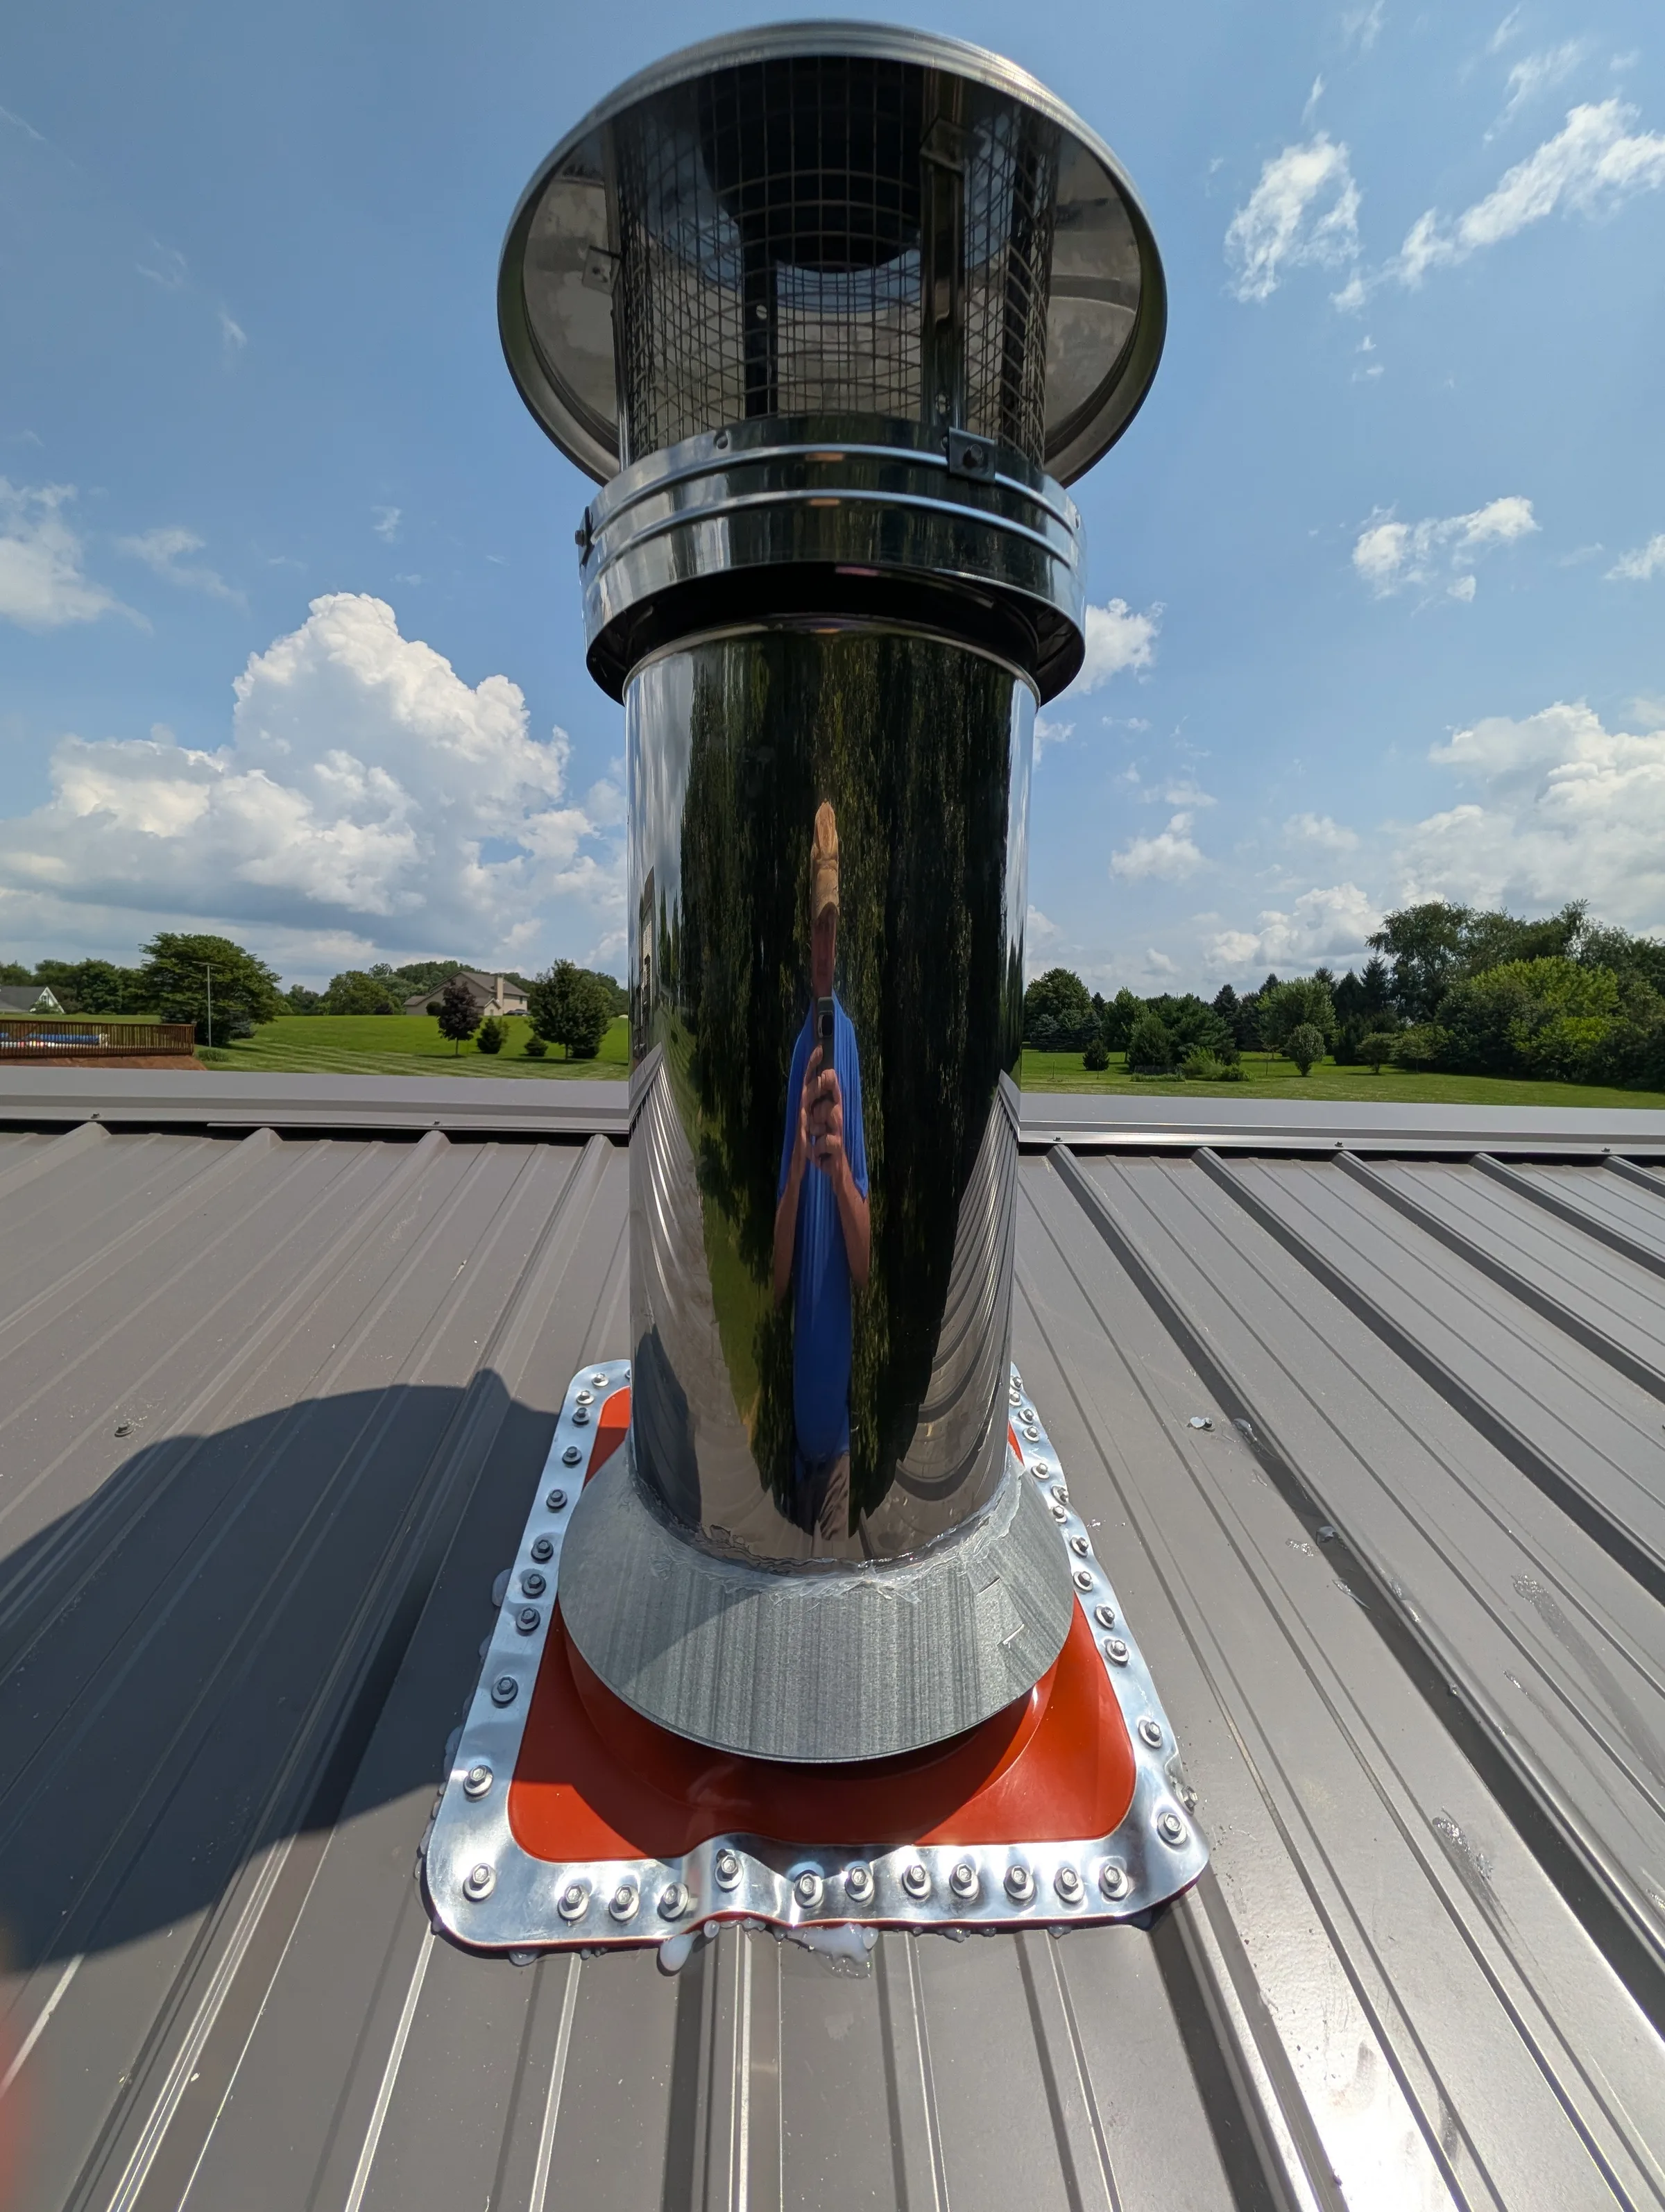
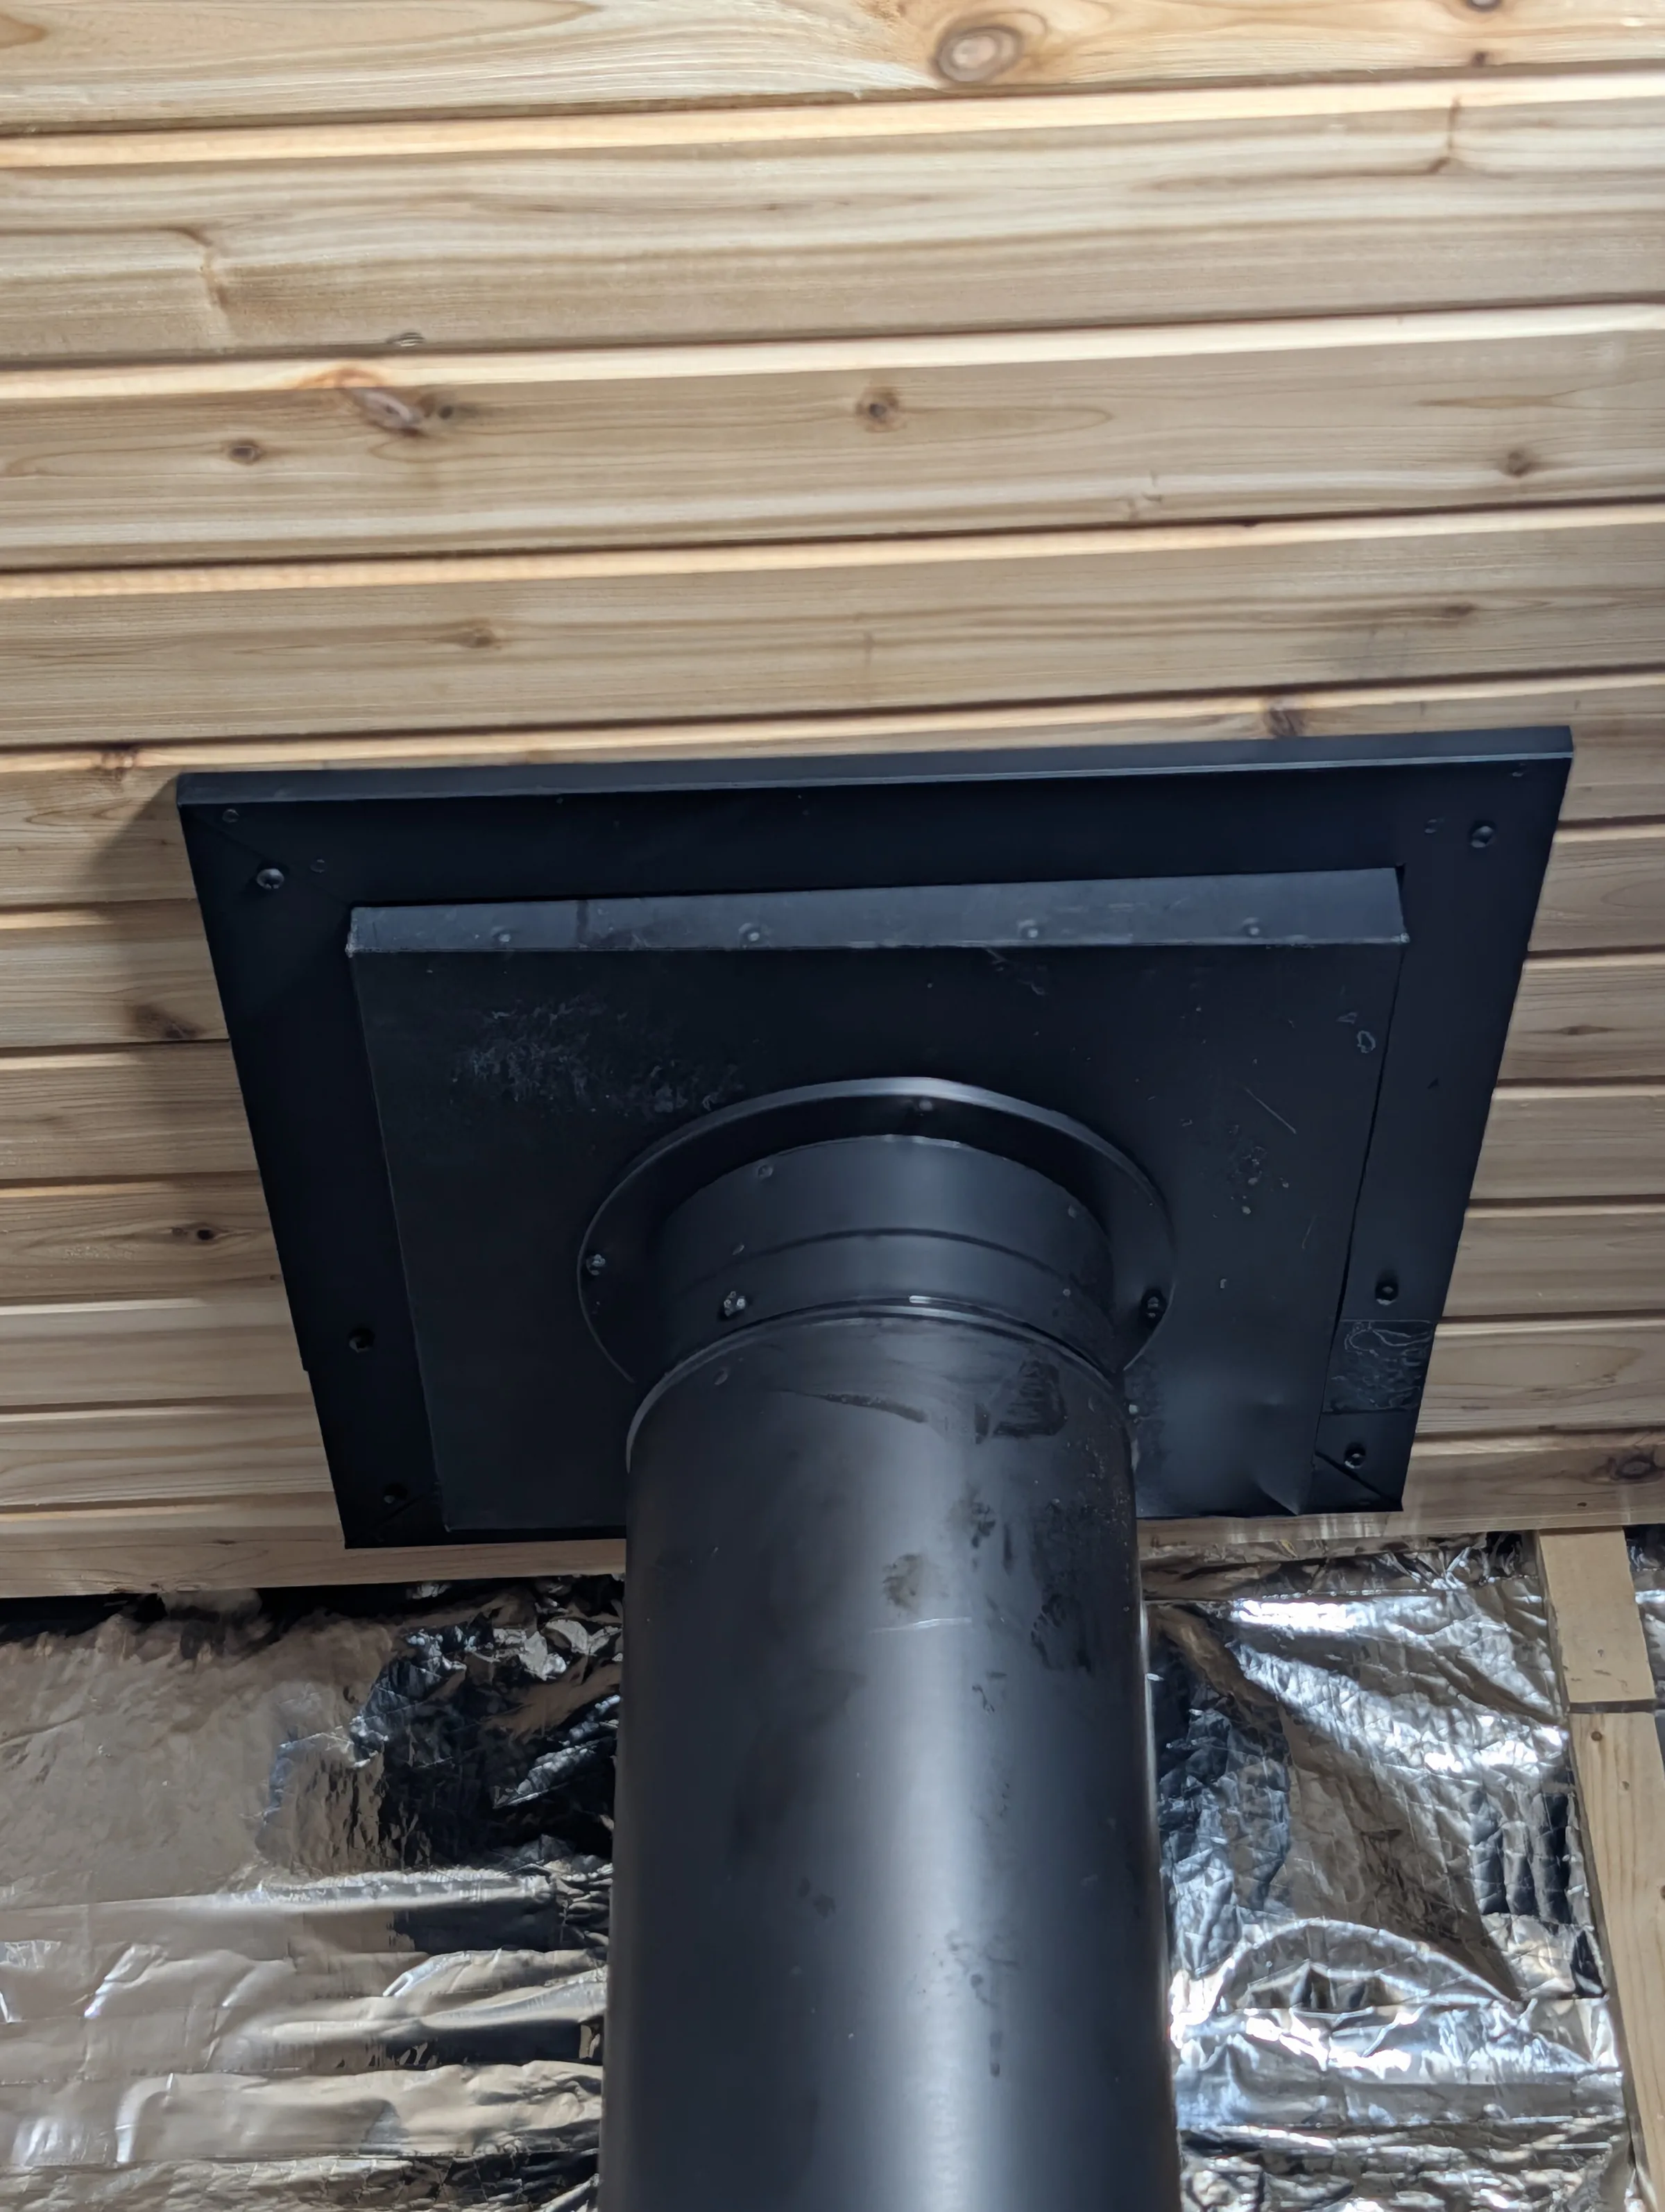
- Triple wall Class A stainless pipe out of the attic support box and through the metal roof
- A rubber boot with silicone sealant and screws to seal the roof penetration with silicone at the top of the rubber boot
- A storm collar over the rubber boot which also has silicone sealant around the top
- A chimney cap on top of the triple wall pipe to finish things off.
I had a friend come over to help do the chimney work as we first needed to get the stove inside the sauna room so we could use a plumb bob to get the position right.
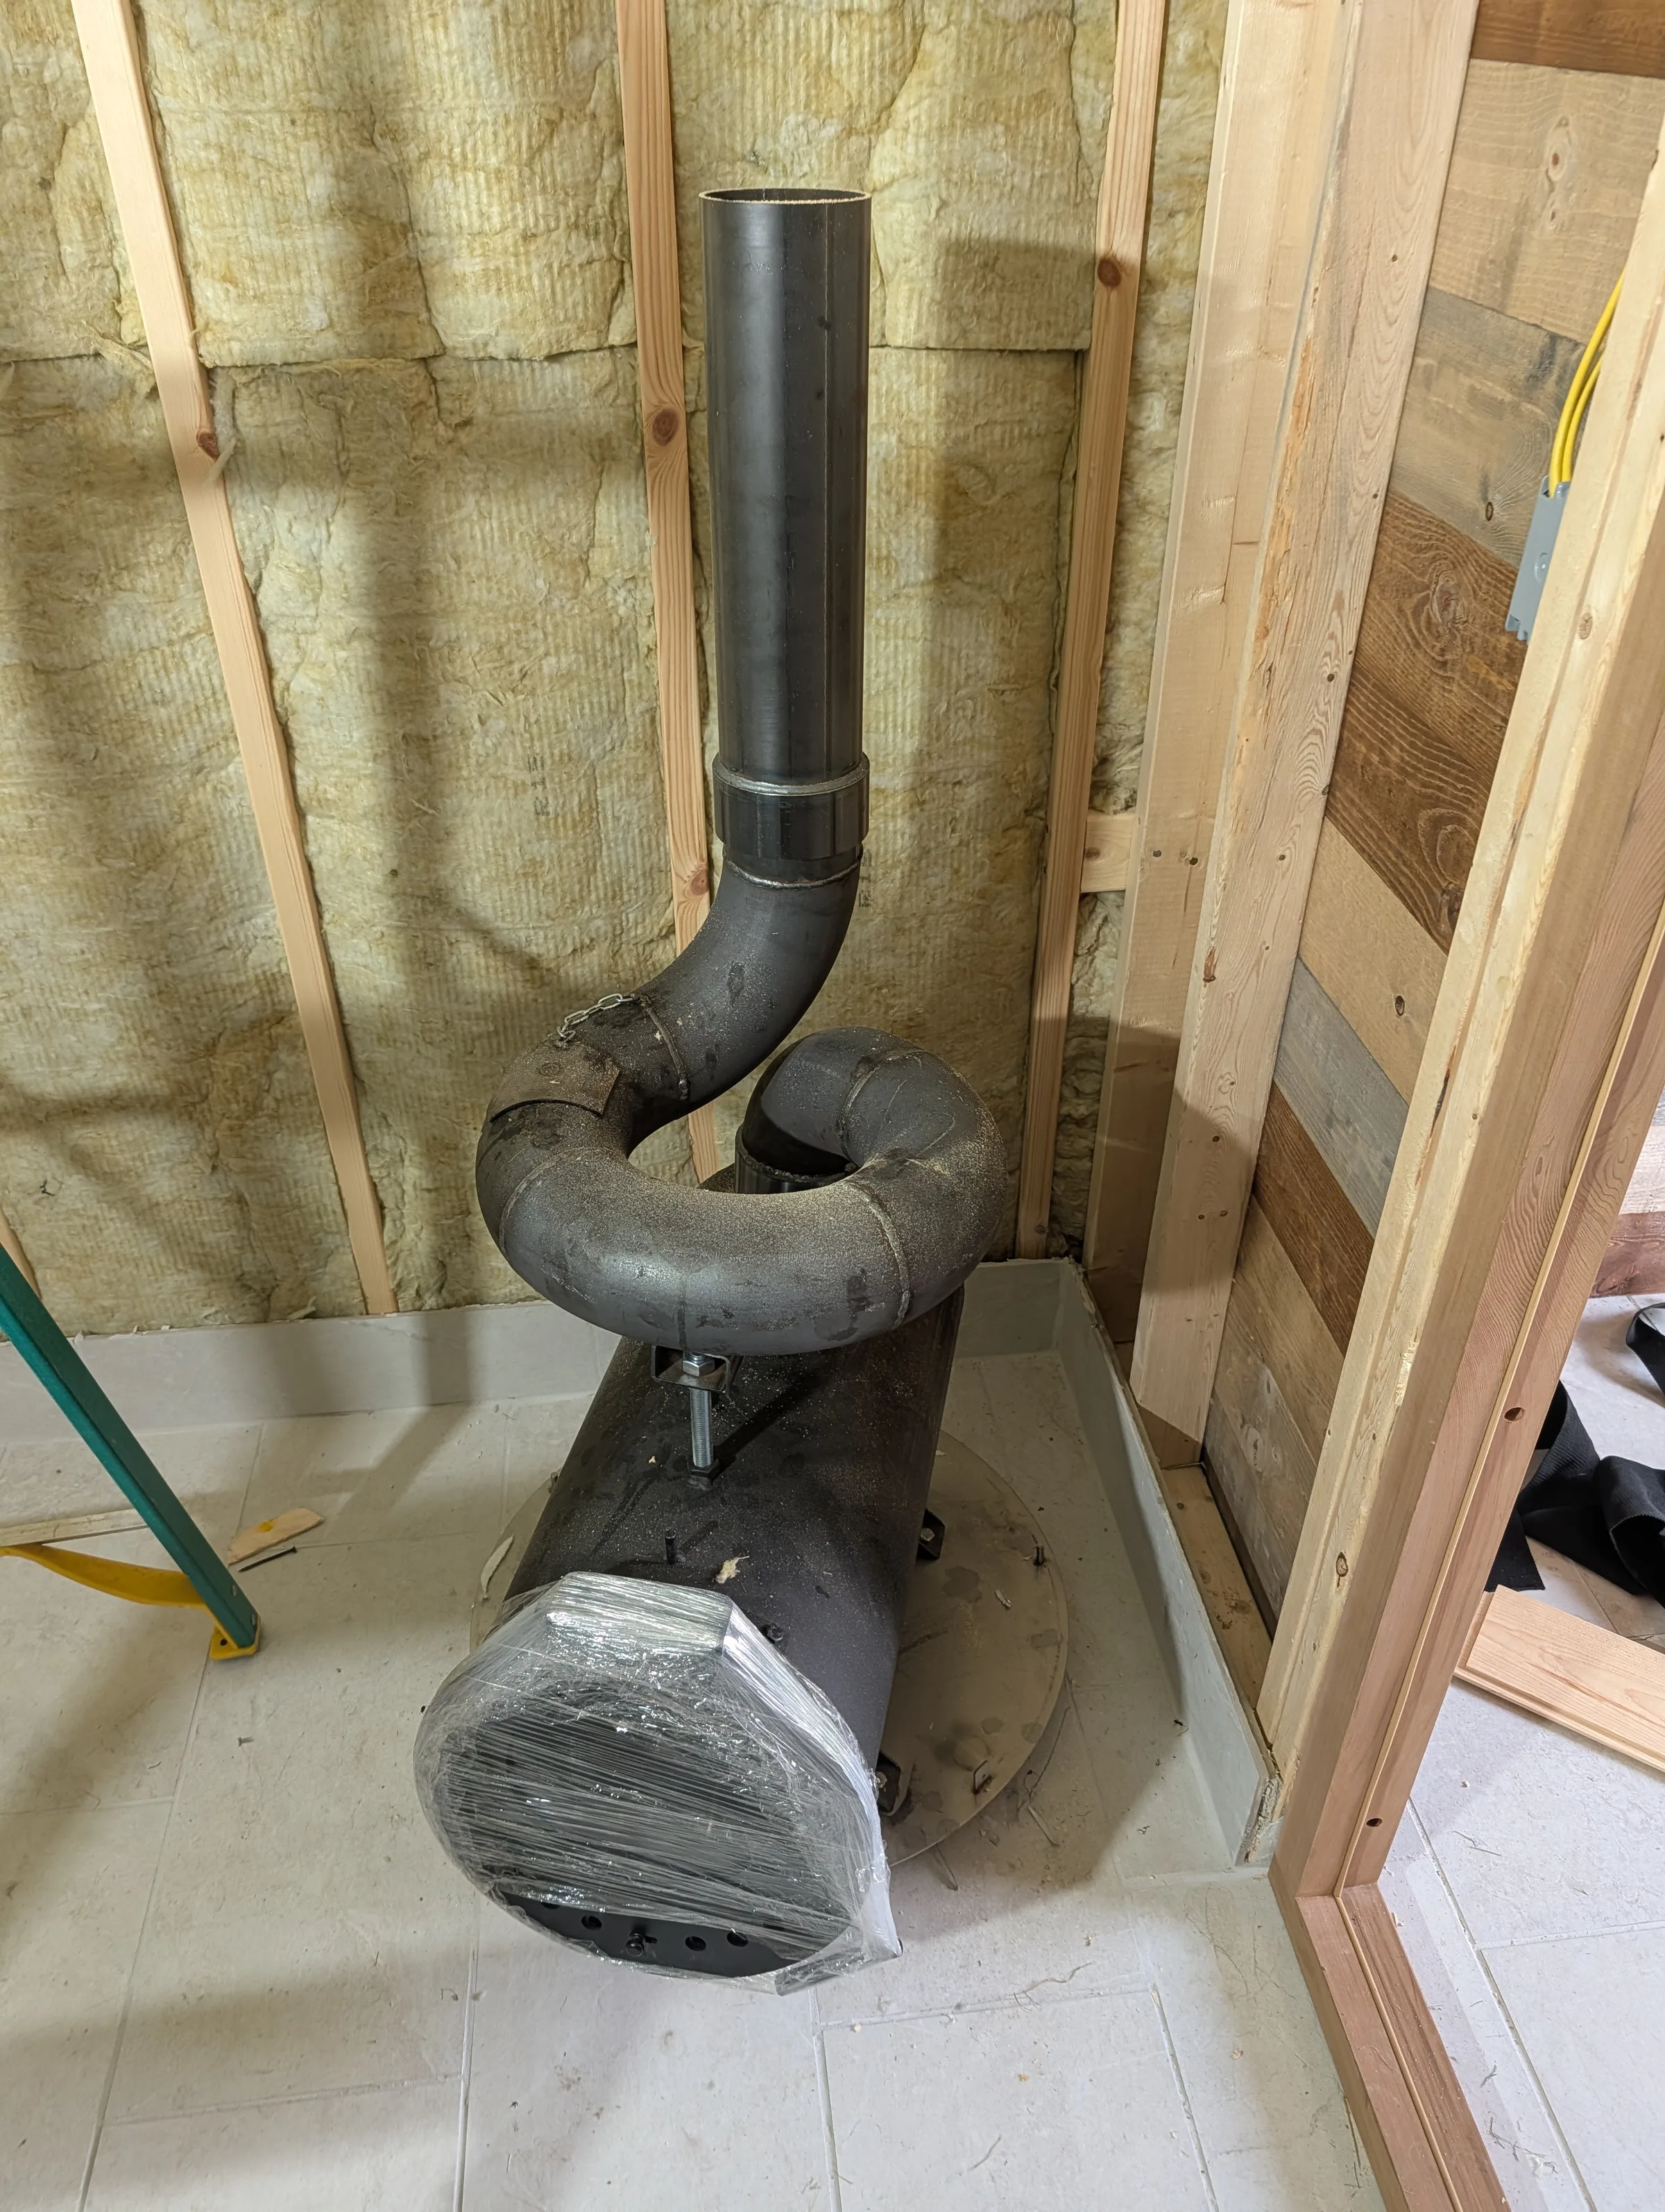
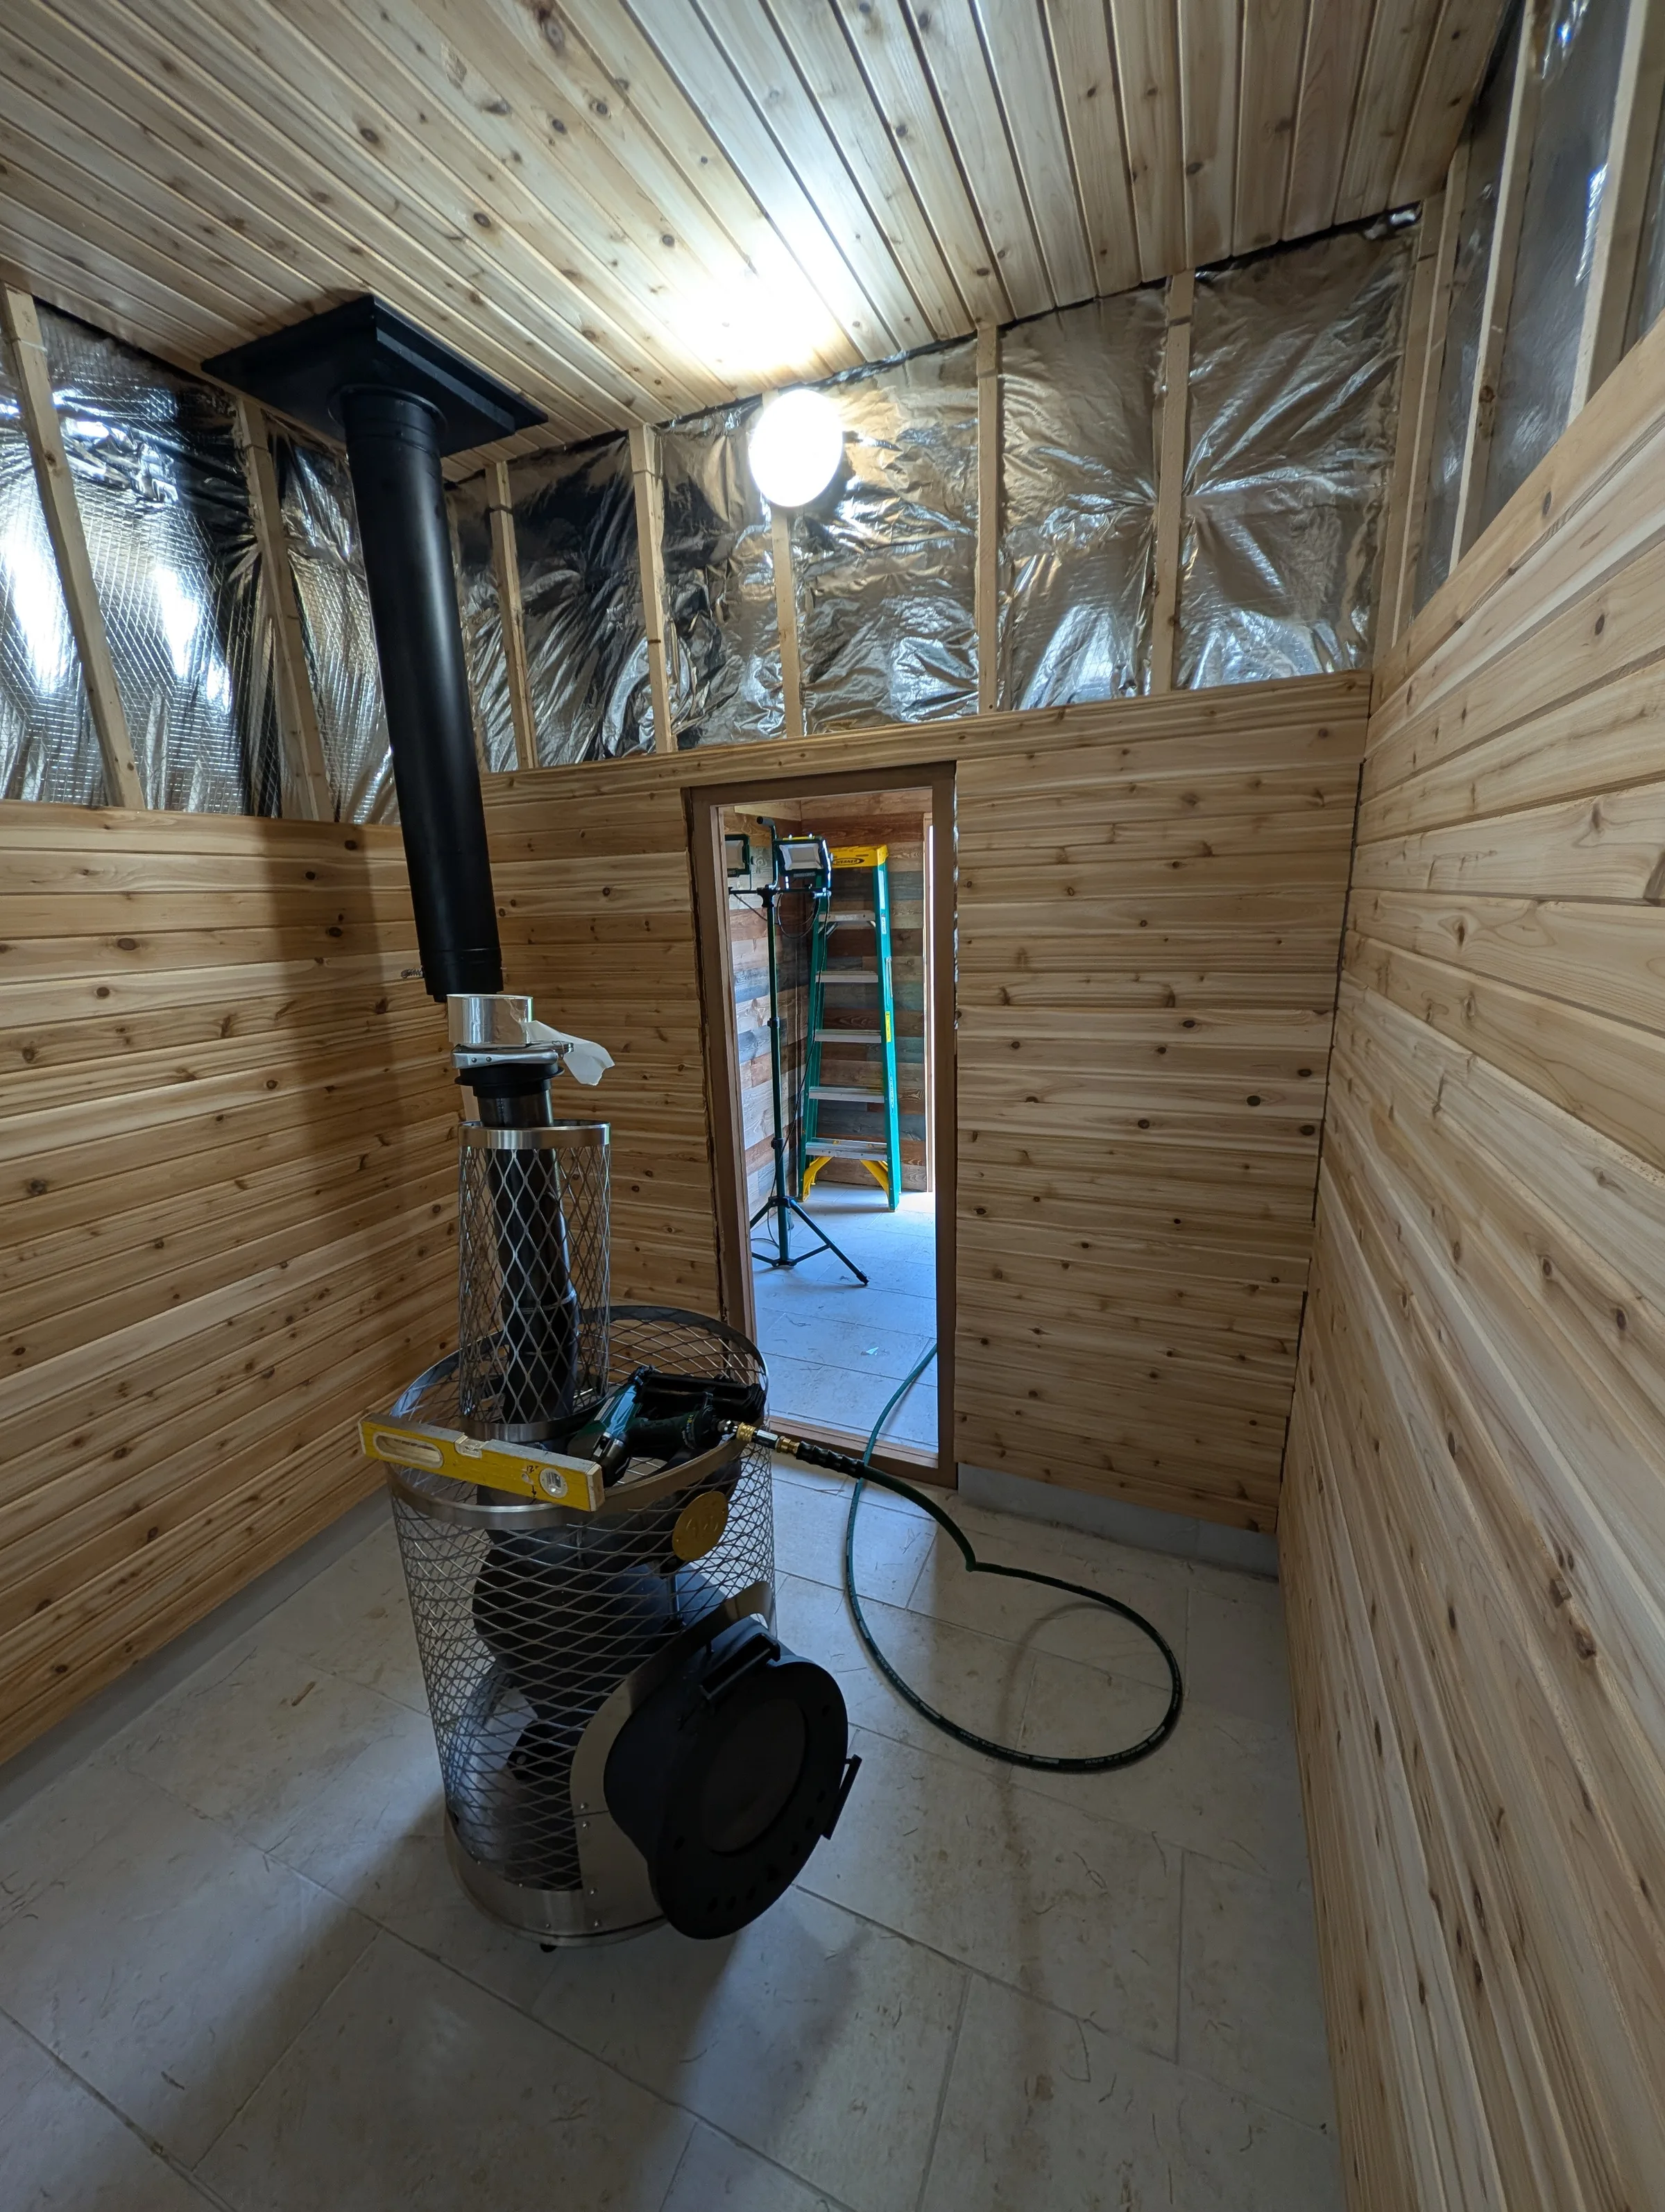
I had measured the rough opening for the sauna door and the stove fit through. Then later I decided to install the door and totally forgot to re-measure. We ended up having to disassemble the stove to get it in the room which you can see in the image below.
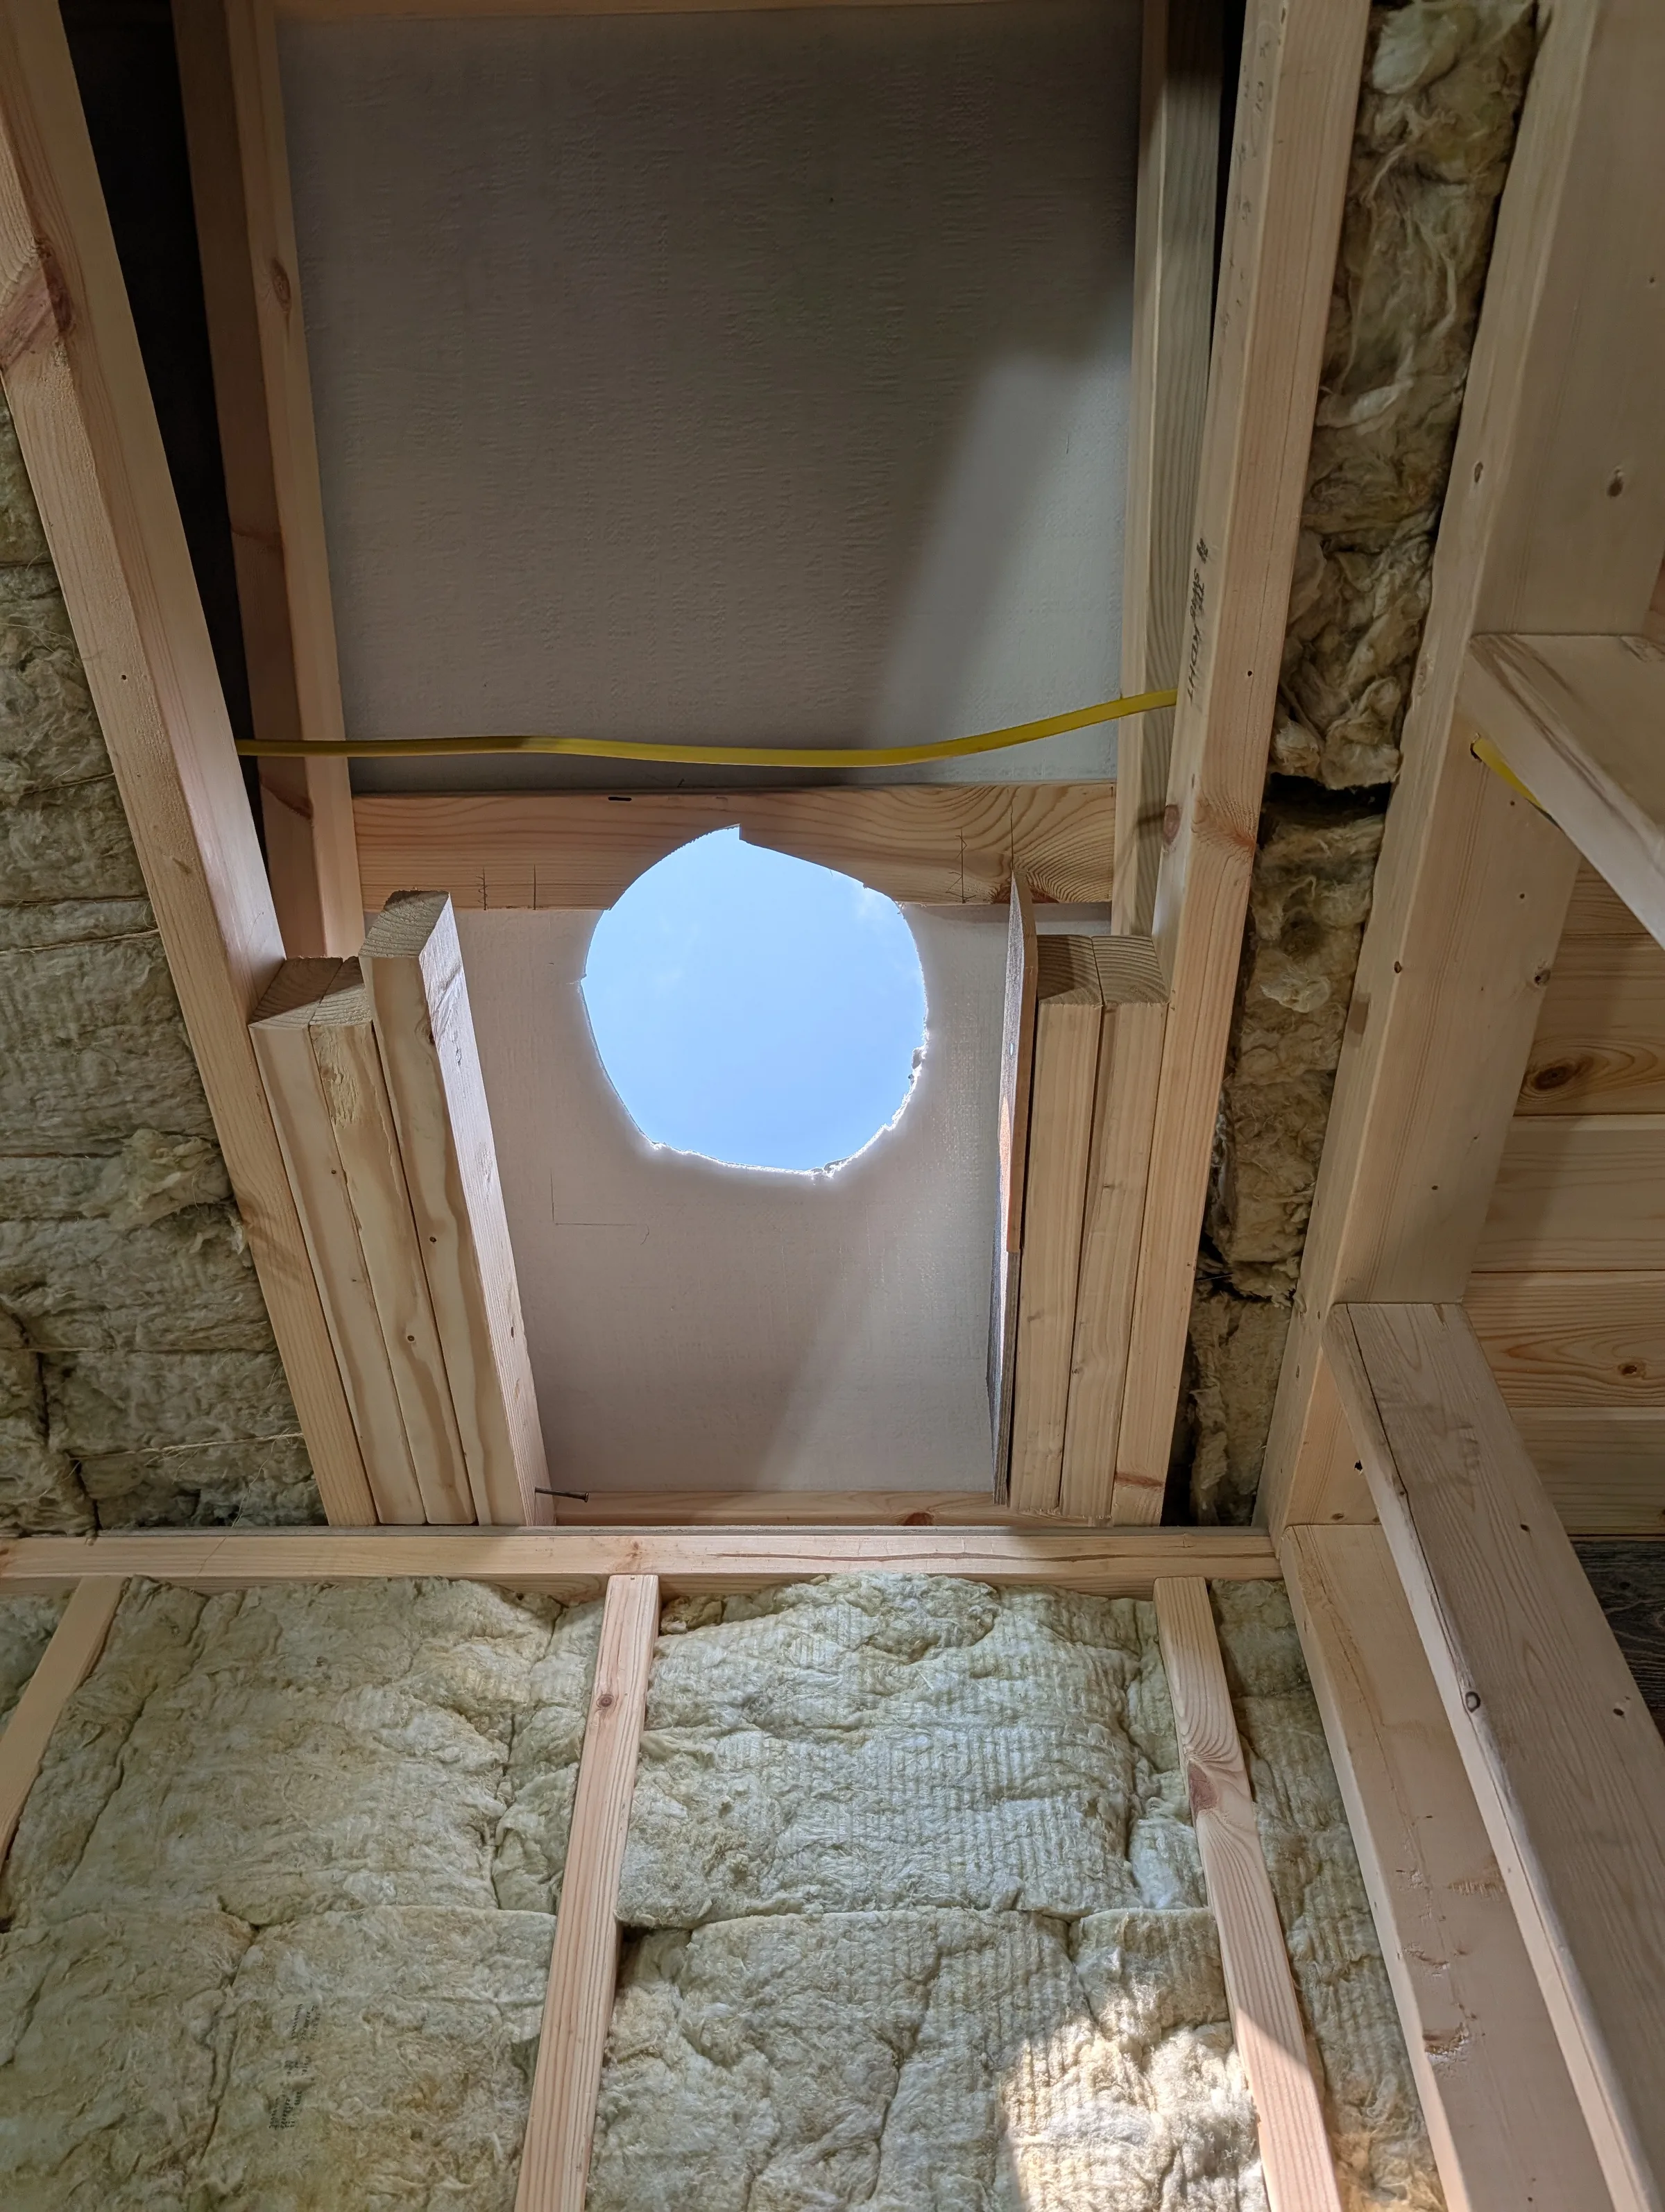
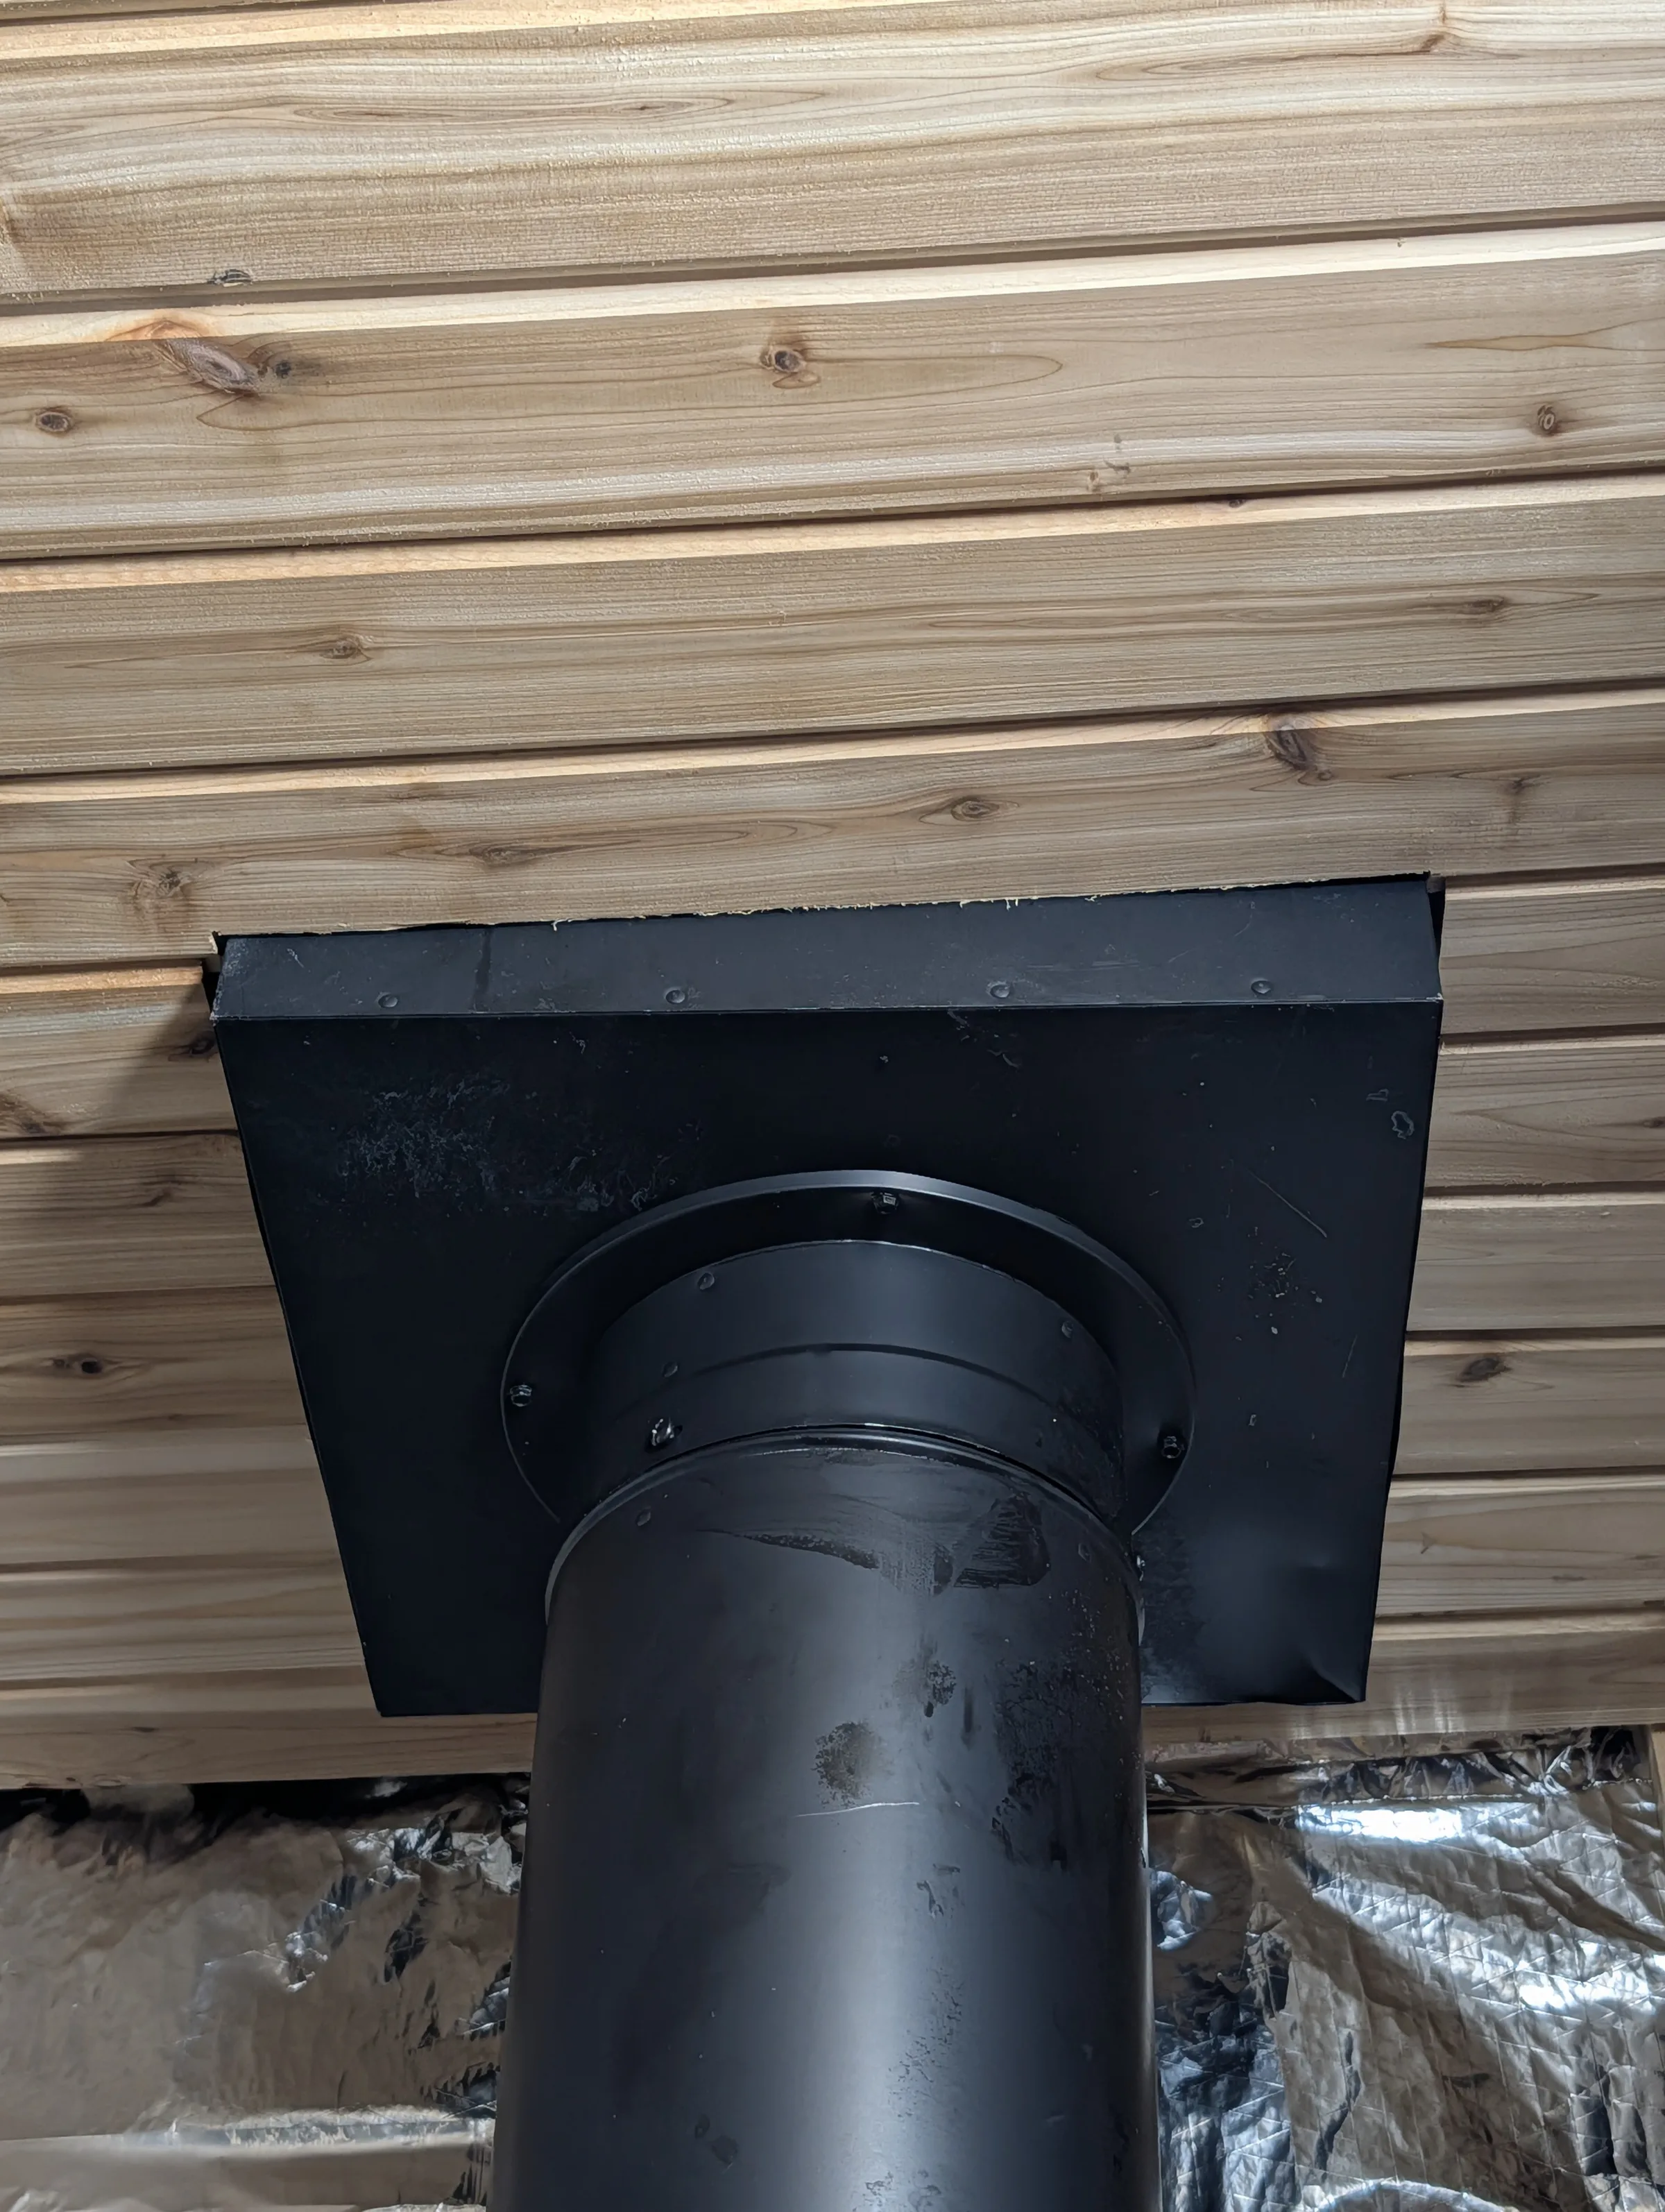
We used a jigsaw with metal blade to cut the opening on the roof. We then measured, framed a place for the attic support box, and cut it to size to match the angle of the roof. This part was really hard with the angles, and measuring, etc. I feel like this was an area where a professional carpenter would have done it really fast. They'd say something like "no, no... just use the square here, measure that height, and cut it like x." To use my buddy's words: "we snuck up on it" and eventually figured it out.
The rubber boot sealing method seems solid and sealed enough, I used a lot of silicone to try and make sure it was water tight. I also sealed the seam in the triple wall pipe like the instructions said, although it seems really tight.
All the pieces of chimney, including the attic support box, were about $700. I got a pipe adapter with the stove from bsaunas that helps convert the stove's European 4" outlet into the American 6" pipe standard.
Foil Vapor Barrier
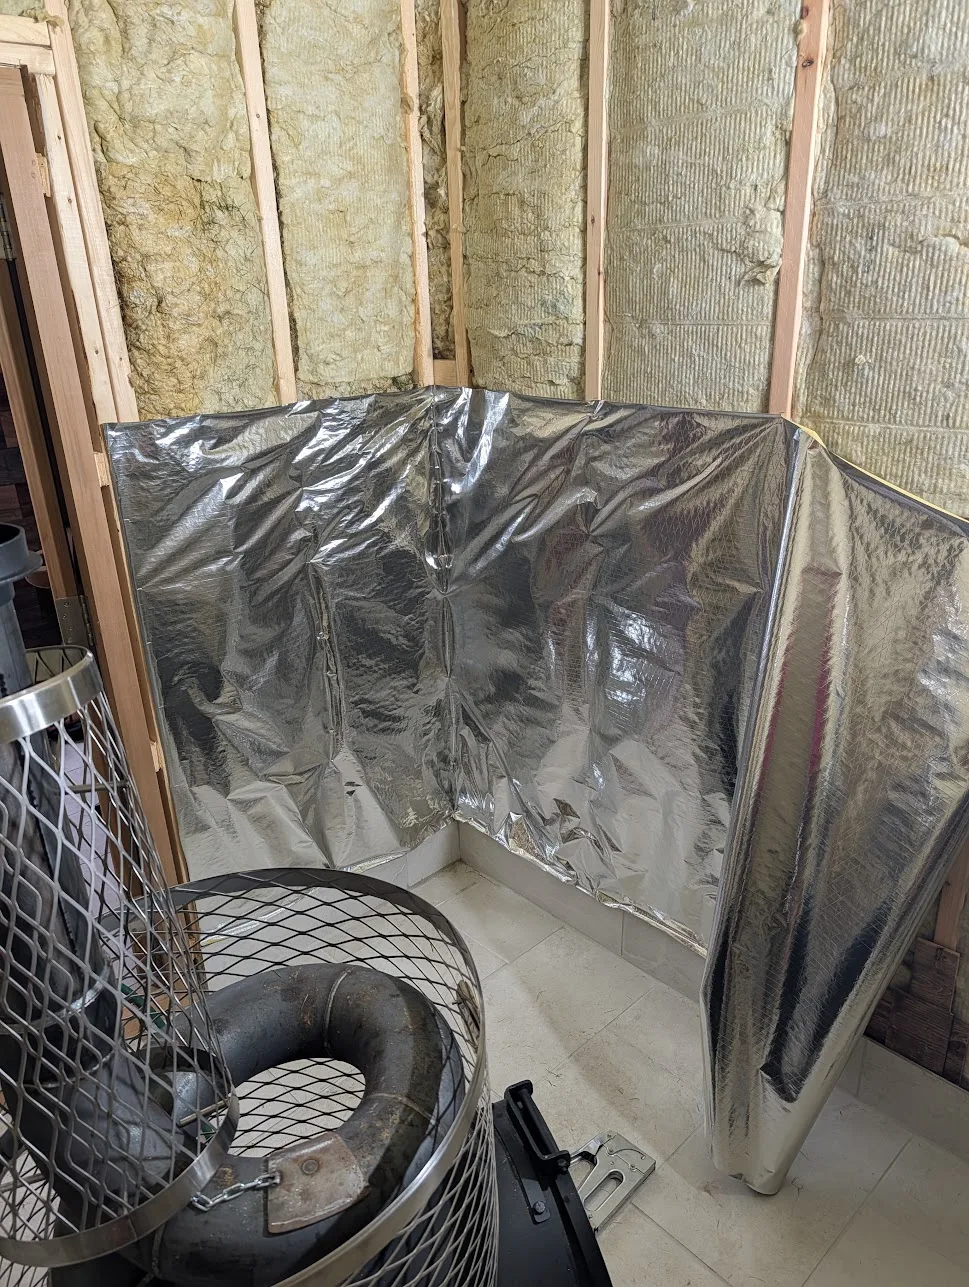
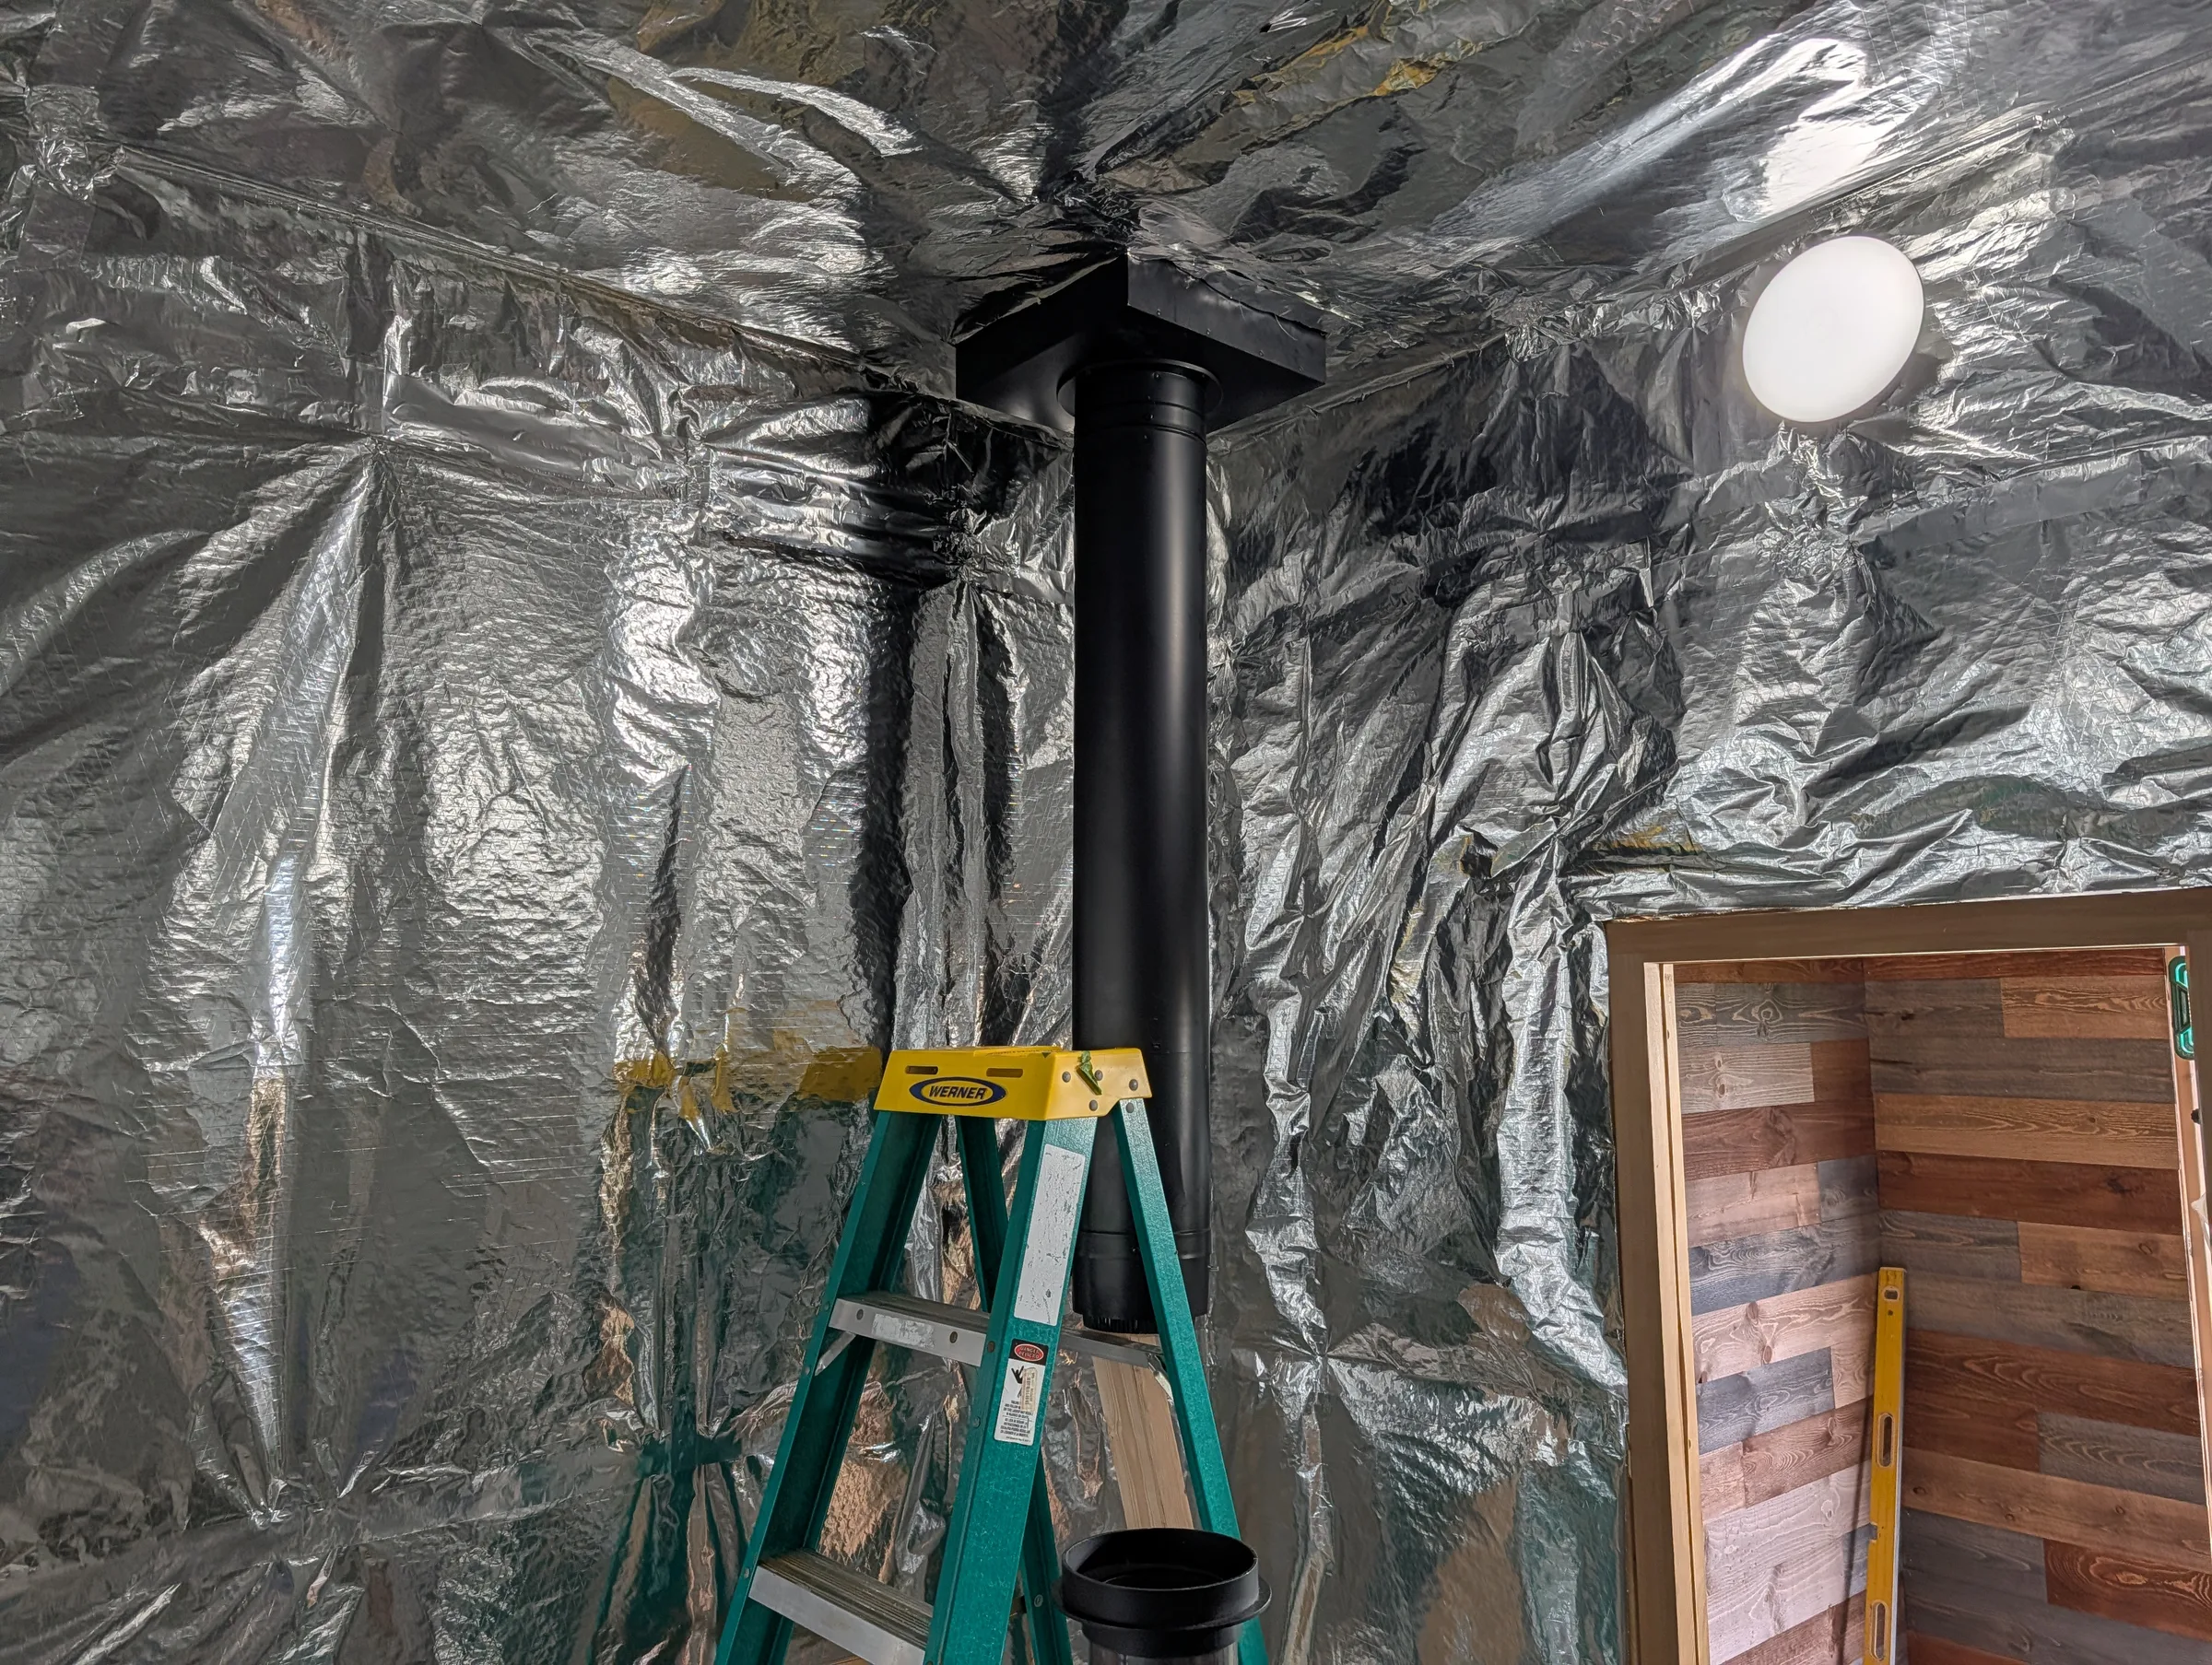
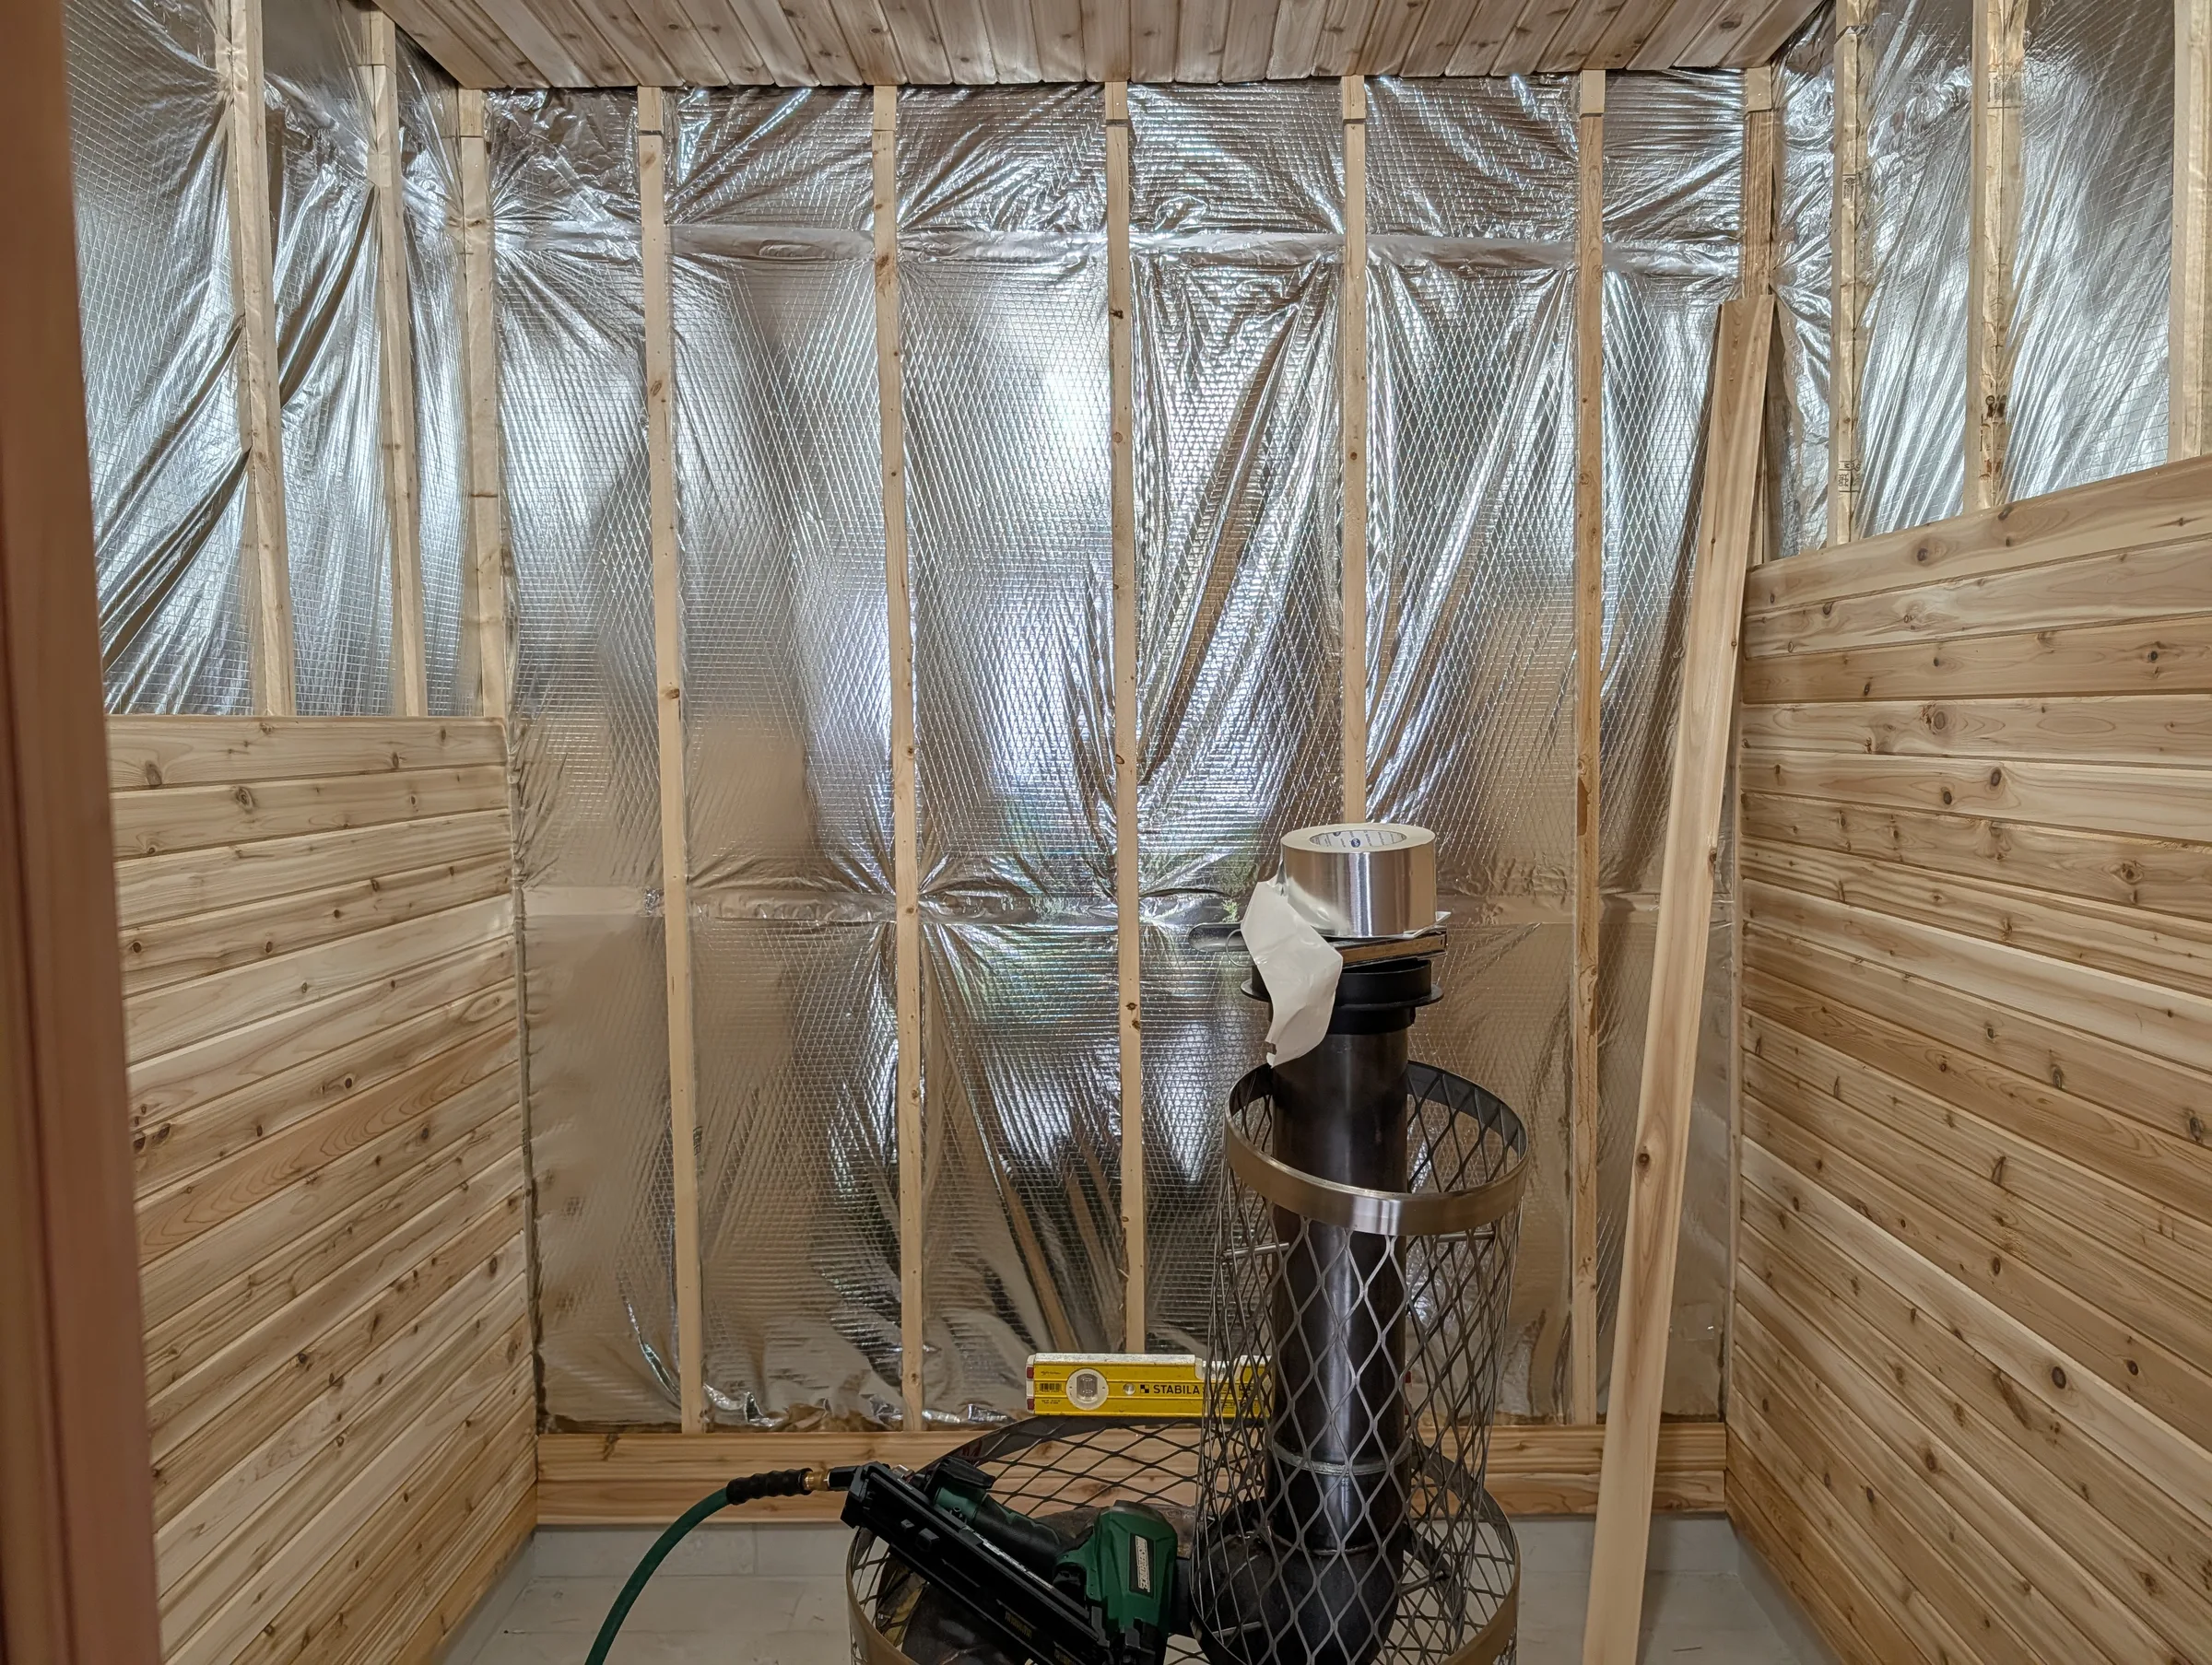
Once the chimney was in place and the stove was ready to go, I finished adding insulation to the divider wall and installed the foil vapor barrier. This was a product sent in the sauna kit that has foil on one side and something like kraft paper on the other side. I used staples to attach it to the studs and then used metallic duct tape to tape any seams I needed. I made sure the foil was slightly longer than the tile so any moisture dripping down the foil would run inside the tile and into the "bathtub" waterproof floor to be evaporated or mopped up.
I added some nailing supports near the floor. The tile around the inner wall stuck out from the studs about 1/2" so I needed to slope walls at the bottom to make sure the cedar would sit a little proud from the tile. I forgot I was going to add 1x2" furring strips to the studs after the foil so I may not have needed these floor nailing extensions, but it didn't hurt too much.
Once the furring strips were added, I was ready to start the cedar installation.
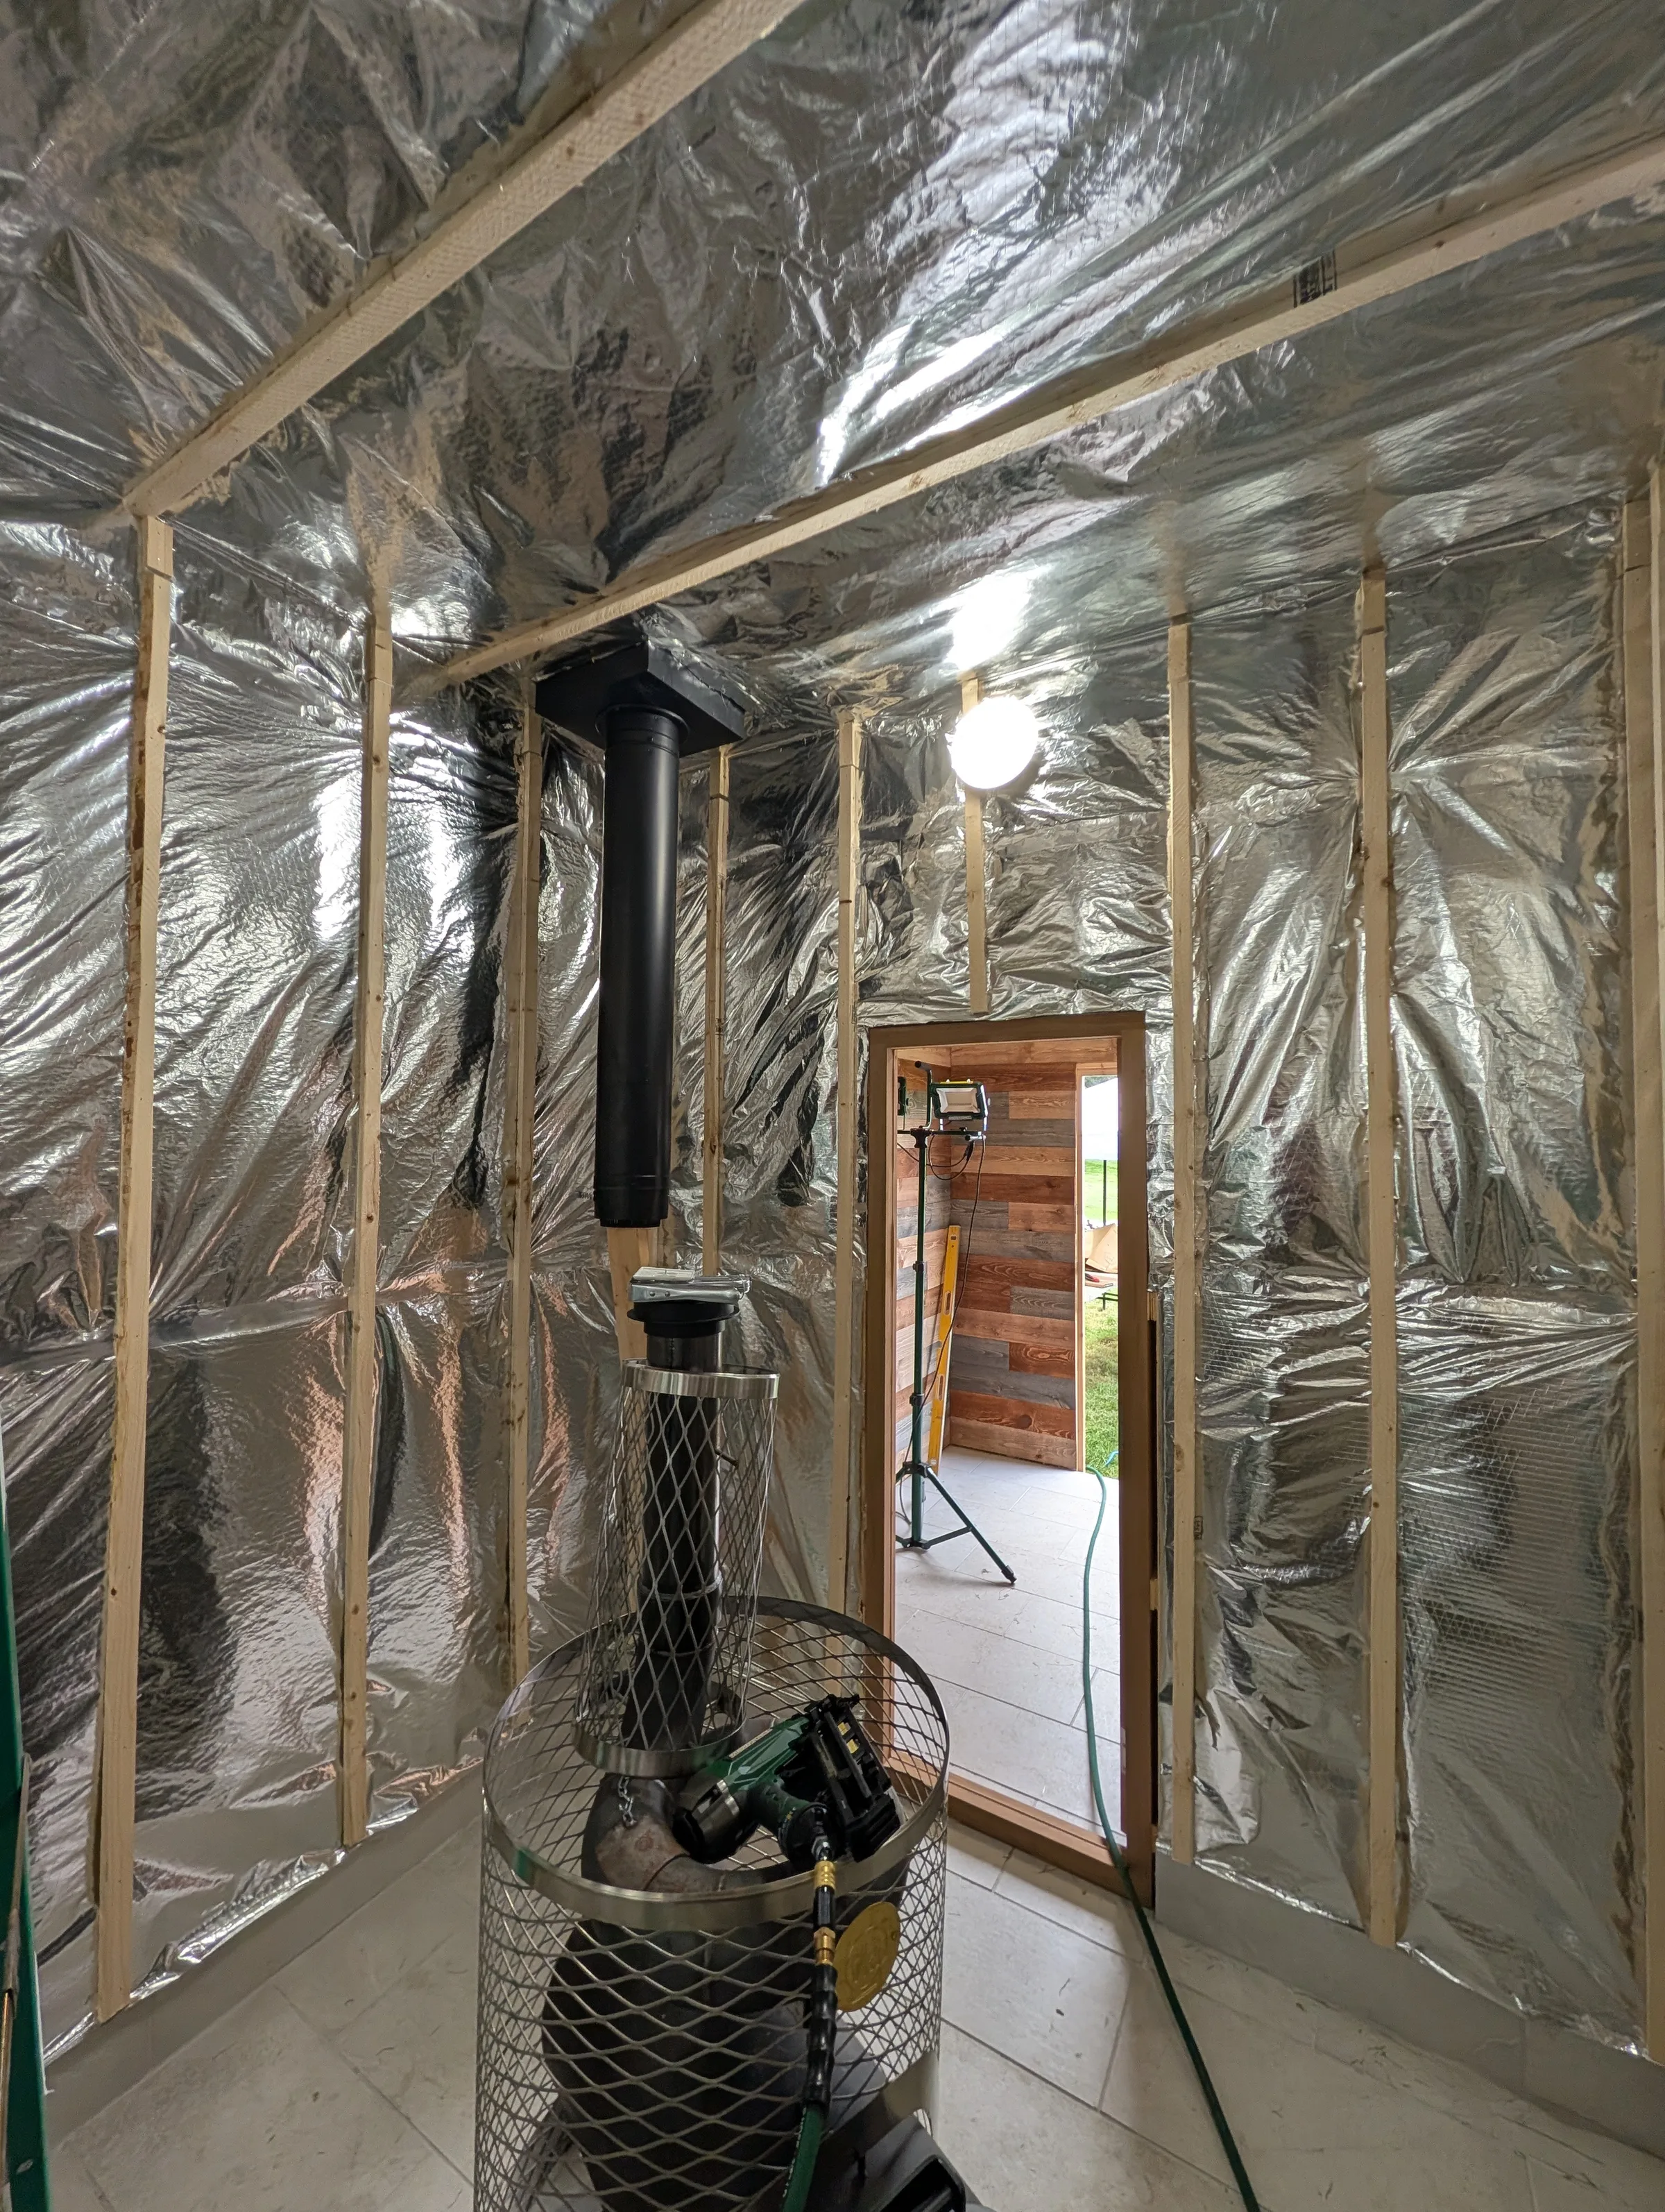
Cedar Tongue and Groove
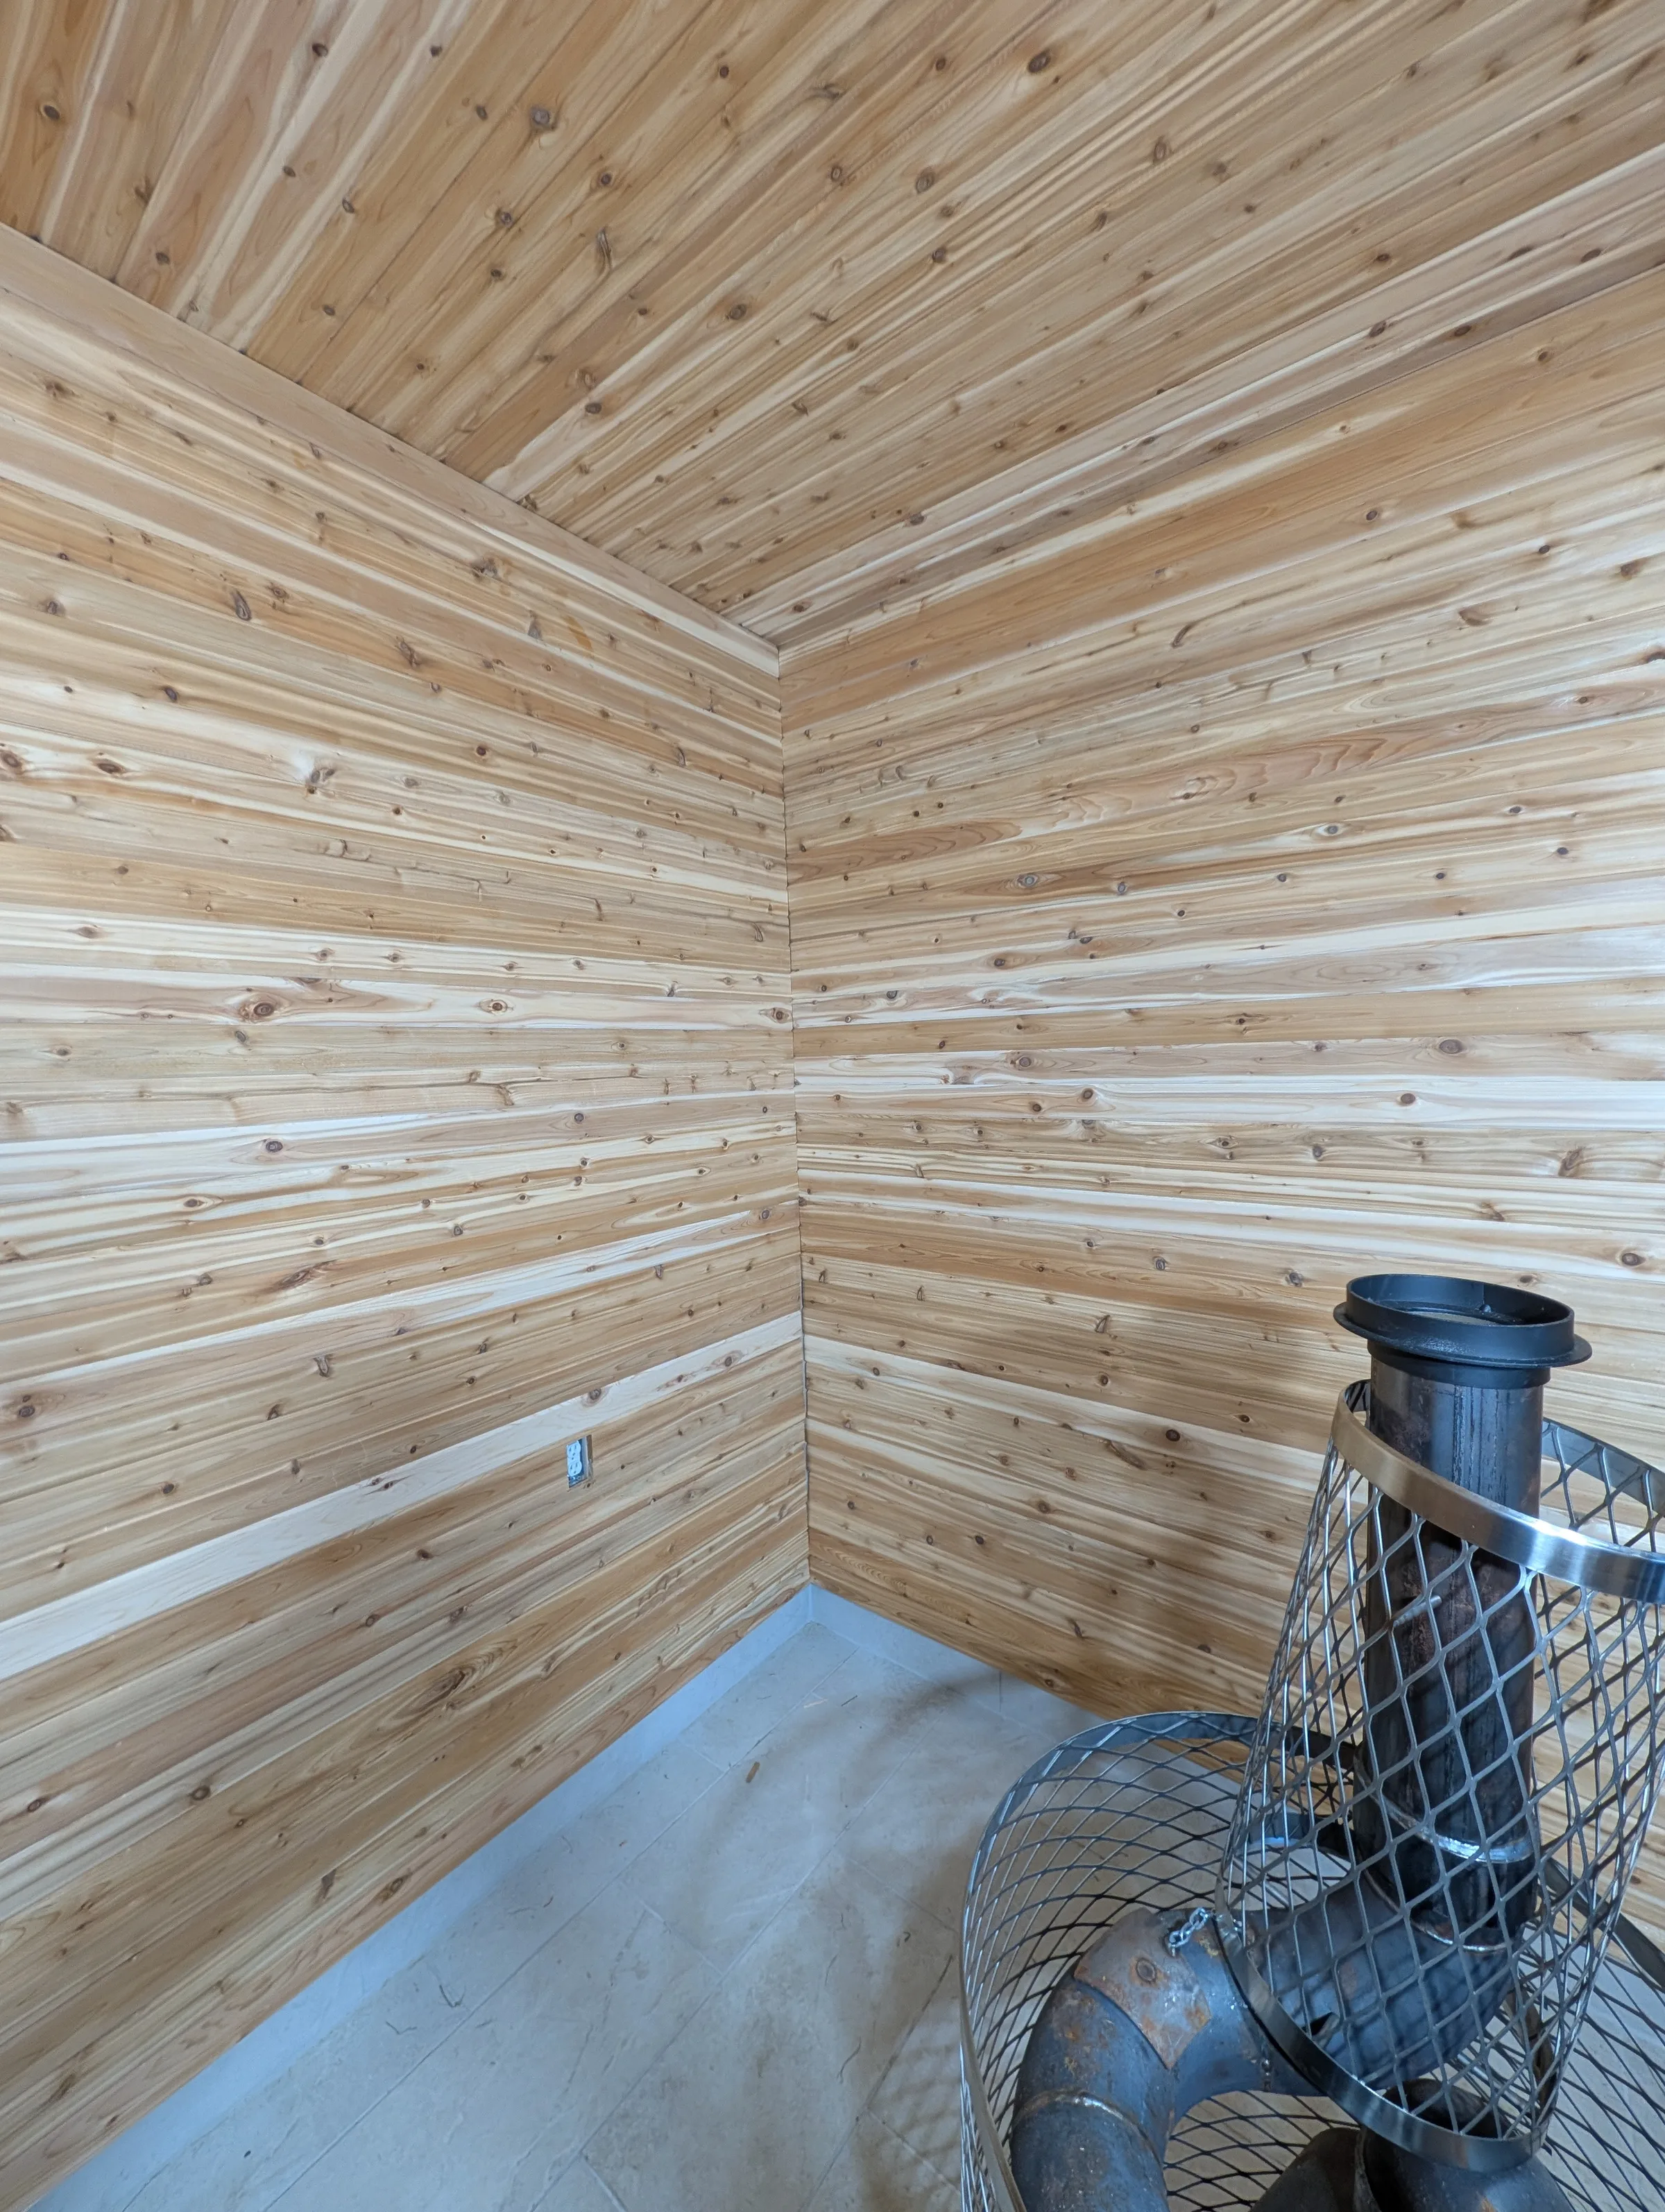
The next step is one I had been looking forward to for a long time; adding the cedar tongue and groove boards to the sauna room walls and ceiling. I started with the ceiling and went across making cuts to go around the attic support box for the chimney. After the cedar was in place it became obvious that the attic support box was a little crooked. You can see it in the photos below, but adding the decorative trim ring helped quite a bit. It's not the end of the world.
After the ceiling was done I moved to the walls. I started with two rows around the entire room getting the height right as well as ensuring they were level. The foil had been run to overlap the tile about 1/2". I ran the first cedar board about 1/2" below that so you didn't see any foil. With the extensions at the bottom of the walls plus the furring strips there was clear daylight behind the cedar boards all the way down to the floor. This should ensure any moisture behind the cedar hits the foil, drips down, and into the waterproof bathtub of the tile. I'll also add that seeing the cedar hanging down in front of the tile makes it look really professional and classy!
With the room all done the smell is amazing and it looks kind of like a space ship. One mistake I made was I totally underestimated how far forward I needed to mount my electrical boxes (1 outlet, 1 ceiling light box). Luckily I found extensions on Amazon for just such a boneheaded installation mistake.
I need to put up some trim around the walls and doors and then get going on the benches.
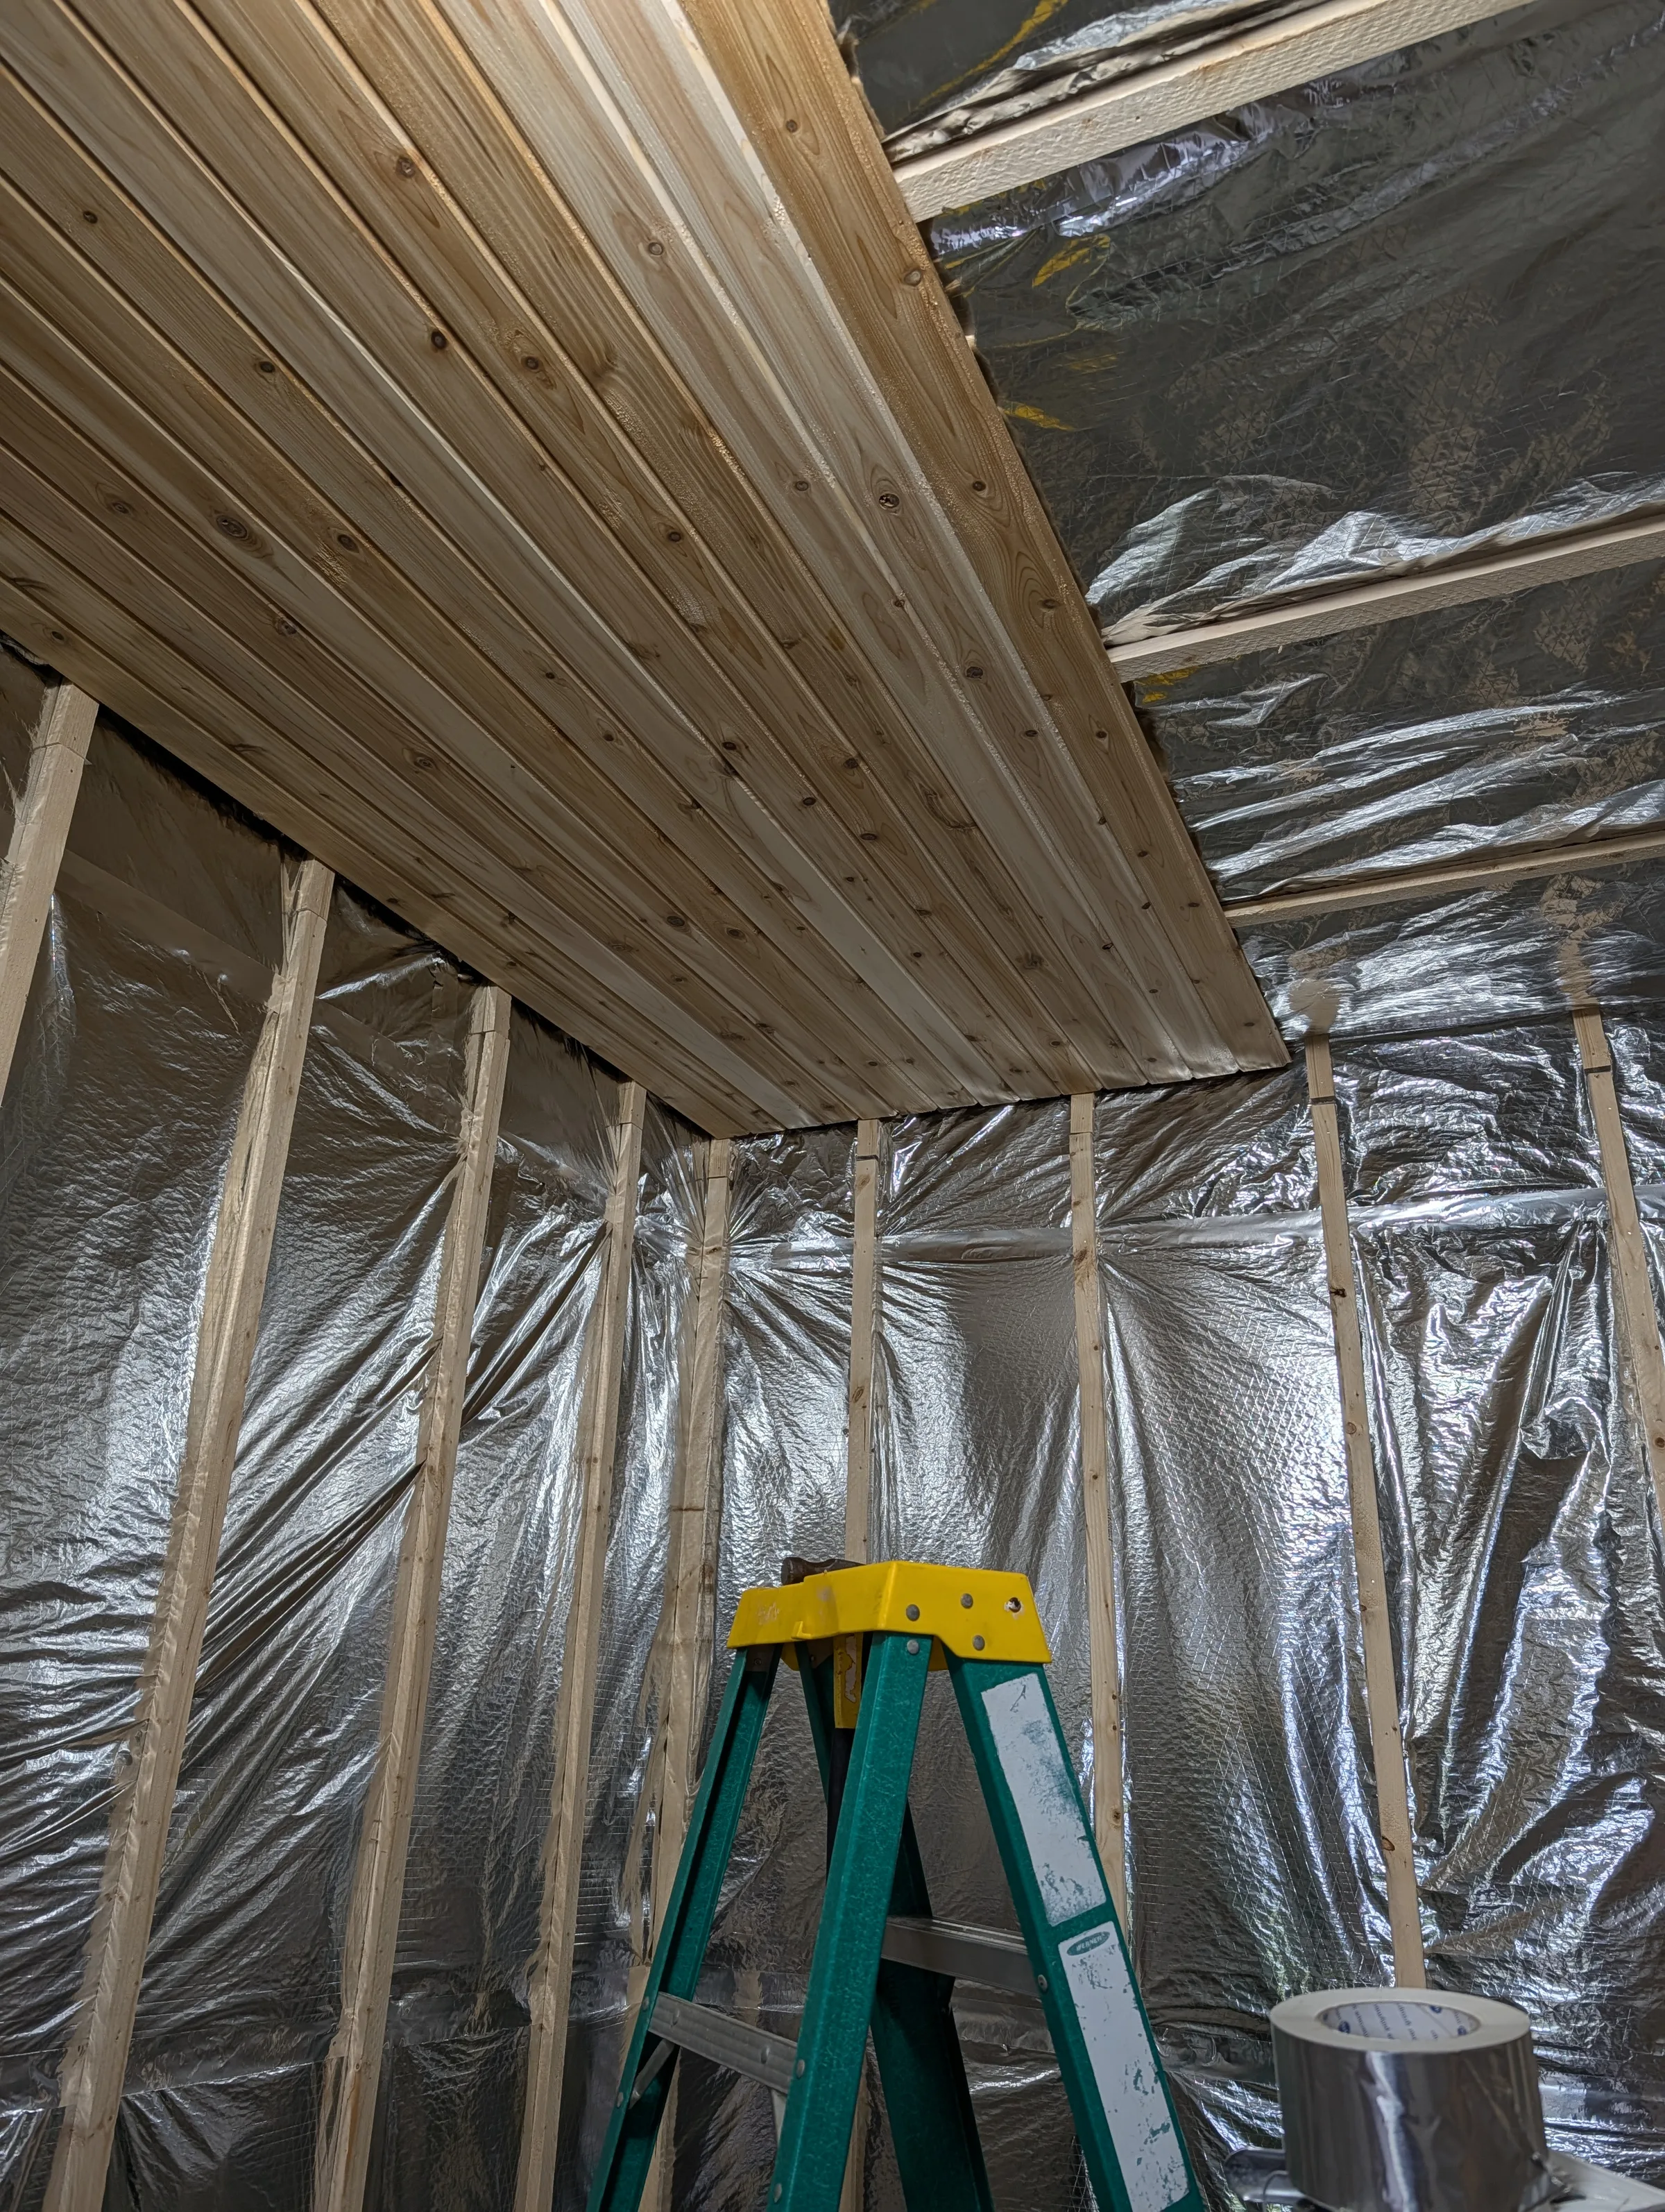
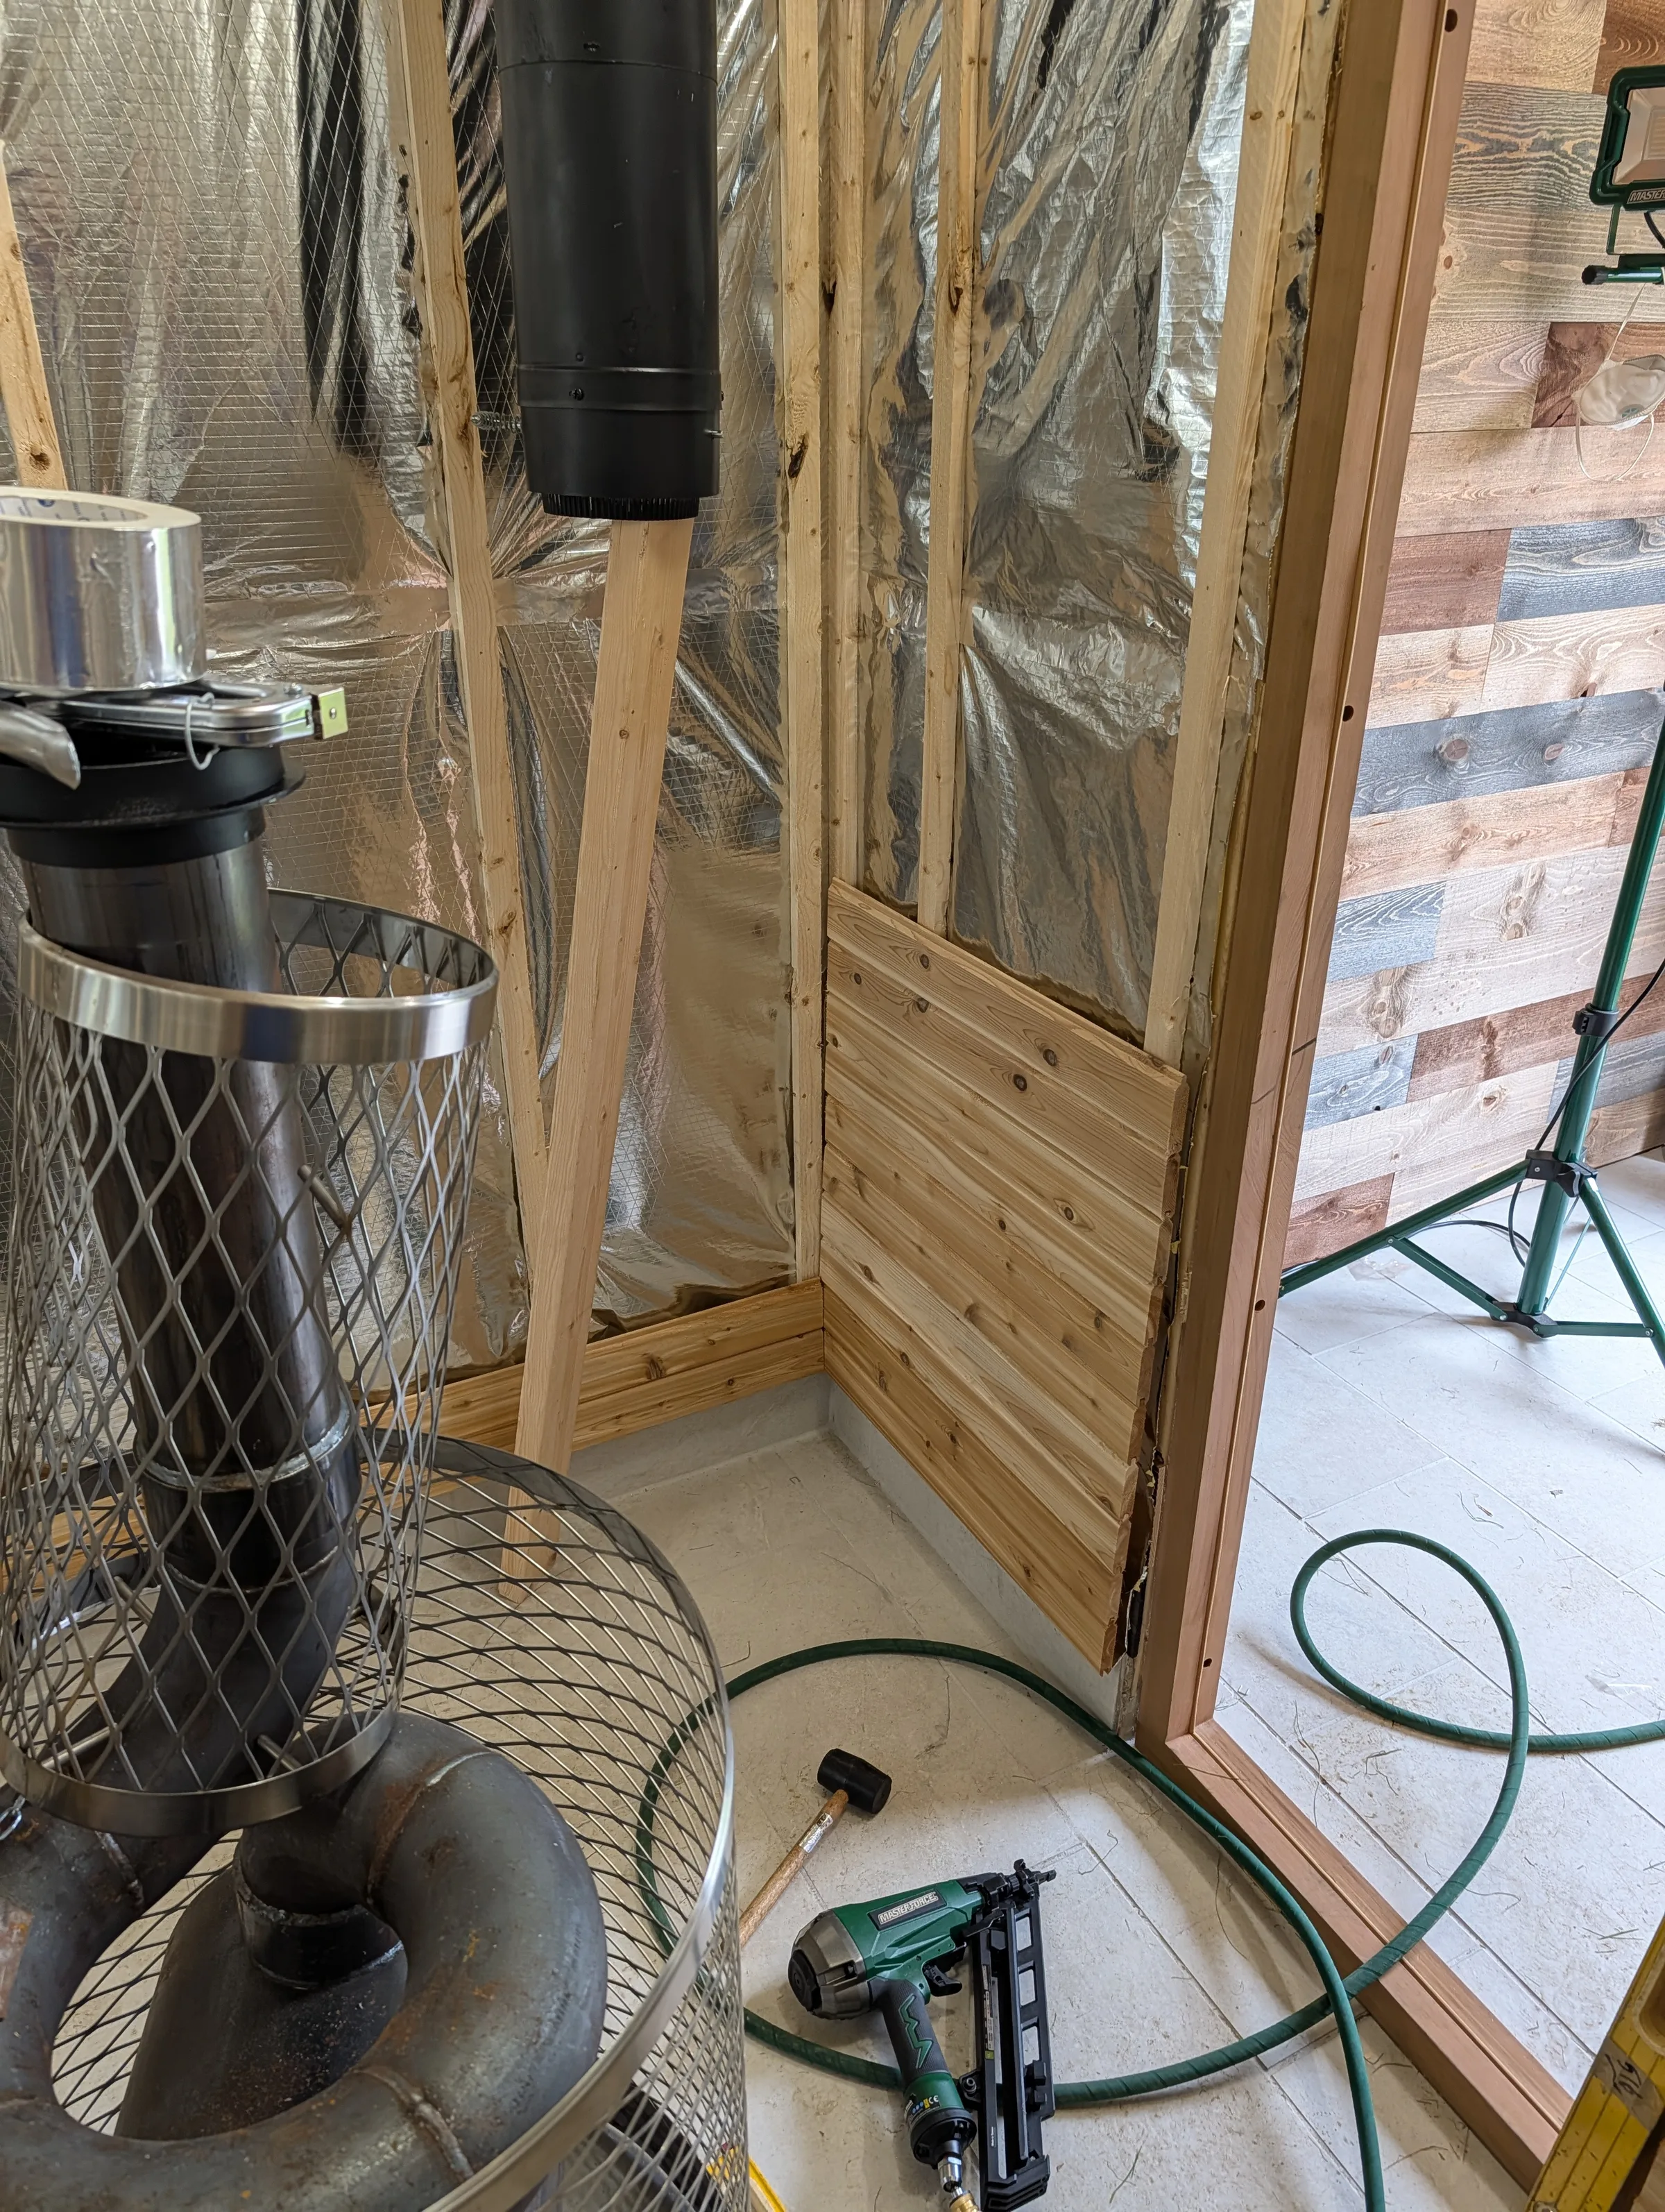
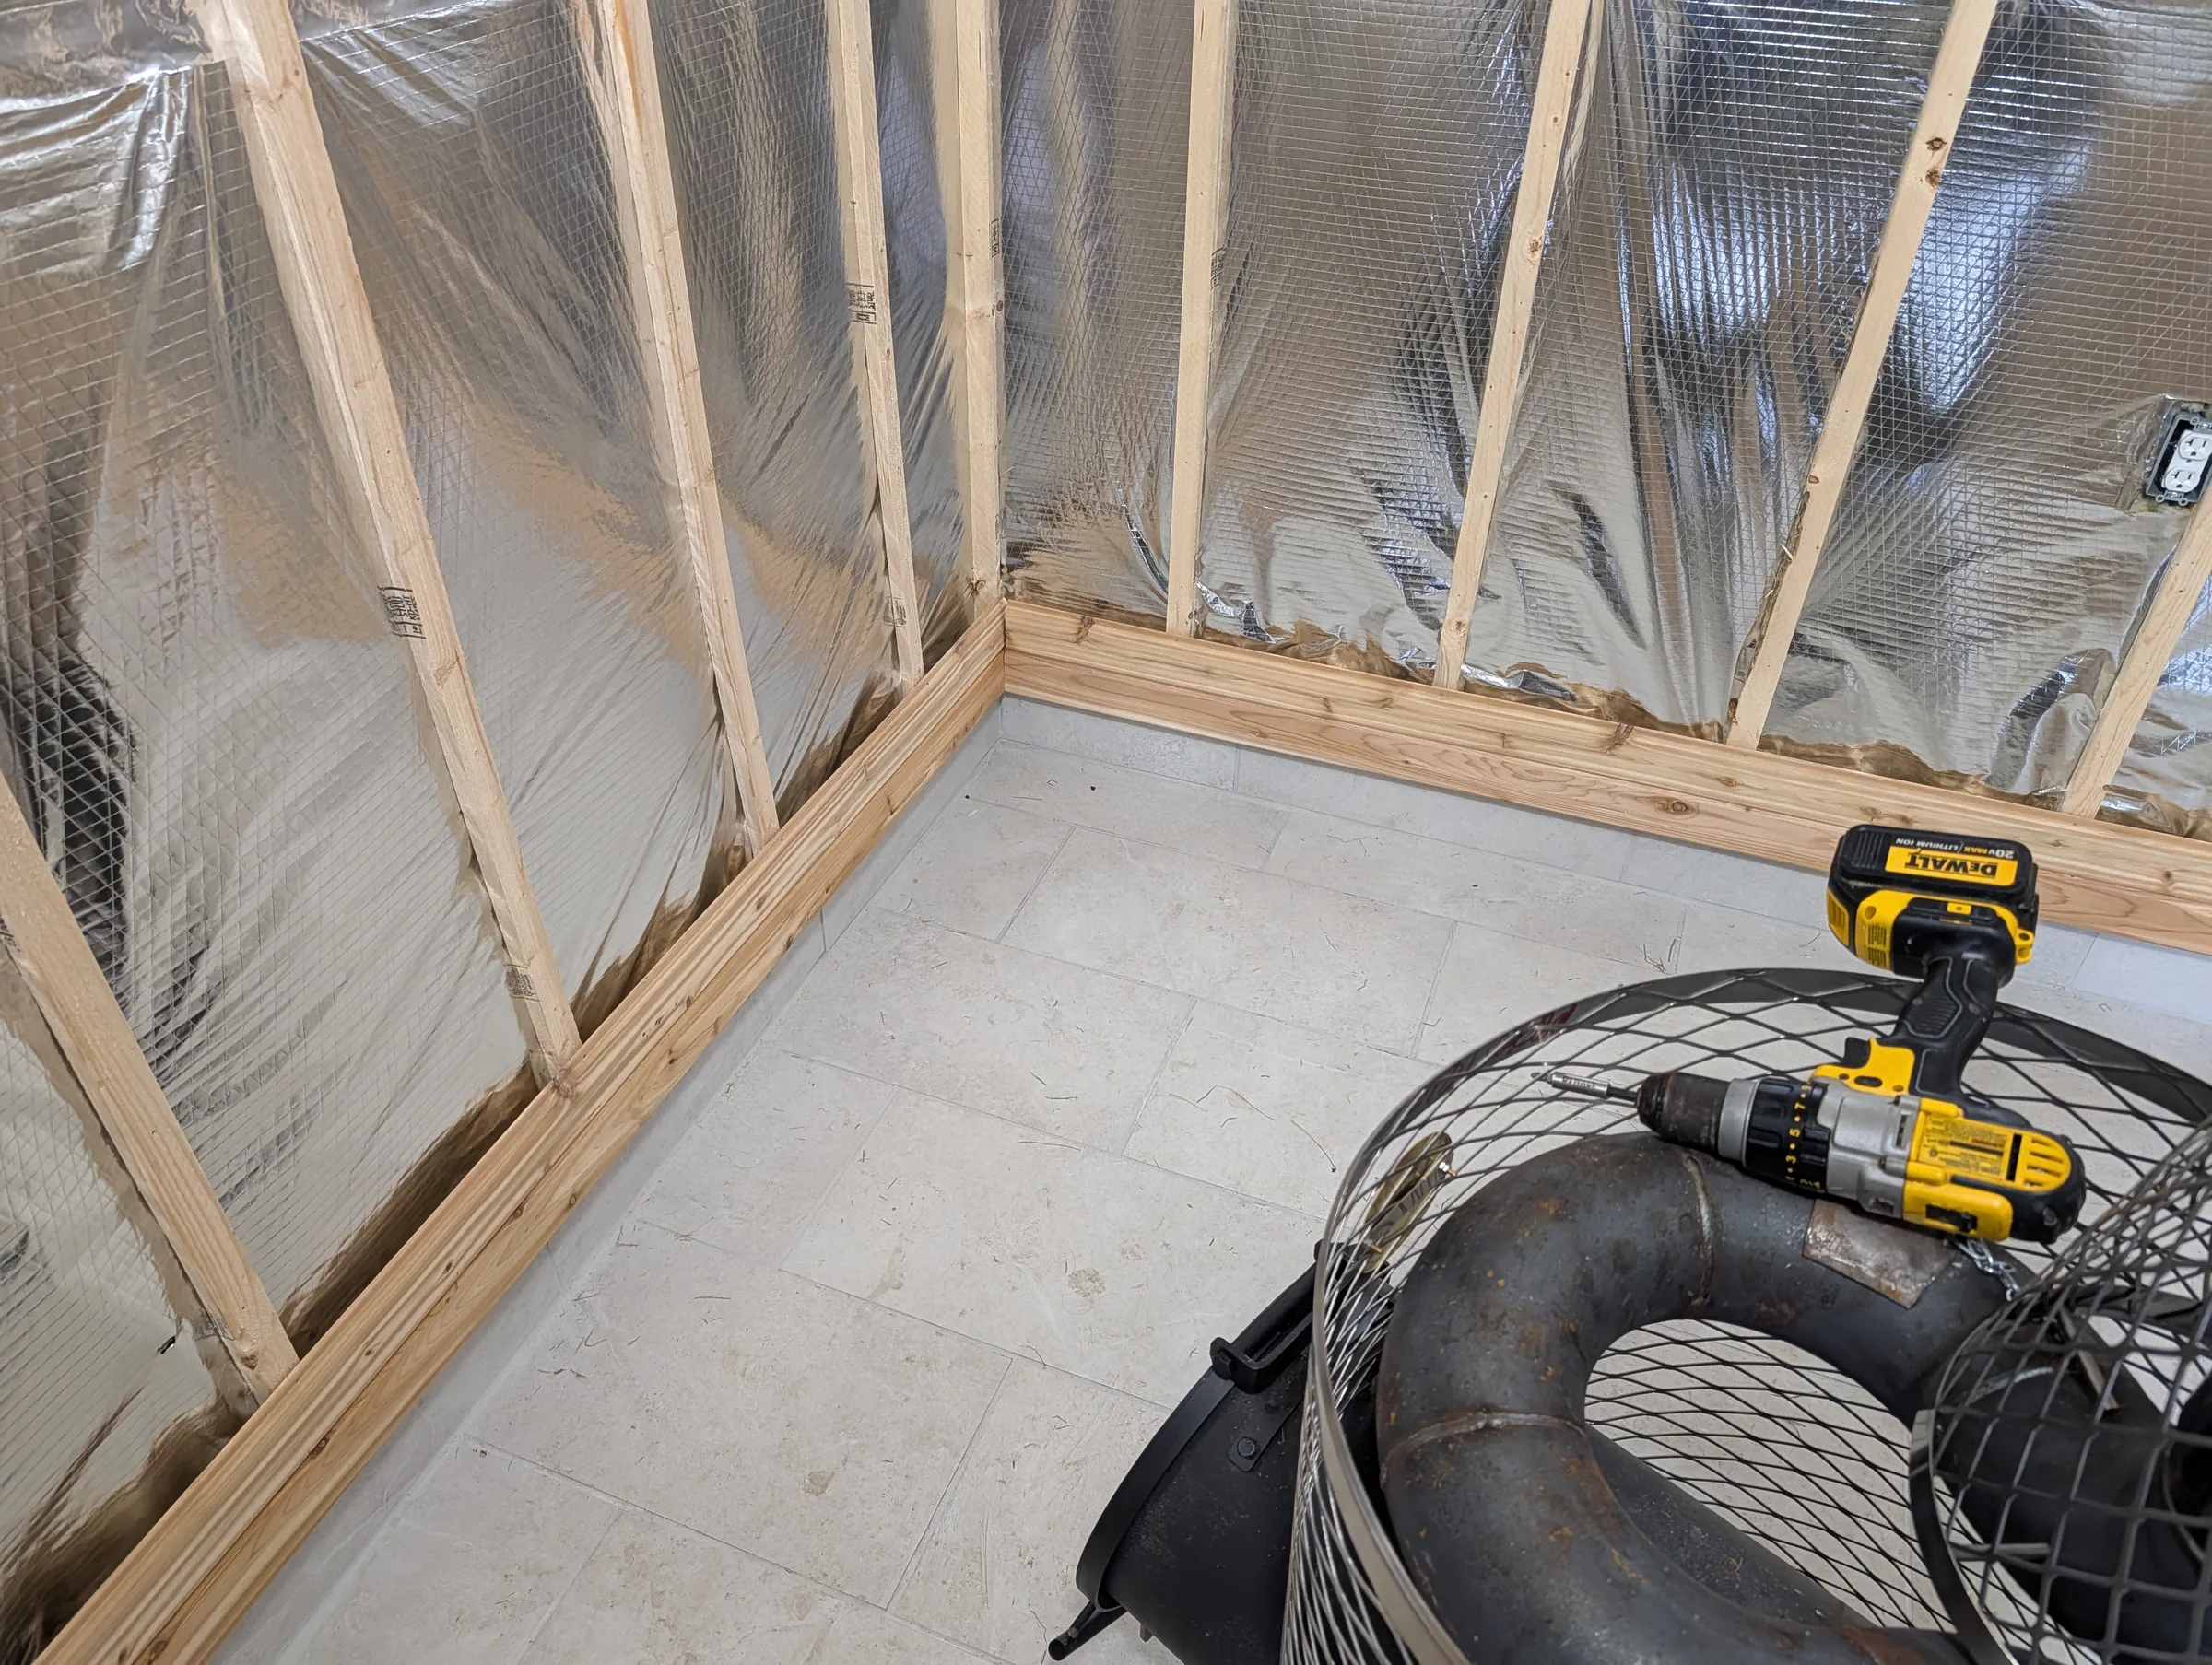
Furniture
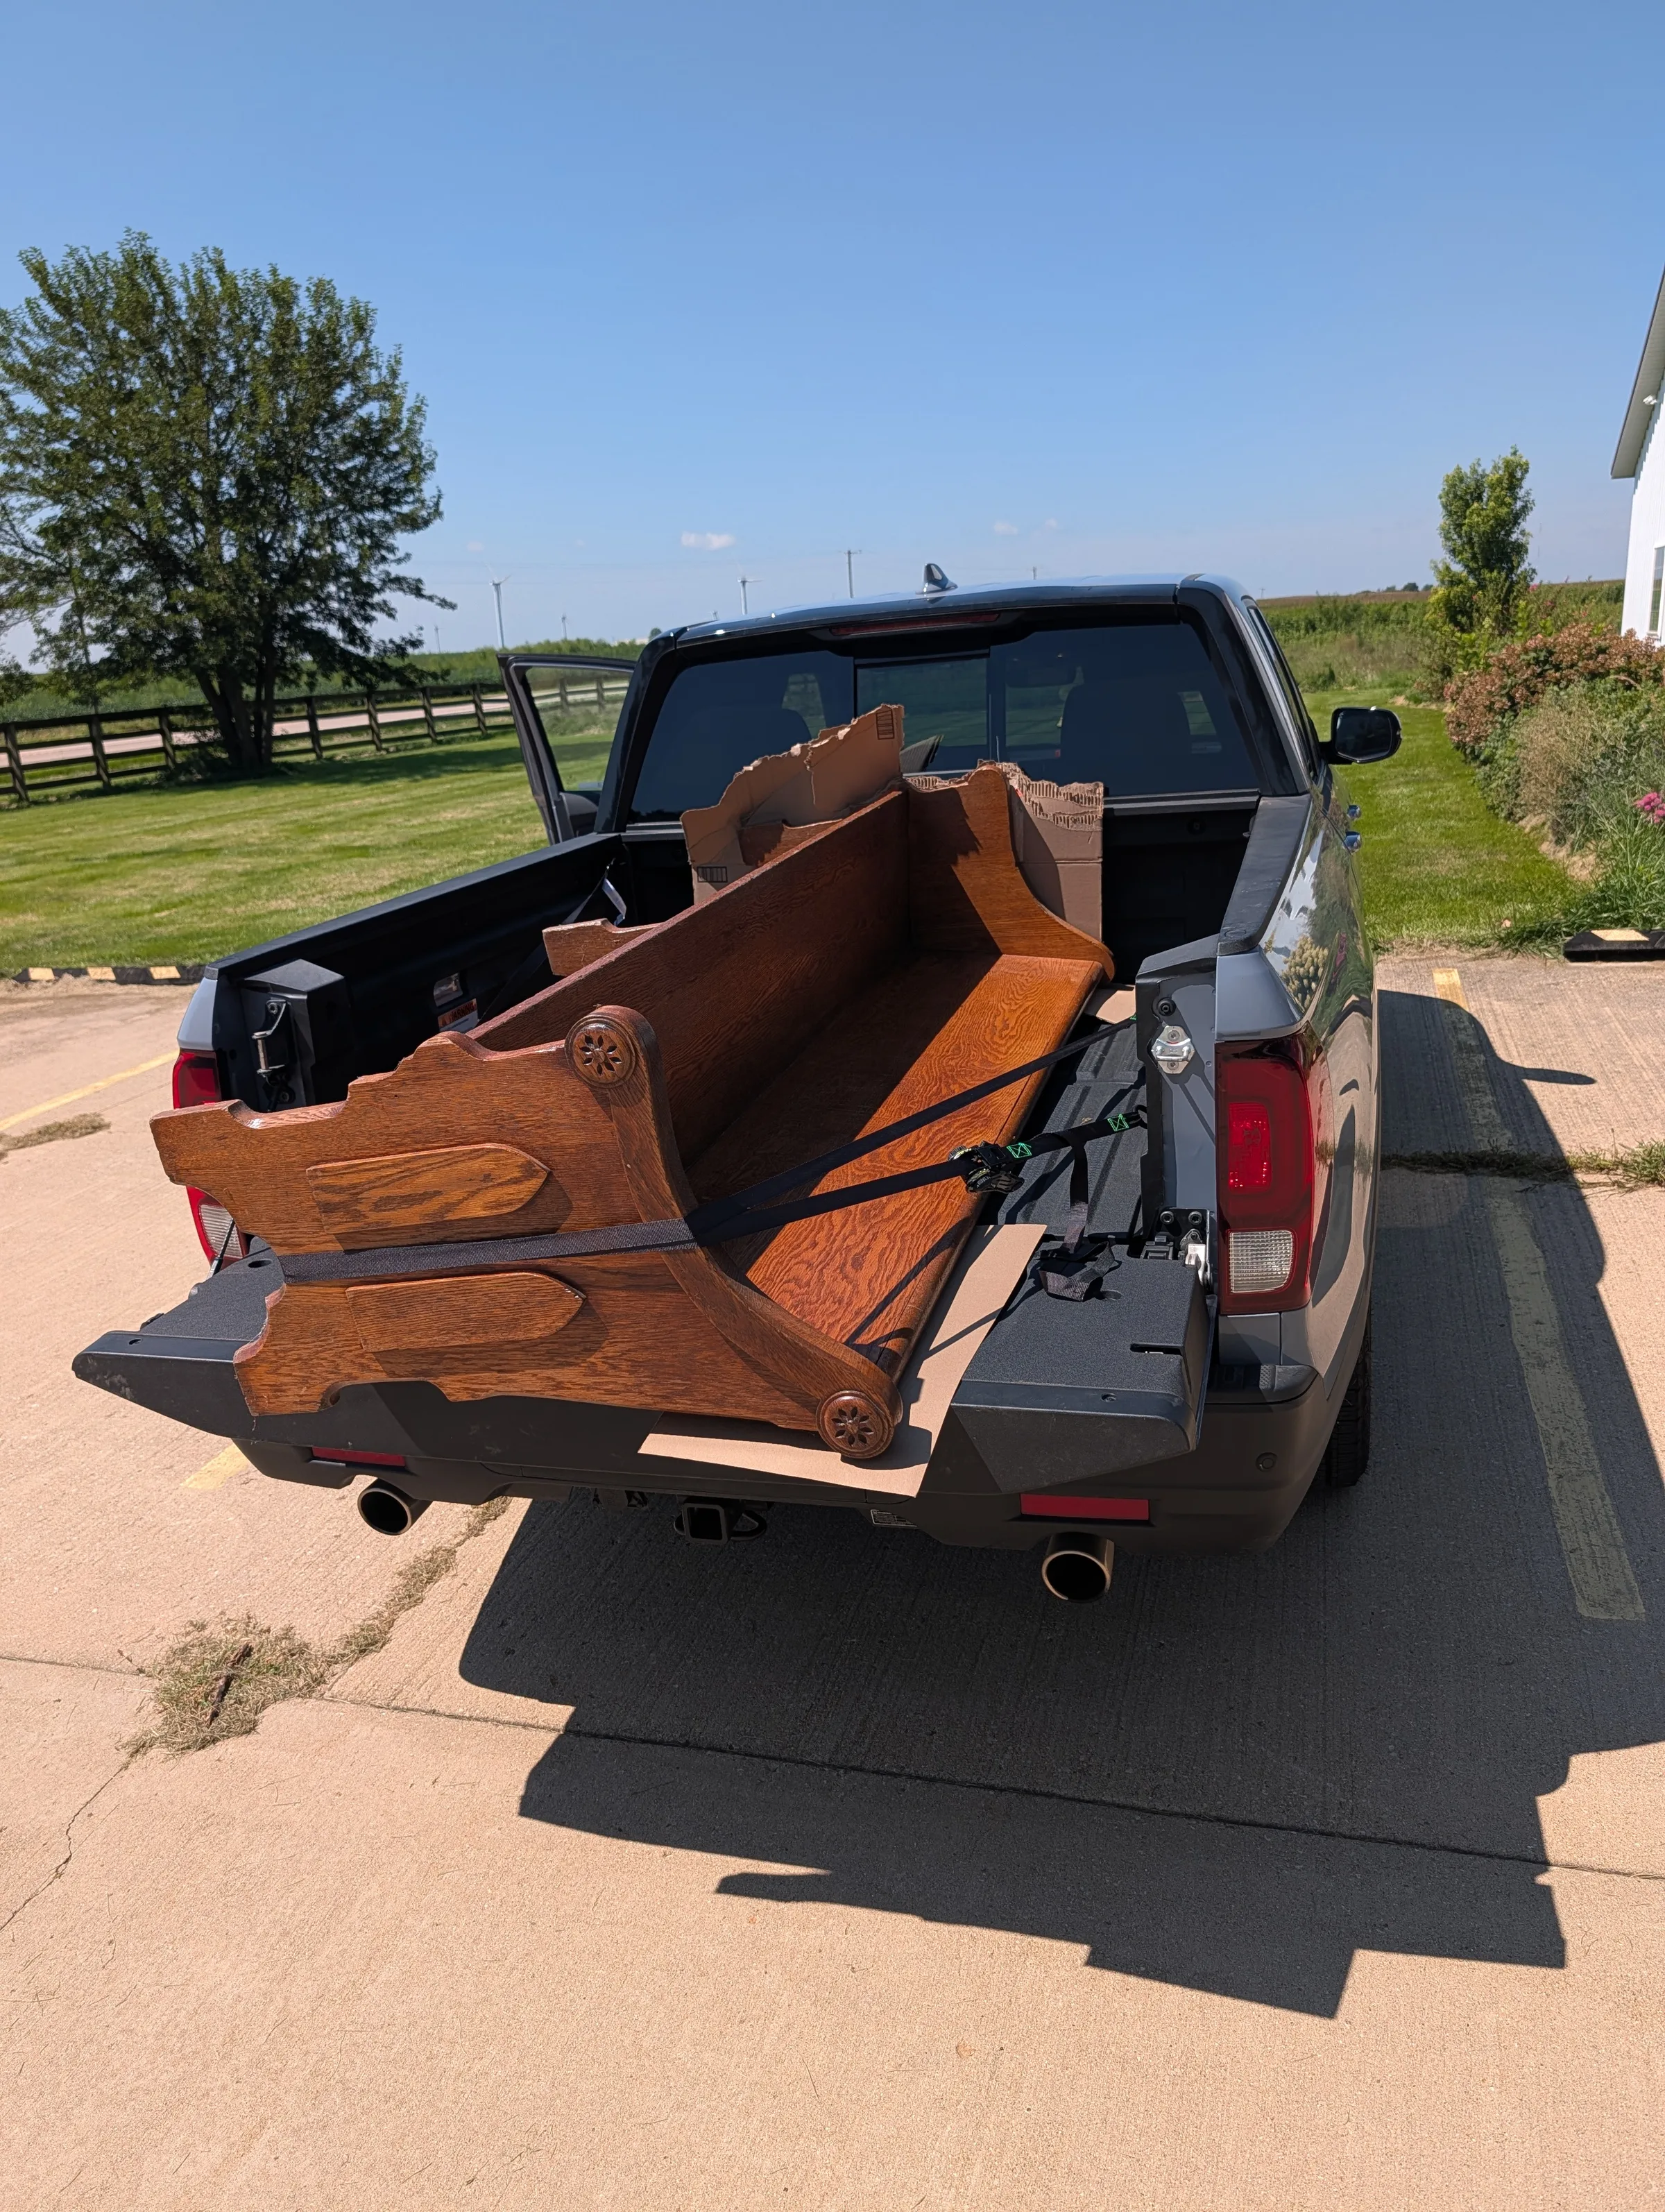
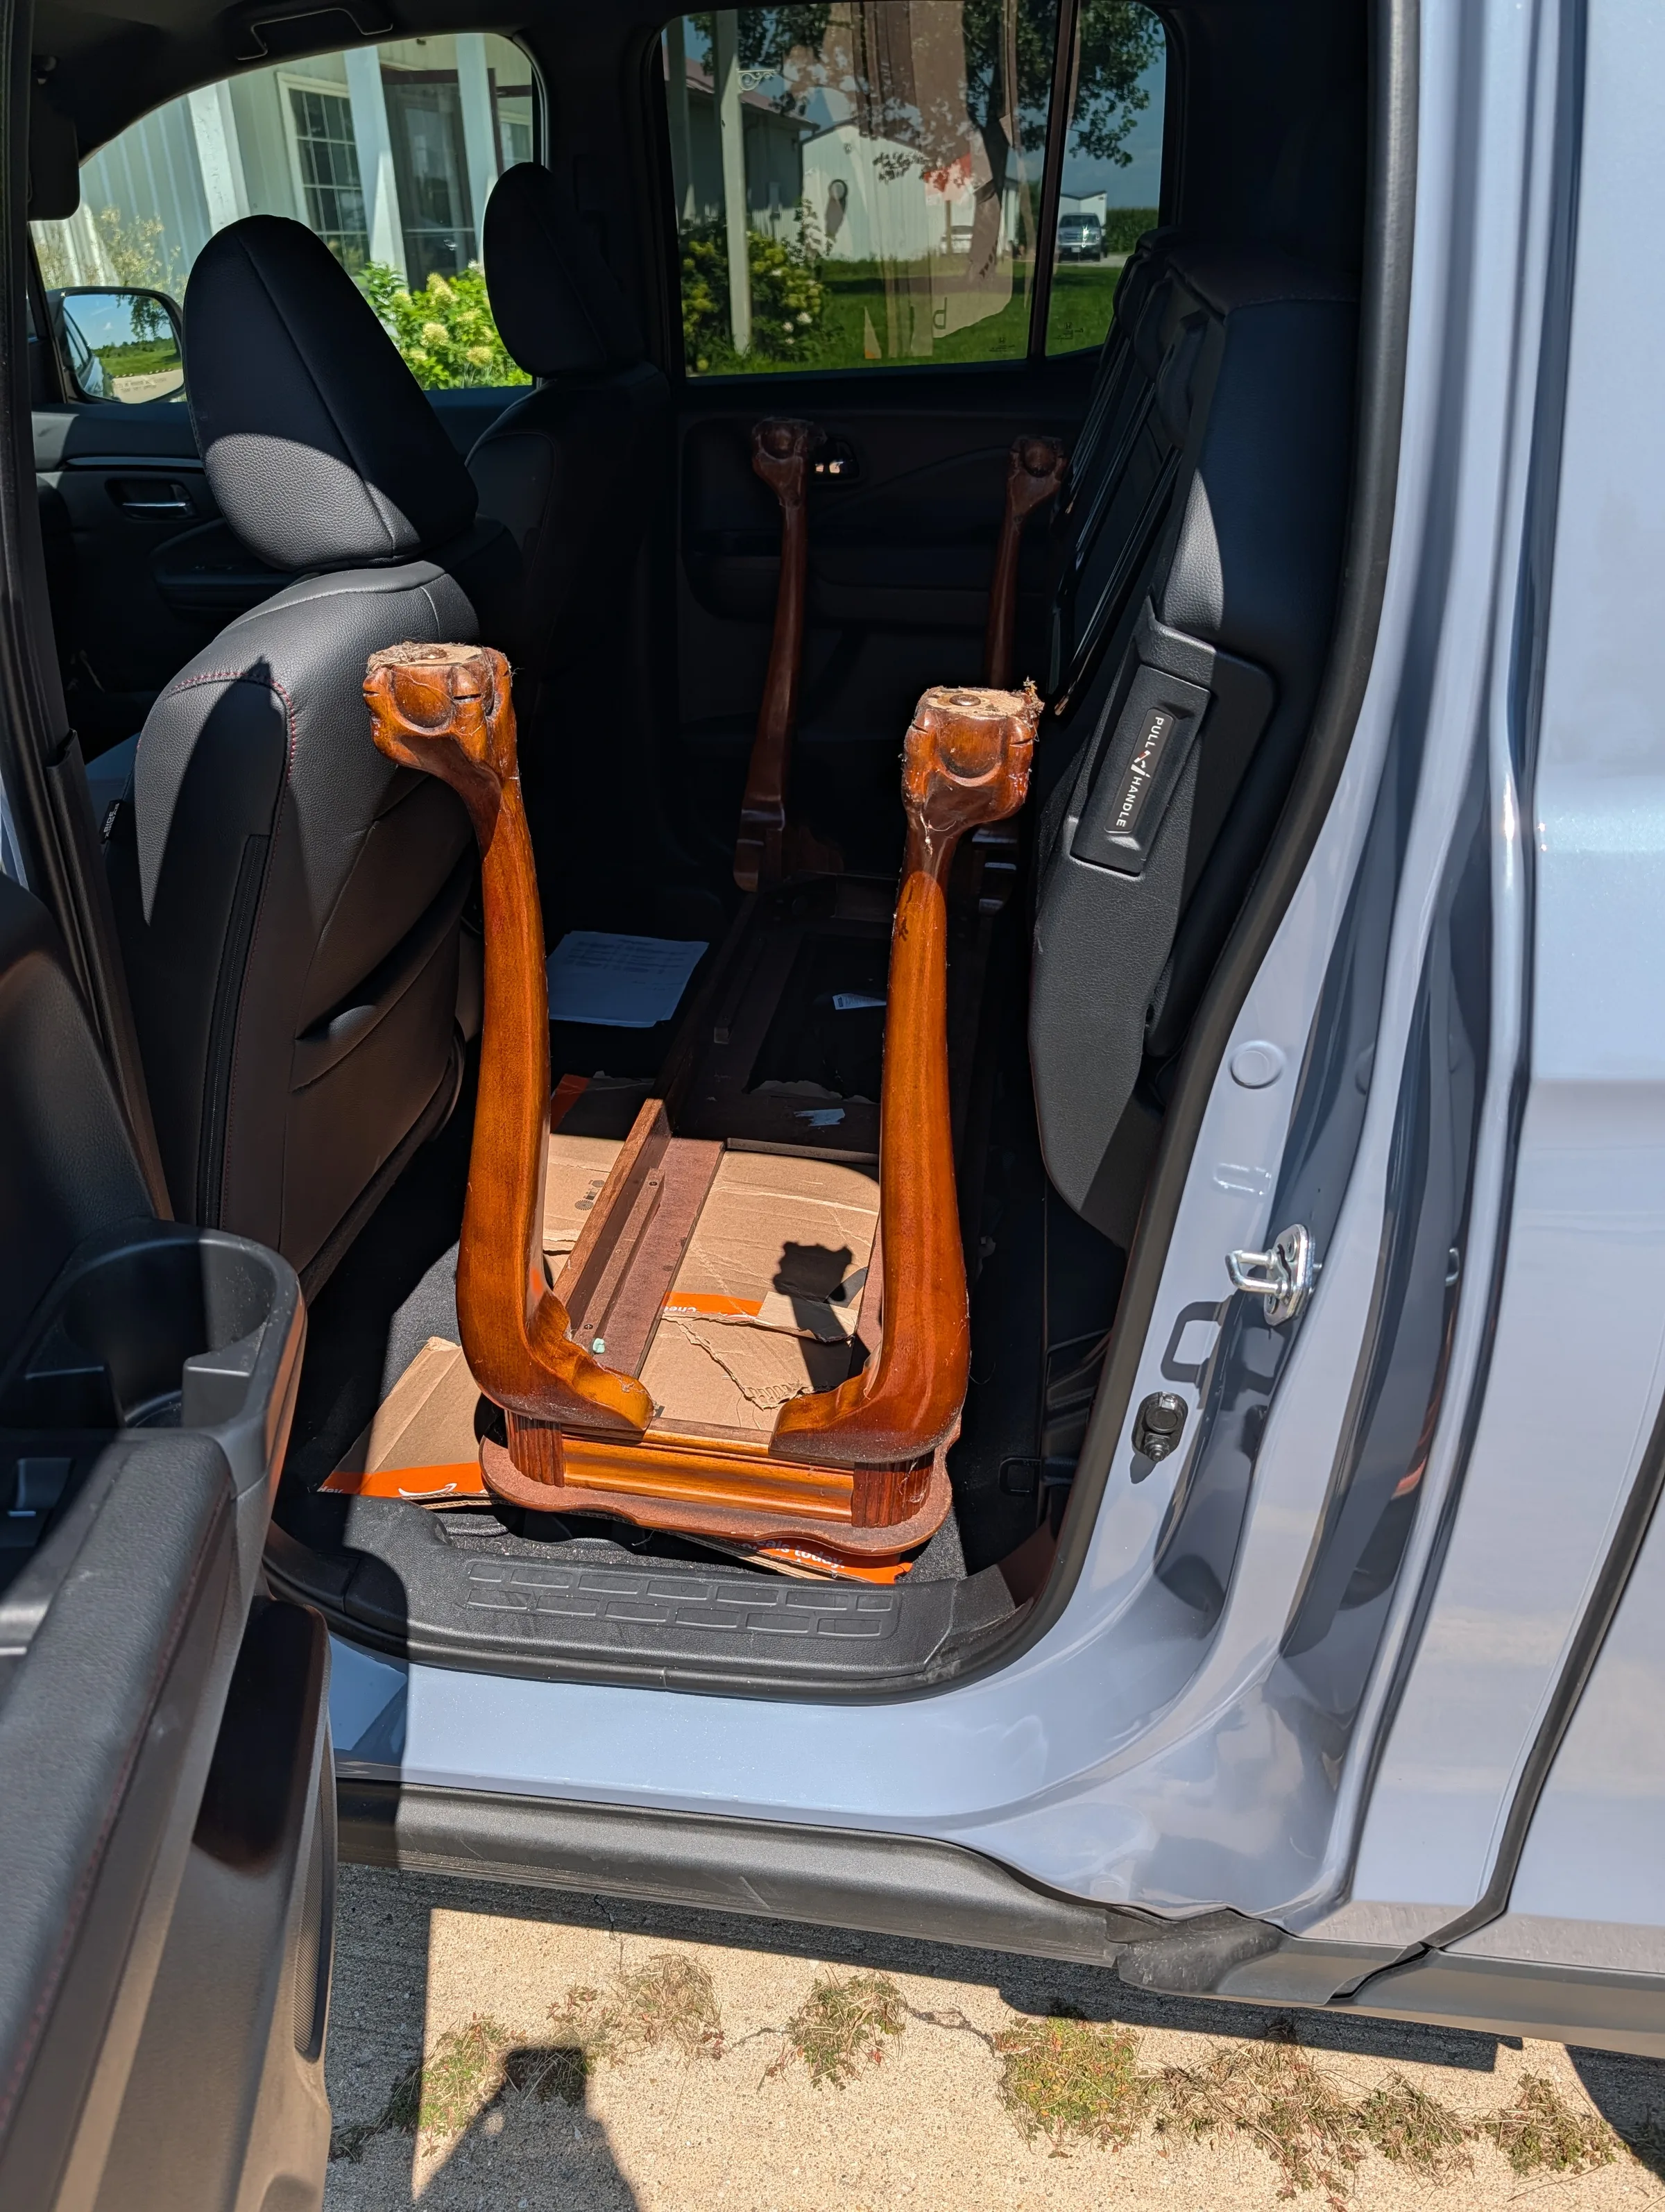
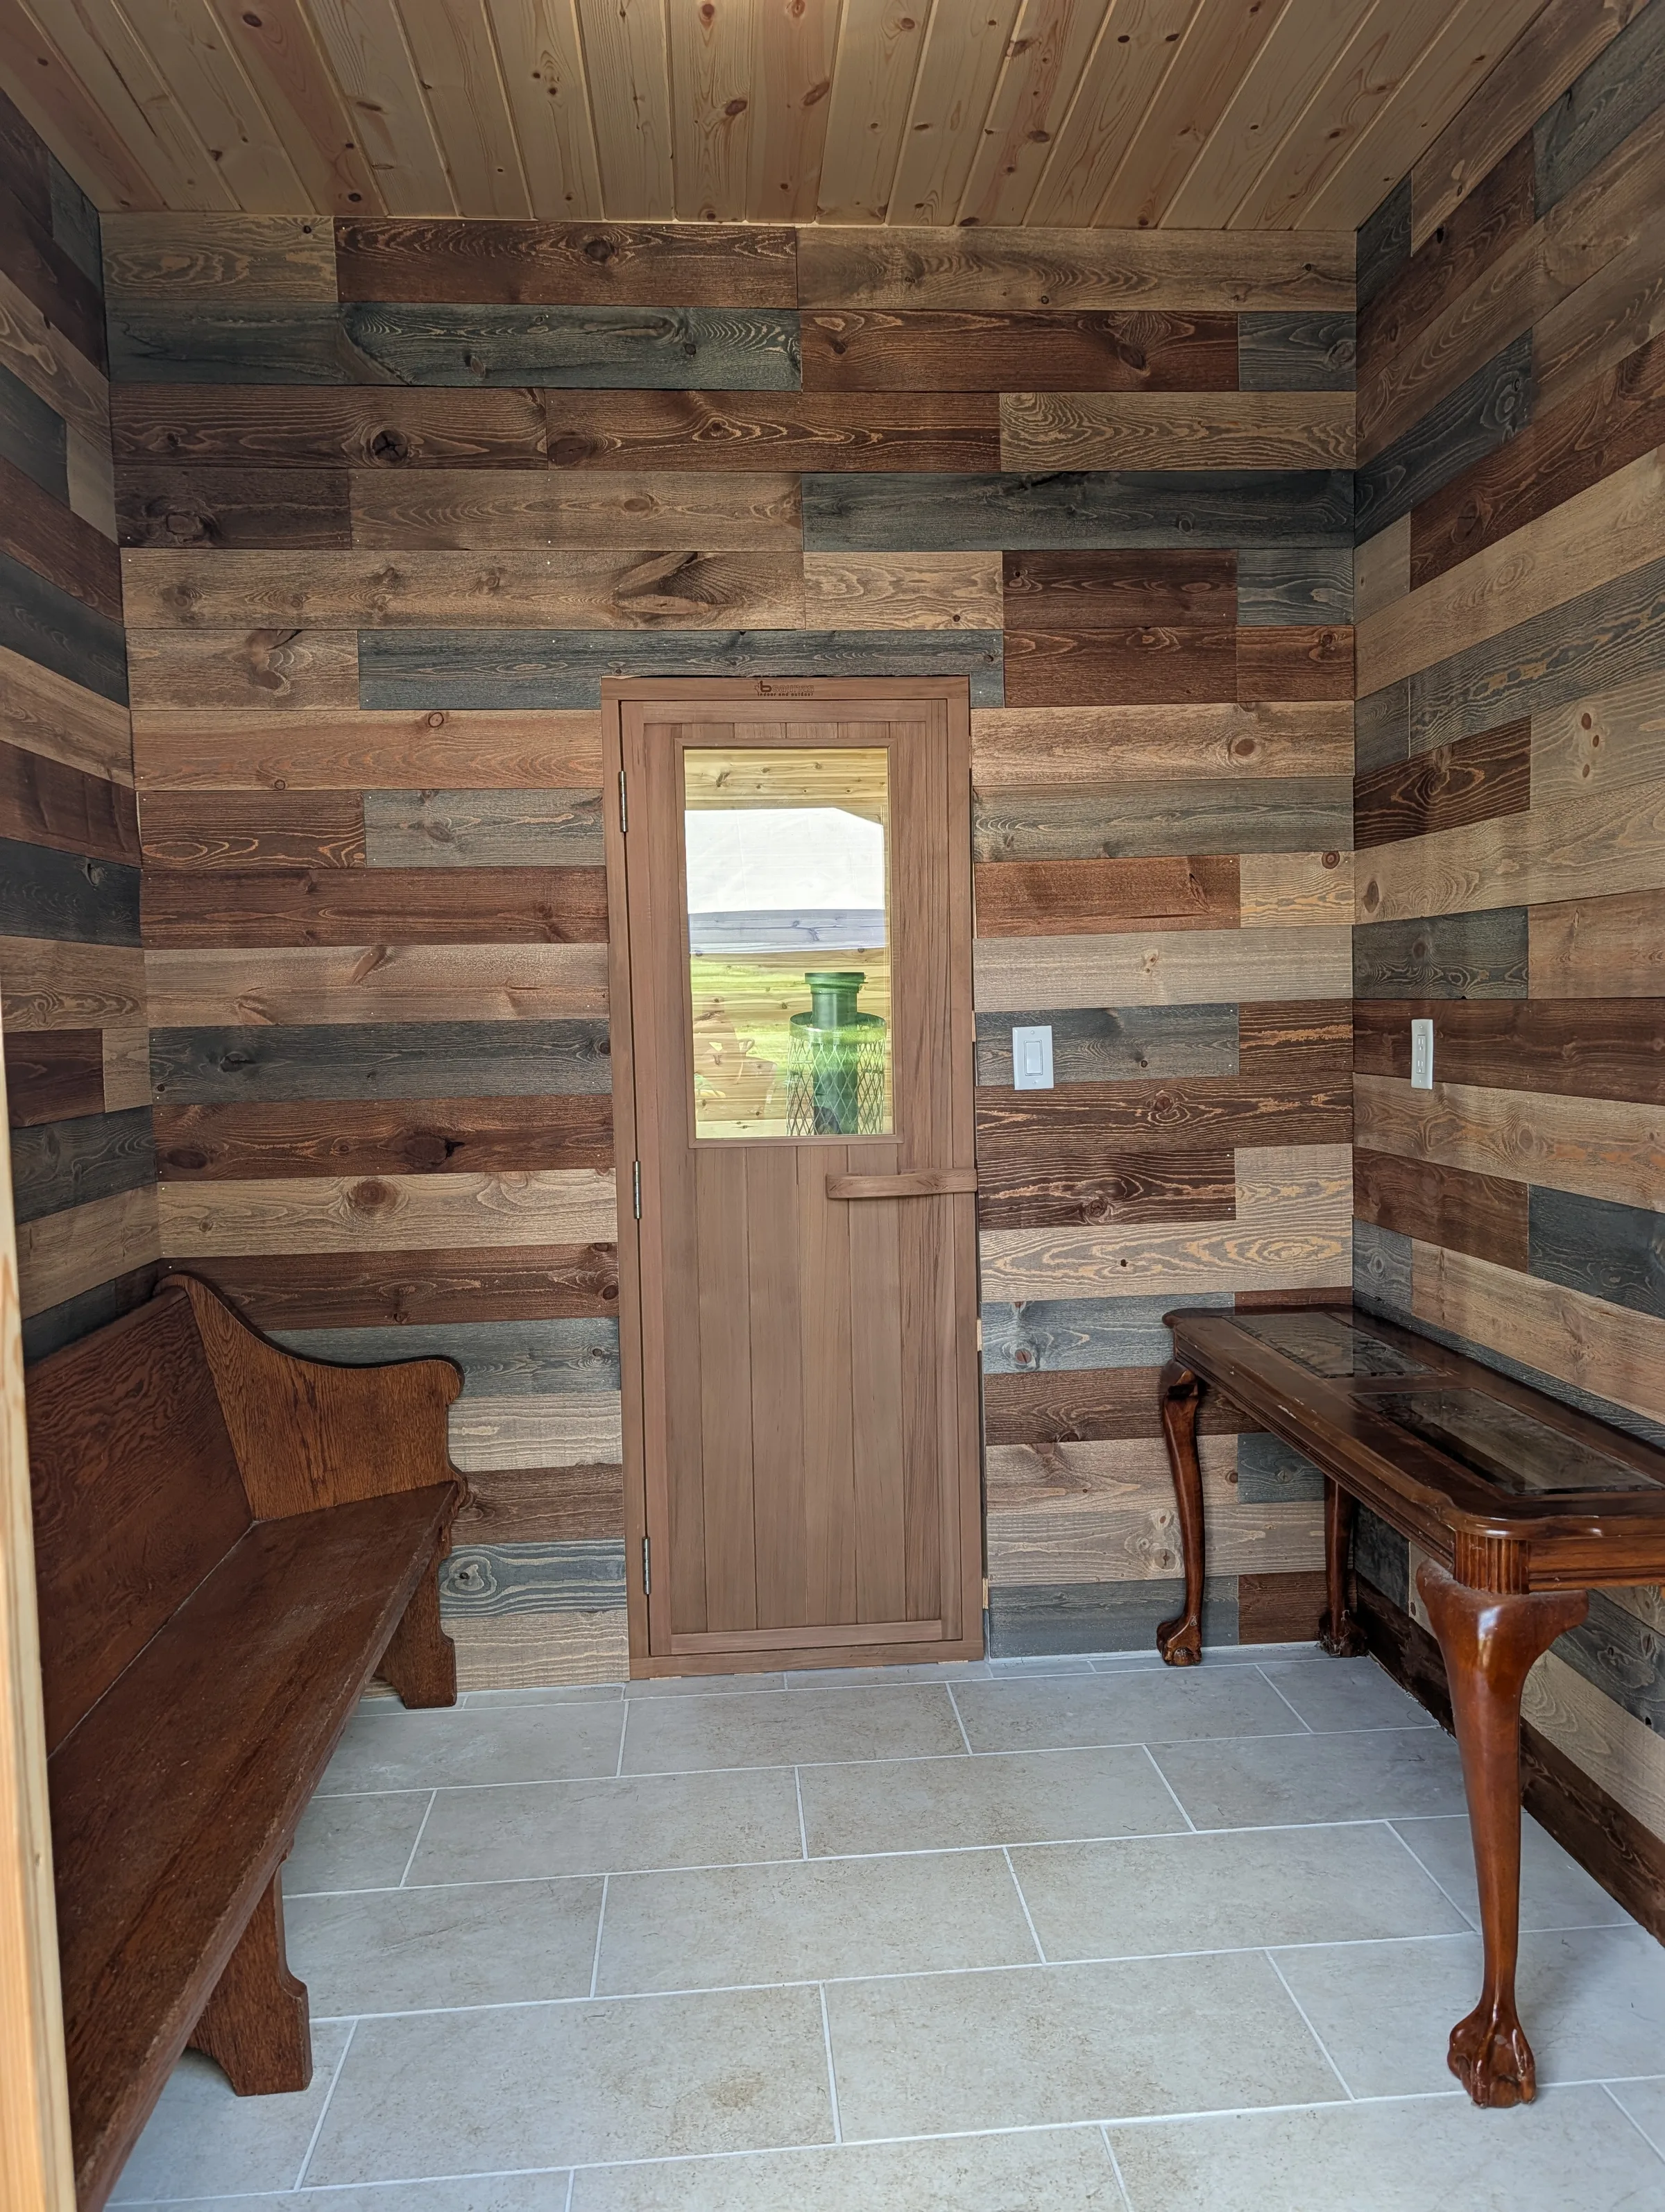
During this I found the furniture for the changing room. I had been watching Facebook marketplace for a bench or seat that would work. I ended up finding a church pew that was almost exactly the right width with zero extra room. The height and depth were perfect as well. When I picked it up the guy who sold it to me also had a perfect narrow table for the other wall. You can see them loaded up below as well as sitting in the changing room. I think they're perfect and fit the all-wood aesthetic perfectly.
NOTE
I did one little mistake here. I saw that the bench was in Colfax, IN which is only about 15 minutes from me. When the morning came around to meet I got his address and it was actually in Colfax, IL which was about 2.5 hours away. I refused to be part of the flakiness that plagues Facebook marketplace, so I drove the 2.5 hours each way to pick it up. It was a nice pretty drive through central Indiana and Illinois farm country and now it's a Type 2 Fun memory.
Benches
After the furniture was in place I was started on the benches. This was another tough part of the build as I wasn't exactly sure how the benches needed to be built, how they would be supported, and if I had enough wood. I had decided before I ever bought the shed to get it extra high and have 3 benches on the back wall with 2 on the side. I did that design to balance use of space as well as to meet the two key points that are famous in the sauna community:
- Your feet should be above the stones on the heater. This ensures you don't get cold feet.
- The top bench should be around 47" from the ceiling for the best heating and sauna experience.
NOTE
These ideas and others come from a resource referred to simply as Trumpkin. This name belongs to the author of a document on sauna design that the whole online community tends to swear by. This link is generally the one included when referring to the "Laws of Trumpkin".
I actually made use of ChatGPT here pretty heavily. I gave it the original .pdf document with the bench plans, a list of all my materials, and then had it come up with a plan for the build and to ensure I didn't run out of wood. It got a lot wrong, but it also ended up catching a few mistakes that saved me extra time and effort later.
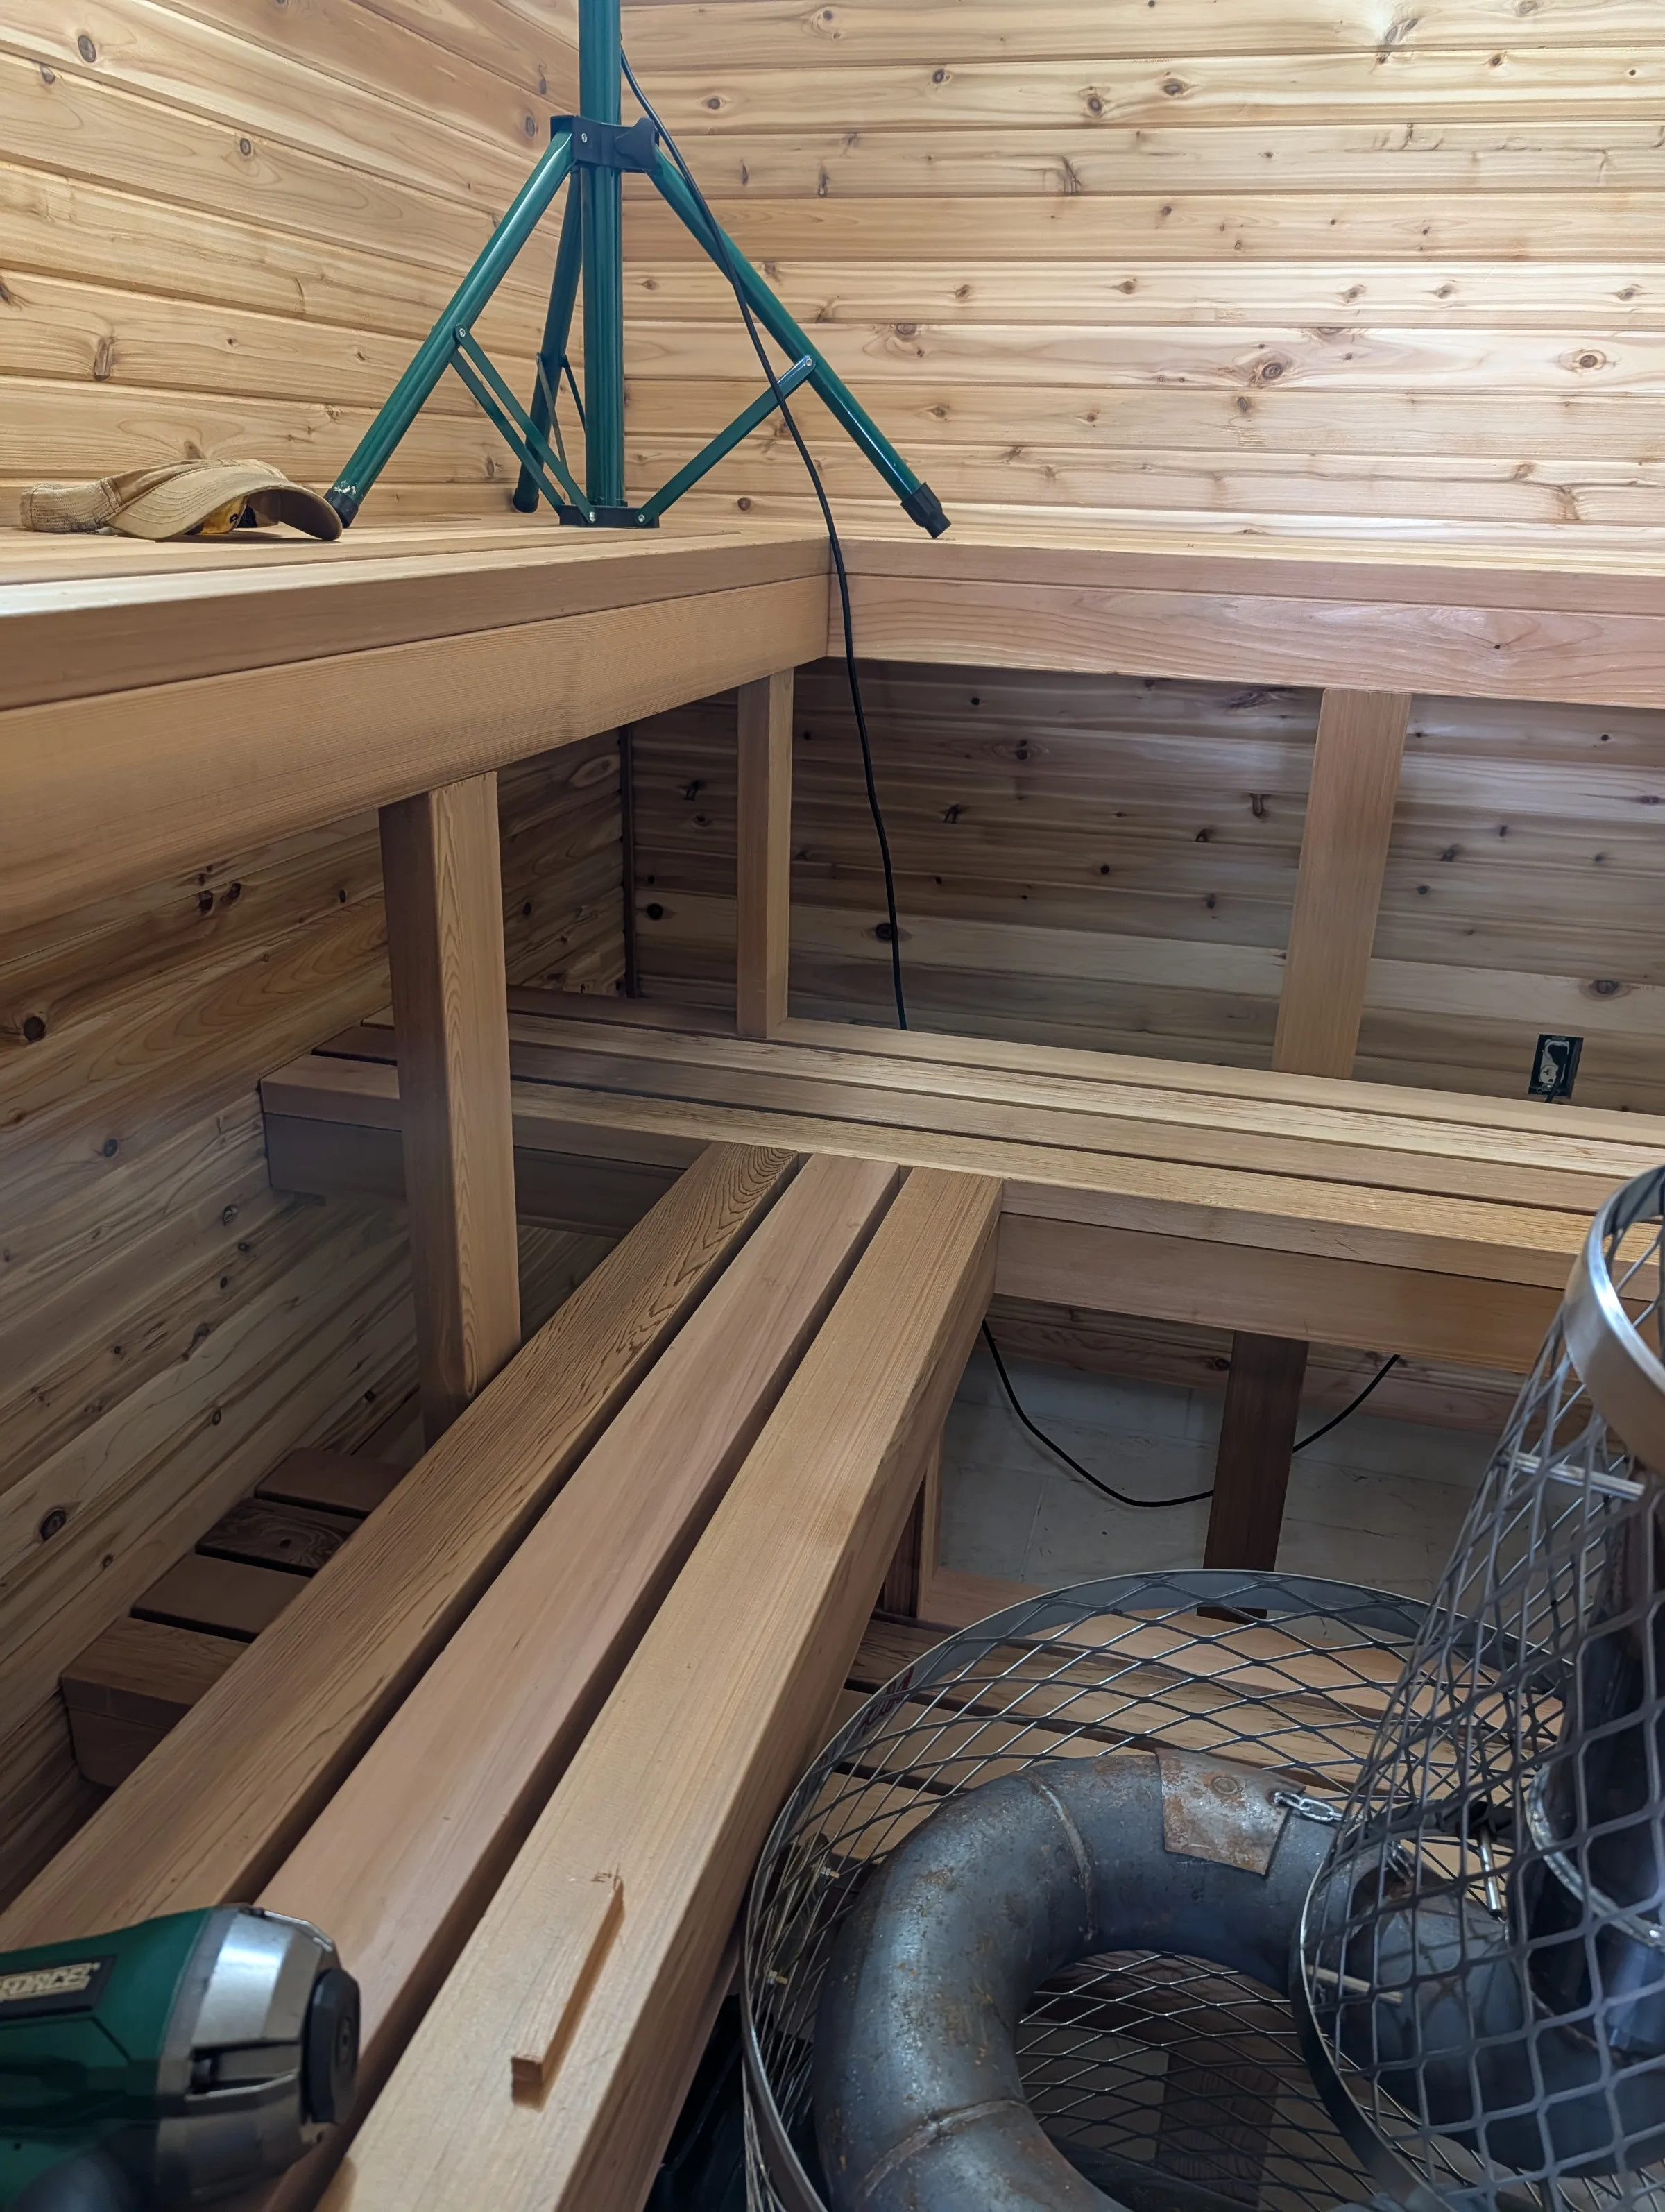
The whole room is about 3" short of being 9 feet tall. I ended up settling on a bench design that had the first bench 18" off the floor. The second bench was another 18" putting the seat at 36" high. The top of the stones on my Iki classic are around 33" to 34" checking box #1 above. The top bench sits right at 58" from the floor. An 18" step is doable, but is a little bit high. A 22" step doesn't really work, but it's a great sitting height and you'll likely never step up on the top step, only lay on it. The top bench to the ceiling is right at 47" which checks box #2 above. The back-top bench is 24" wide and the side-top bench is 18" wide. The back-middle and back-bottom are both 16" wide while the side-bottom is only 12" wide to not obstruct the door. This makes the side-bottom useful to walk on, put your feet on, or sit on with your feet dangling. I'm very happy with this bench layout now that I can see it and use it. I think it really maximizes the space and usability of this size of sauna. I think we could fit 8-10 people in here without too much trouble which wouldn't be true of other 8x8 designs I saw.
First Bench & Final Design
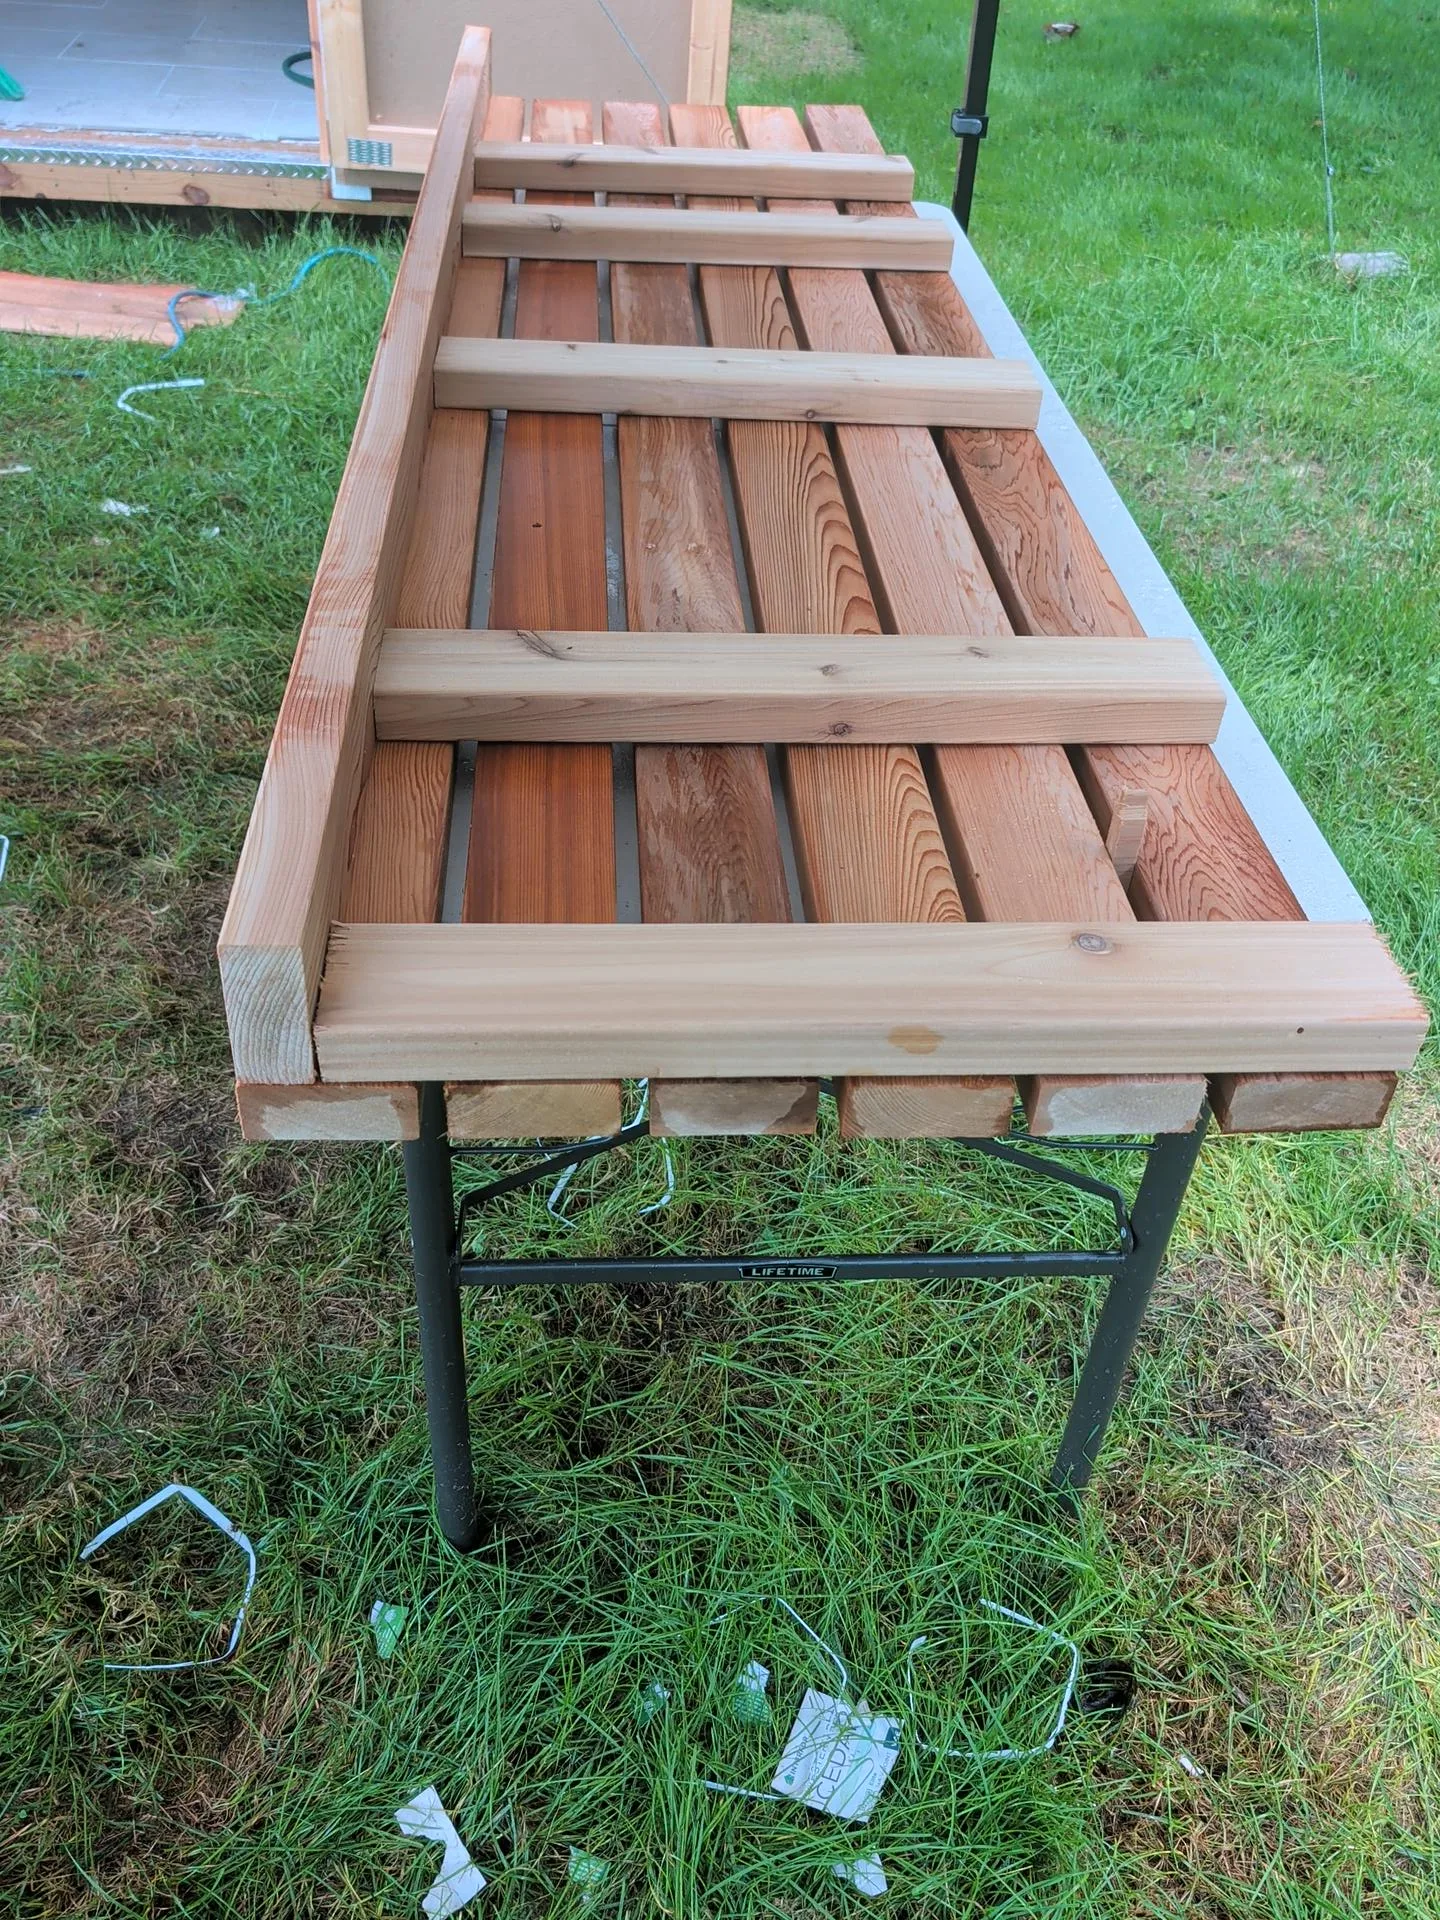
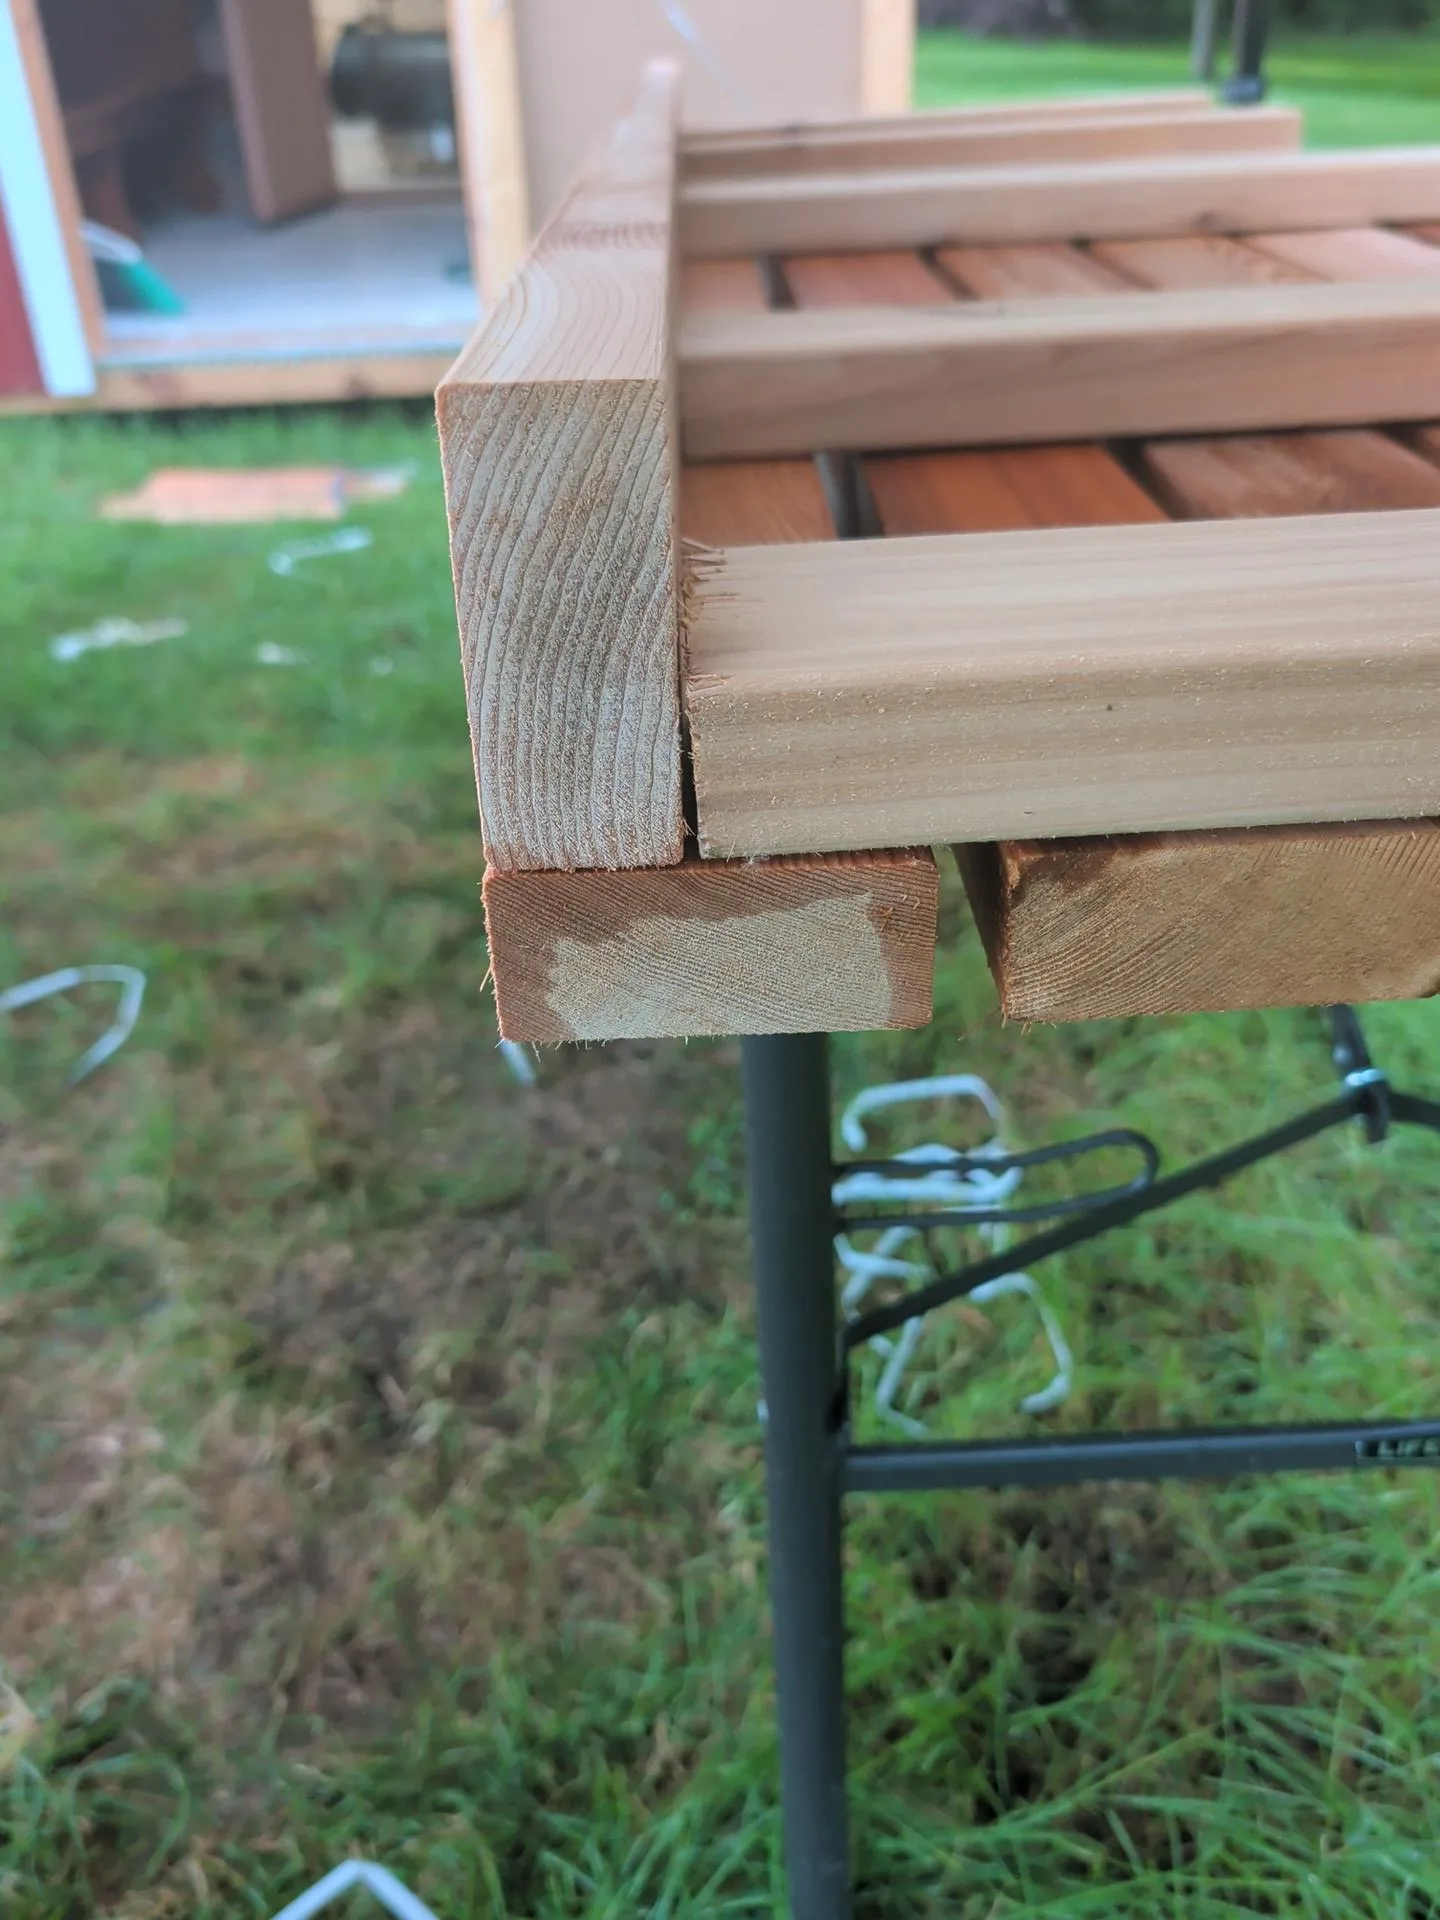
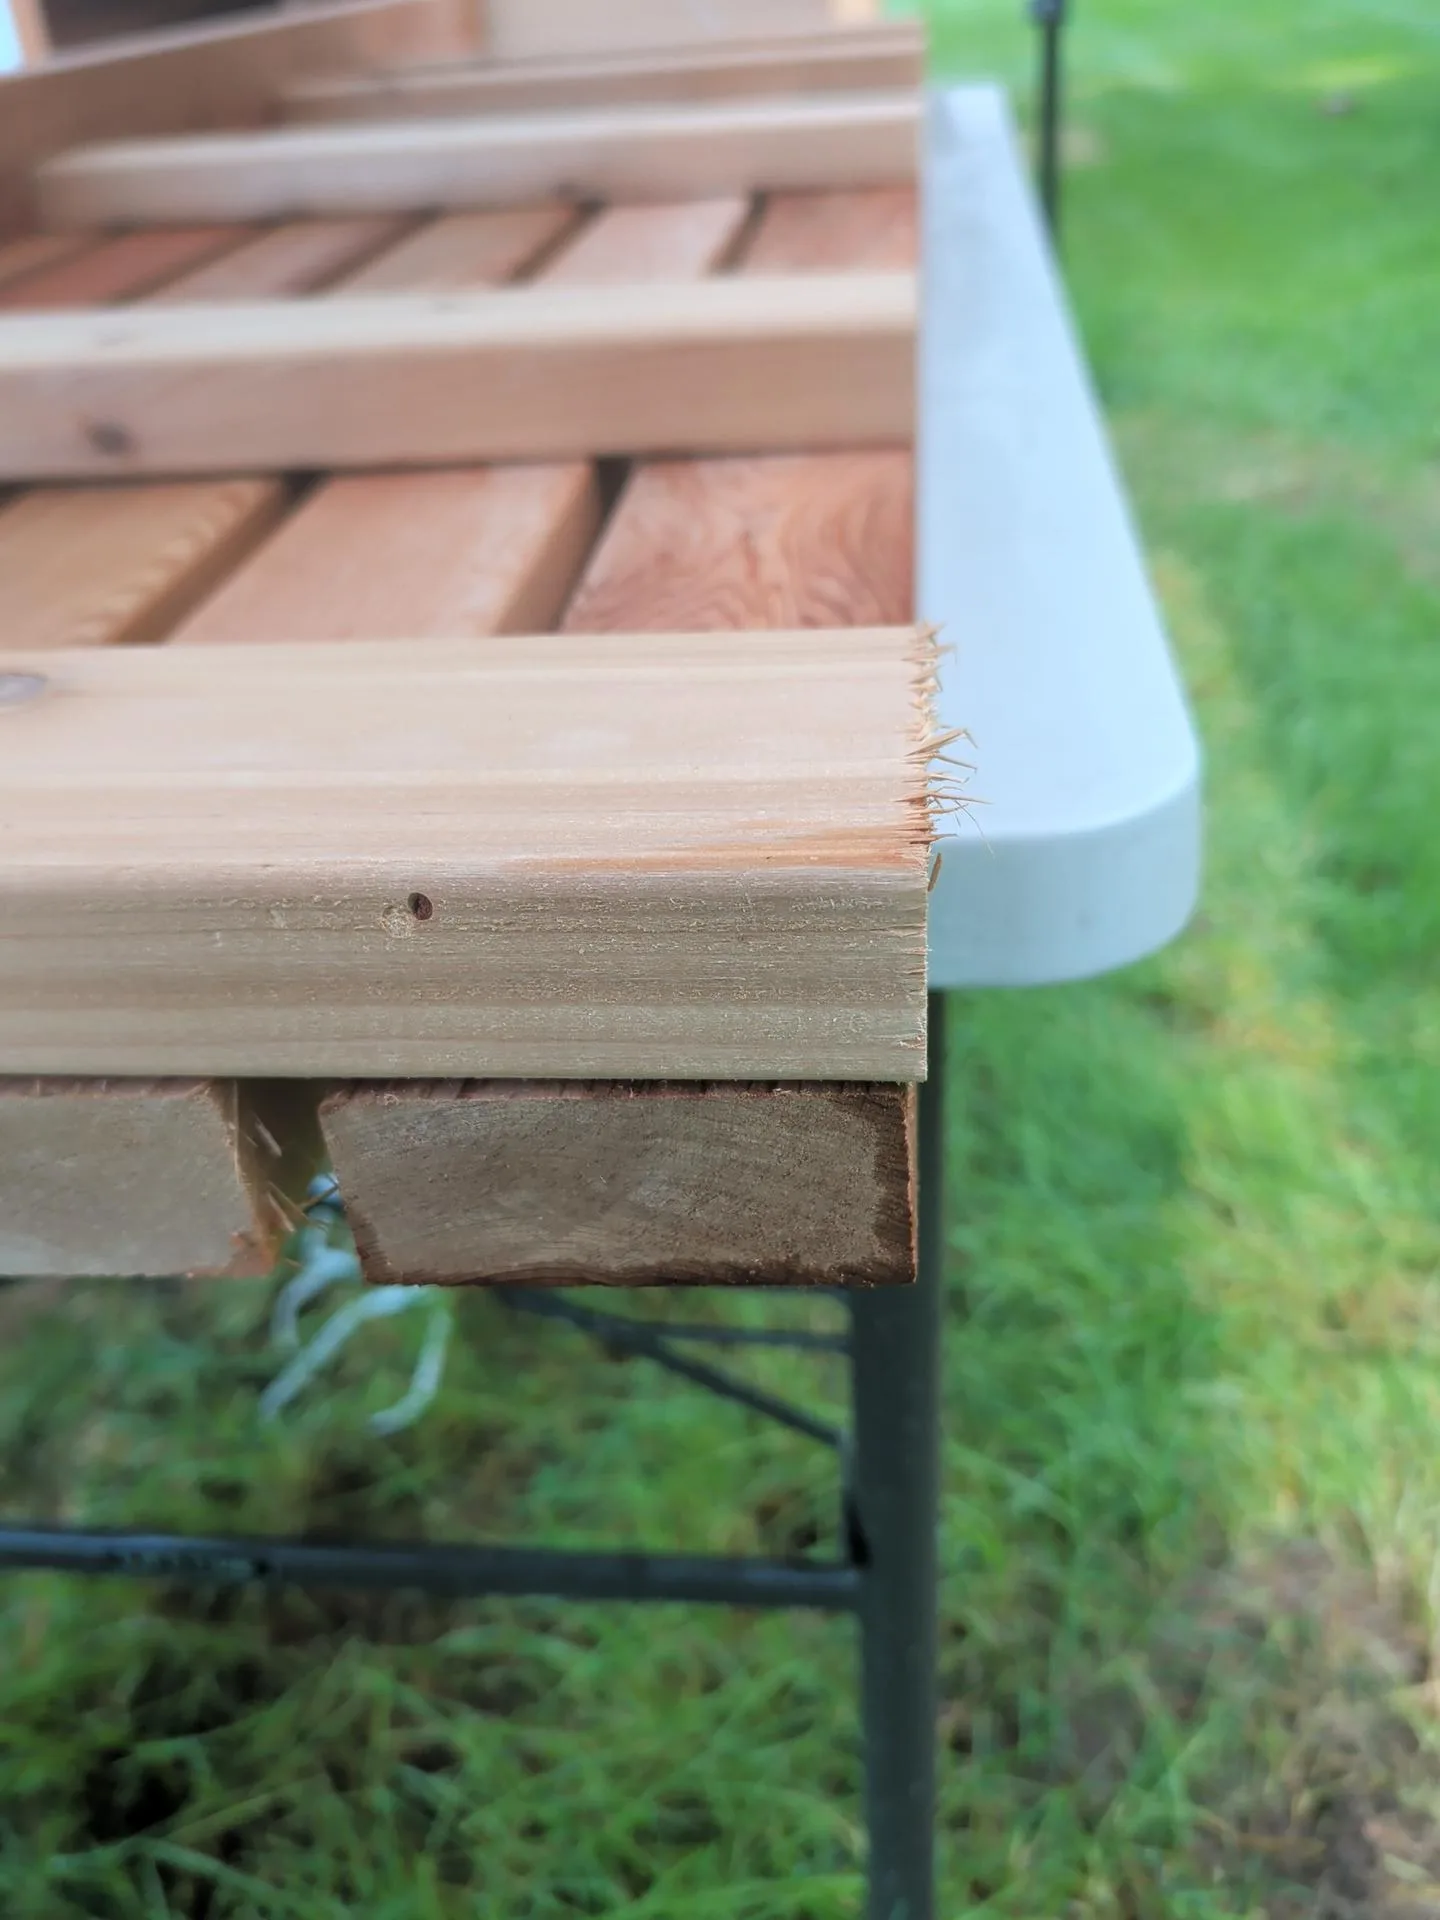
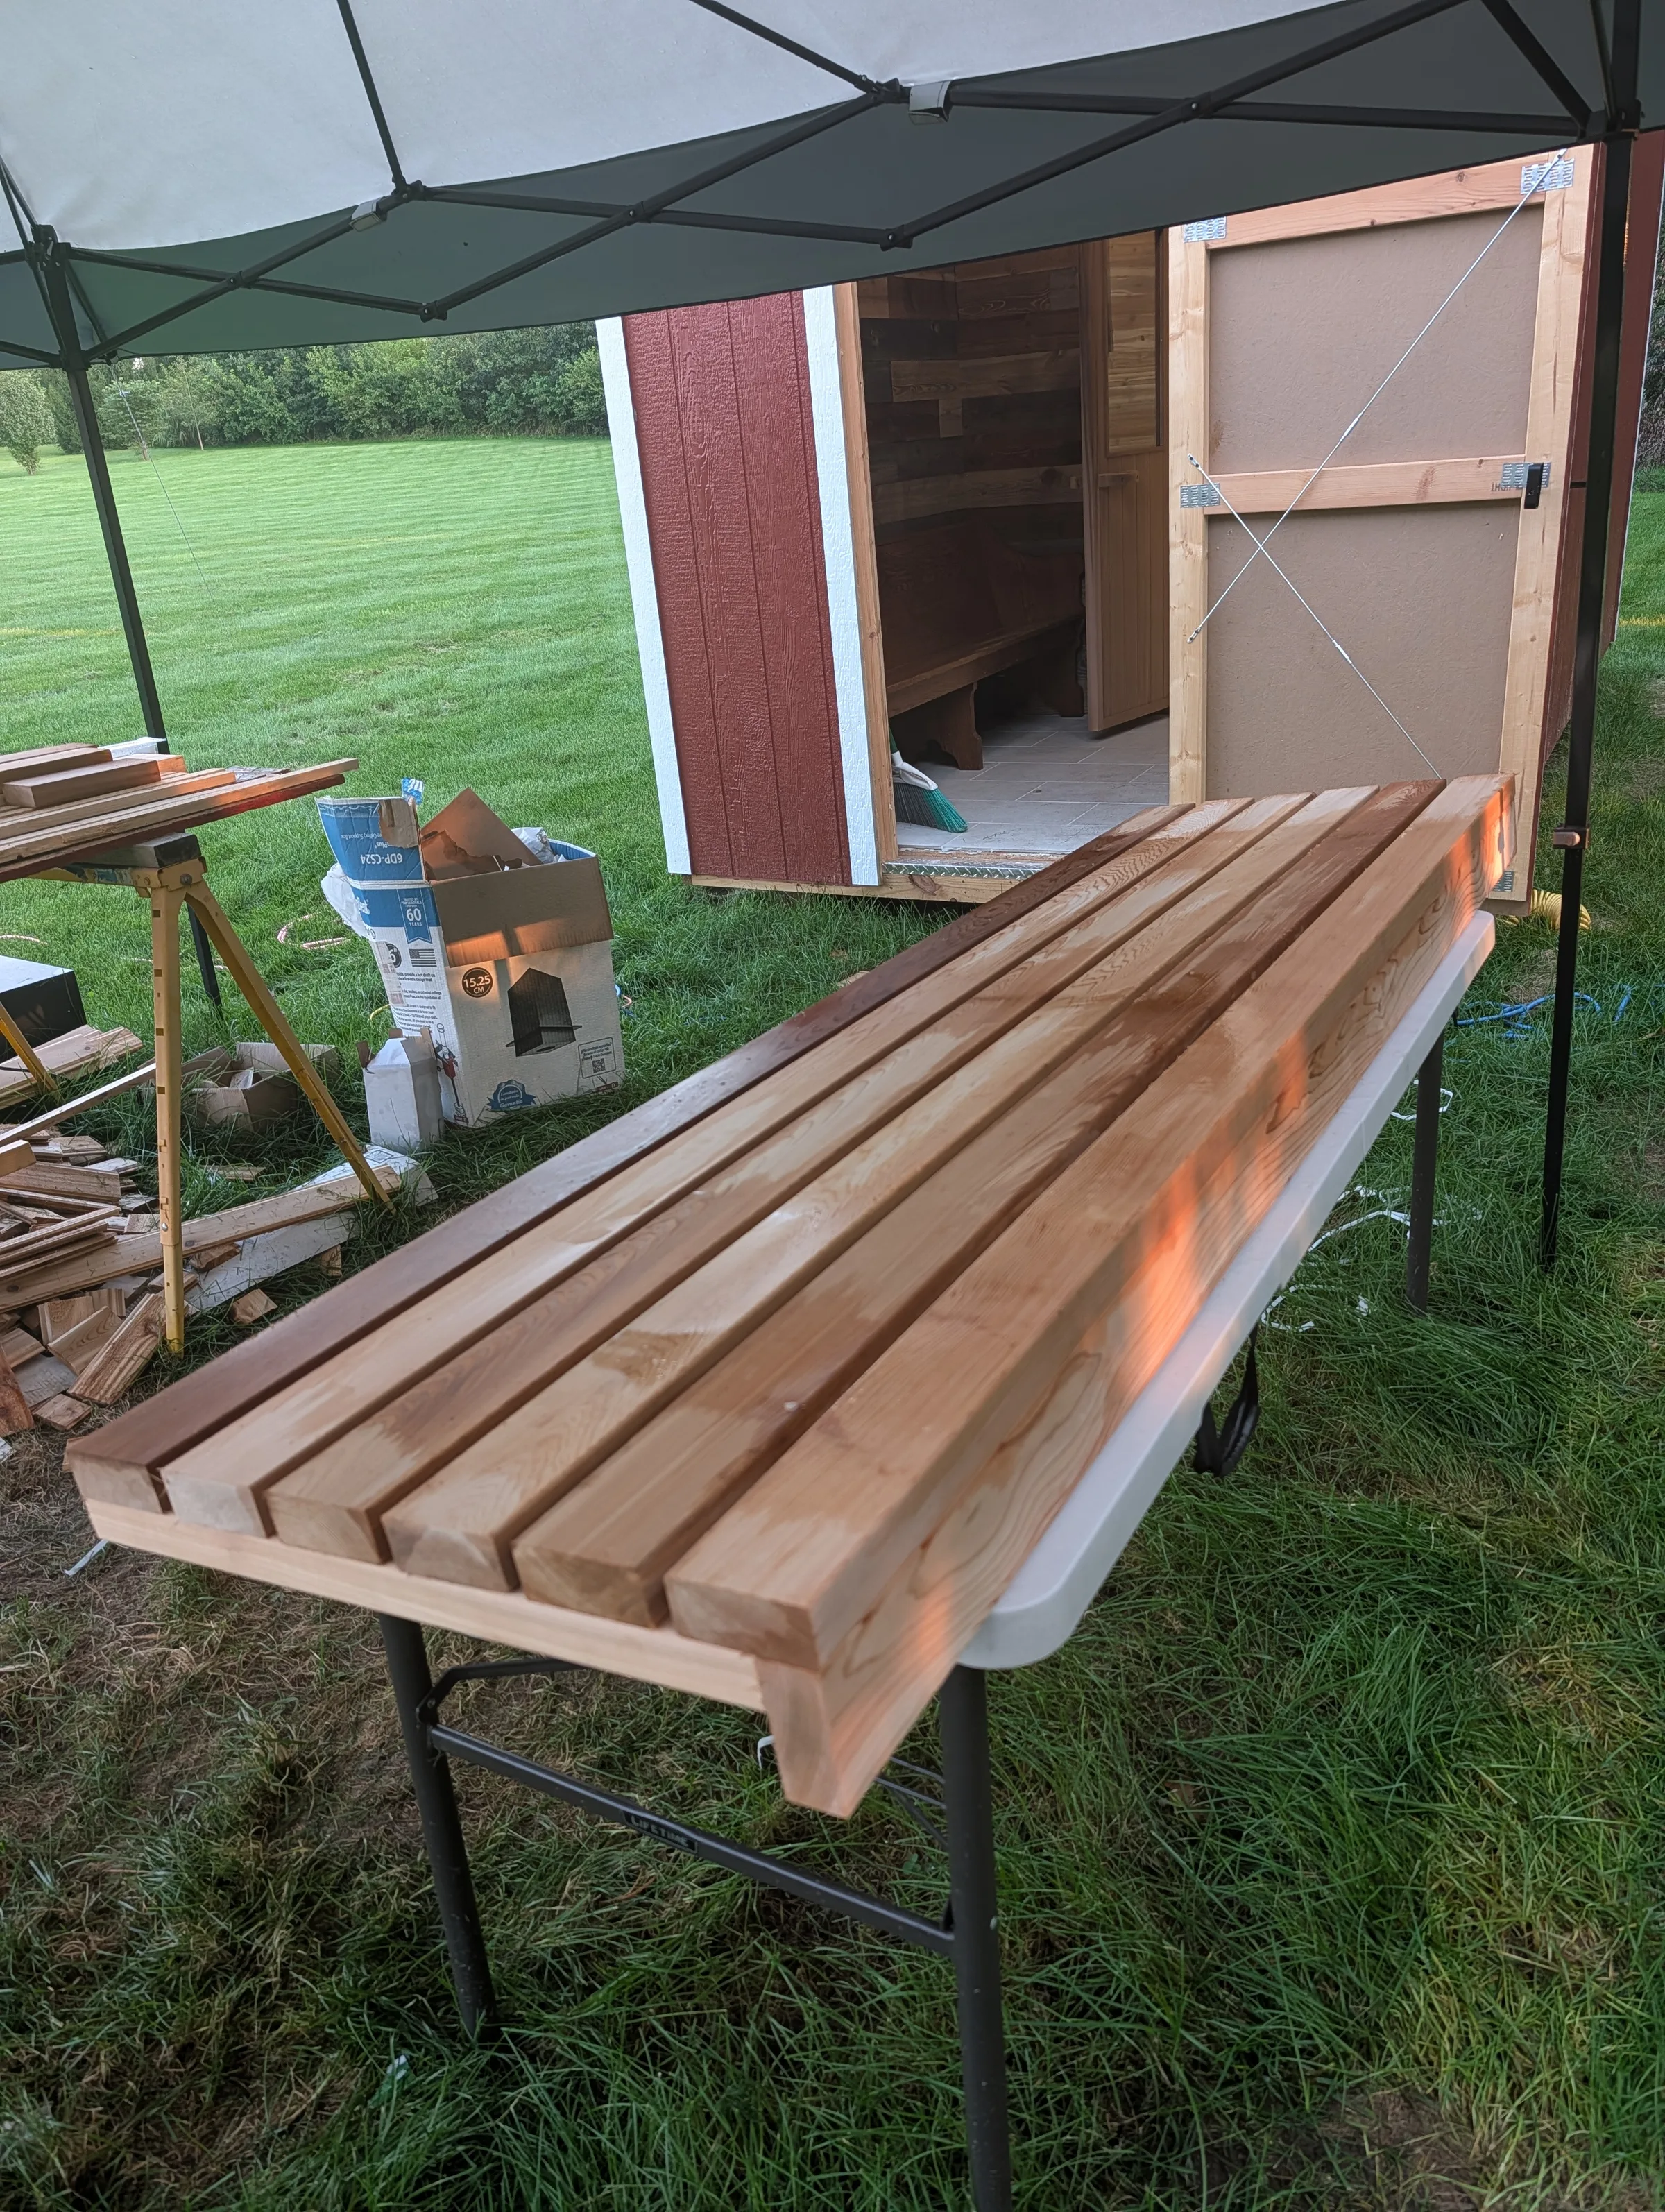
In these first pictures you can see the wood laid out in the final bench format as recommended by bsaunas. The close-ups show the details on how closely the measurements work out. This is for a 24" wide bench. It used 6 top 2x4s of clear cedar as well as one additional for the front facia. There were then 5 22.5" girths made from cedar 2x4s used to hold them together. I made two small 9/16" spacers to hold them at the recommended distance apart.
For fasteners on the bench I used 2.5" stainless steel torx head screws. These were the right length to screw through the girths and into the seat boards without coming through the other side. I used one screw per intersection.
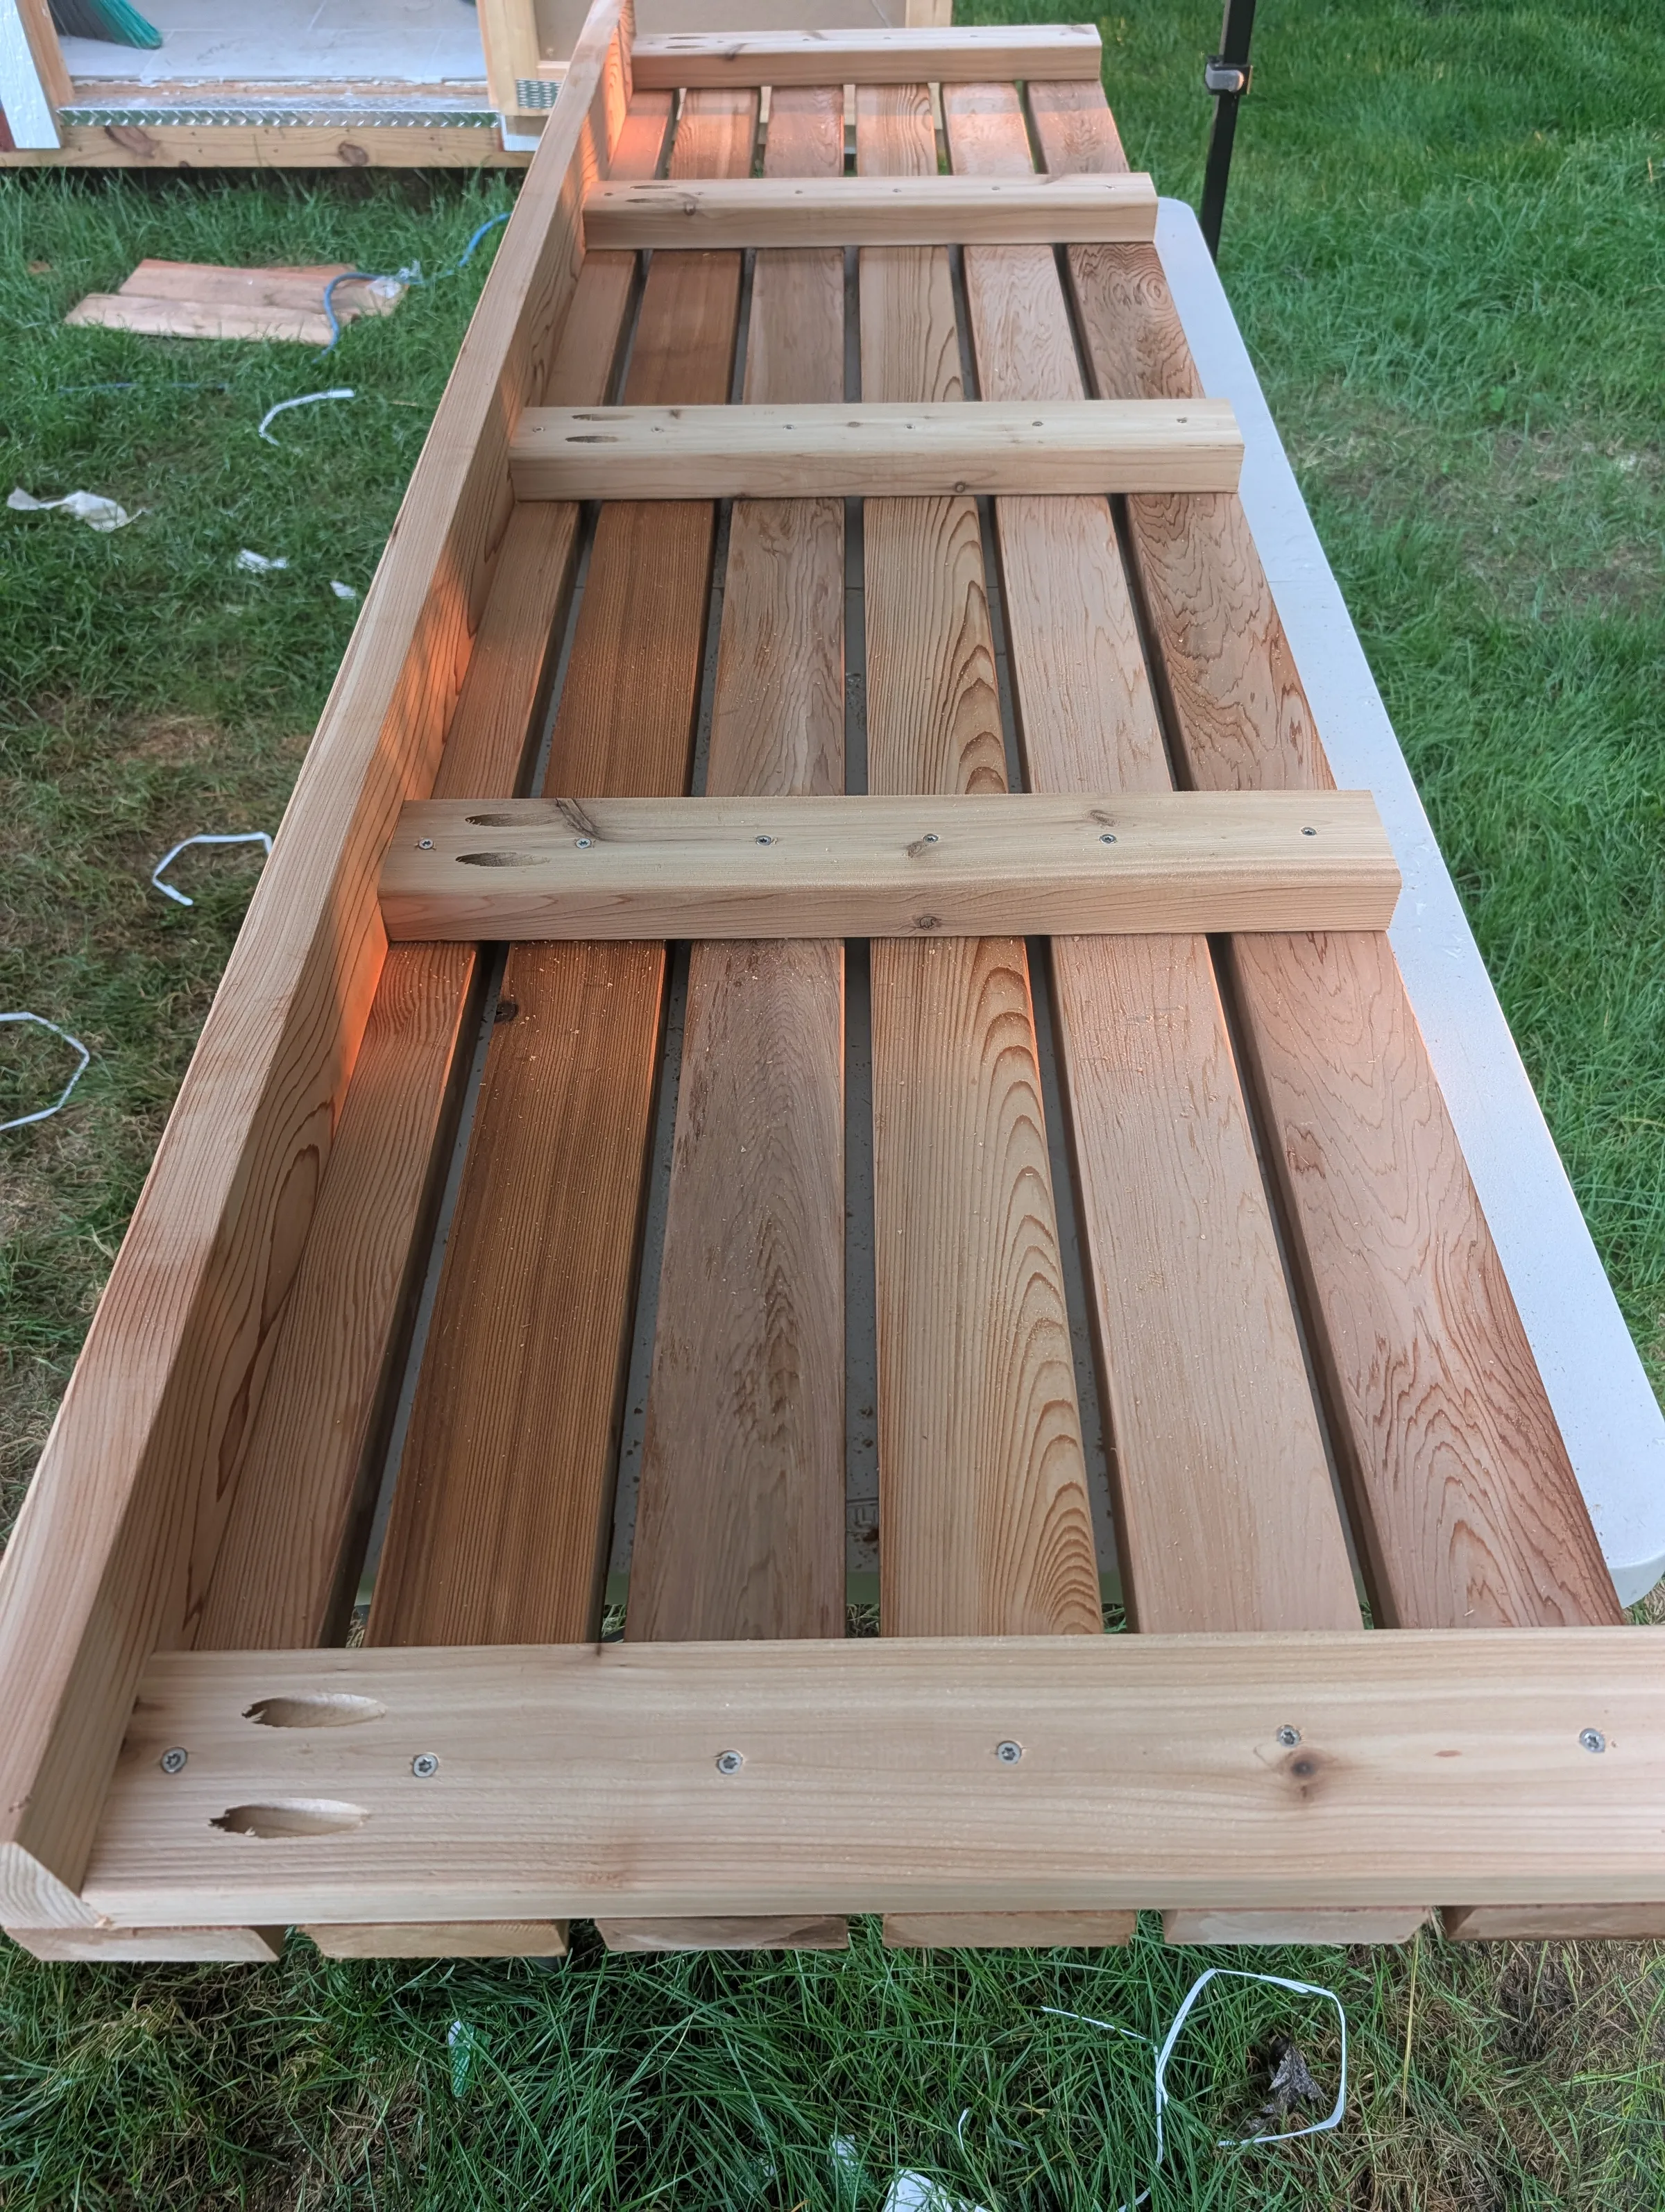
I needed a solid way to attach the facia boards with hidden fasteners and I ended up finding a great solution. I used a Kreg XL Pocket Hole Jig with 2.5" course thread XL pocket hole screws. These were great. This jig was specifically designed to support 2 holes in a 2x4 and the screws were long enough to hold but not go through the facia. I ended up using these in more places (cleats, supports, etc.) than I originally planned and they worked great.
In the next two pictures you can see the stainless screws in the girths and the pocket holes holding on the facia. Once finished the bench was extremely solid and no fasteners were visible from the top or front. I built all 5 benches like this.
Cleats and the Top Row
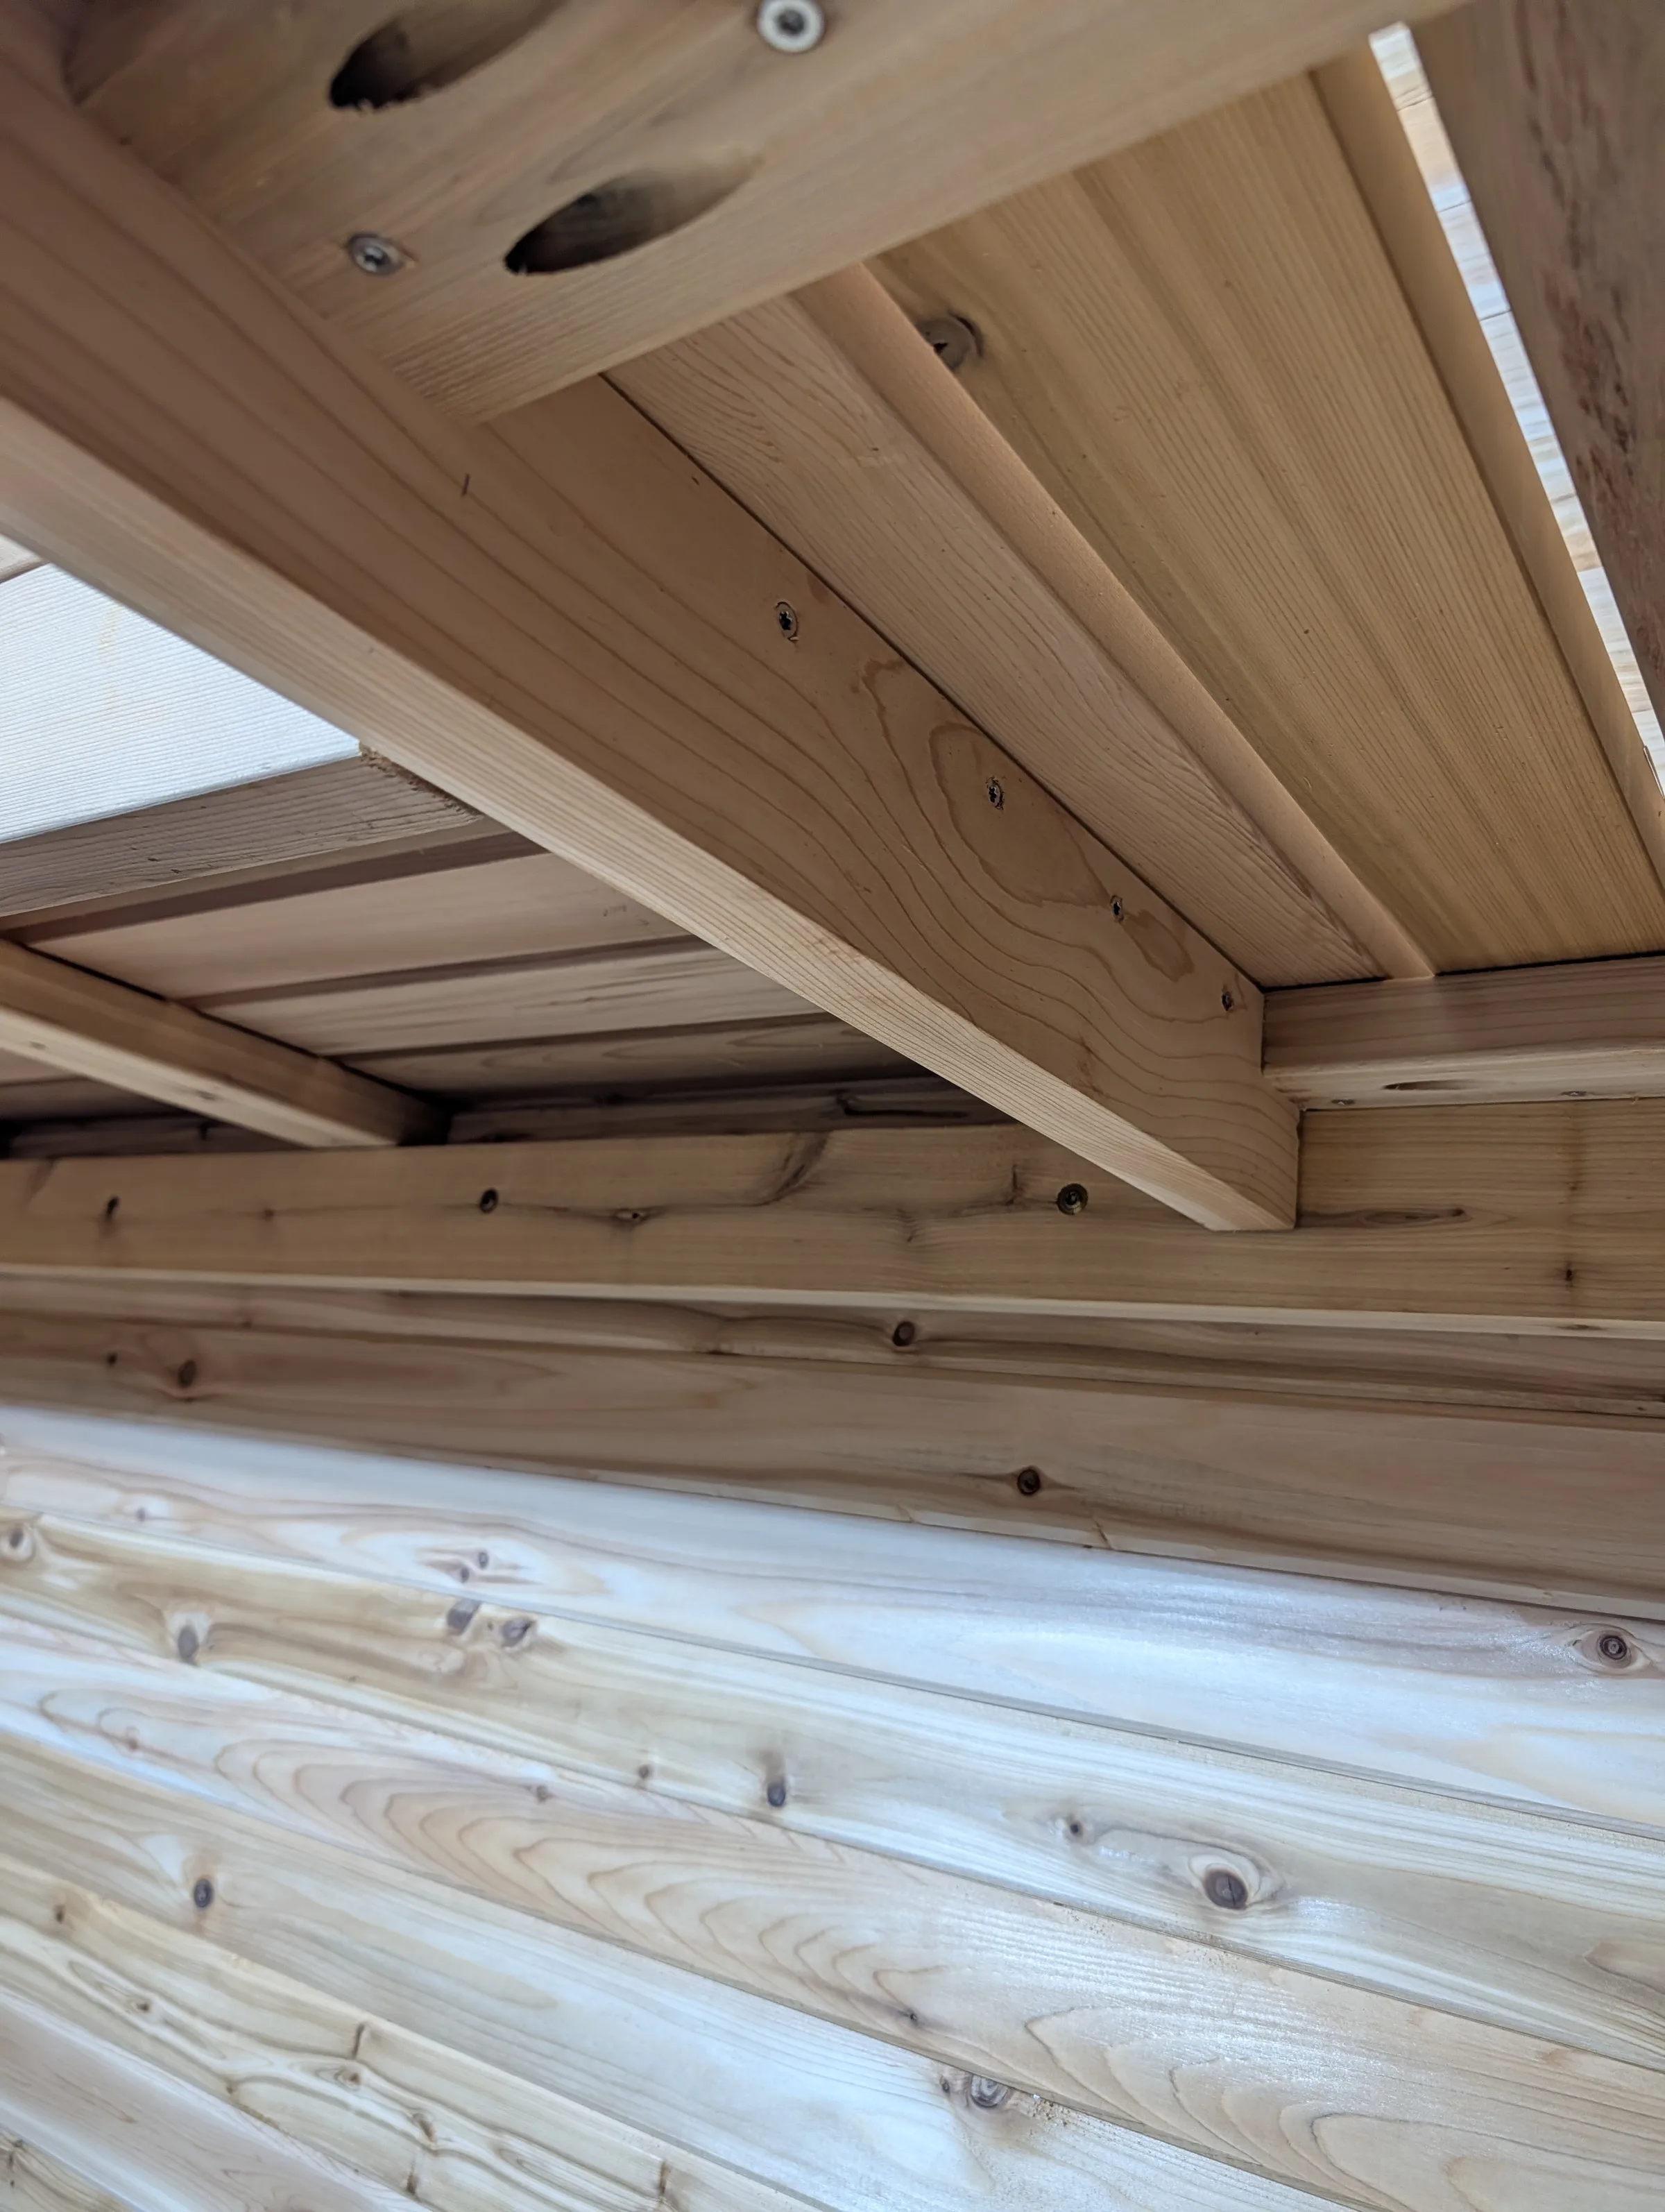
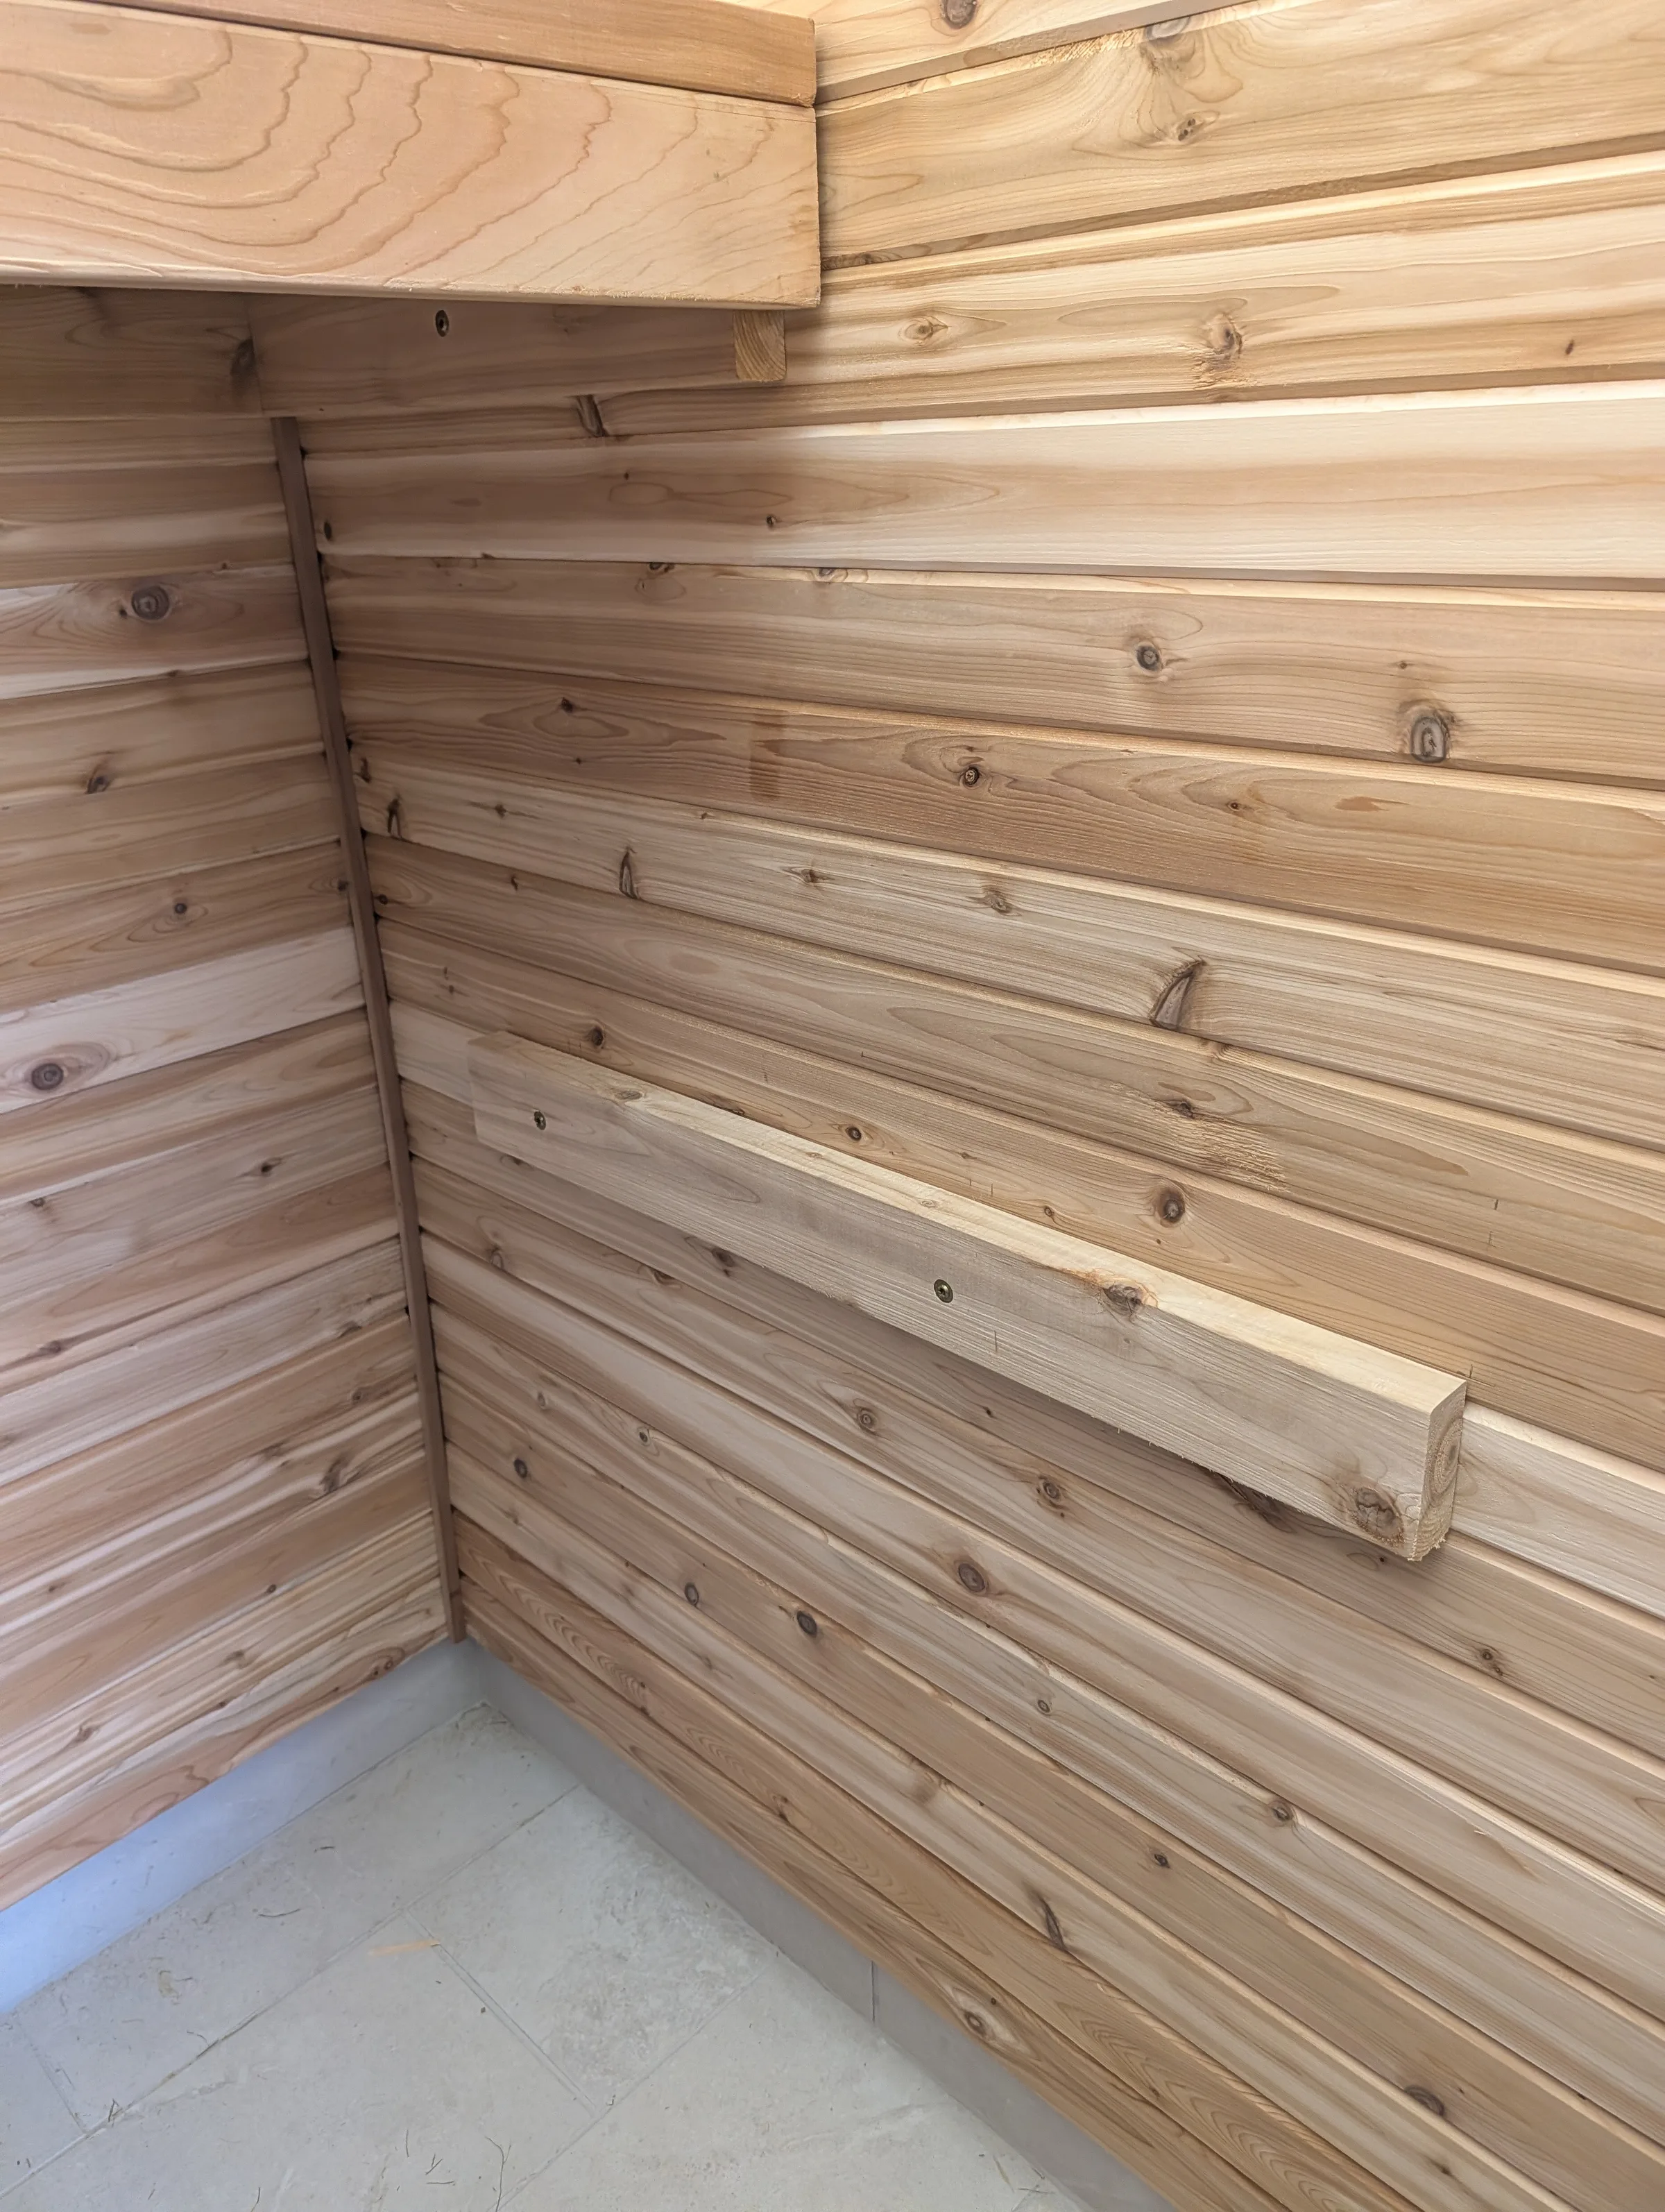
After the back-top bench was built I needed to figure out how to support them. I made a mistake here as I should have put bracing with 2x4s between the studs at the height of the benches. This would have let me get heavy screws into the walls anywhere rather than only at the studs. I didn't do this so I needed to get creative.
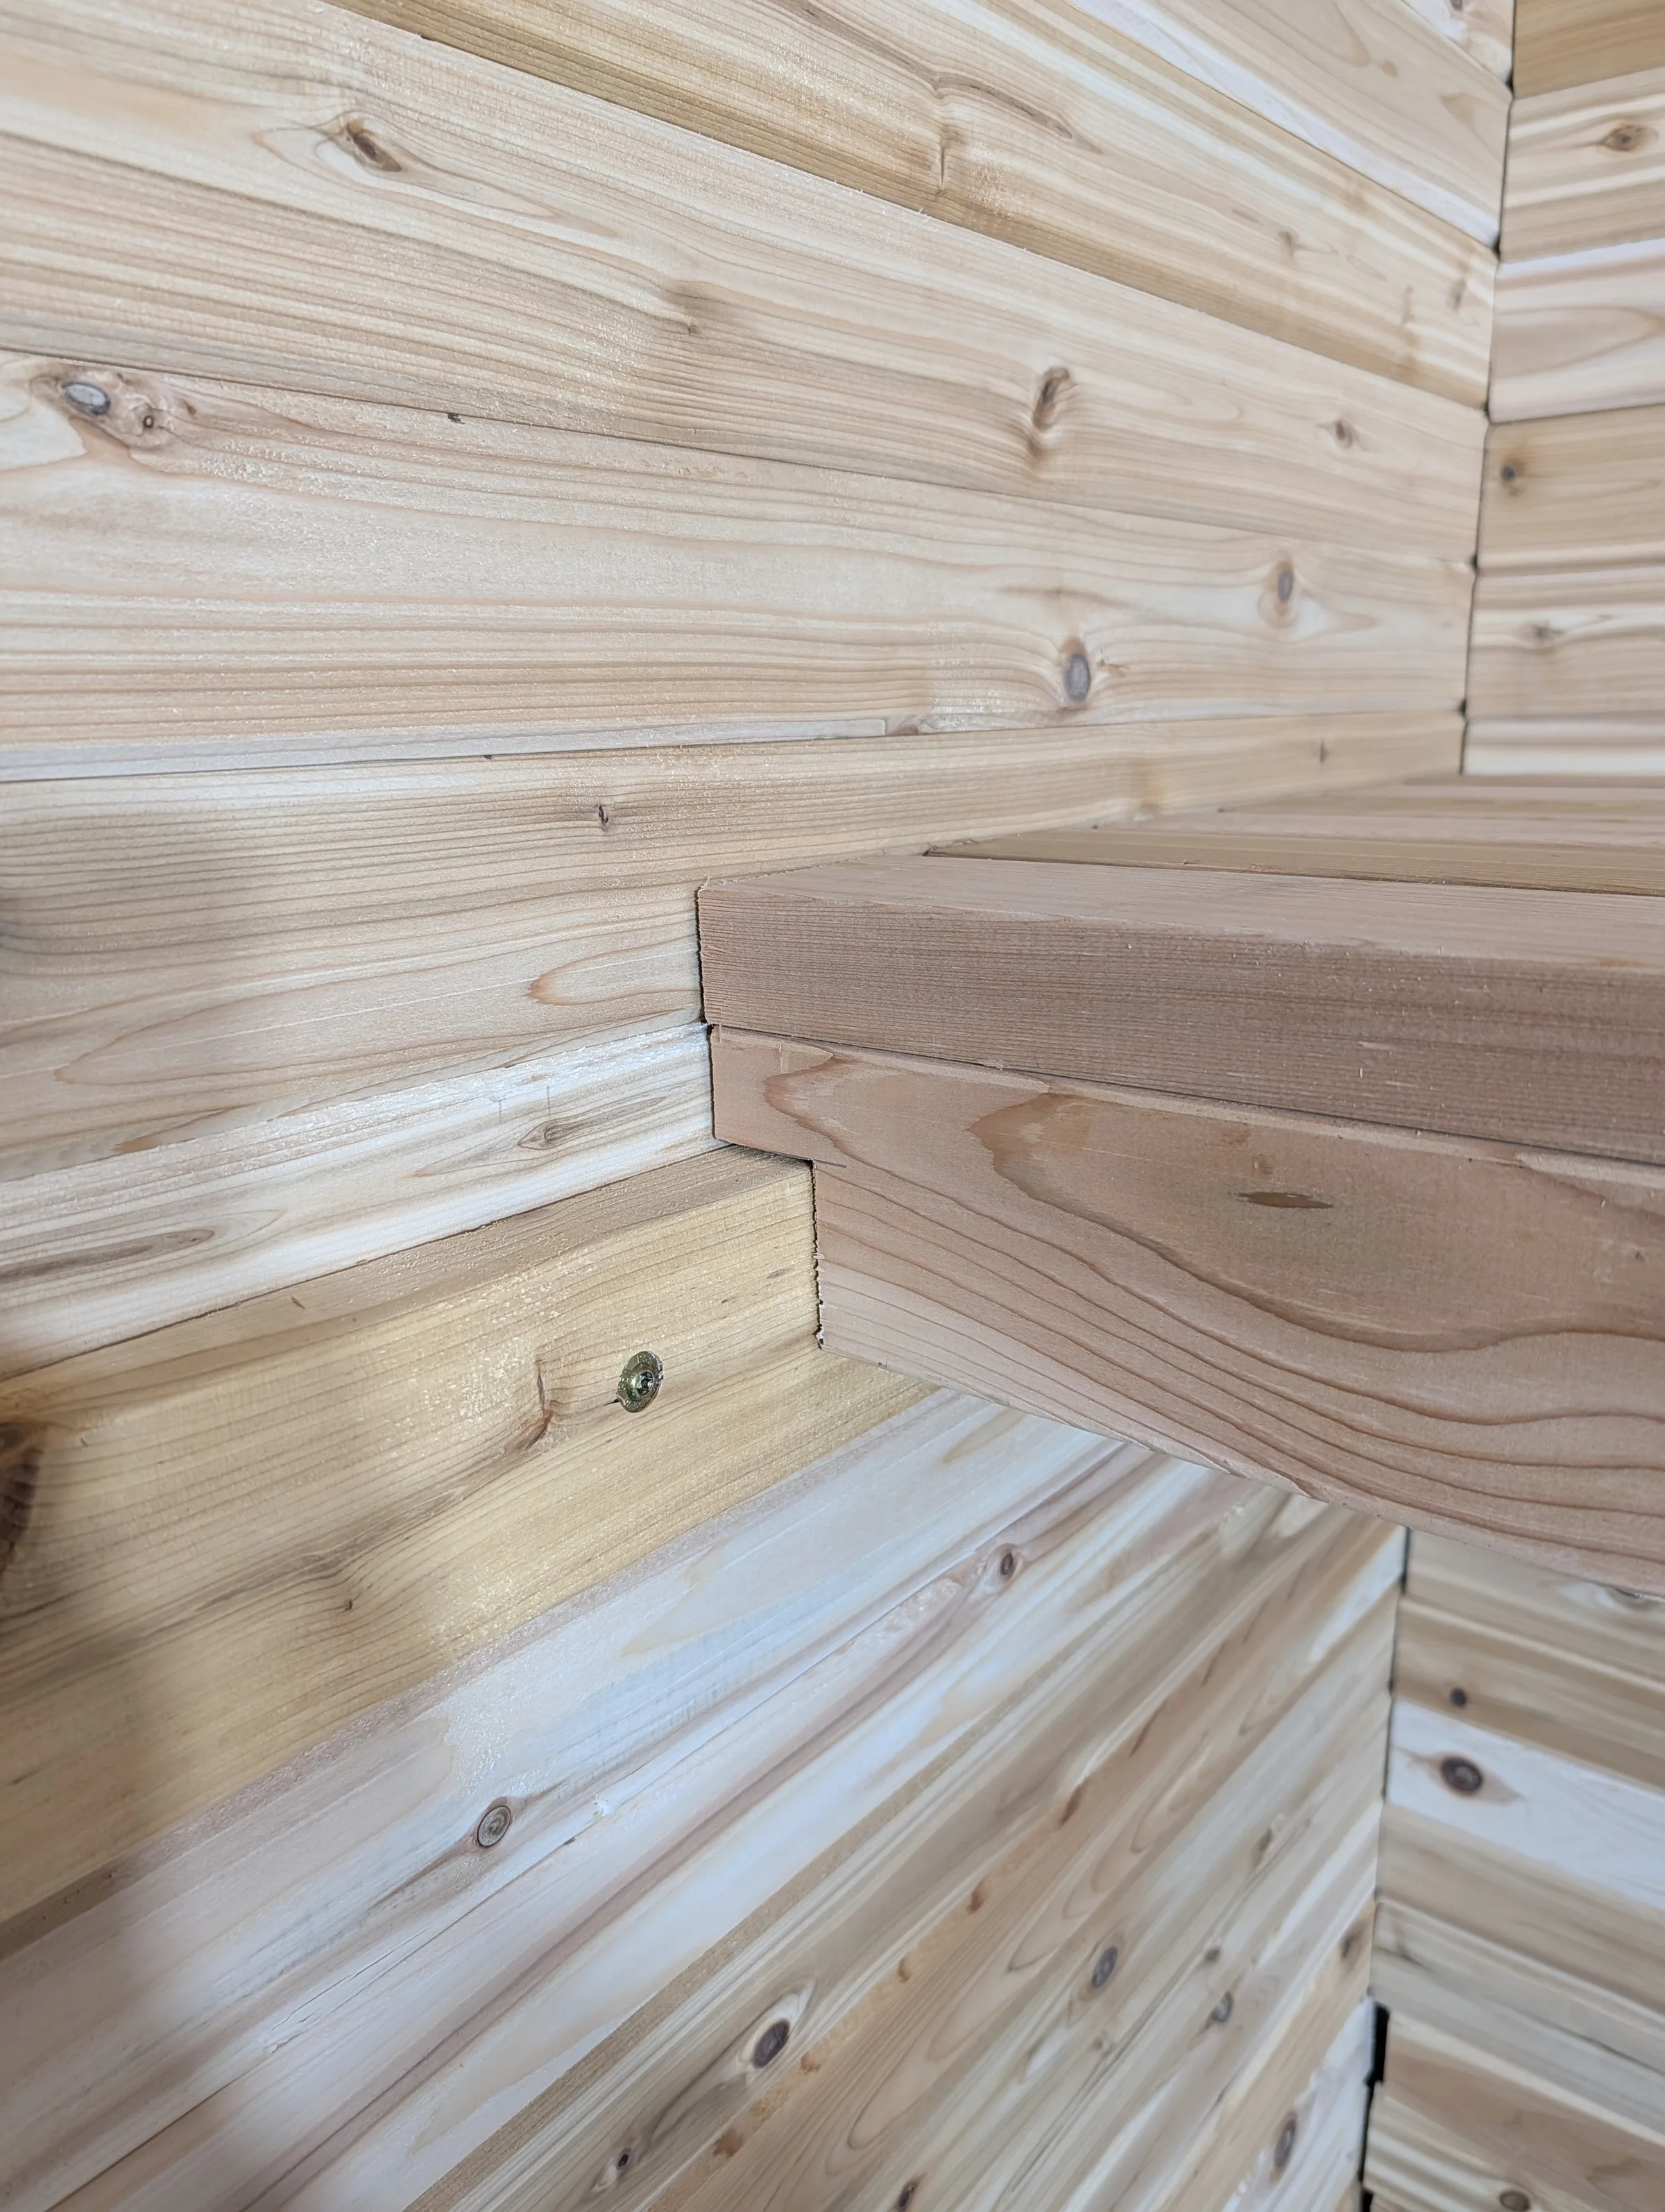
I ended up doing a unified cleat around the room running from the left side of the back-top bench around to the front side of the side-top. This let me maximize how many heavy screws went into the studs as well as supporting the two top benches primarily from the walls.
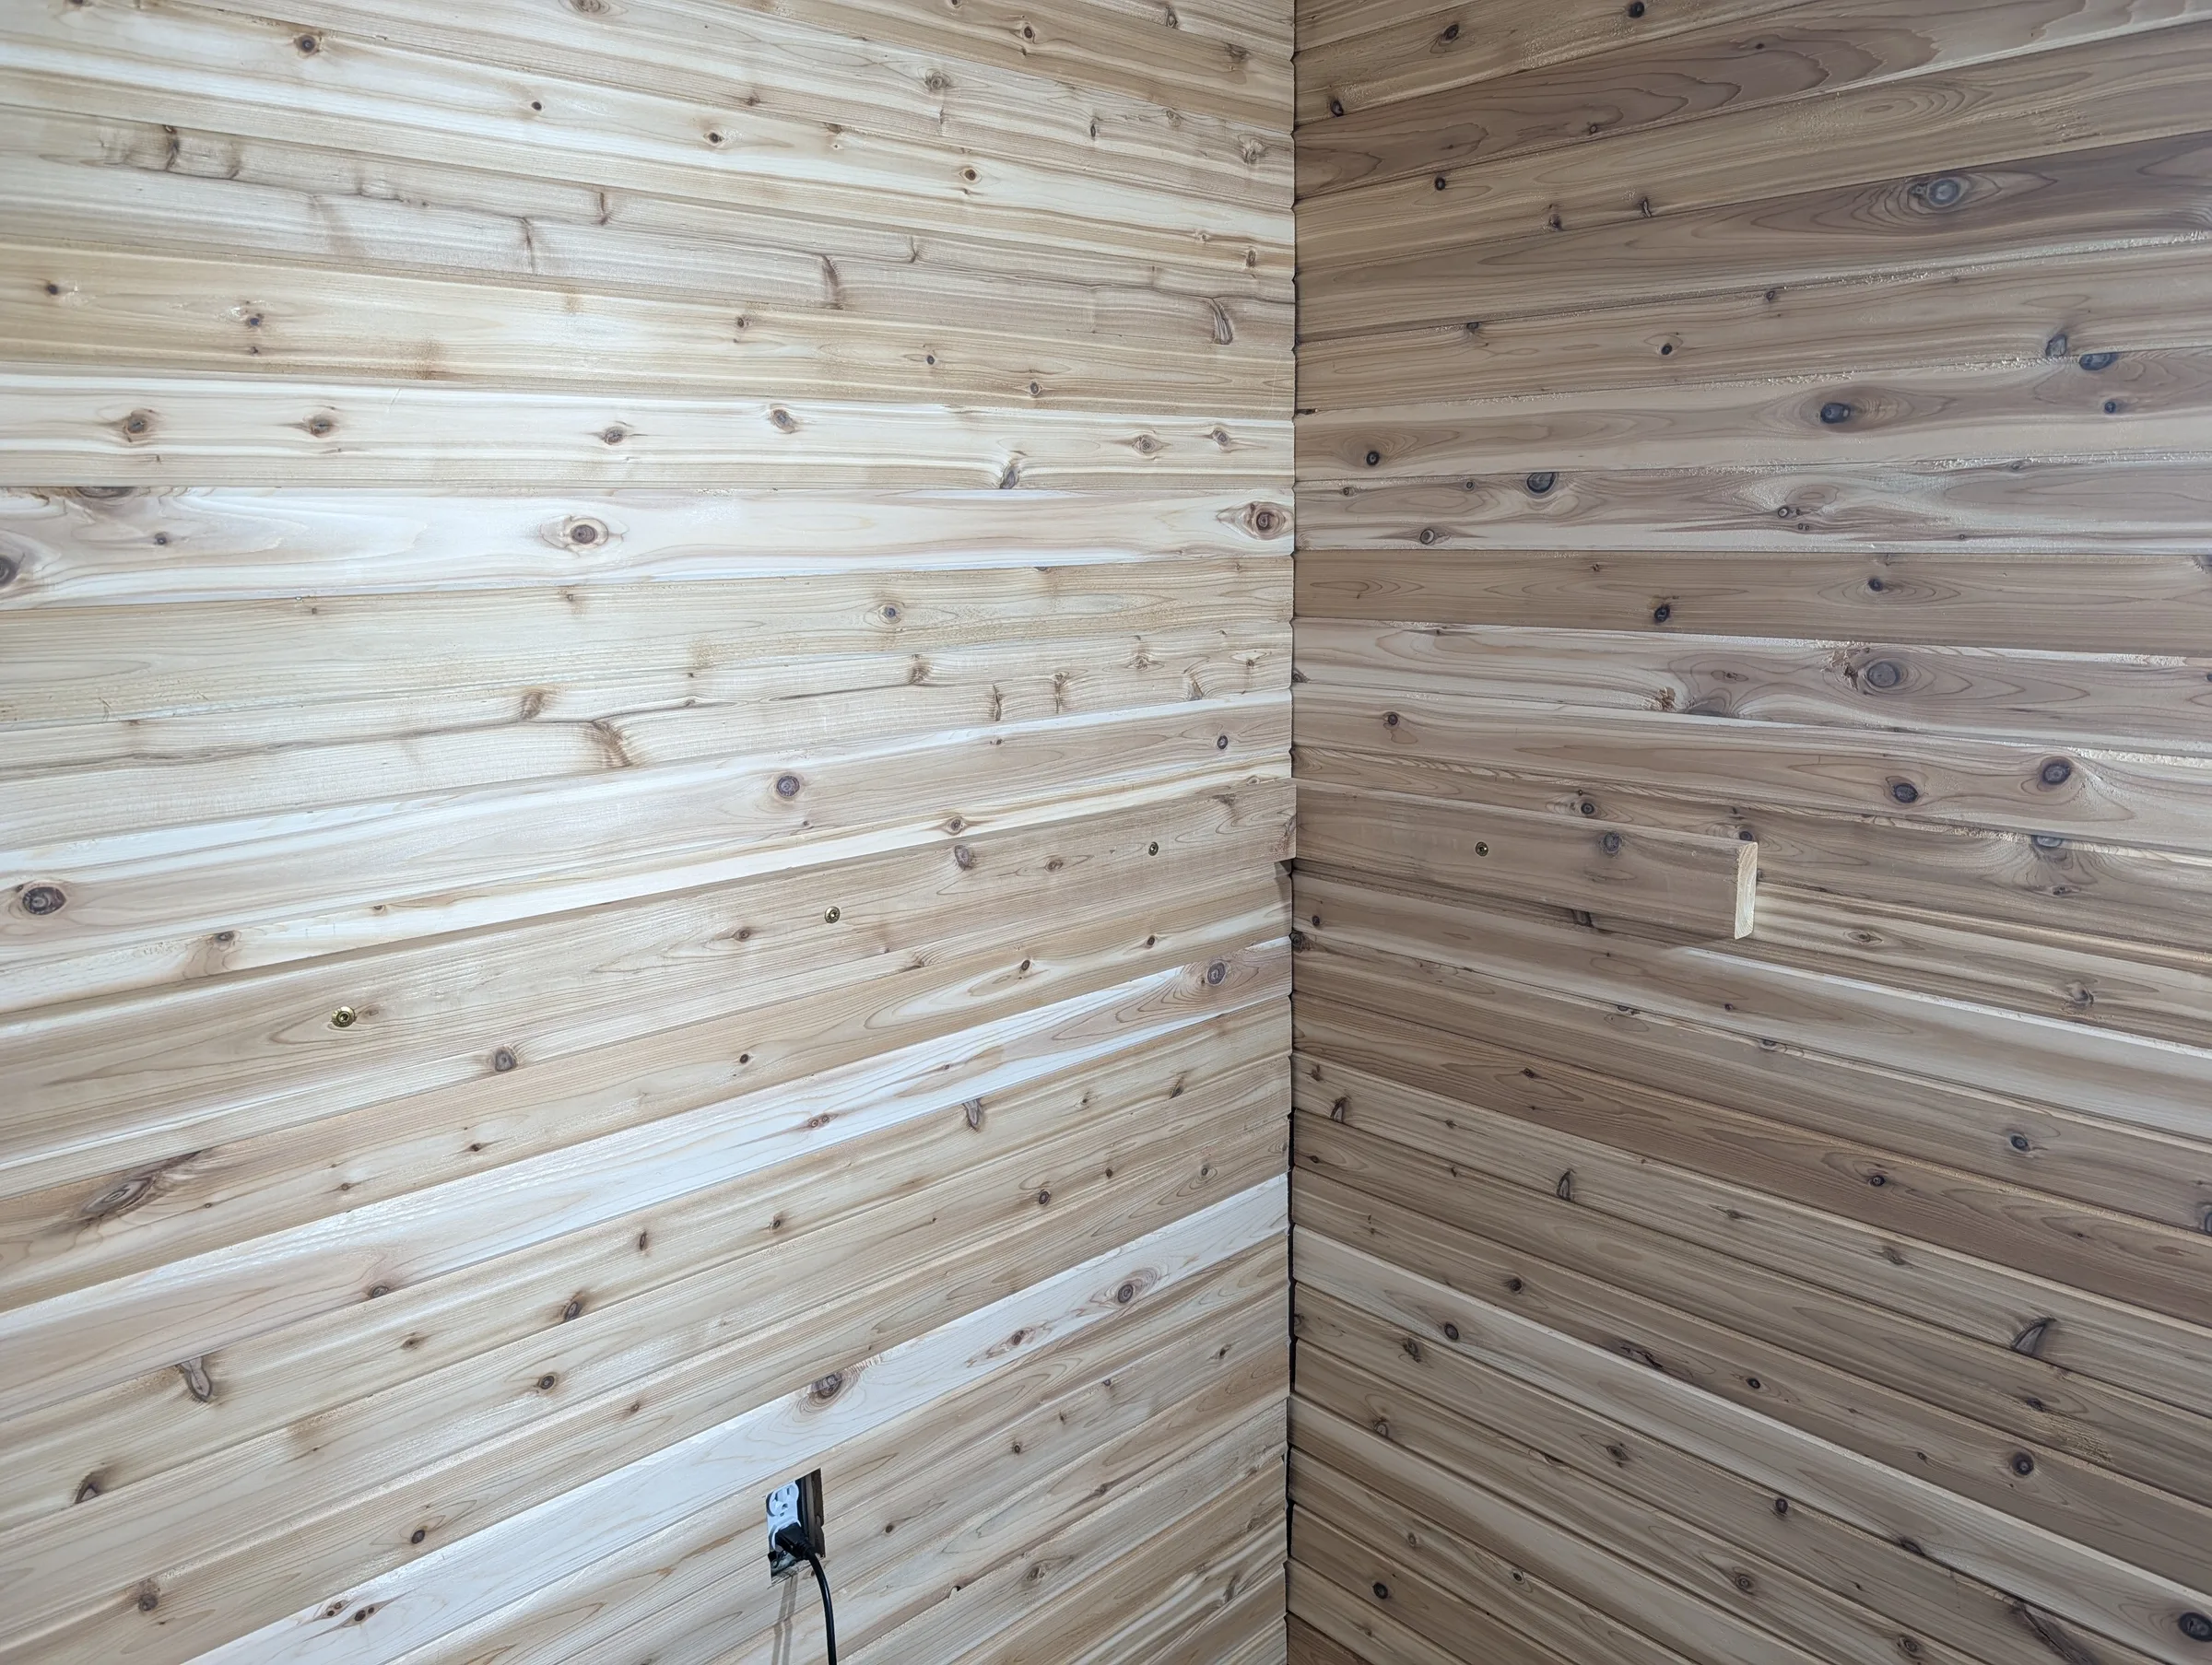
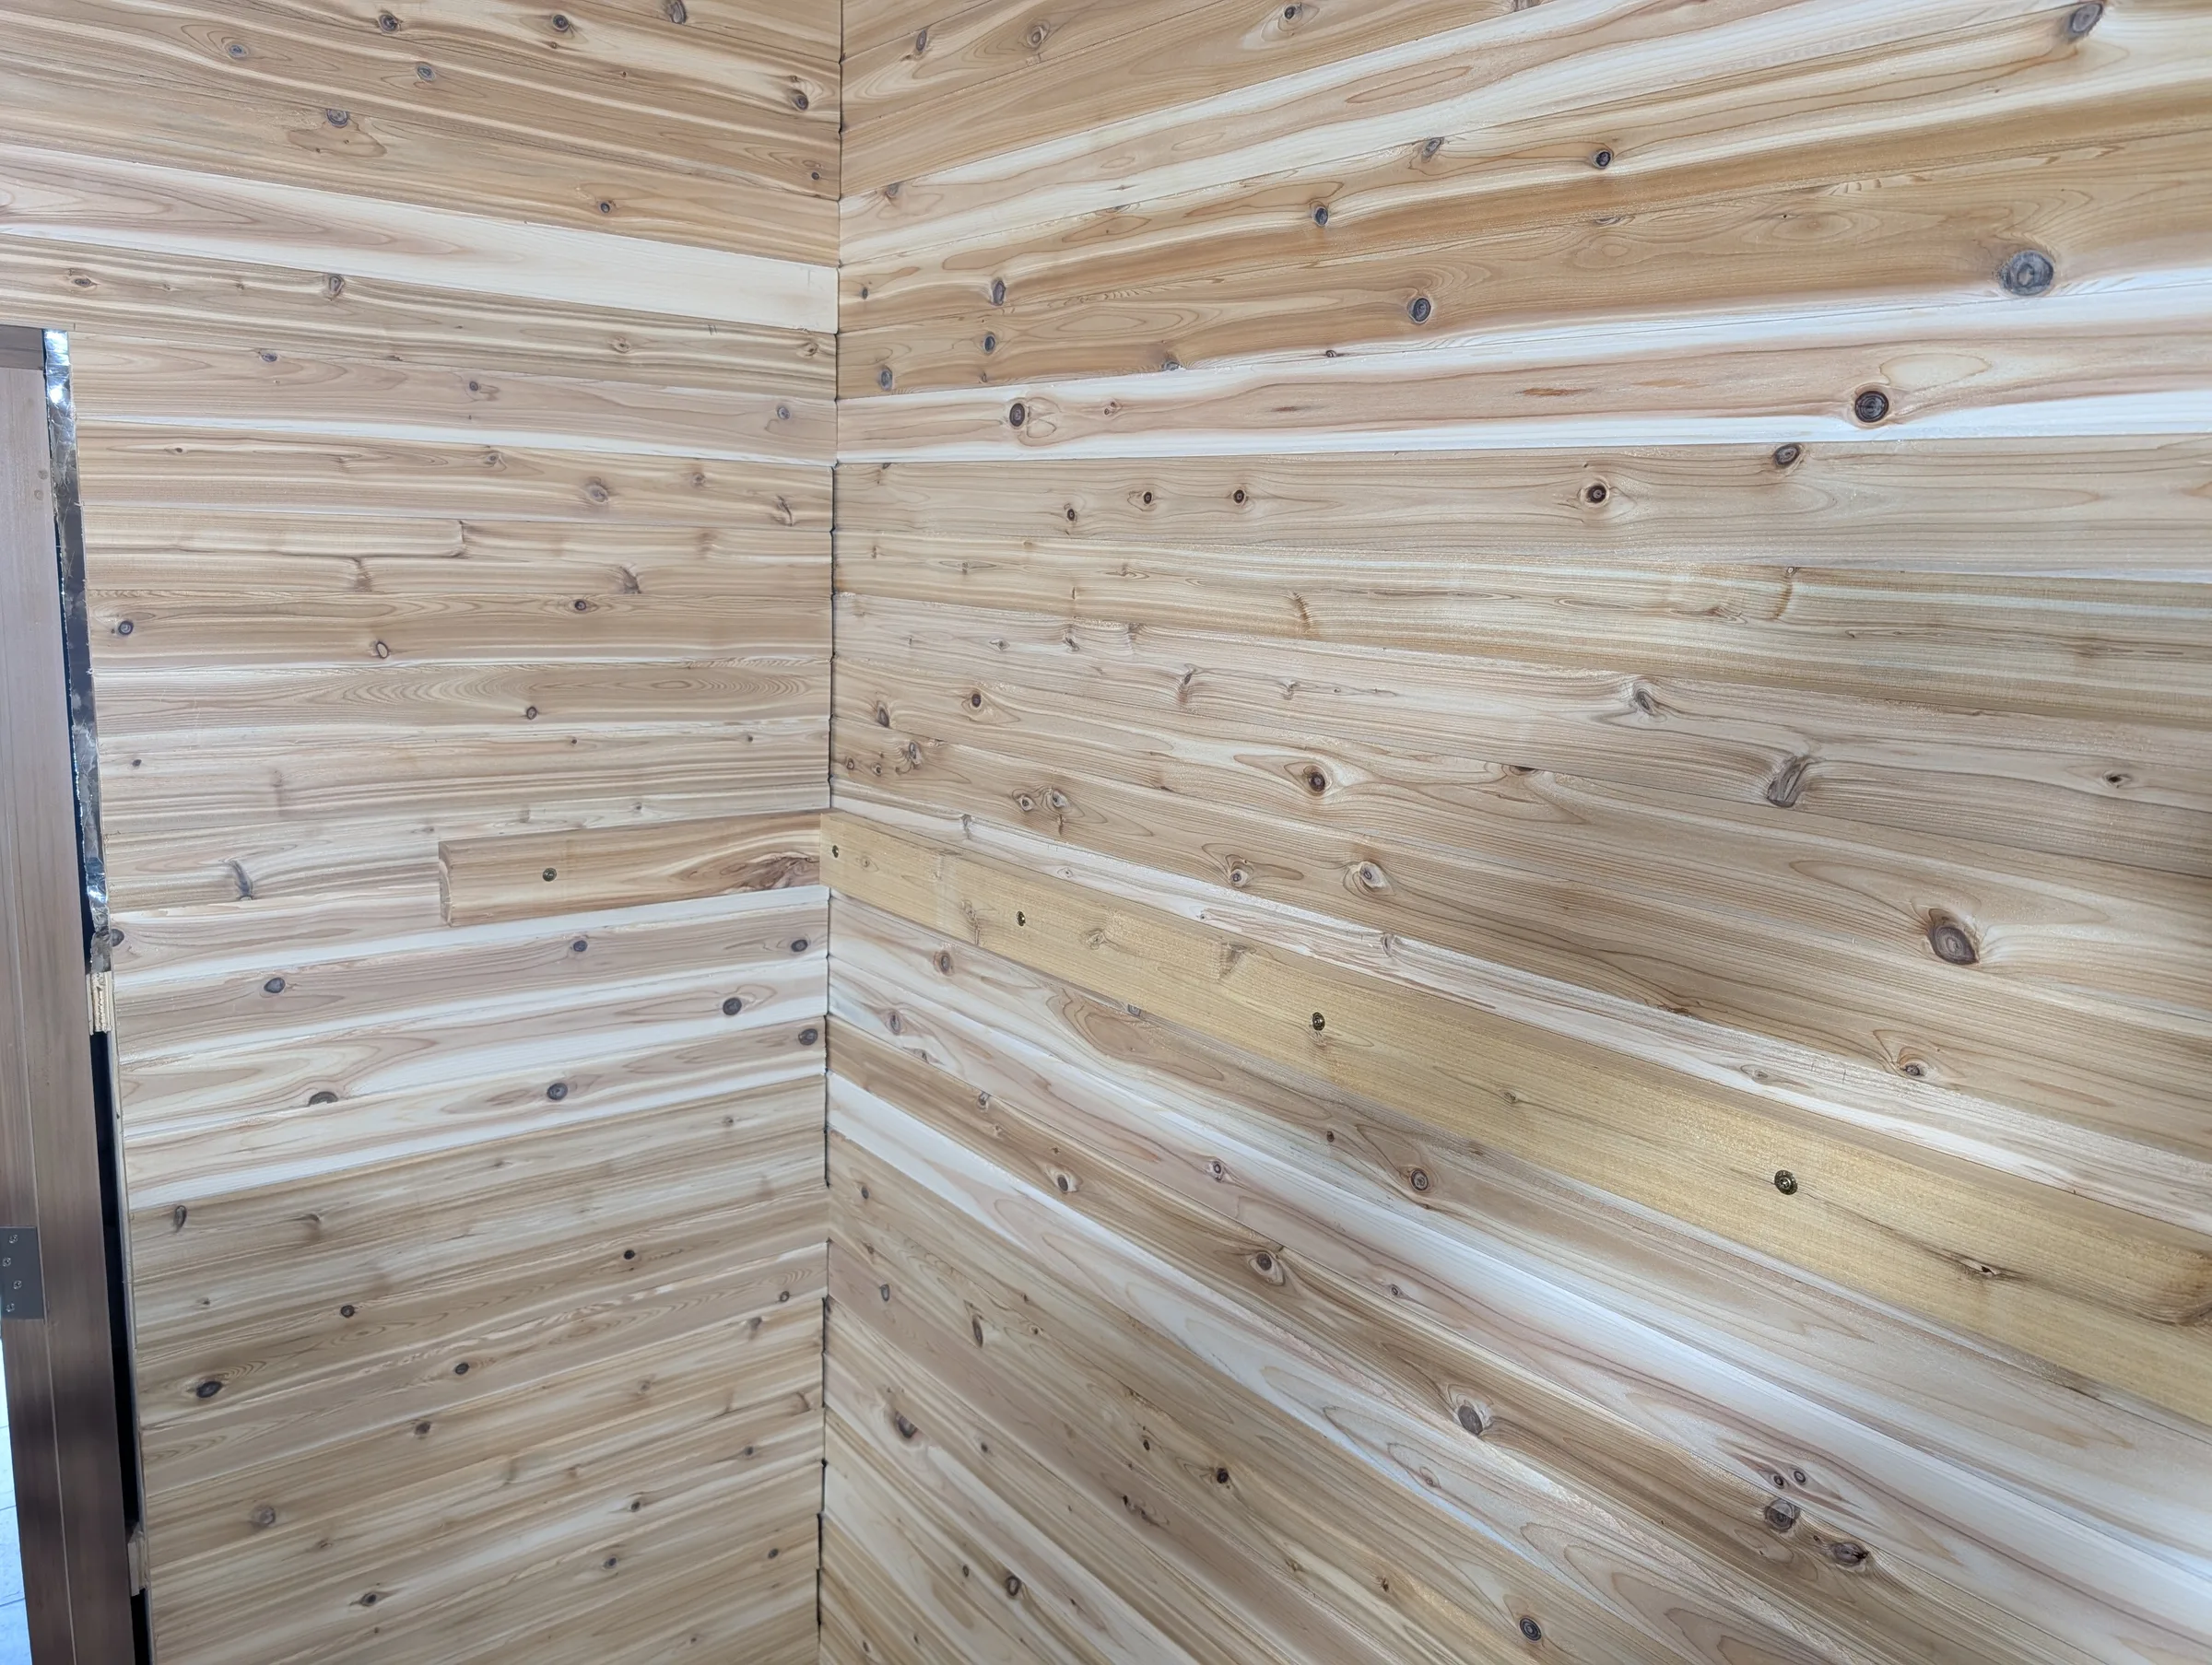
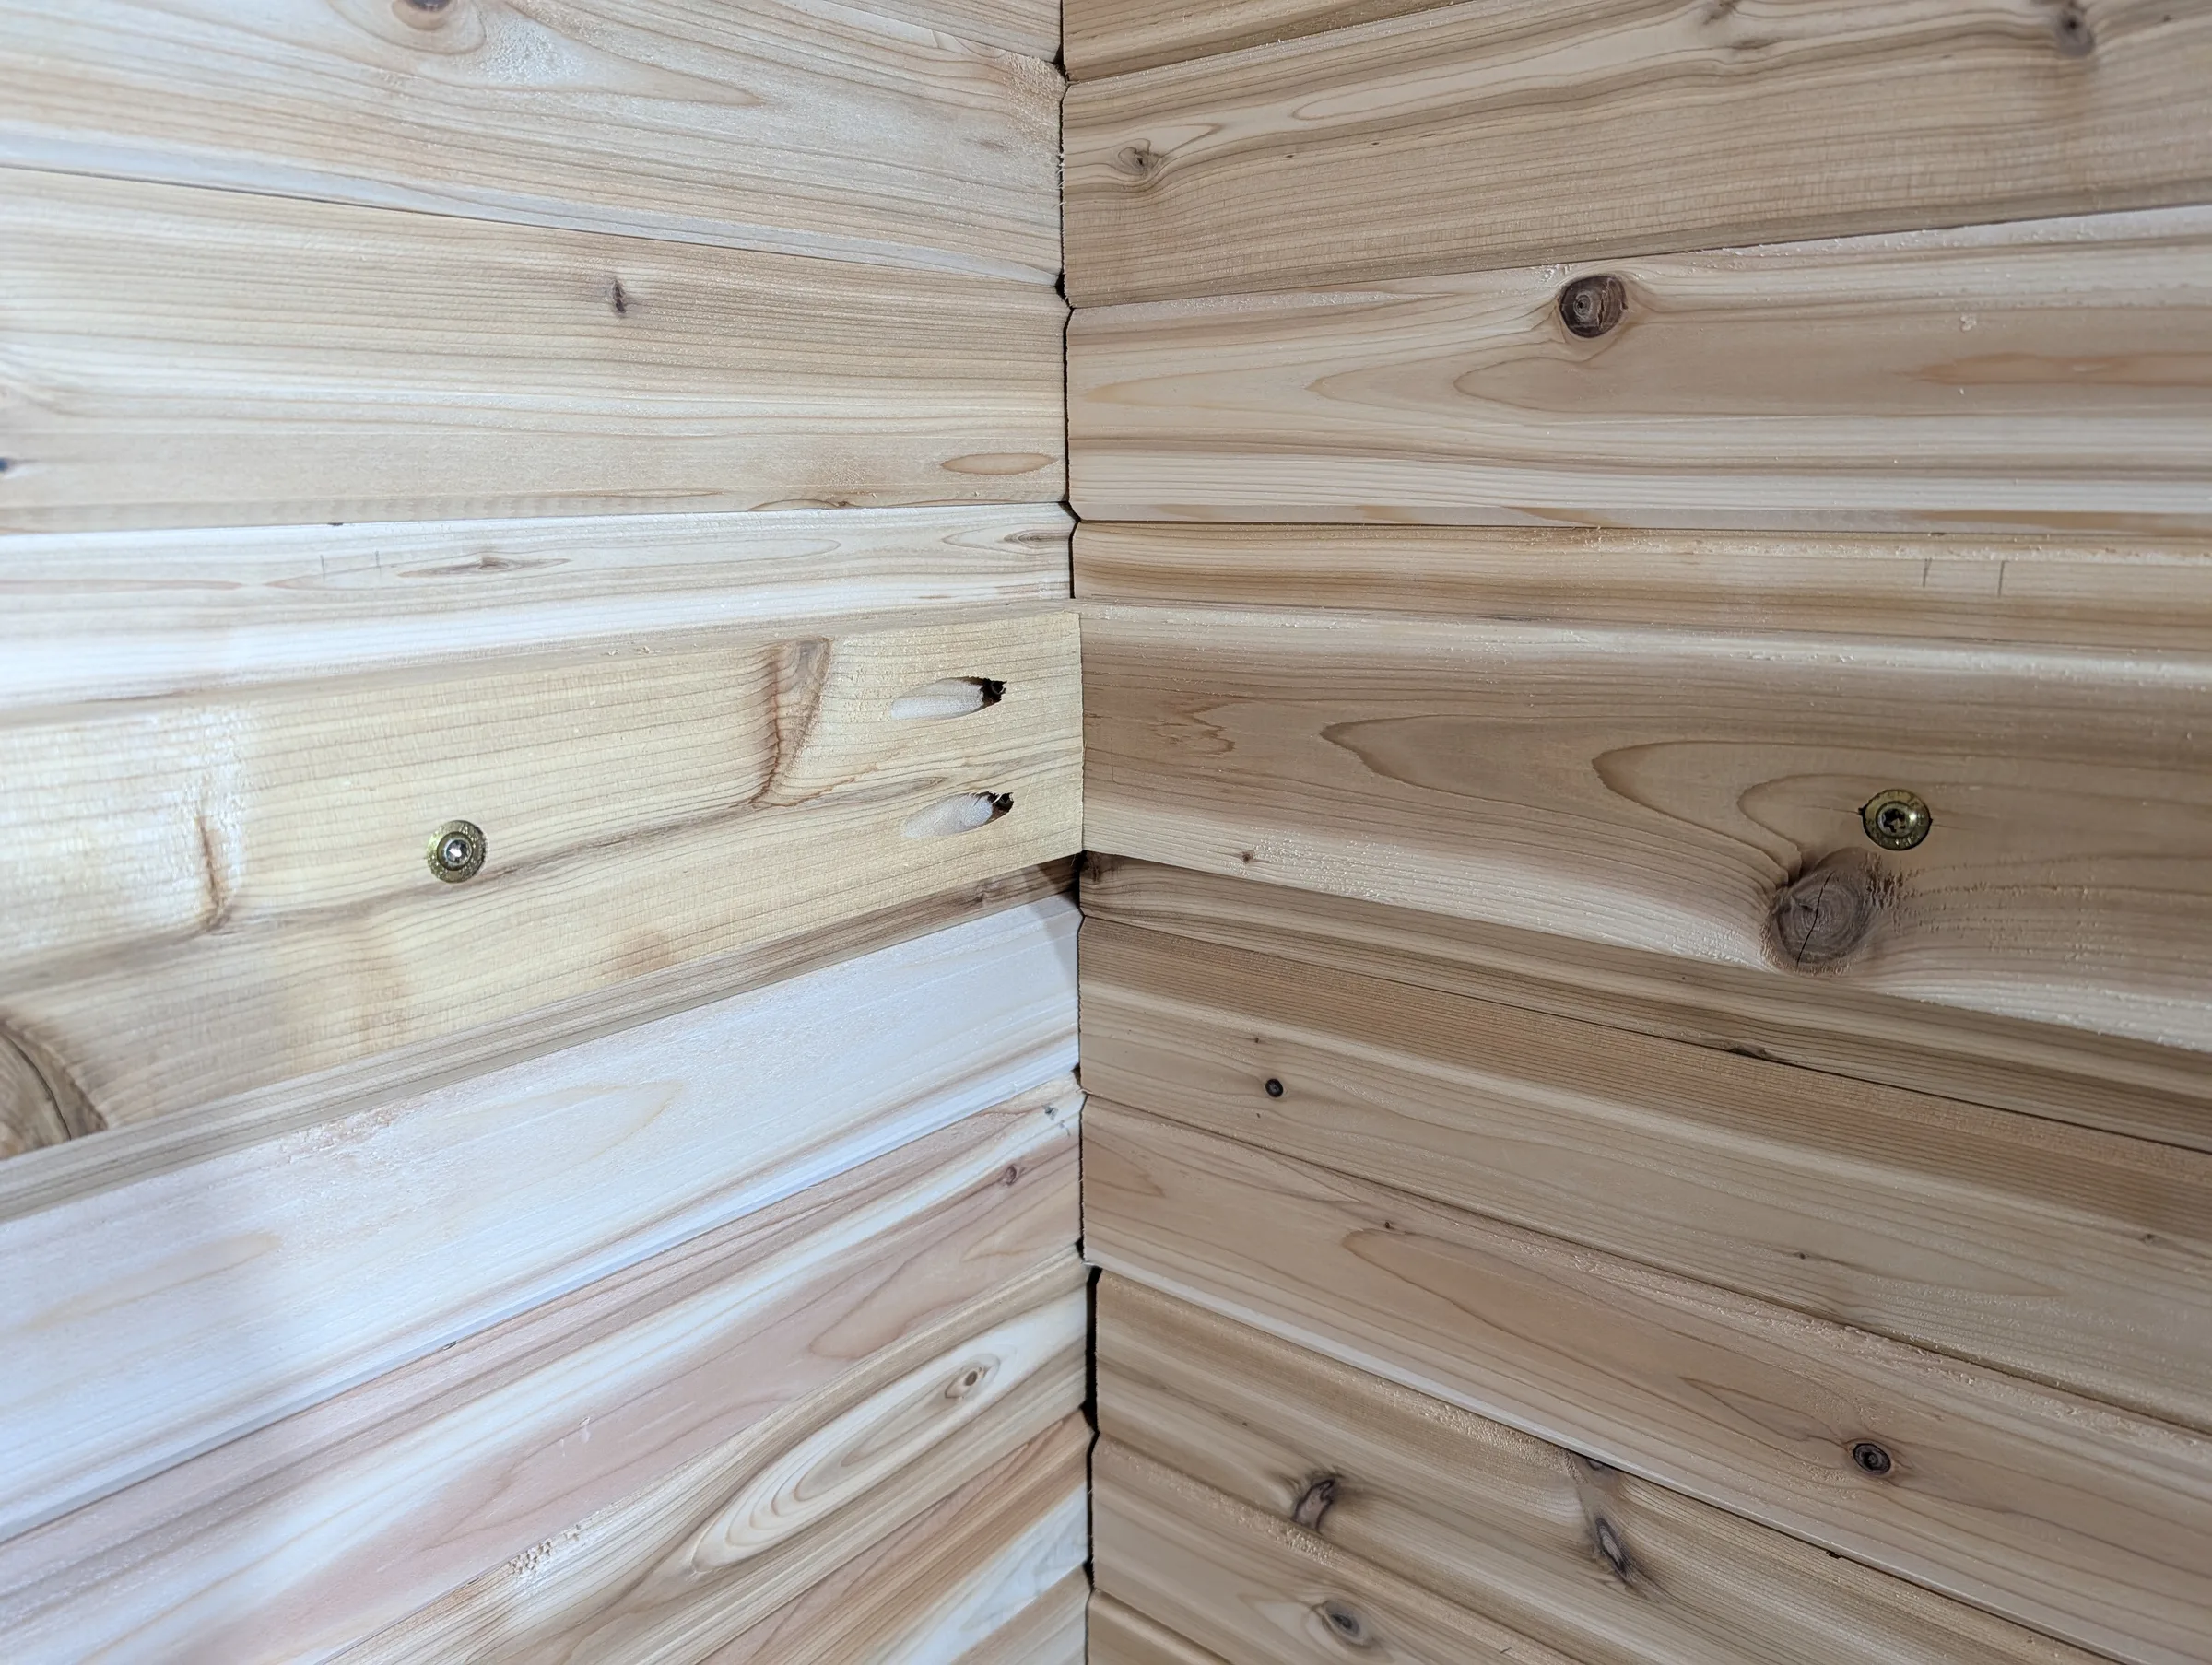
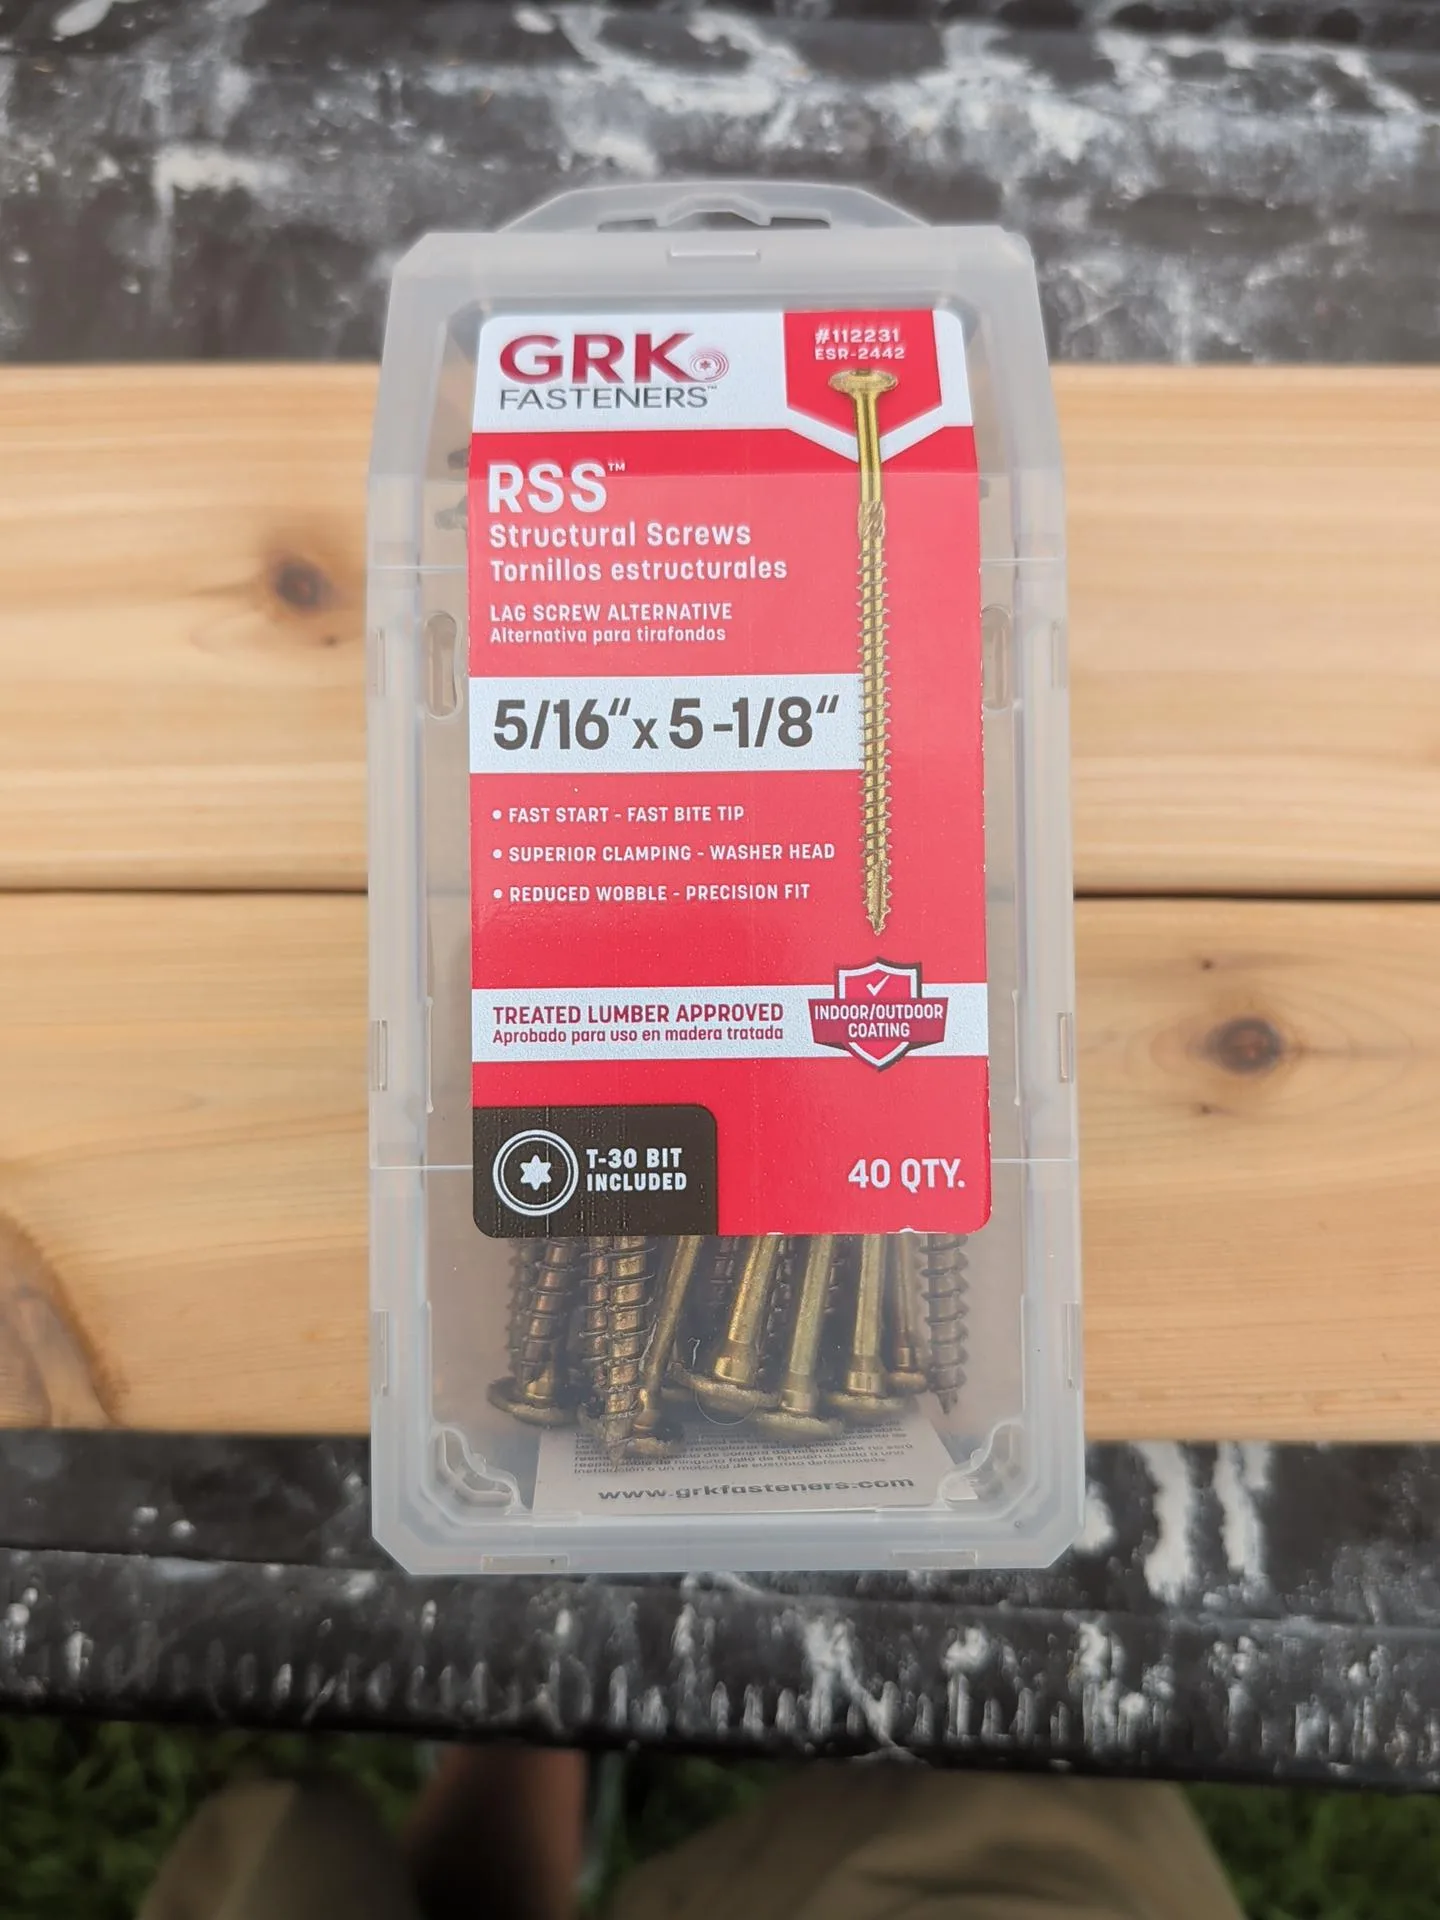
You can see I used the pocket holes to join from the ends as well as some super thick and strong RSS structural screws. I had to get 5" in length to get through the cleat itself, the cedar tongue and groove, the furring strips, and into the studs.
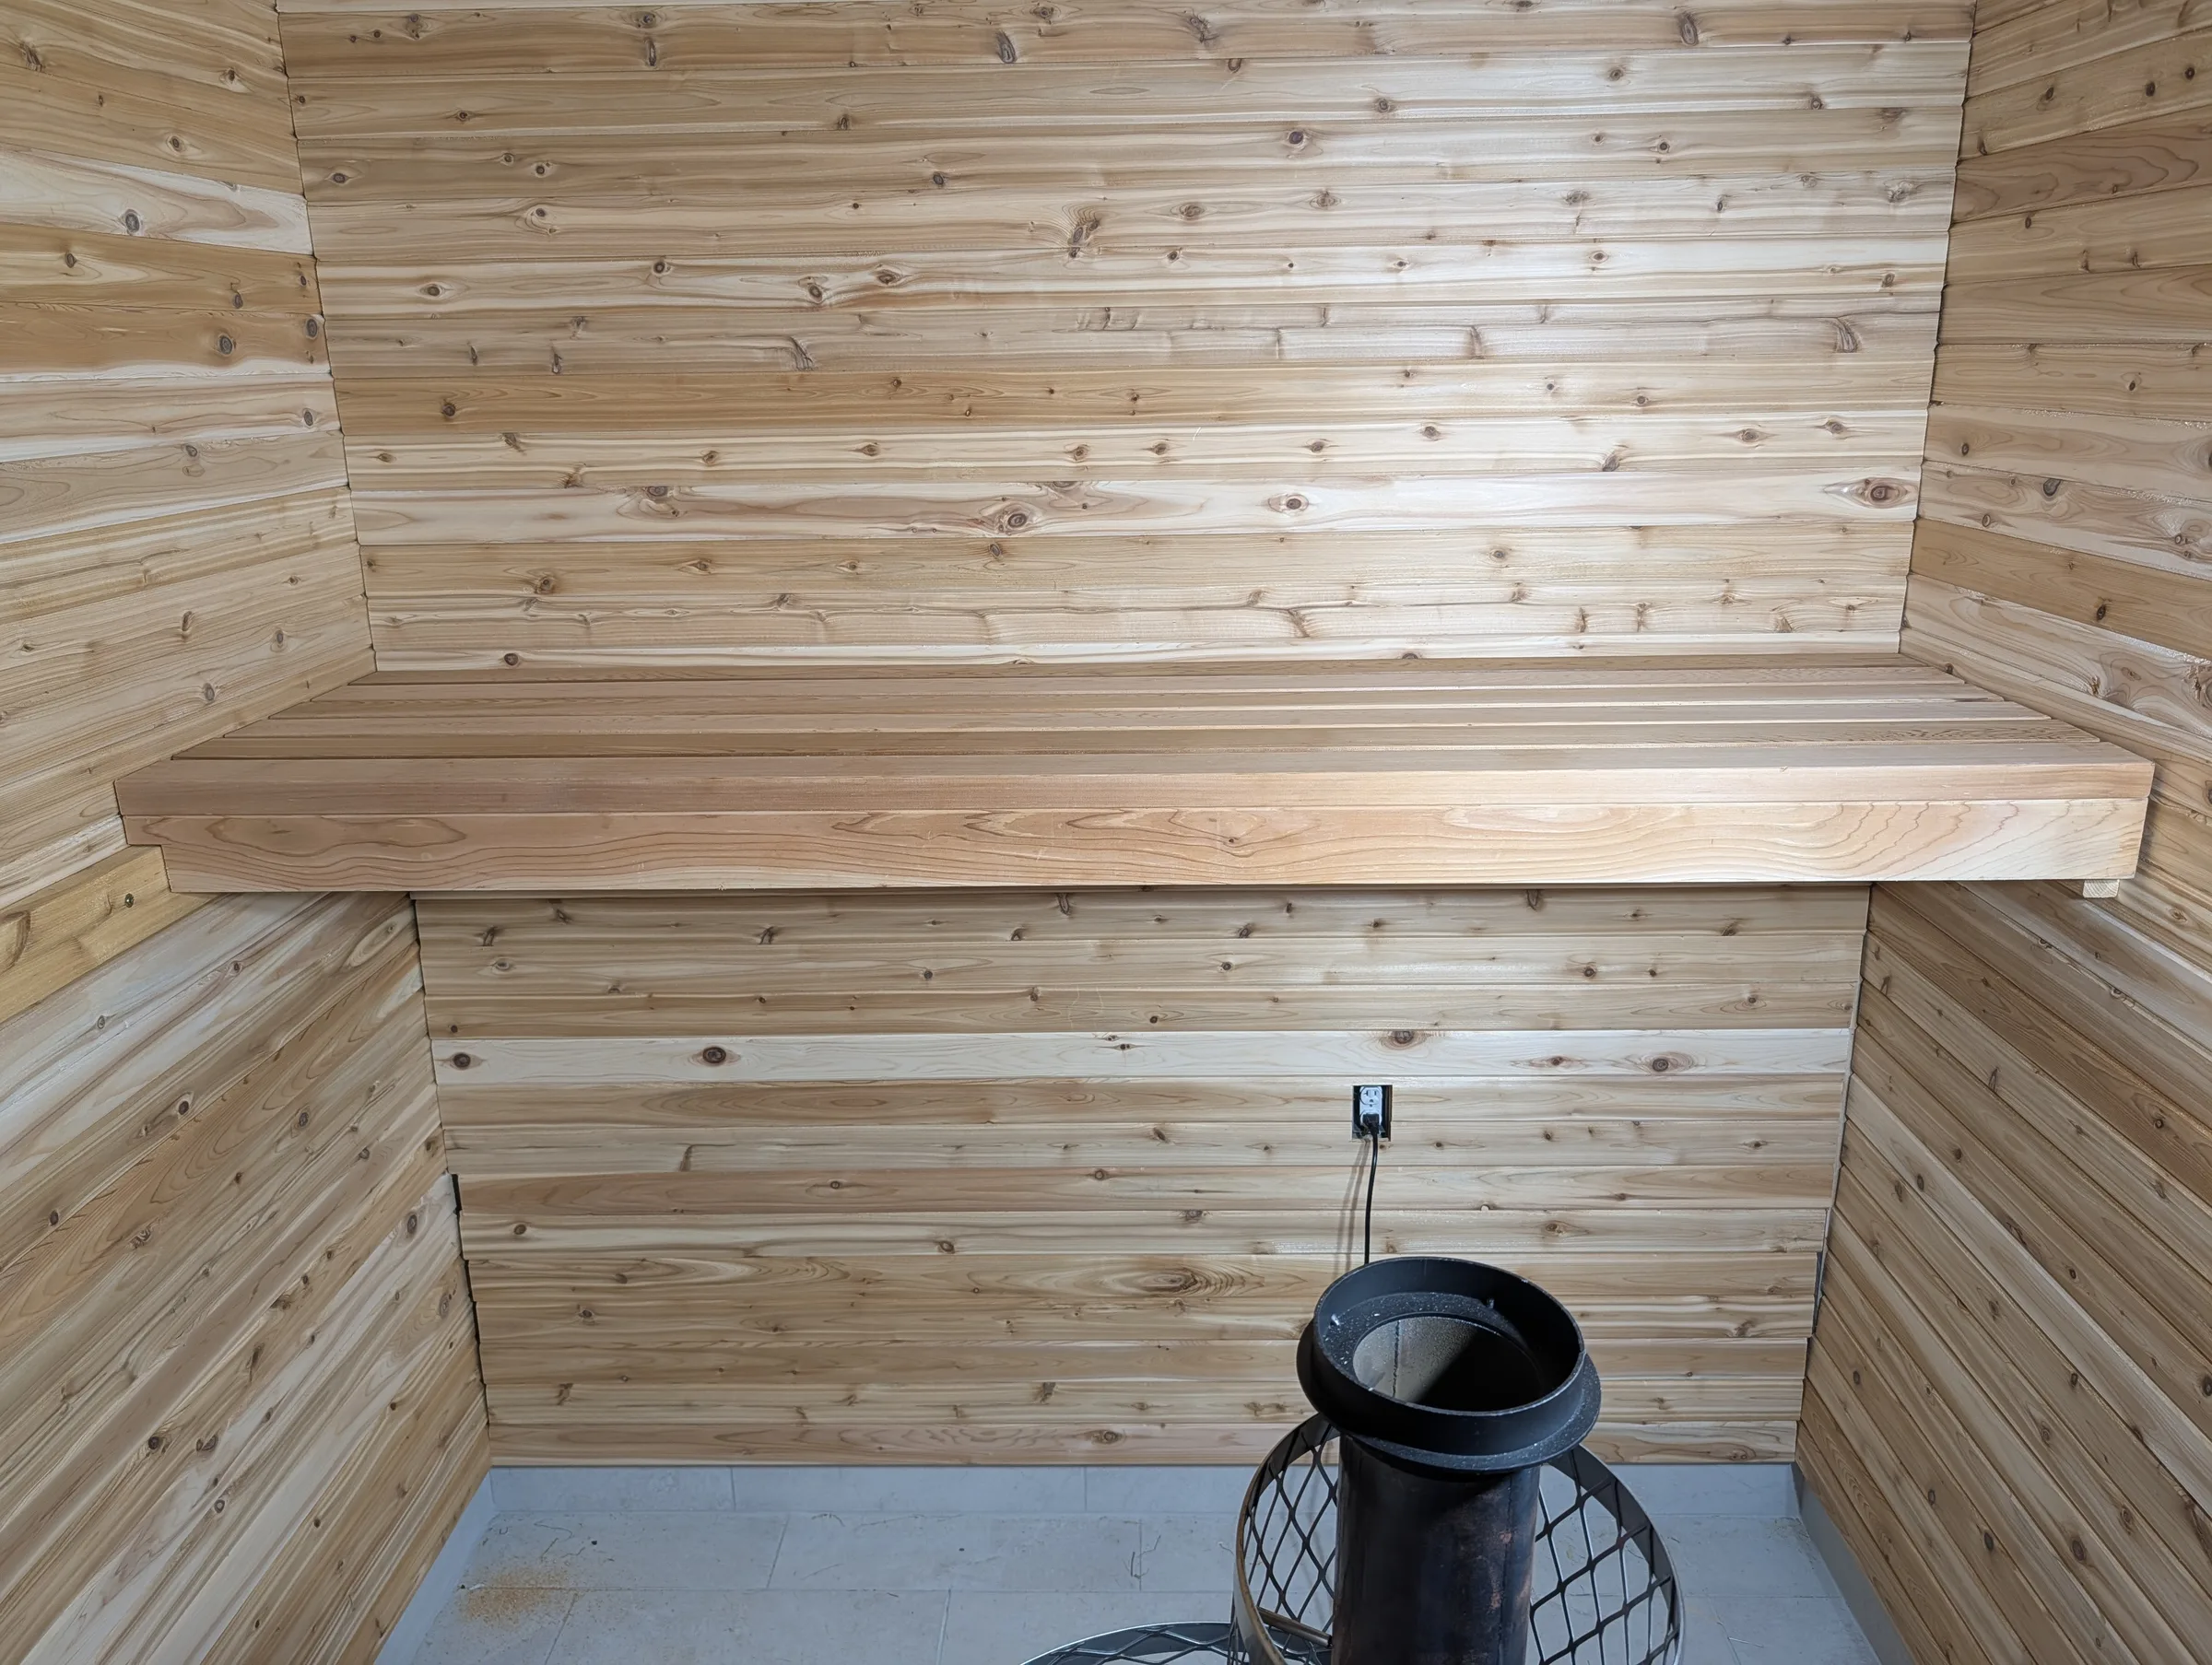
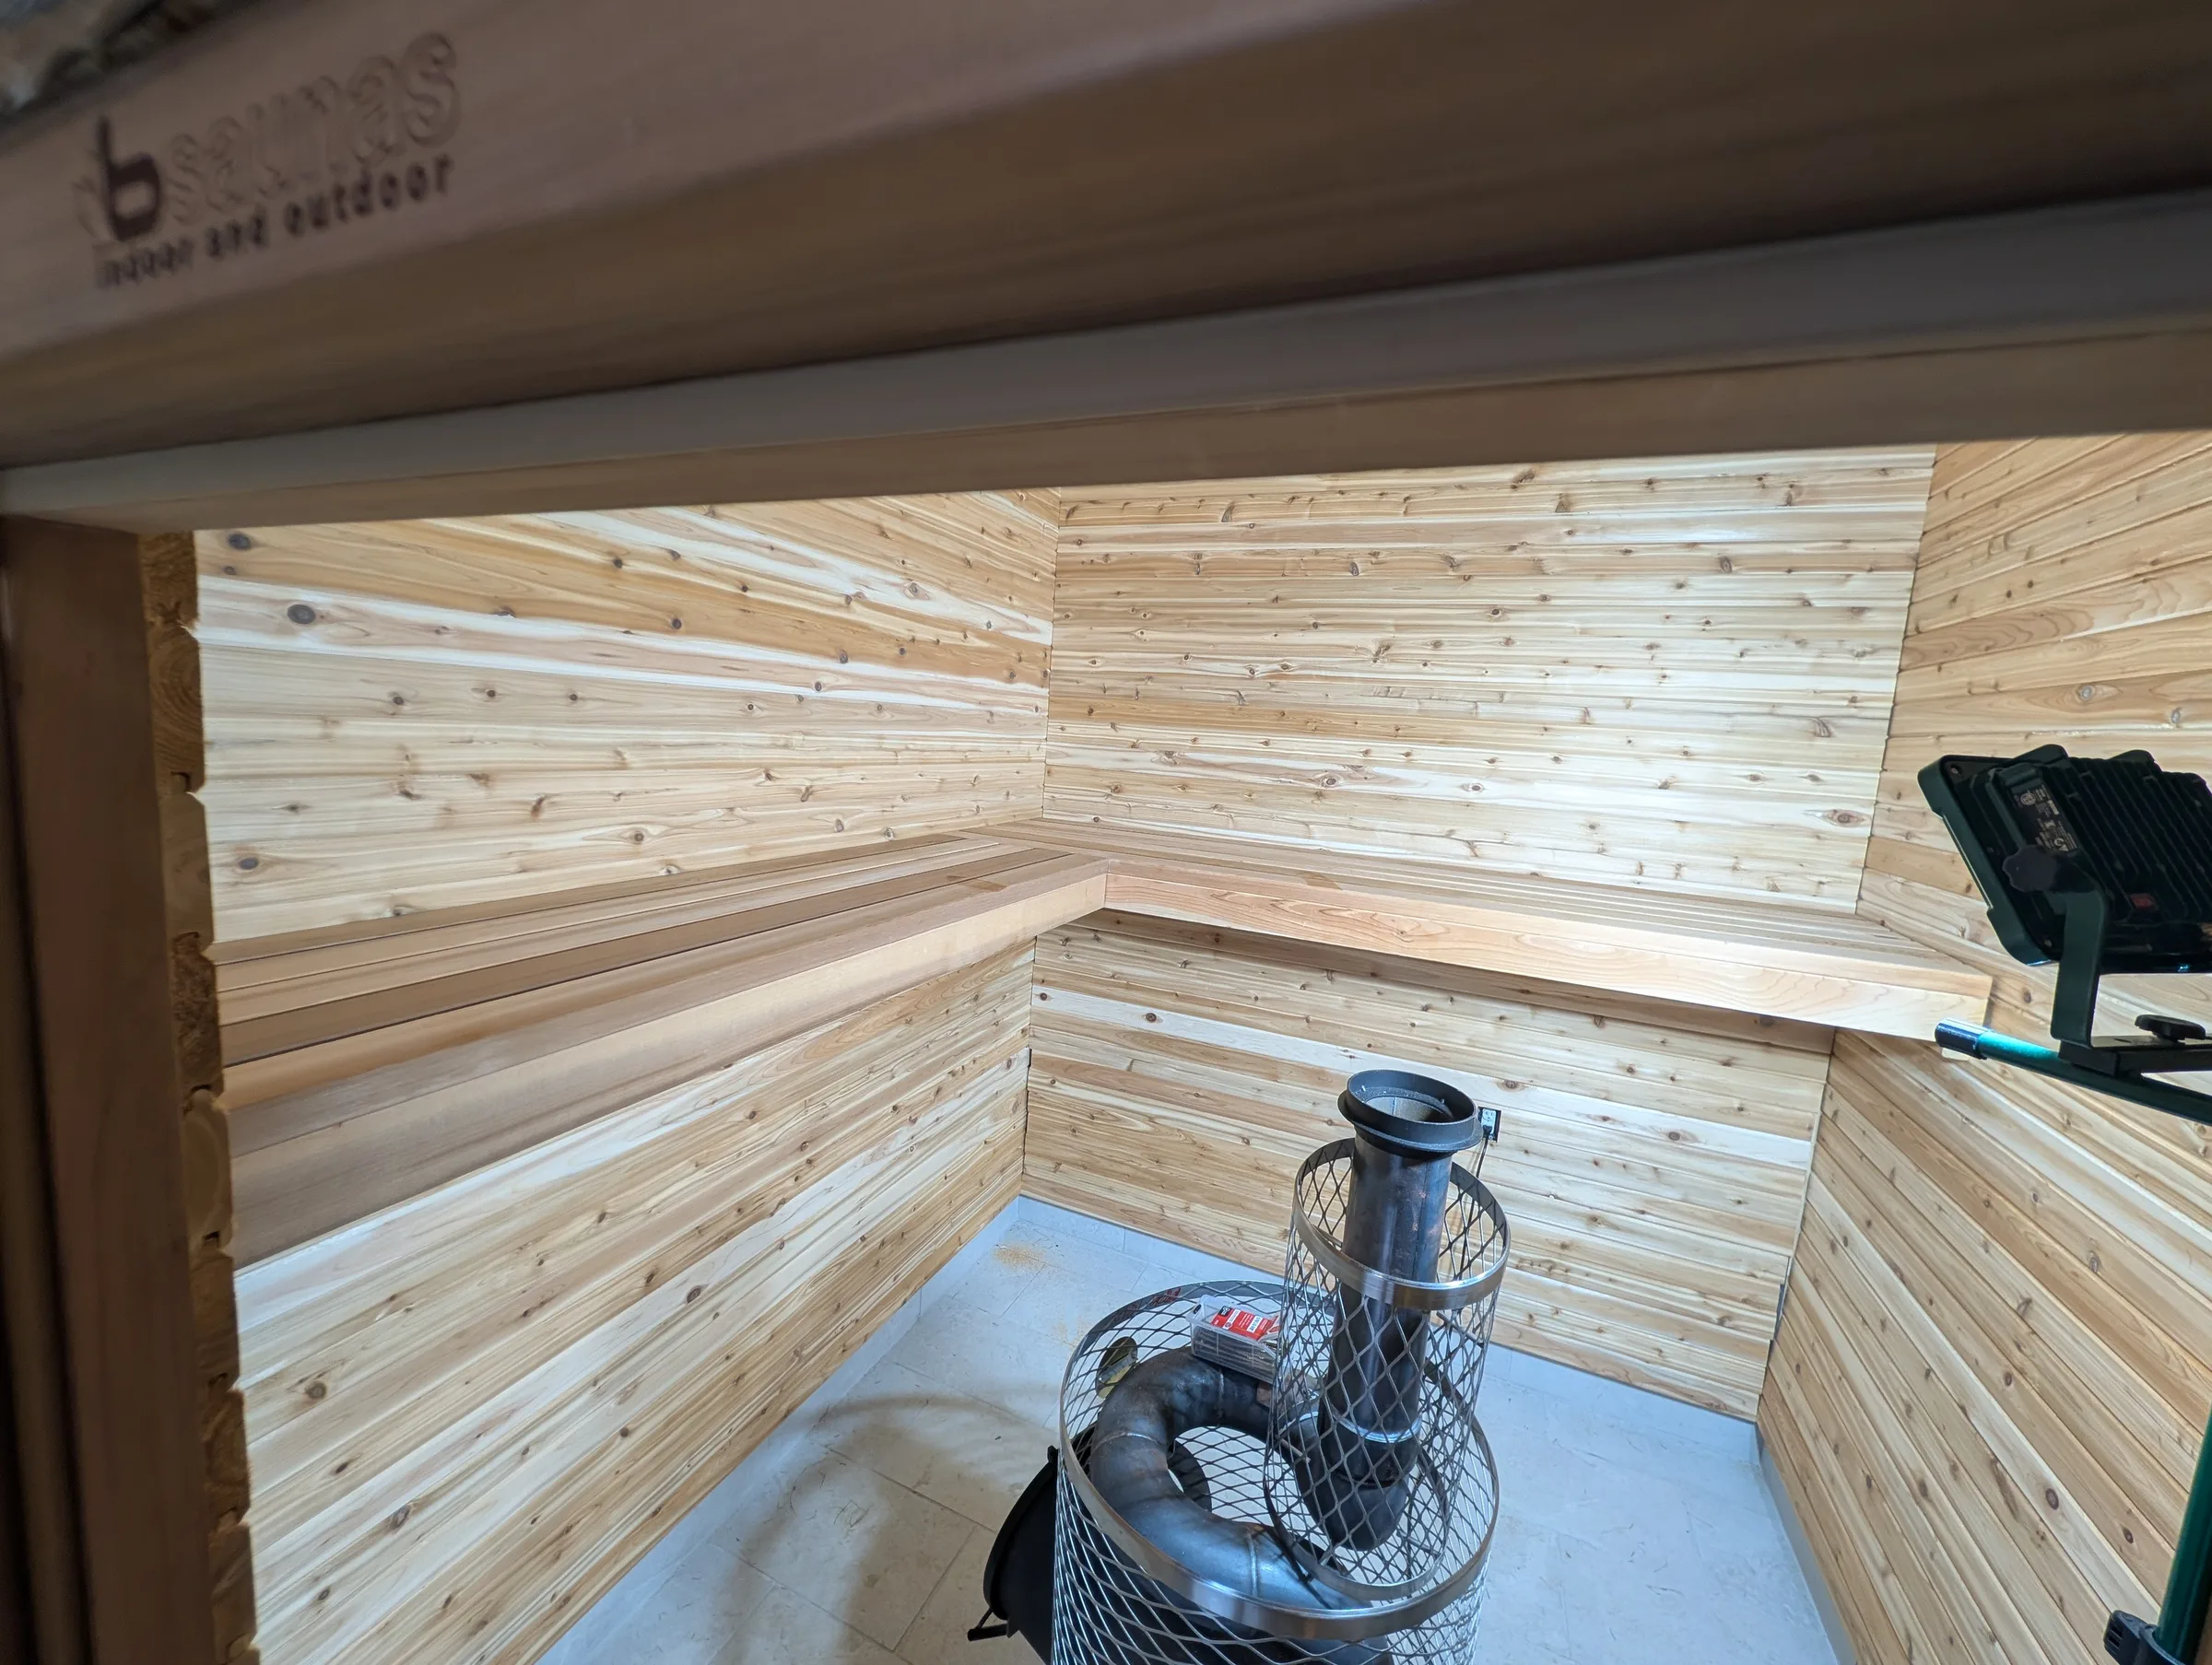
After the cleats were in place I added the back-top bench and the side-top bench. I connected them in the corner with stainless screws from the back-top bench's facia board into the end girth board on the side-top bench. At this point I could get up there and sit/walk around with very little deflection even though the inner corner was fully unsupported.
Remaining Benches
Once the back row was done, it was time to repeat for the back-middle and the side-top. Remember, the left side only has a top and middle bench, no bottom bench due to space constraints.
On the middle benches, I wasn't able to use a continuous wall cleat. I could only use cleats on the ends. It also happened that within the width of the benches I could only hit a single stud. I ended up extending the cleats to hit a second stud with RSS screws to help with the load. Also, the back-middle bench went the full width despite not all of it being useful because it will go underneath the side-top bench.
I once again tied the benches together in the corner and they essentially shared 3 wall cleats with two stud connections each. I could sit/walk on these benches safely, but I did feel a bit of deflection.
I moved on to install the back-bottom bench using the same extended-cleat design as before.
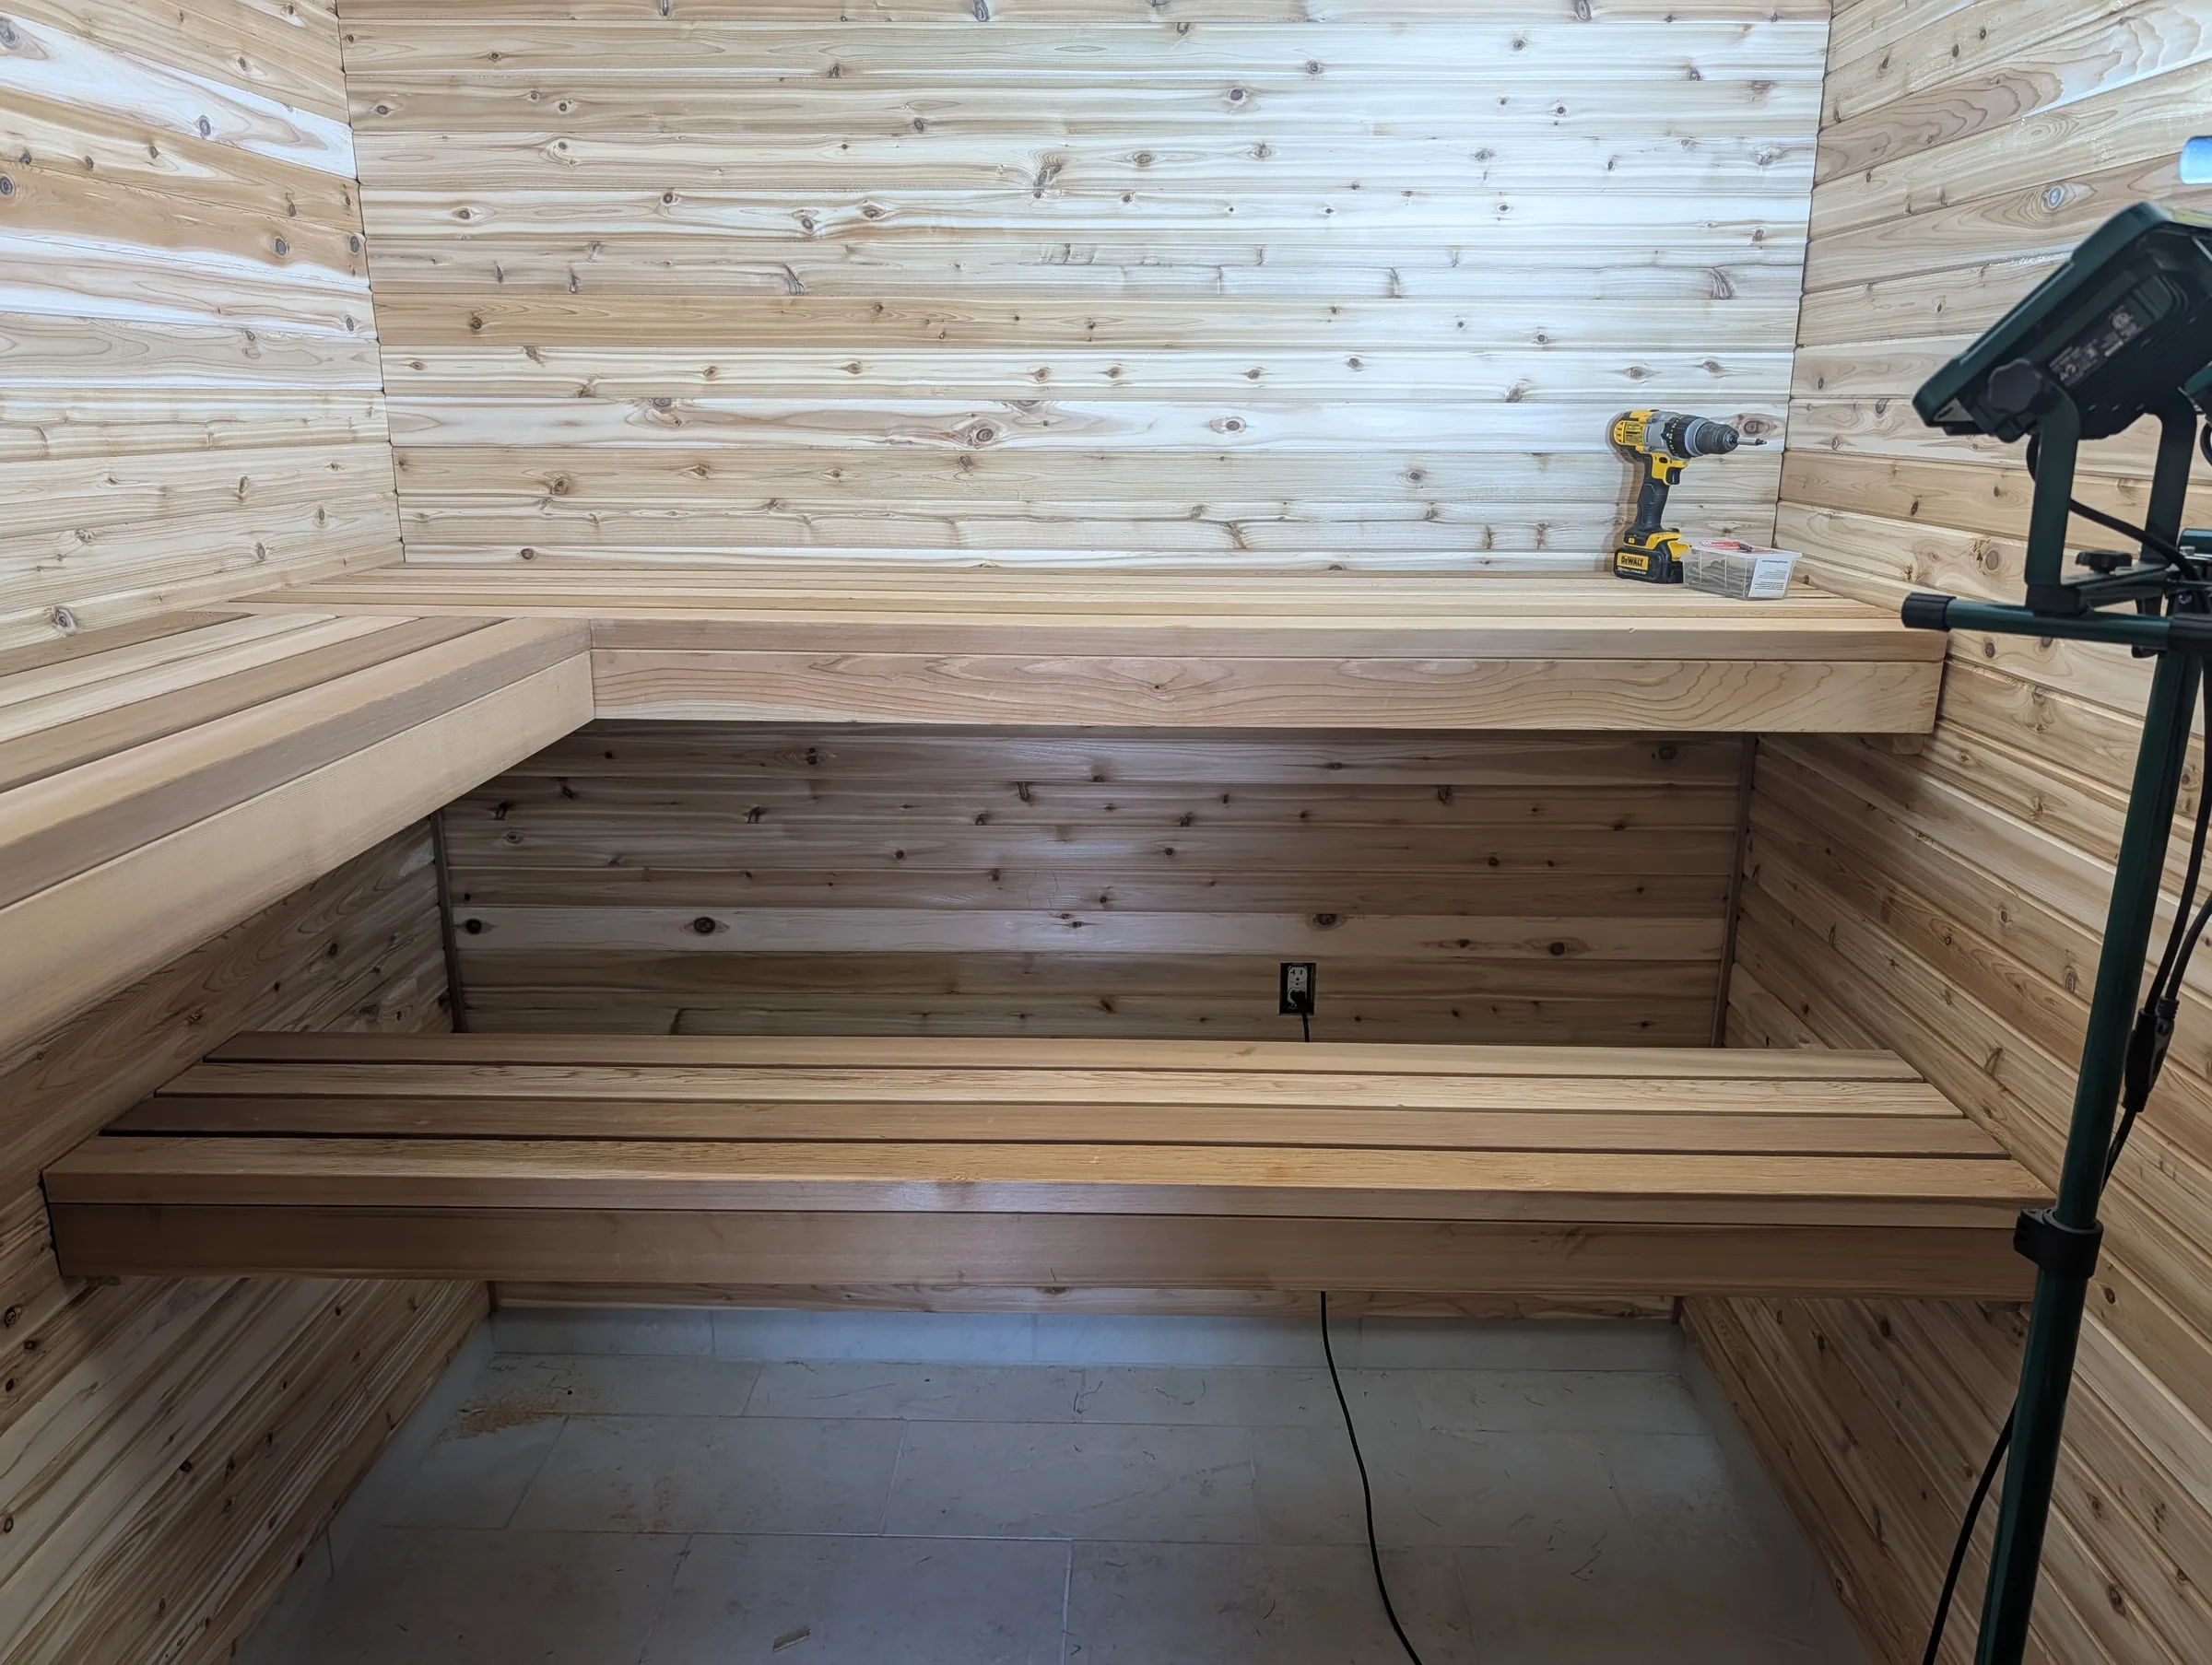
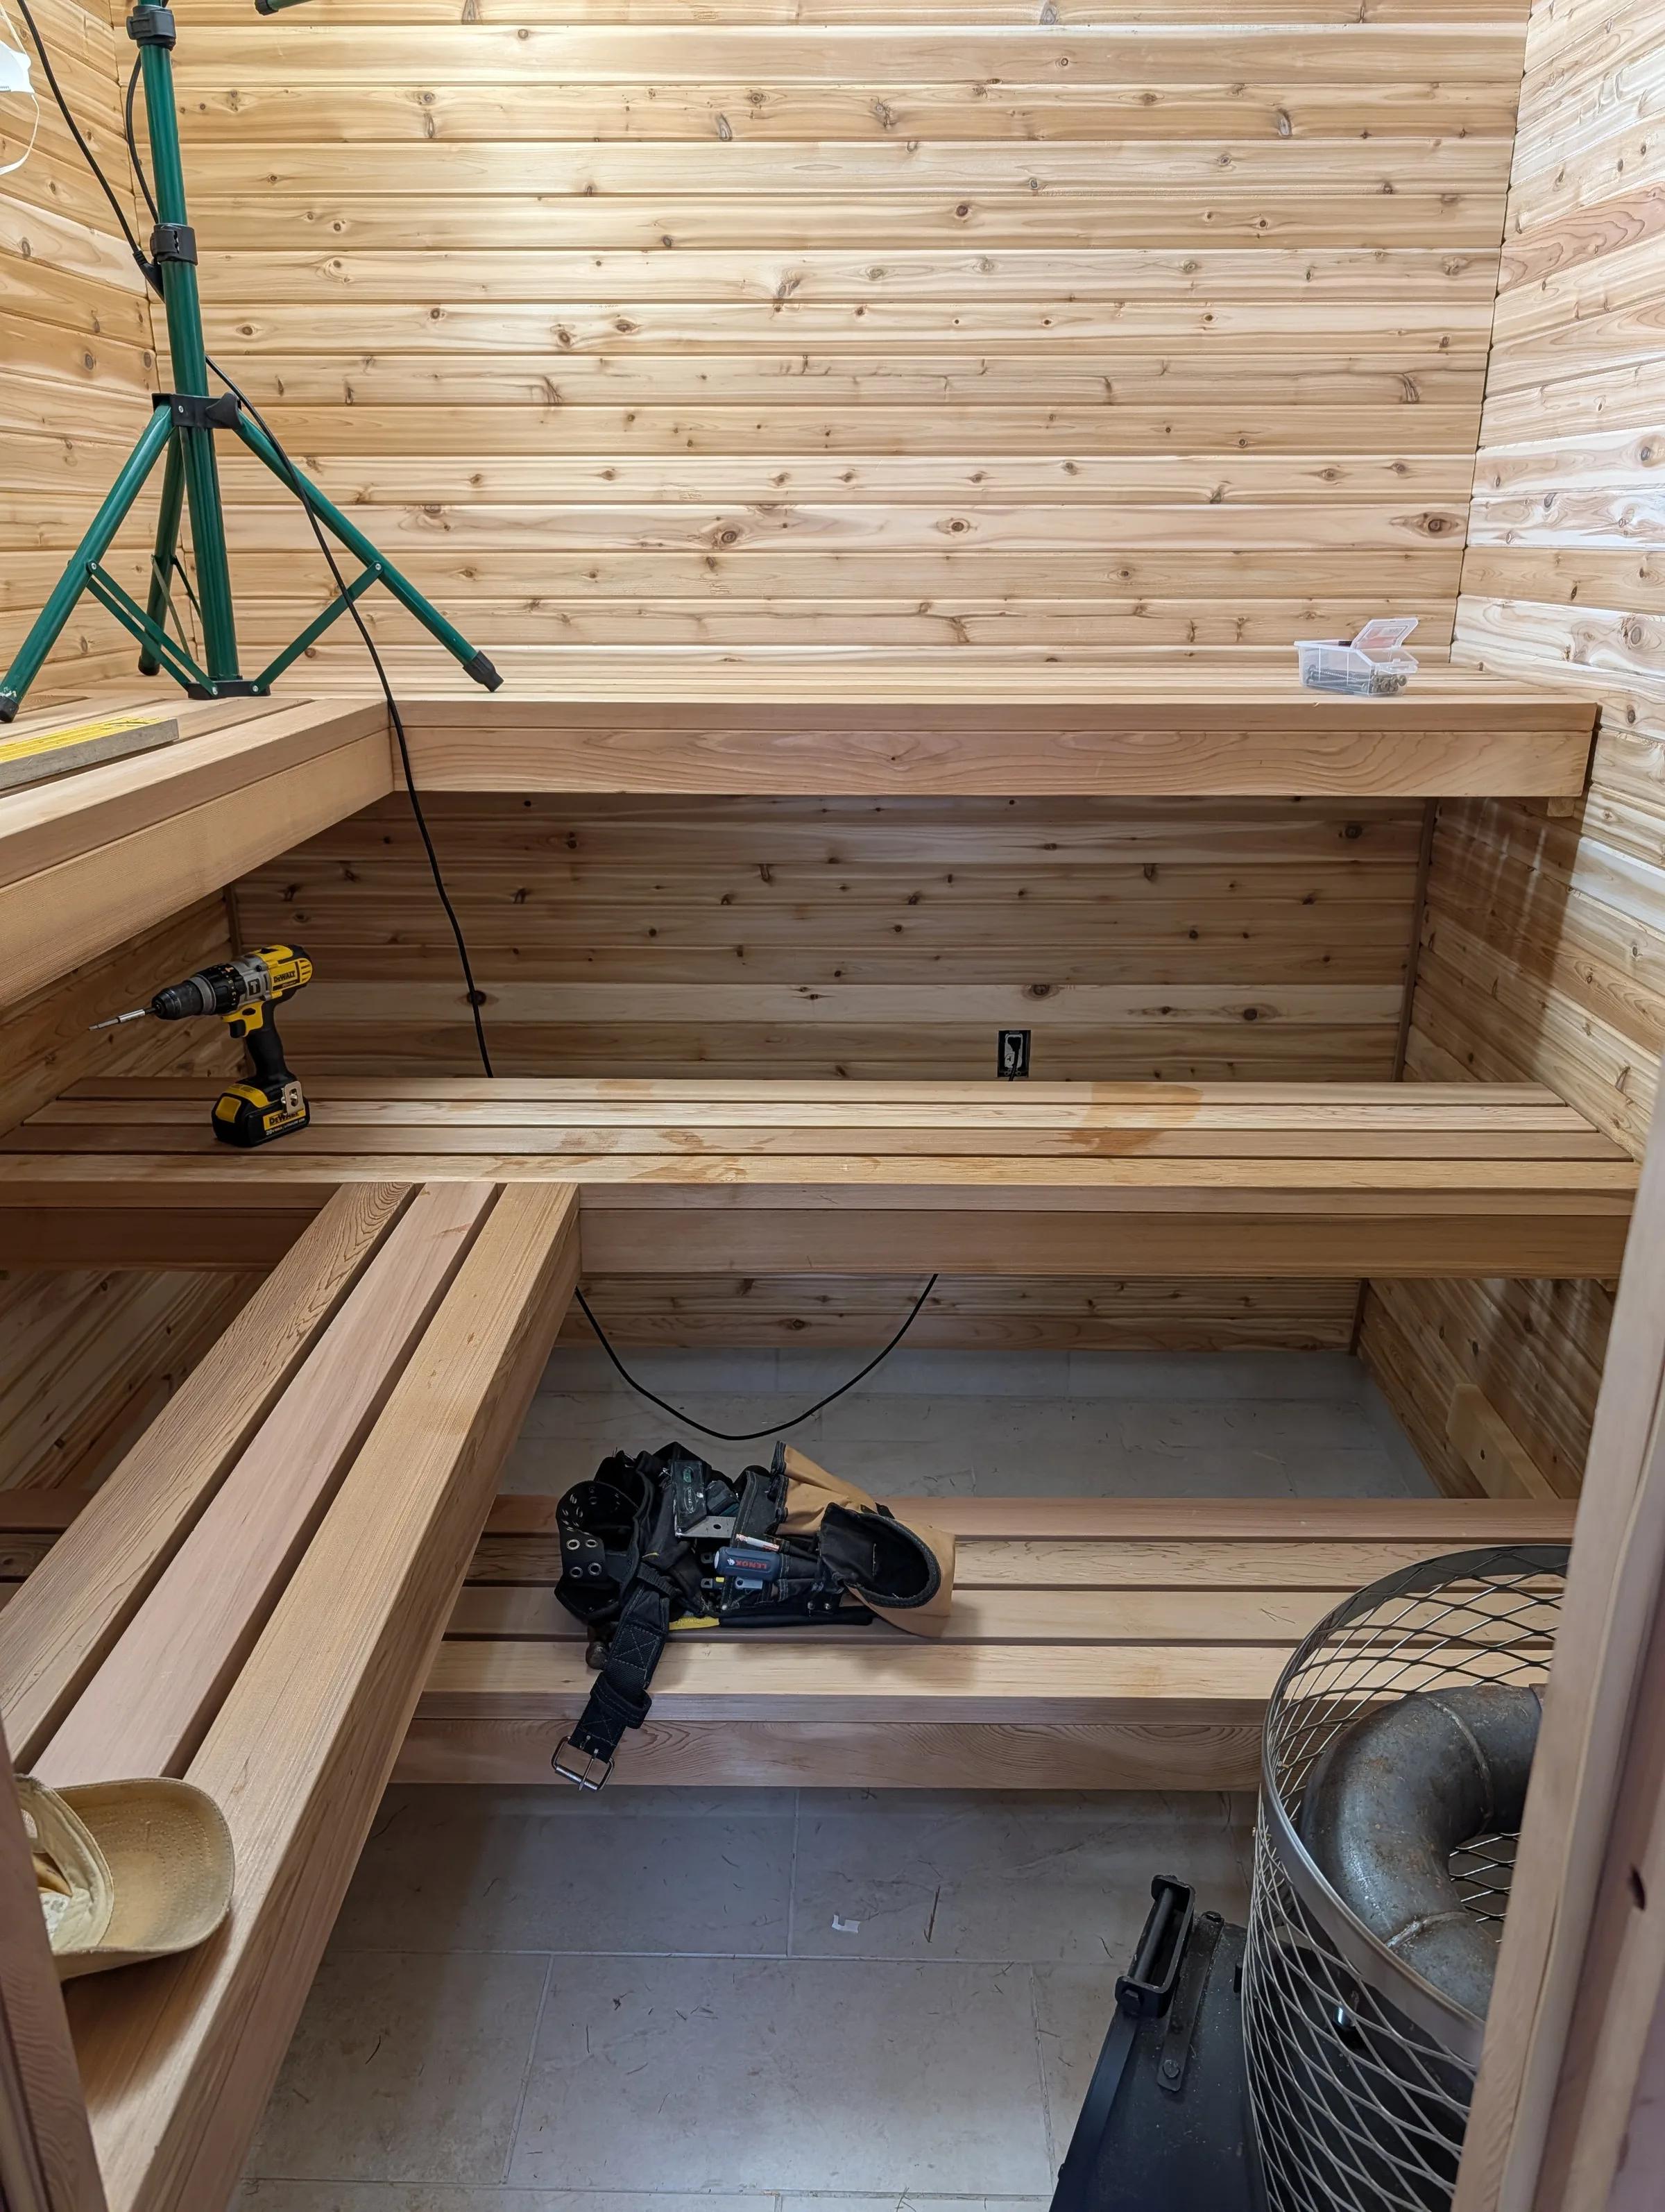
Once all the benches were in I added some structural supports. These supports were to add additional rigidity to the structure as well as bring in some floor supports in addition to the wall cleats.
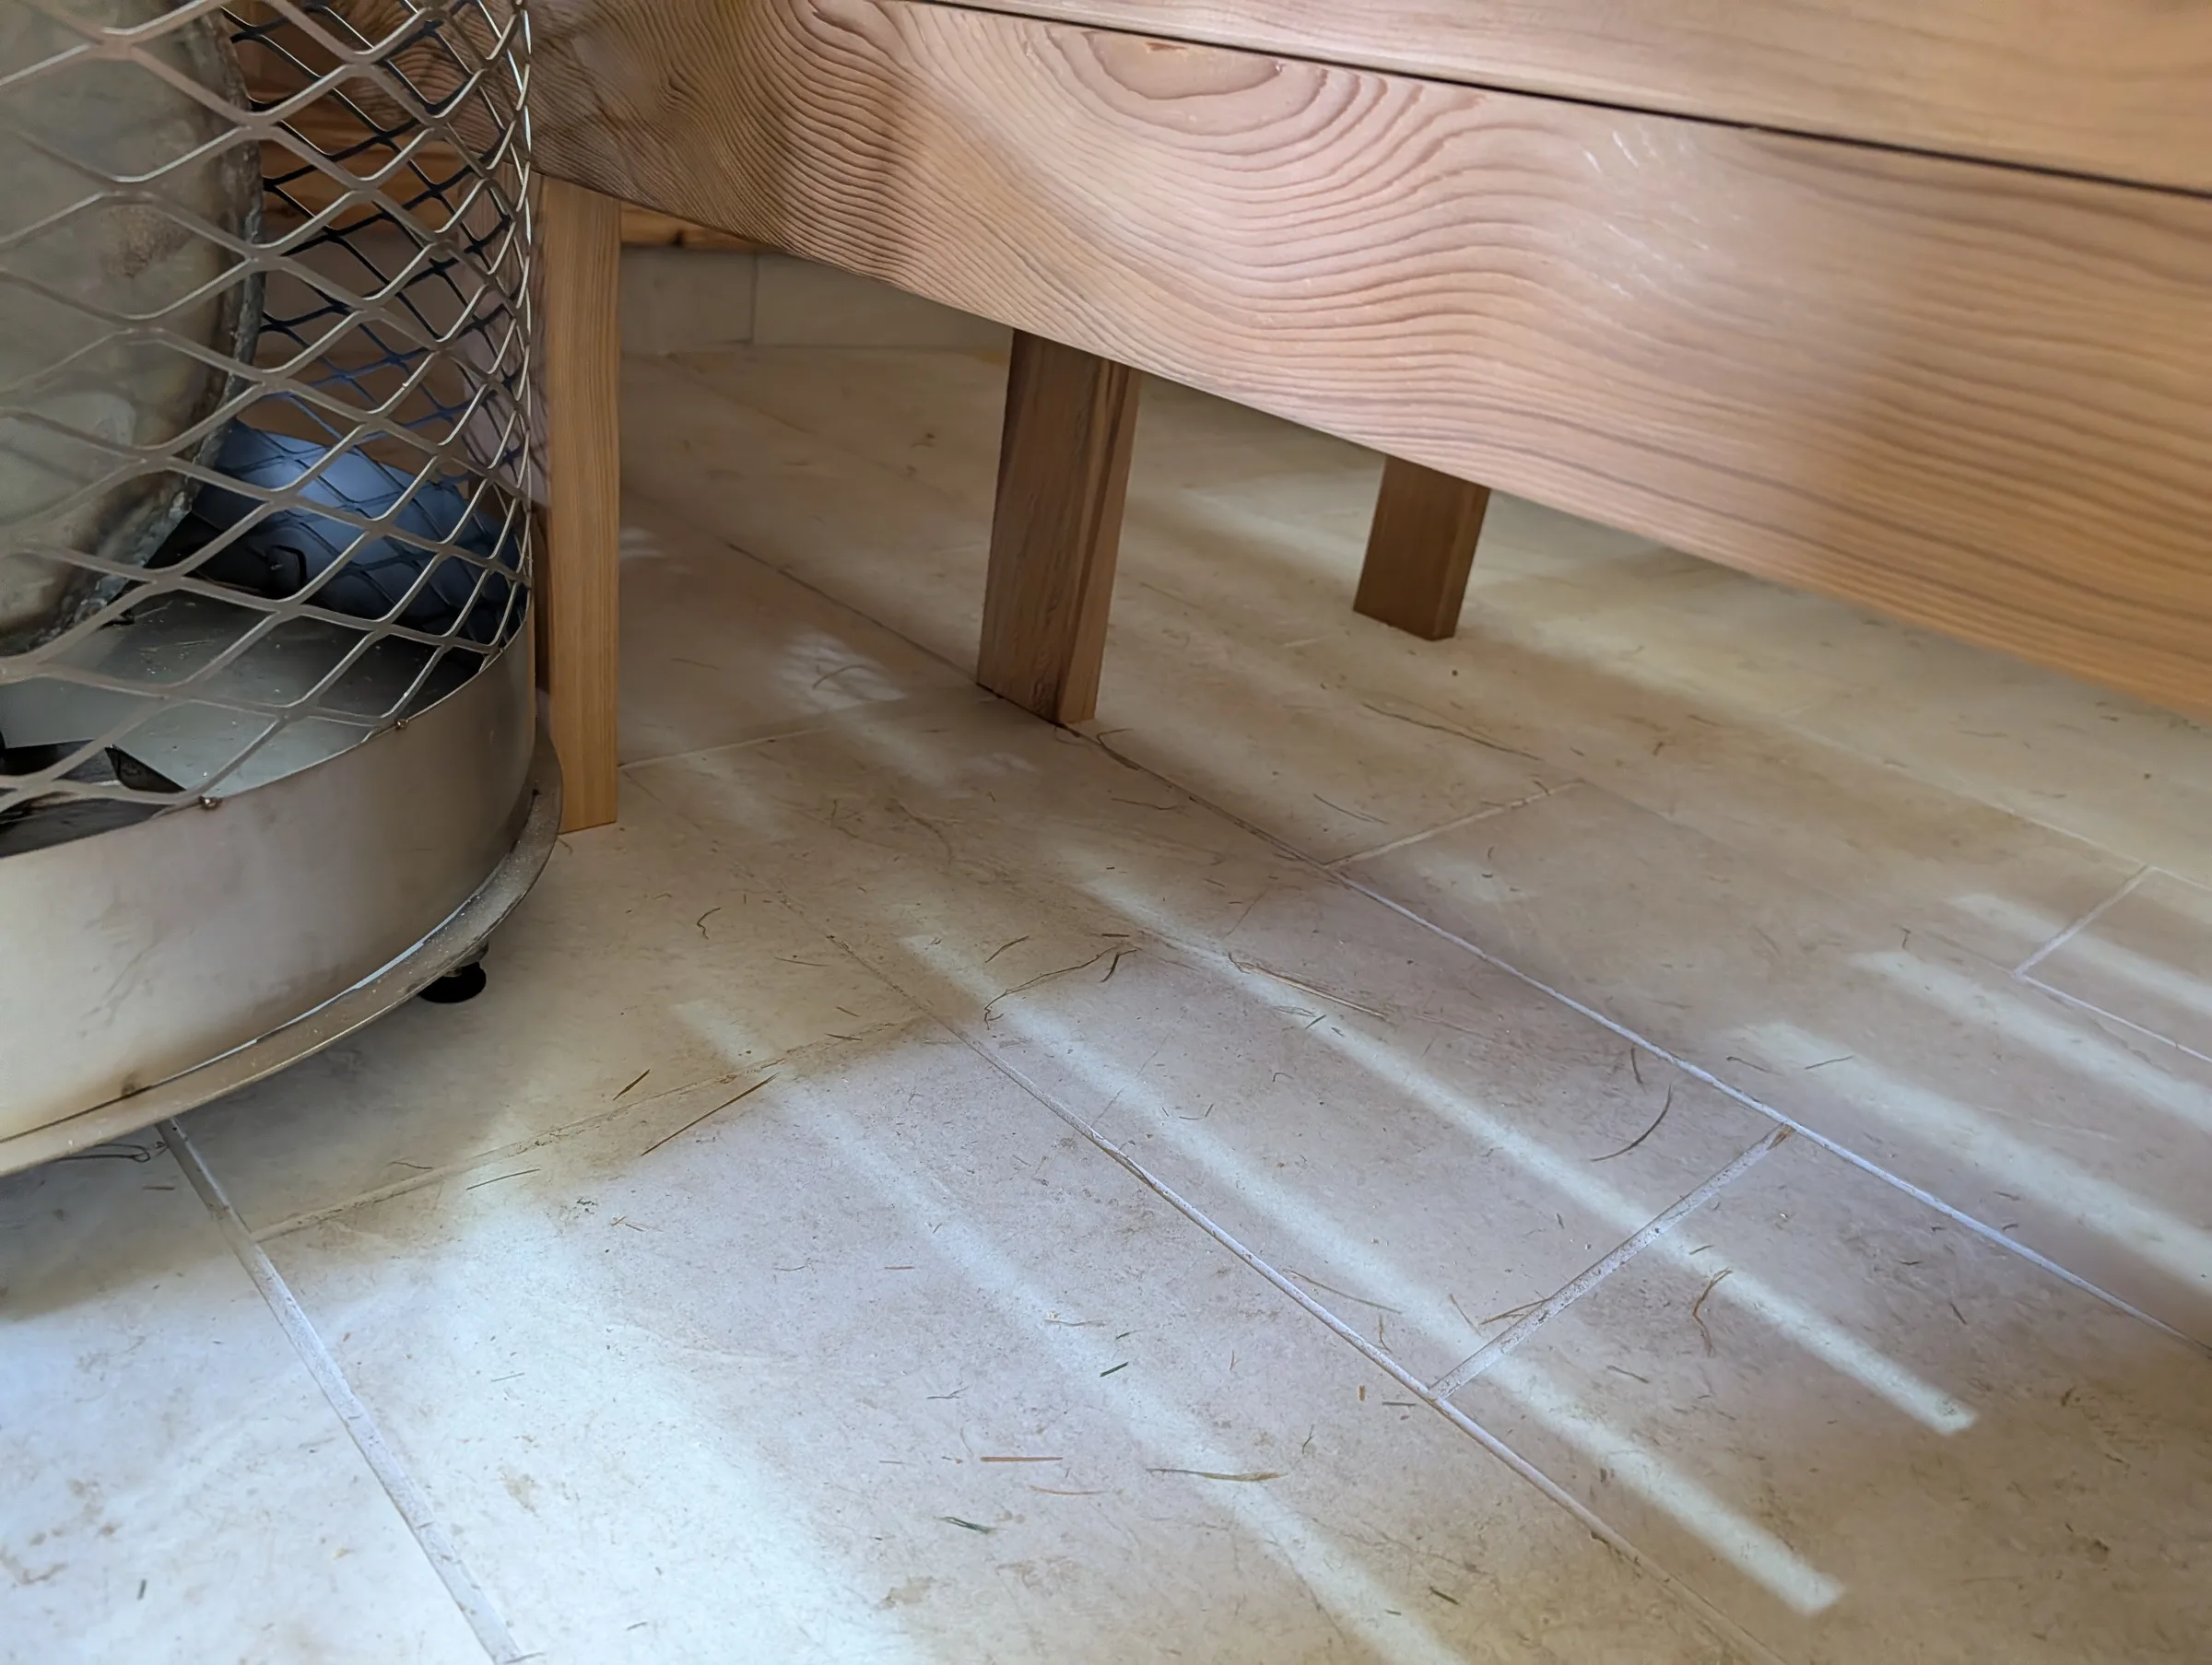
In a couple places I was able to run a board from the top bench to the floor while tying in the middle benches. On the lowest bench, for example, I added a couple short legs on the front and back as people jumping down would have a lot of shock loading. After these supports were added the entire structure was solid, creak free, and I felt no movement when moving, jumping, bouncing, etc. I'll note that the pocket jigs came in handy as I braced underneath the facia boards and have pocket screws on the back side in a few places which made everything extremely solid.
Bits and Bobs
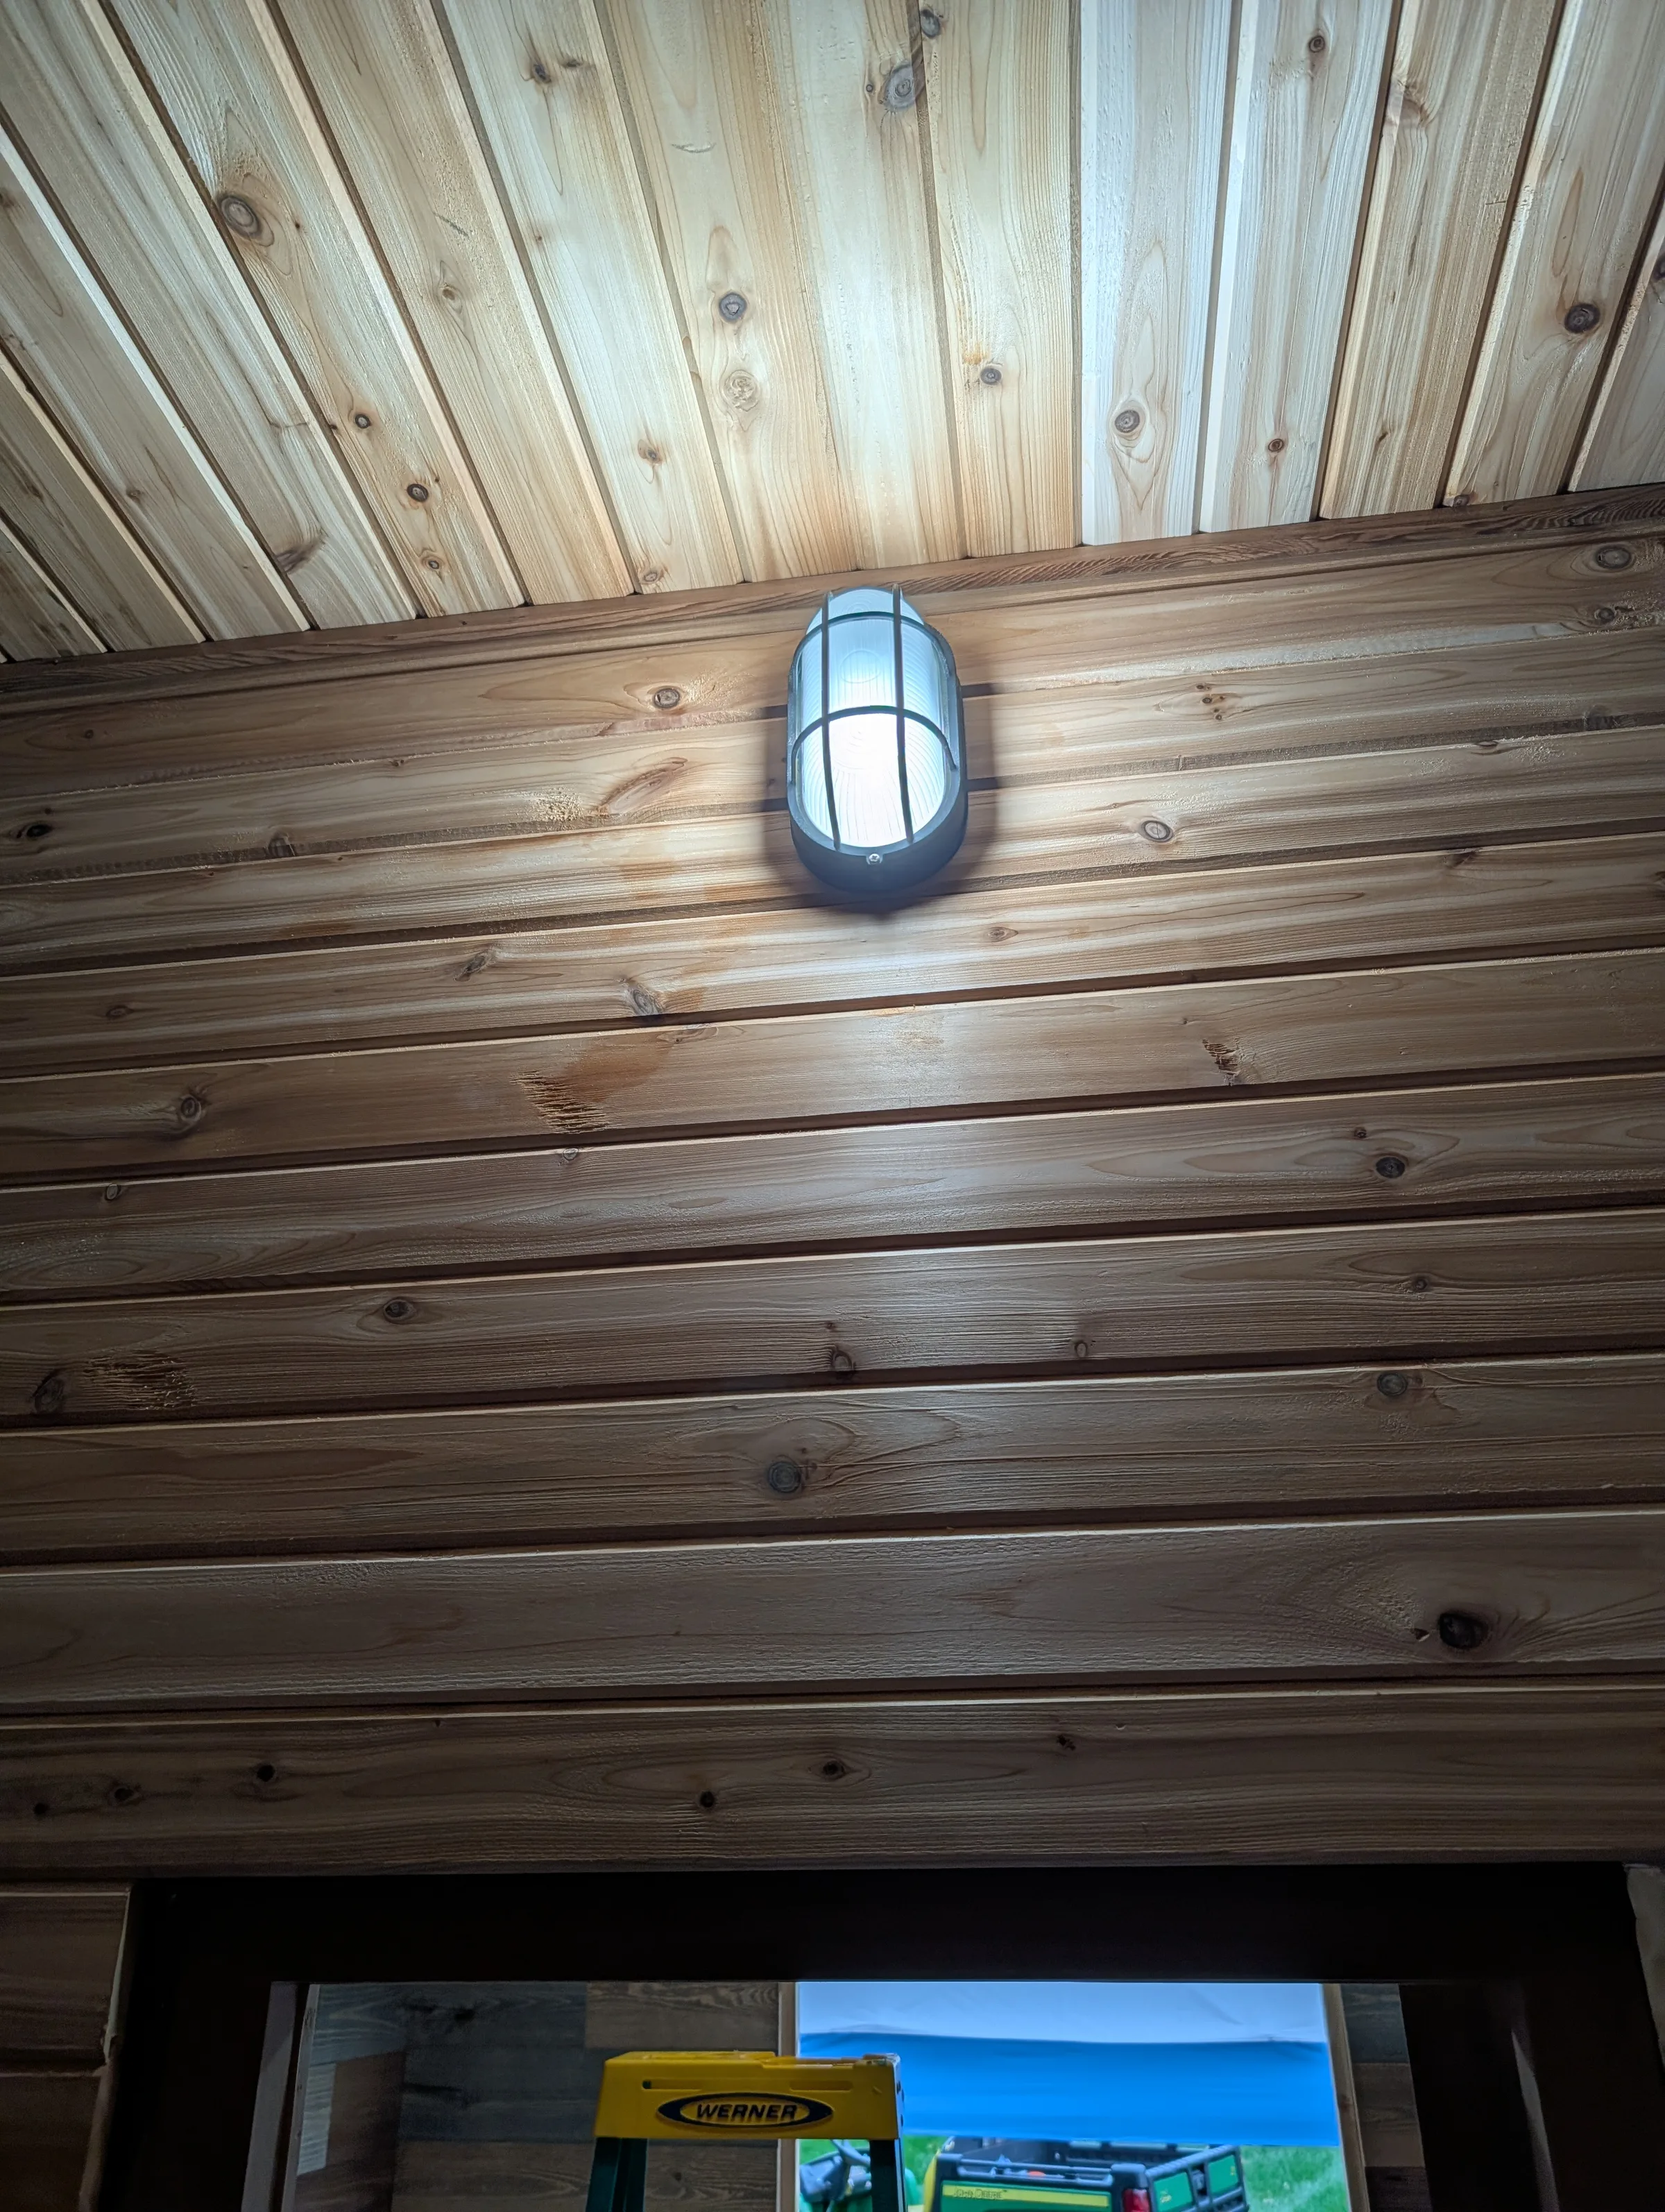
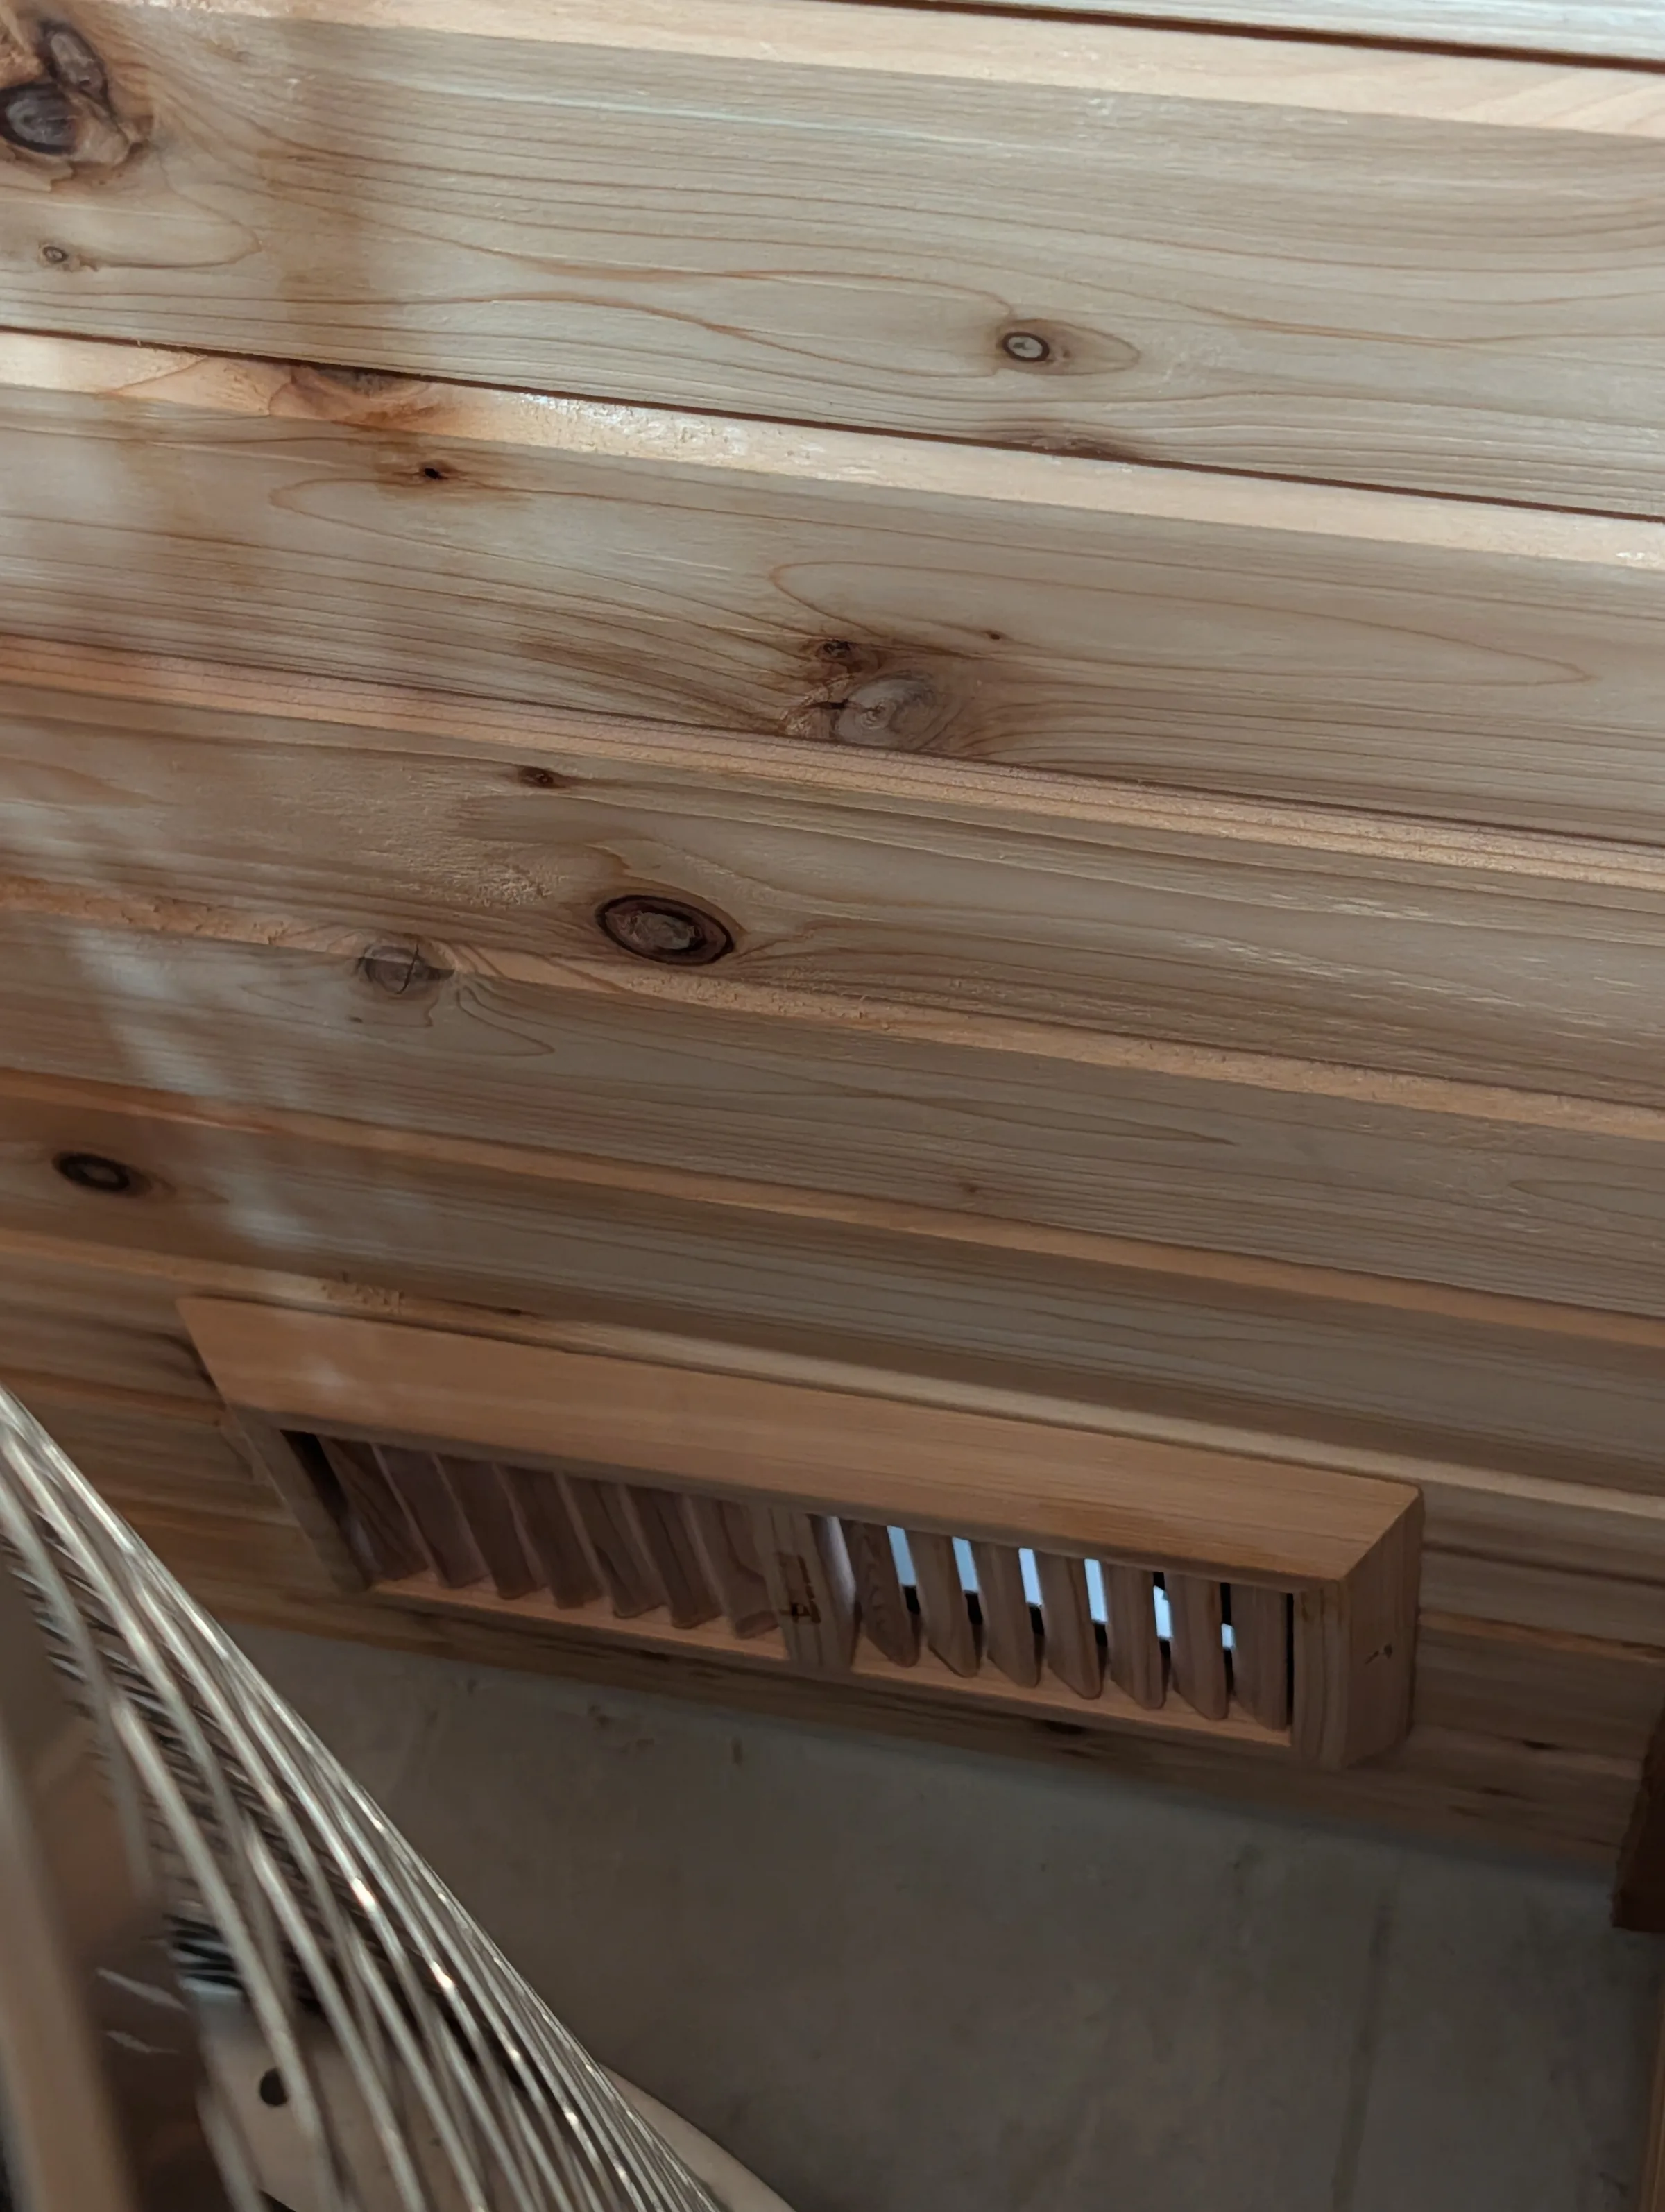
With the benches done, it was really down to a few small items I needed to do in order to wrap everything up. I needed to install the actual sealed sauna light in the hot room. I needed to cut and add the main vent by the heater and the adjustable vent near the opposite ceiling. I also finished the simple trim in the hot room which is visible in the picture with the adjustable vent.
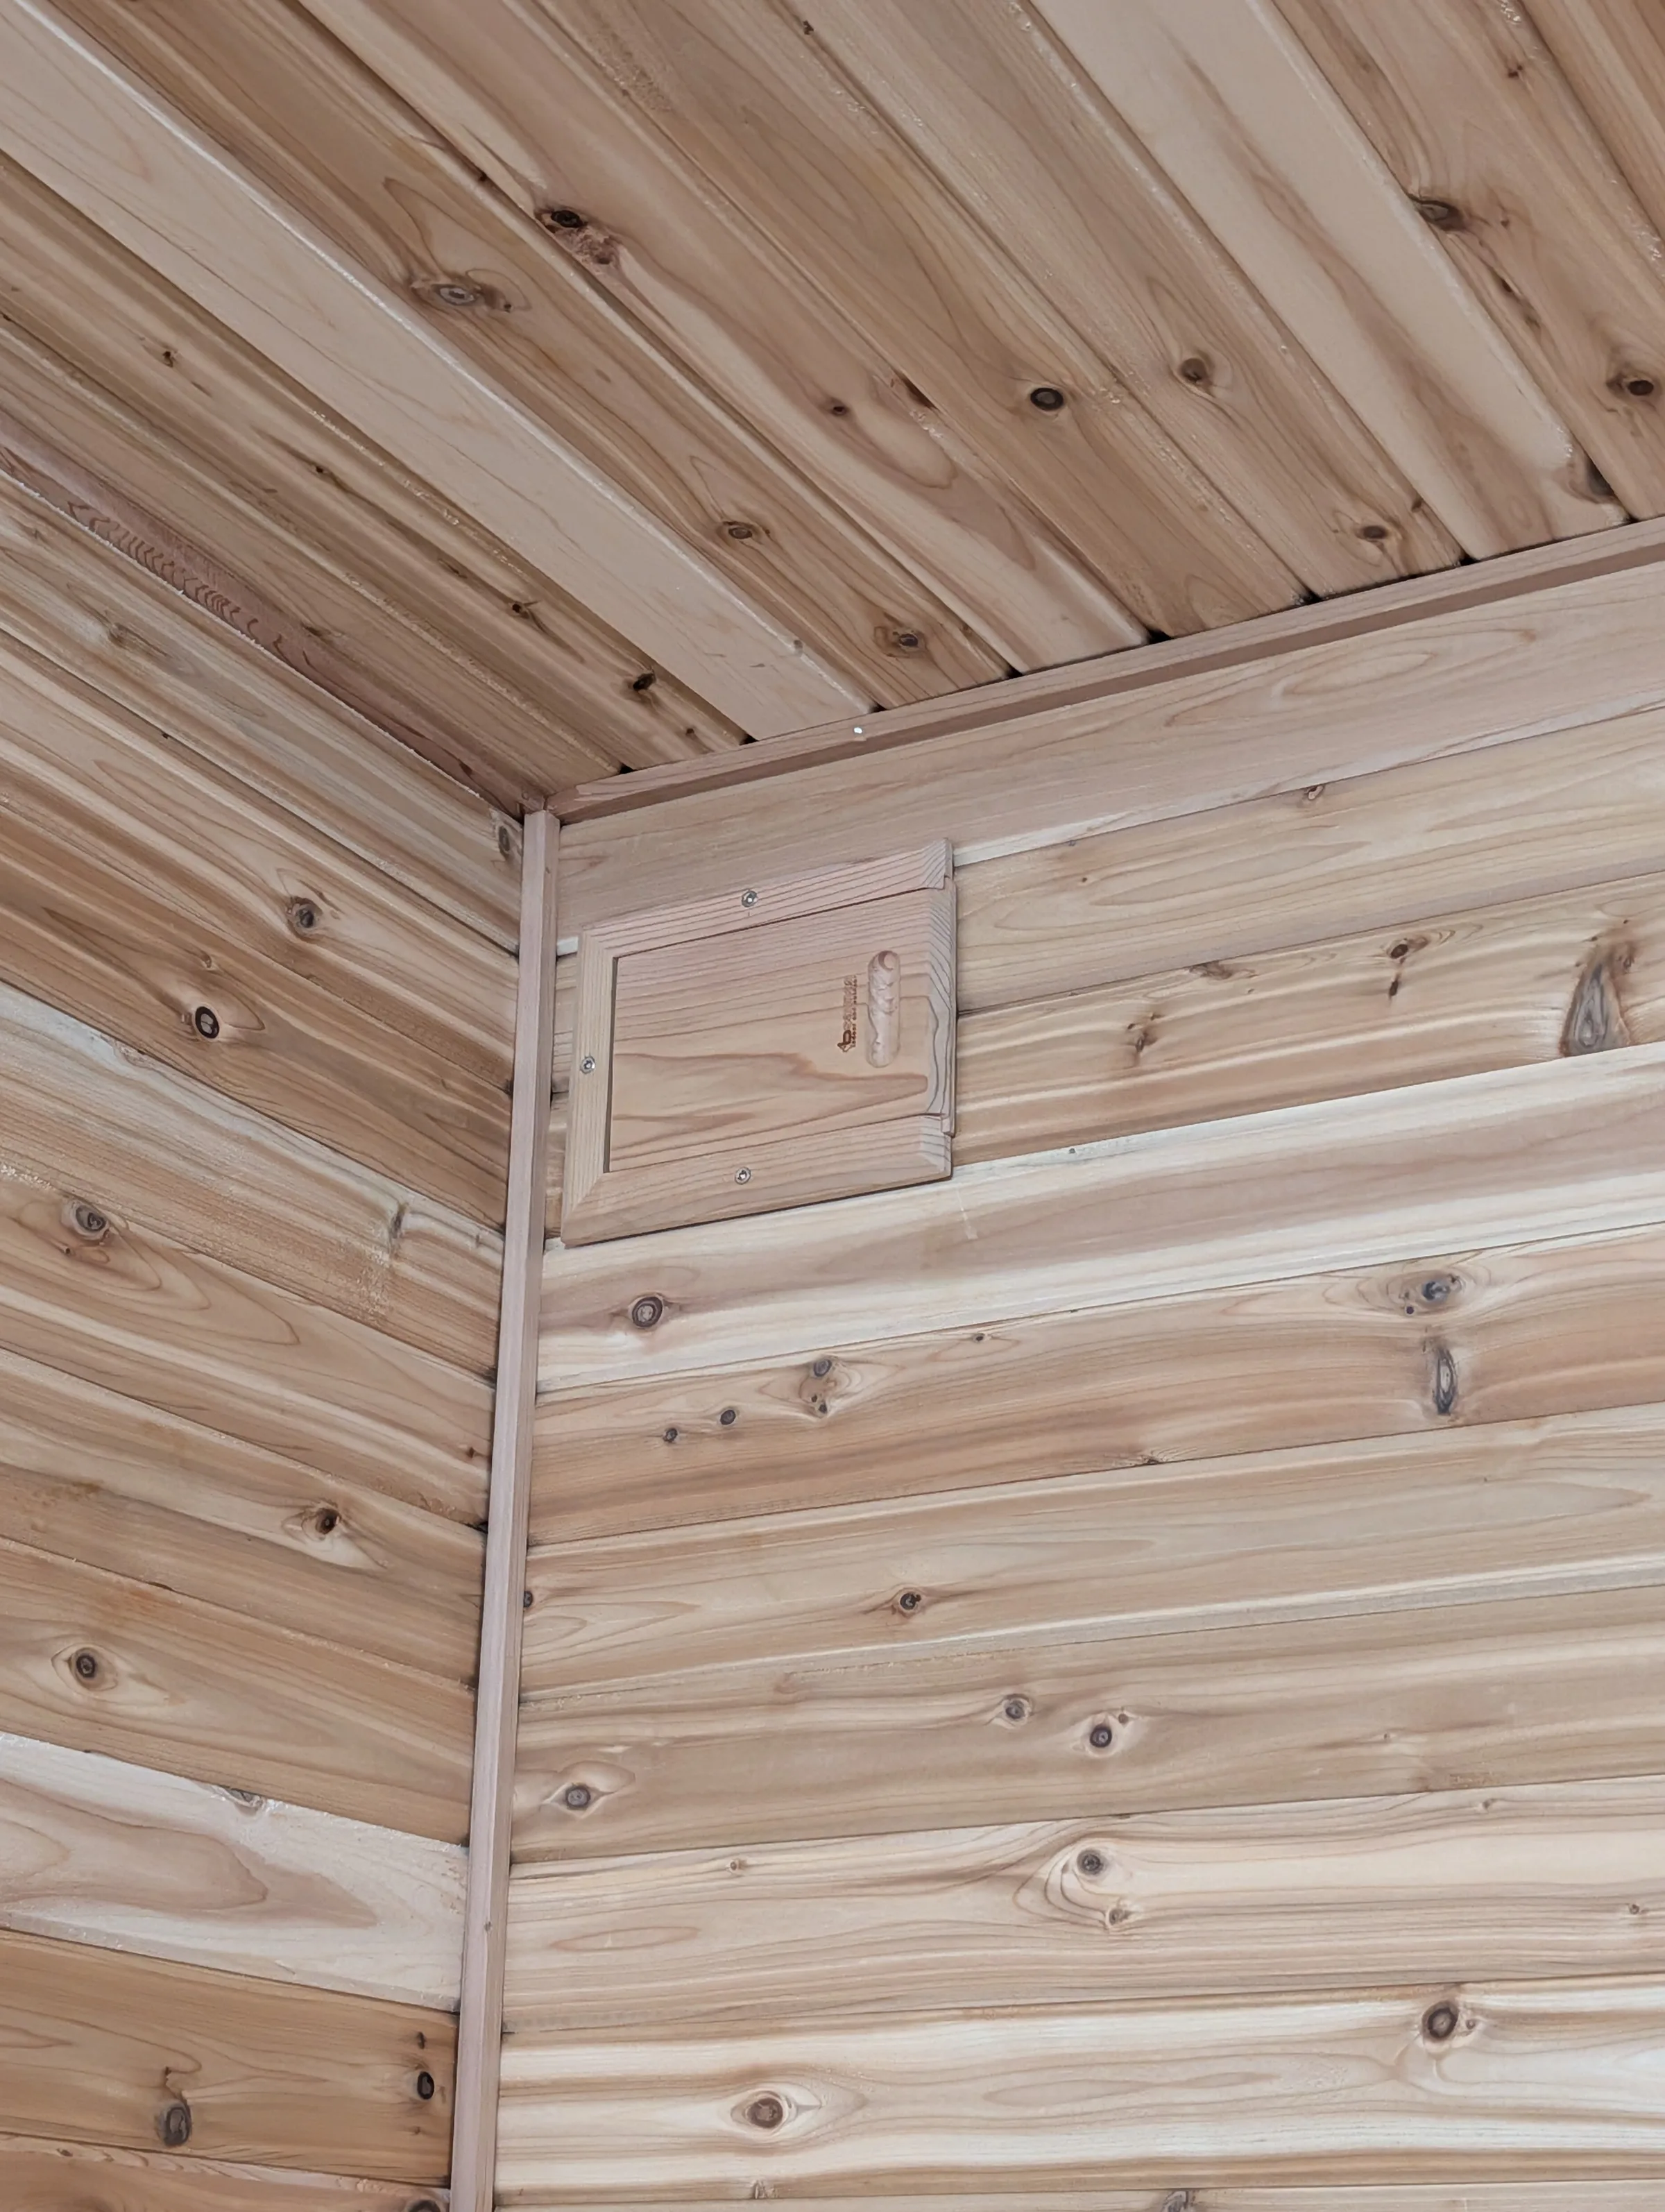
I still needed to add trim to the sauna door. The sauna company gave me trim for this, but I wasn't sure how to actually add it. On the changing room side, the door handle went all the way to the edge of the frame making it hard to trim. On the inside, the thickness varied and was deeper down near the floor tile as the wall needed to slop in to cover the tile. I eventually figured it out. I added the backrests too. The walls have knots which can get hot and burn you, so the clear-cedar boards as backrests are nice here.
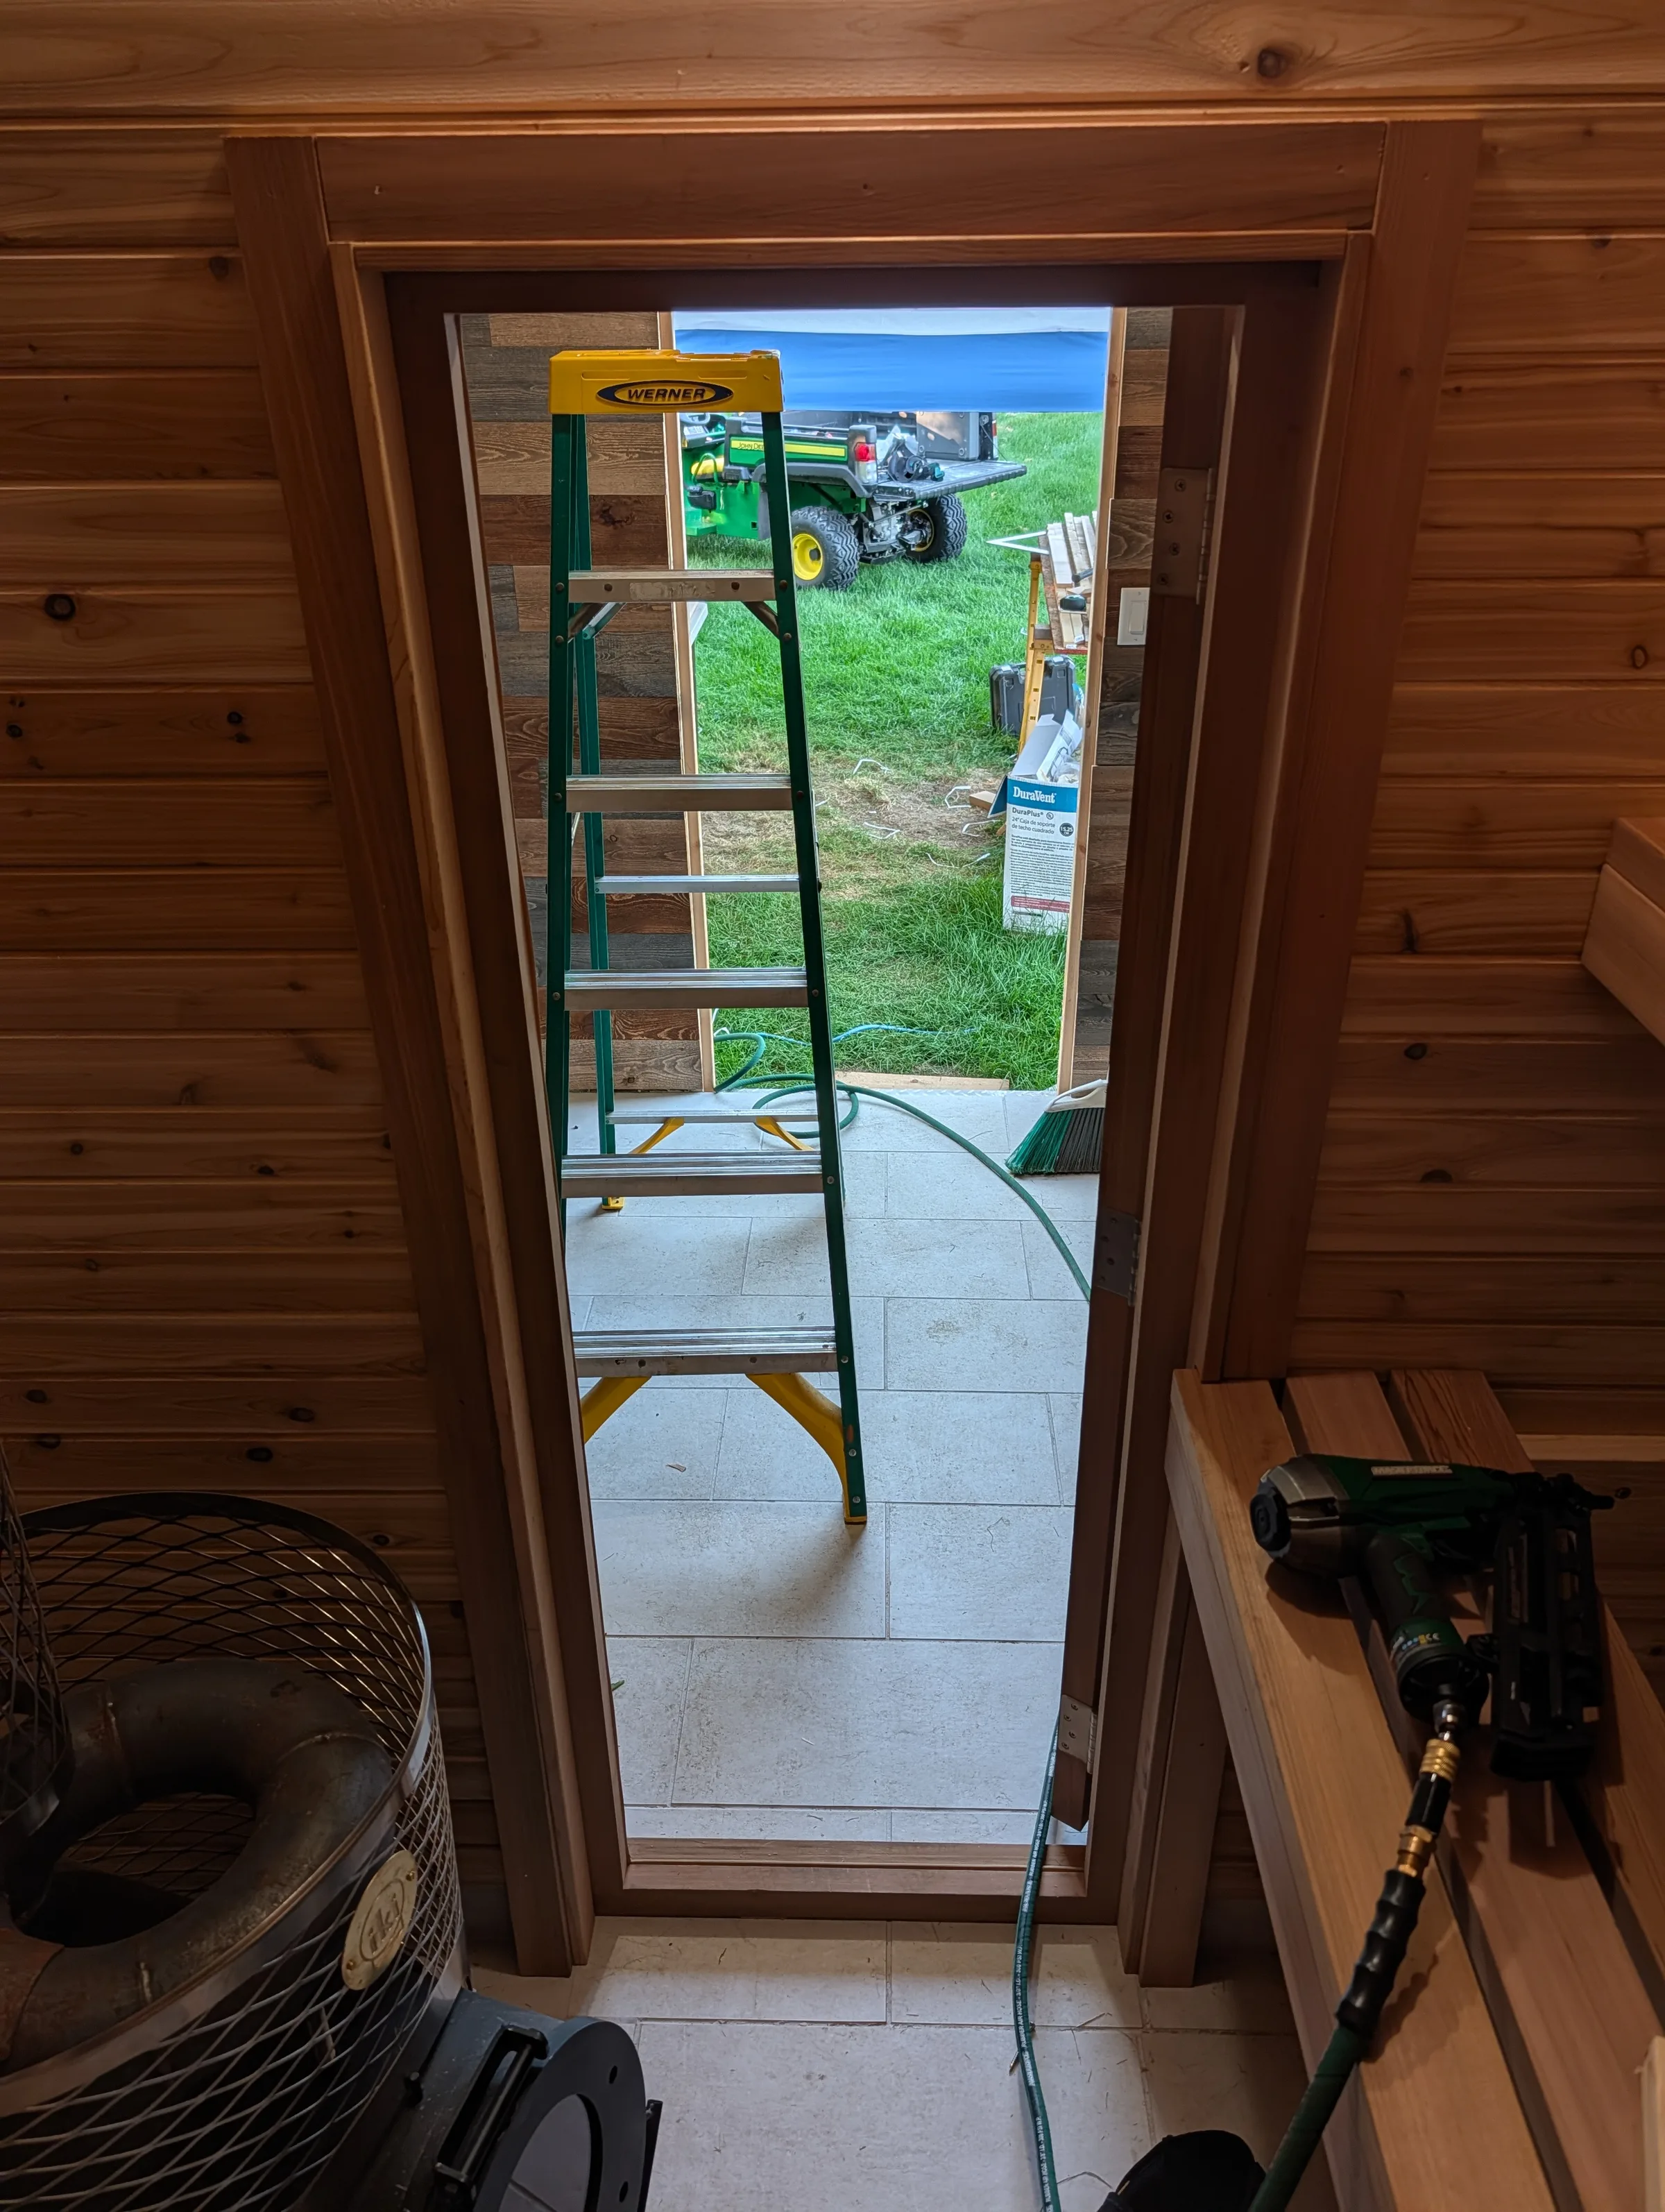
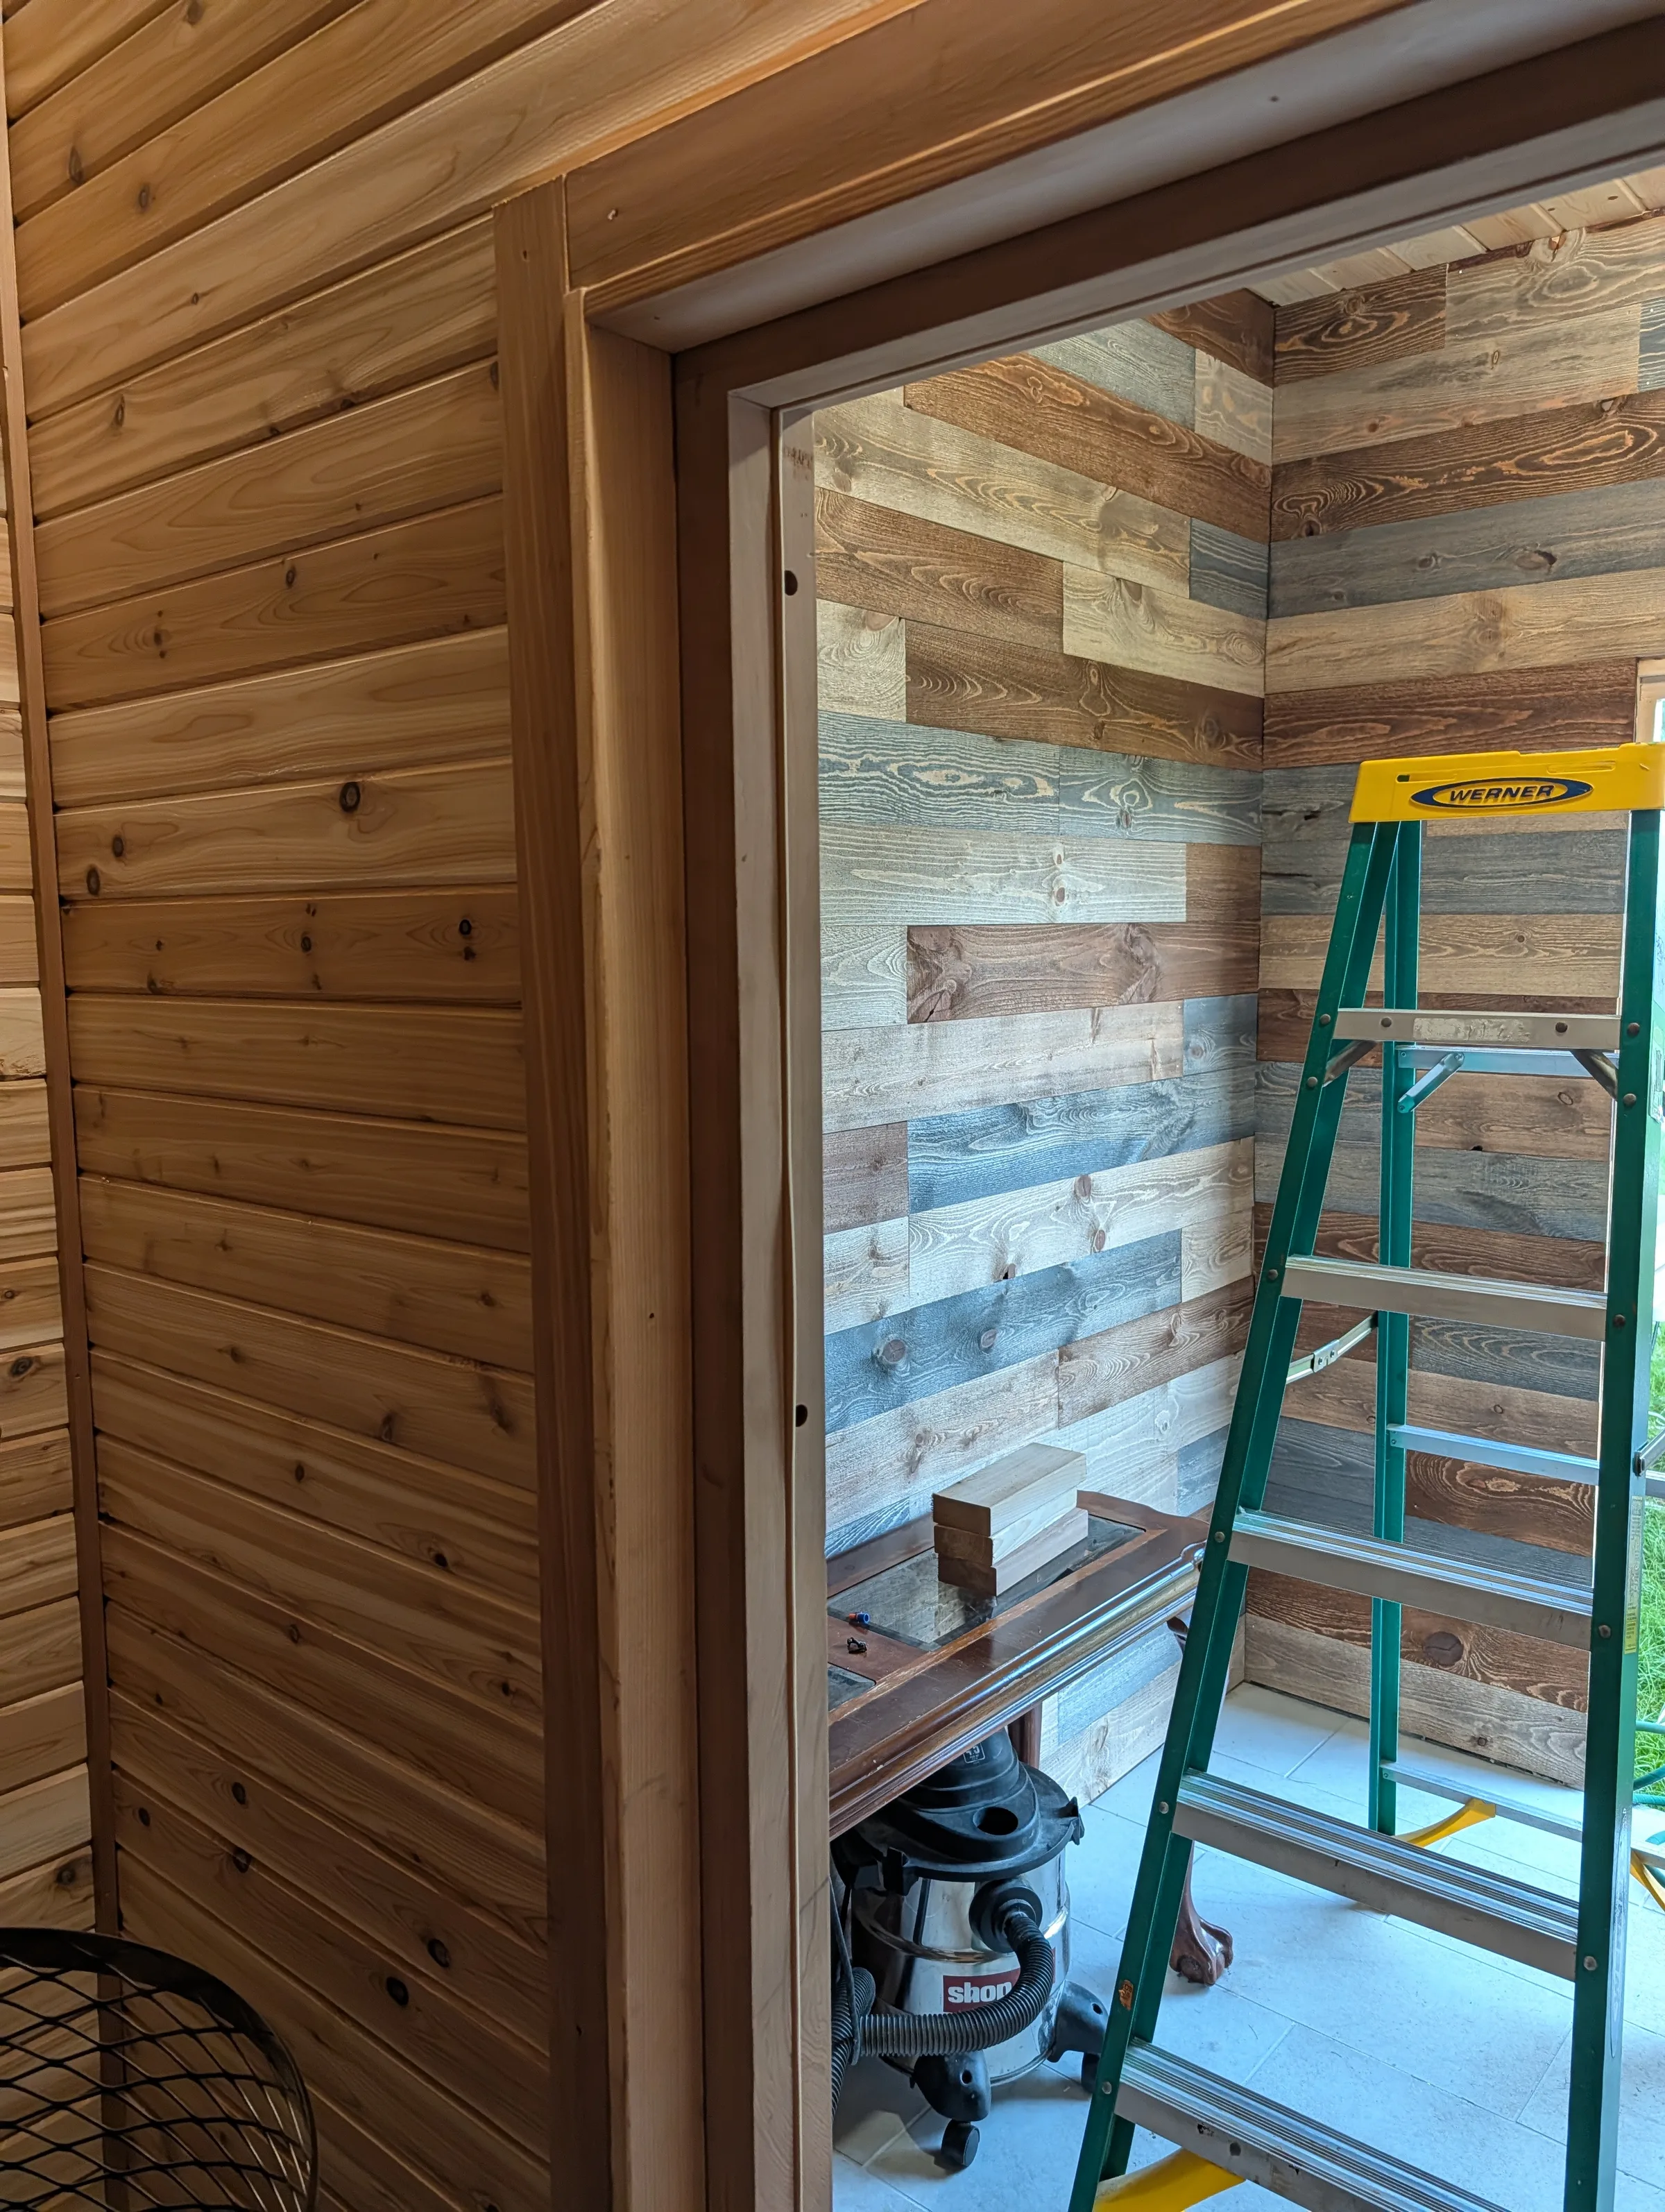
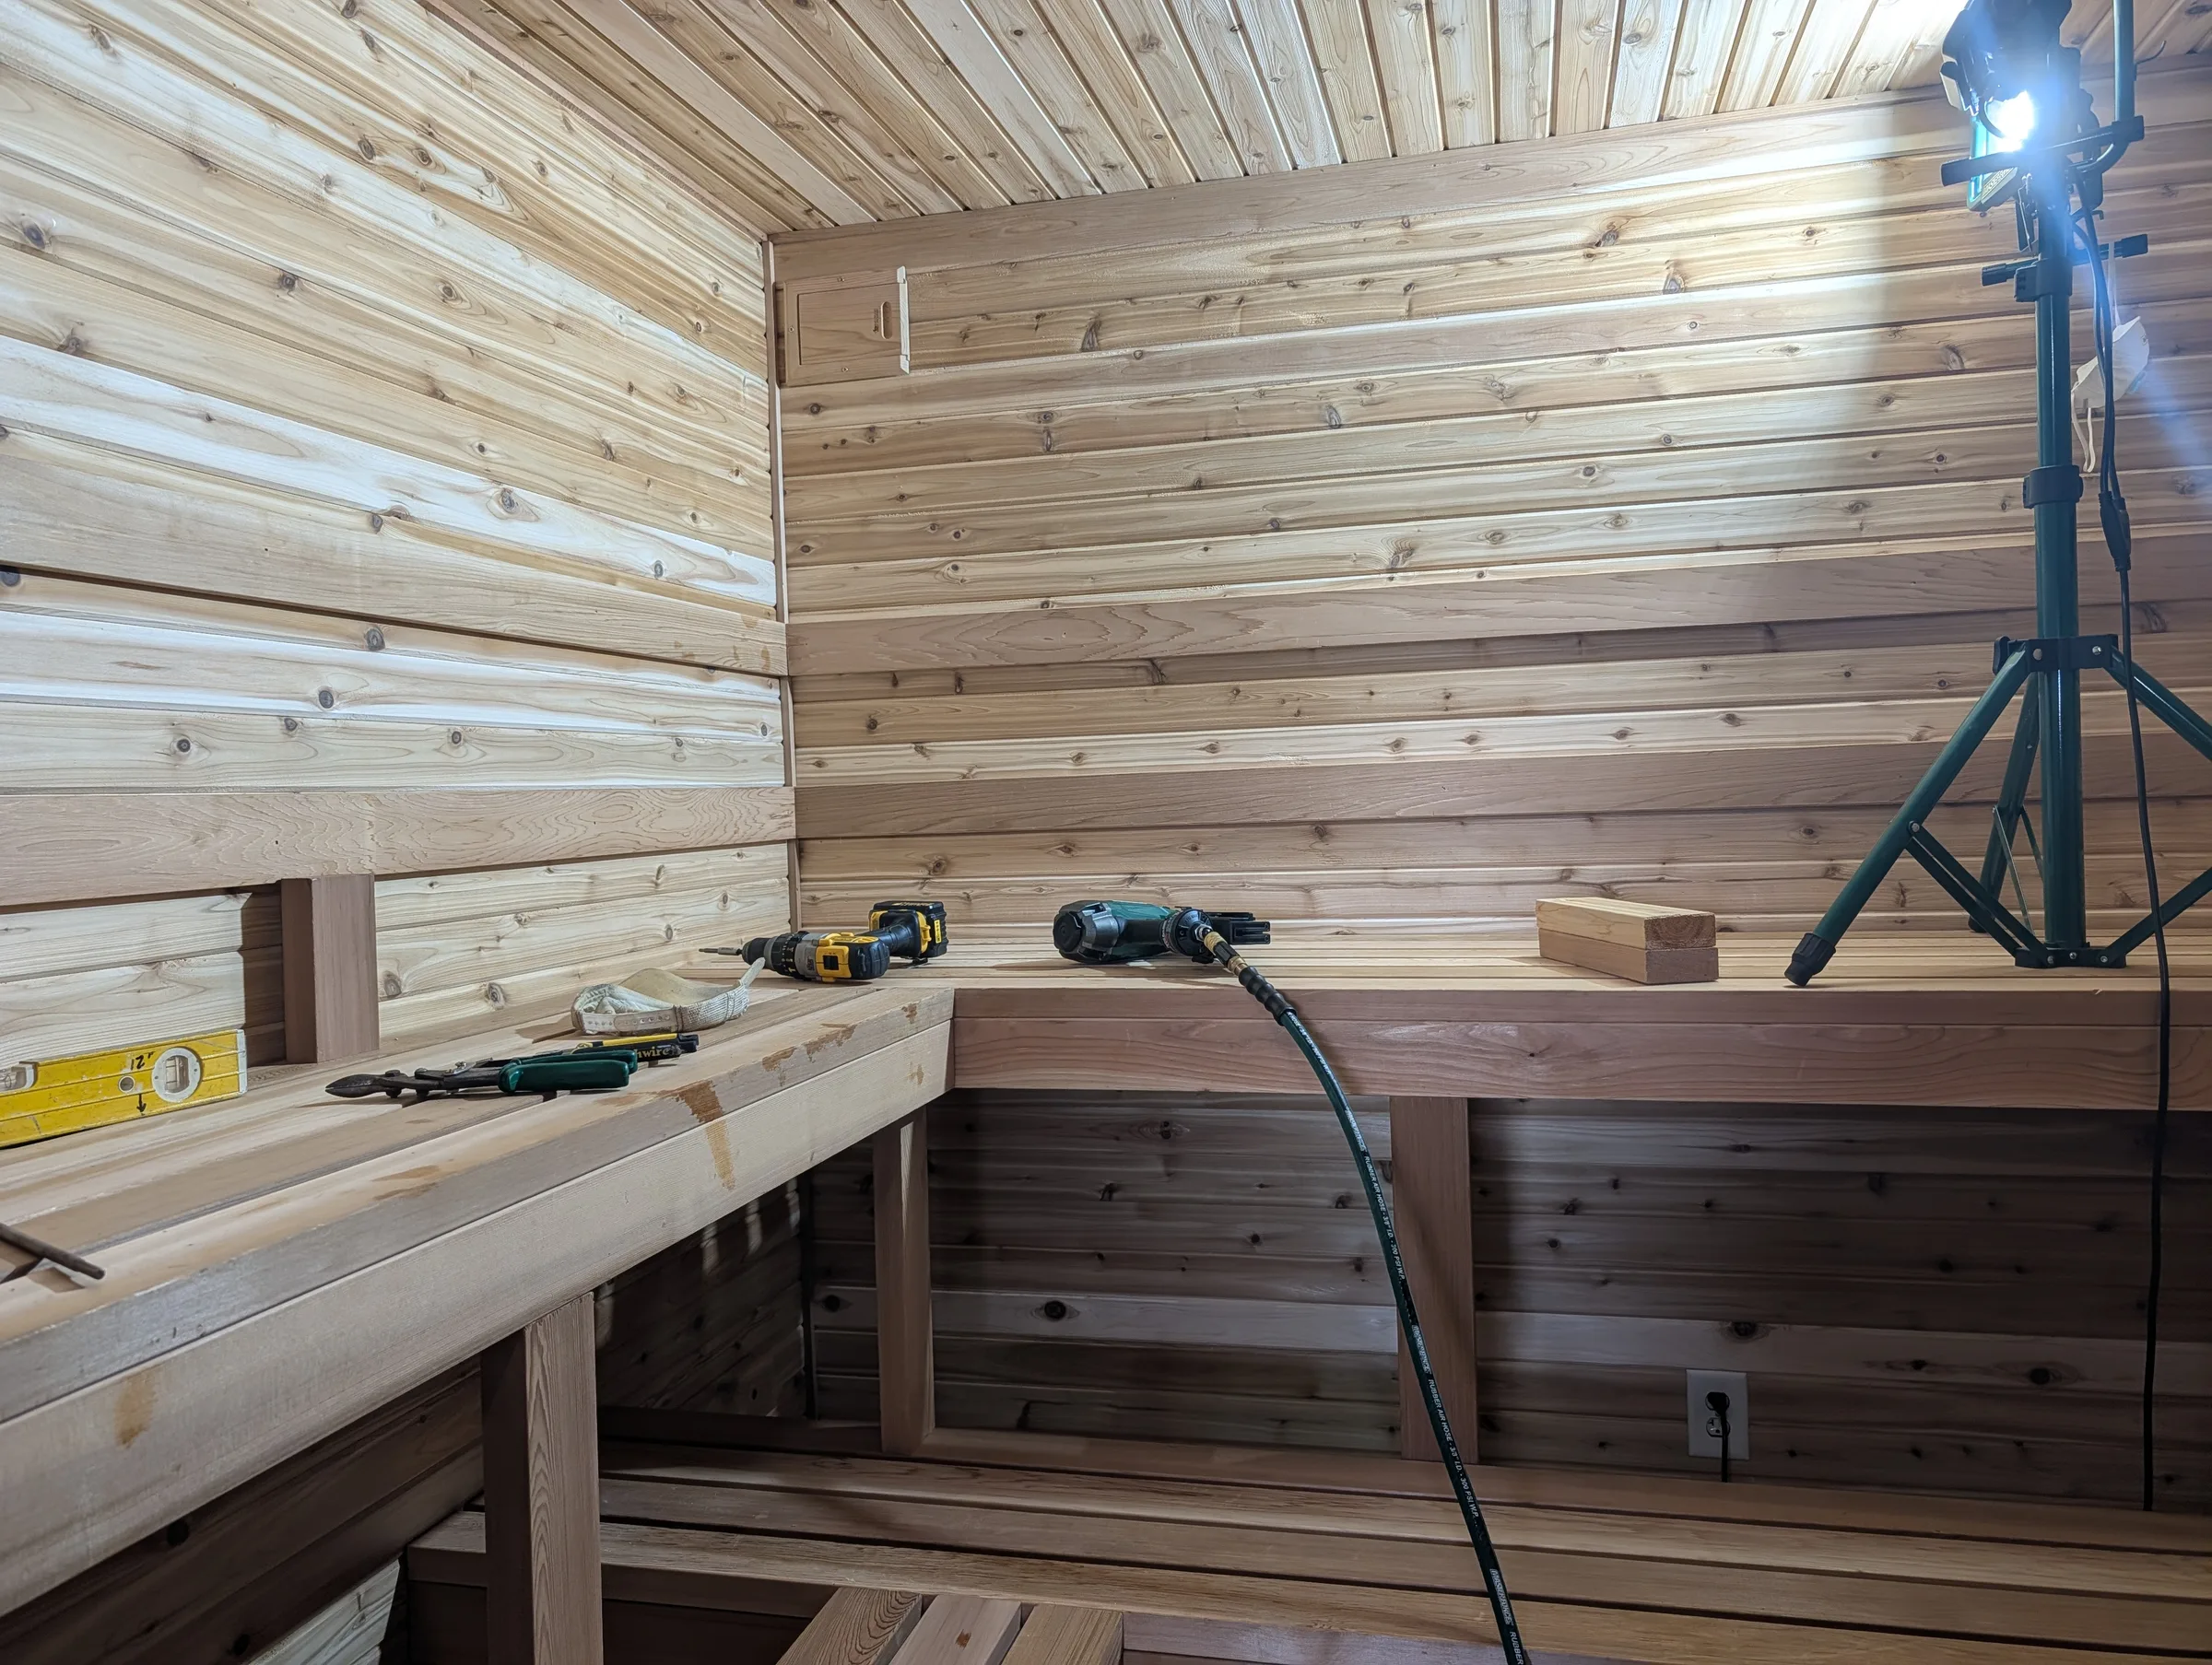
I added some trim to the walls, floor, and ceiling in the changing room. I also added a couple hanging hooks and Sonos speaker for music.
I also added a few small accessories like a thermometer and hygrometer, a 15 minute hour glass, and some pillows my wife got me as a present.
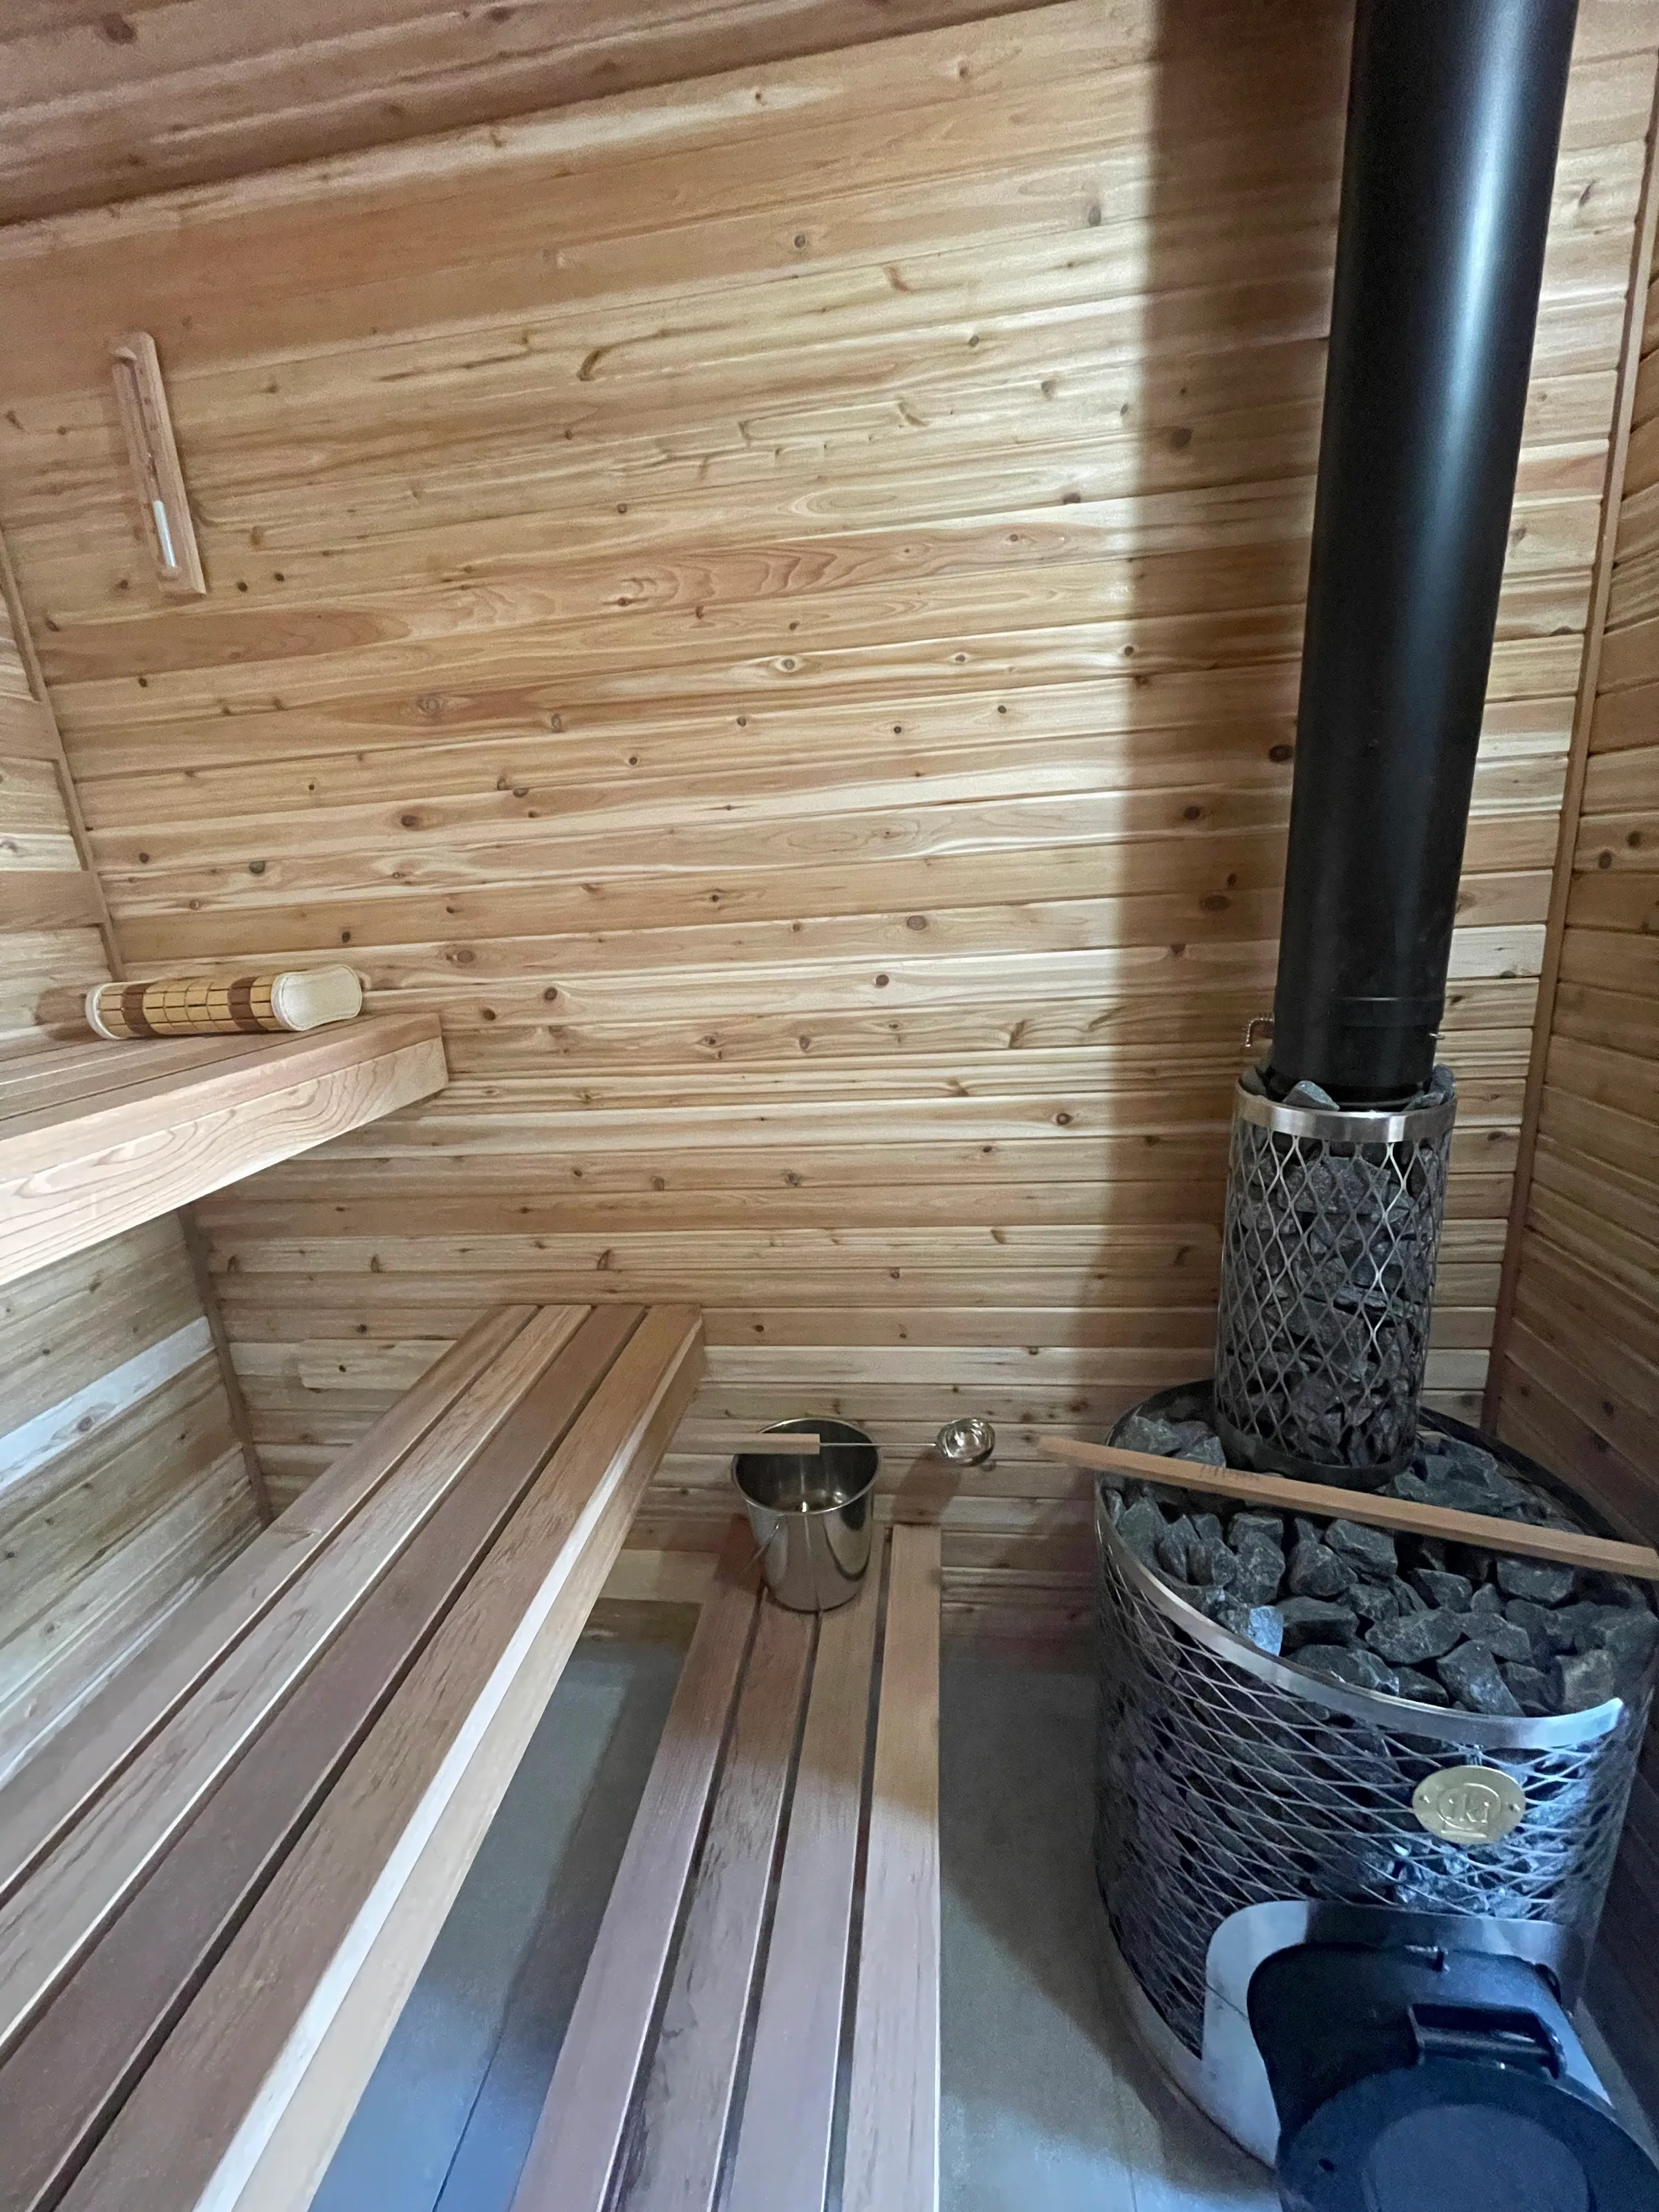
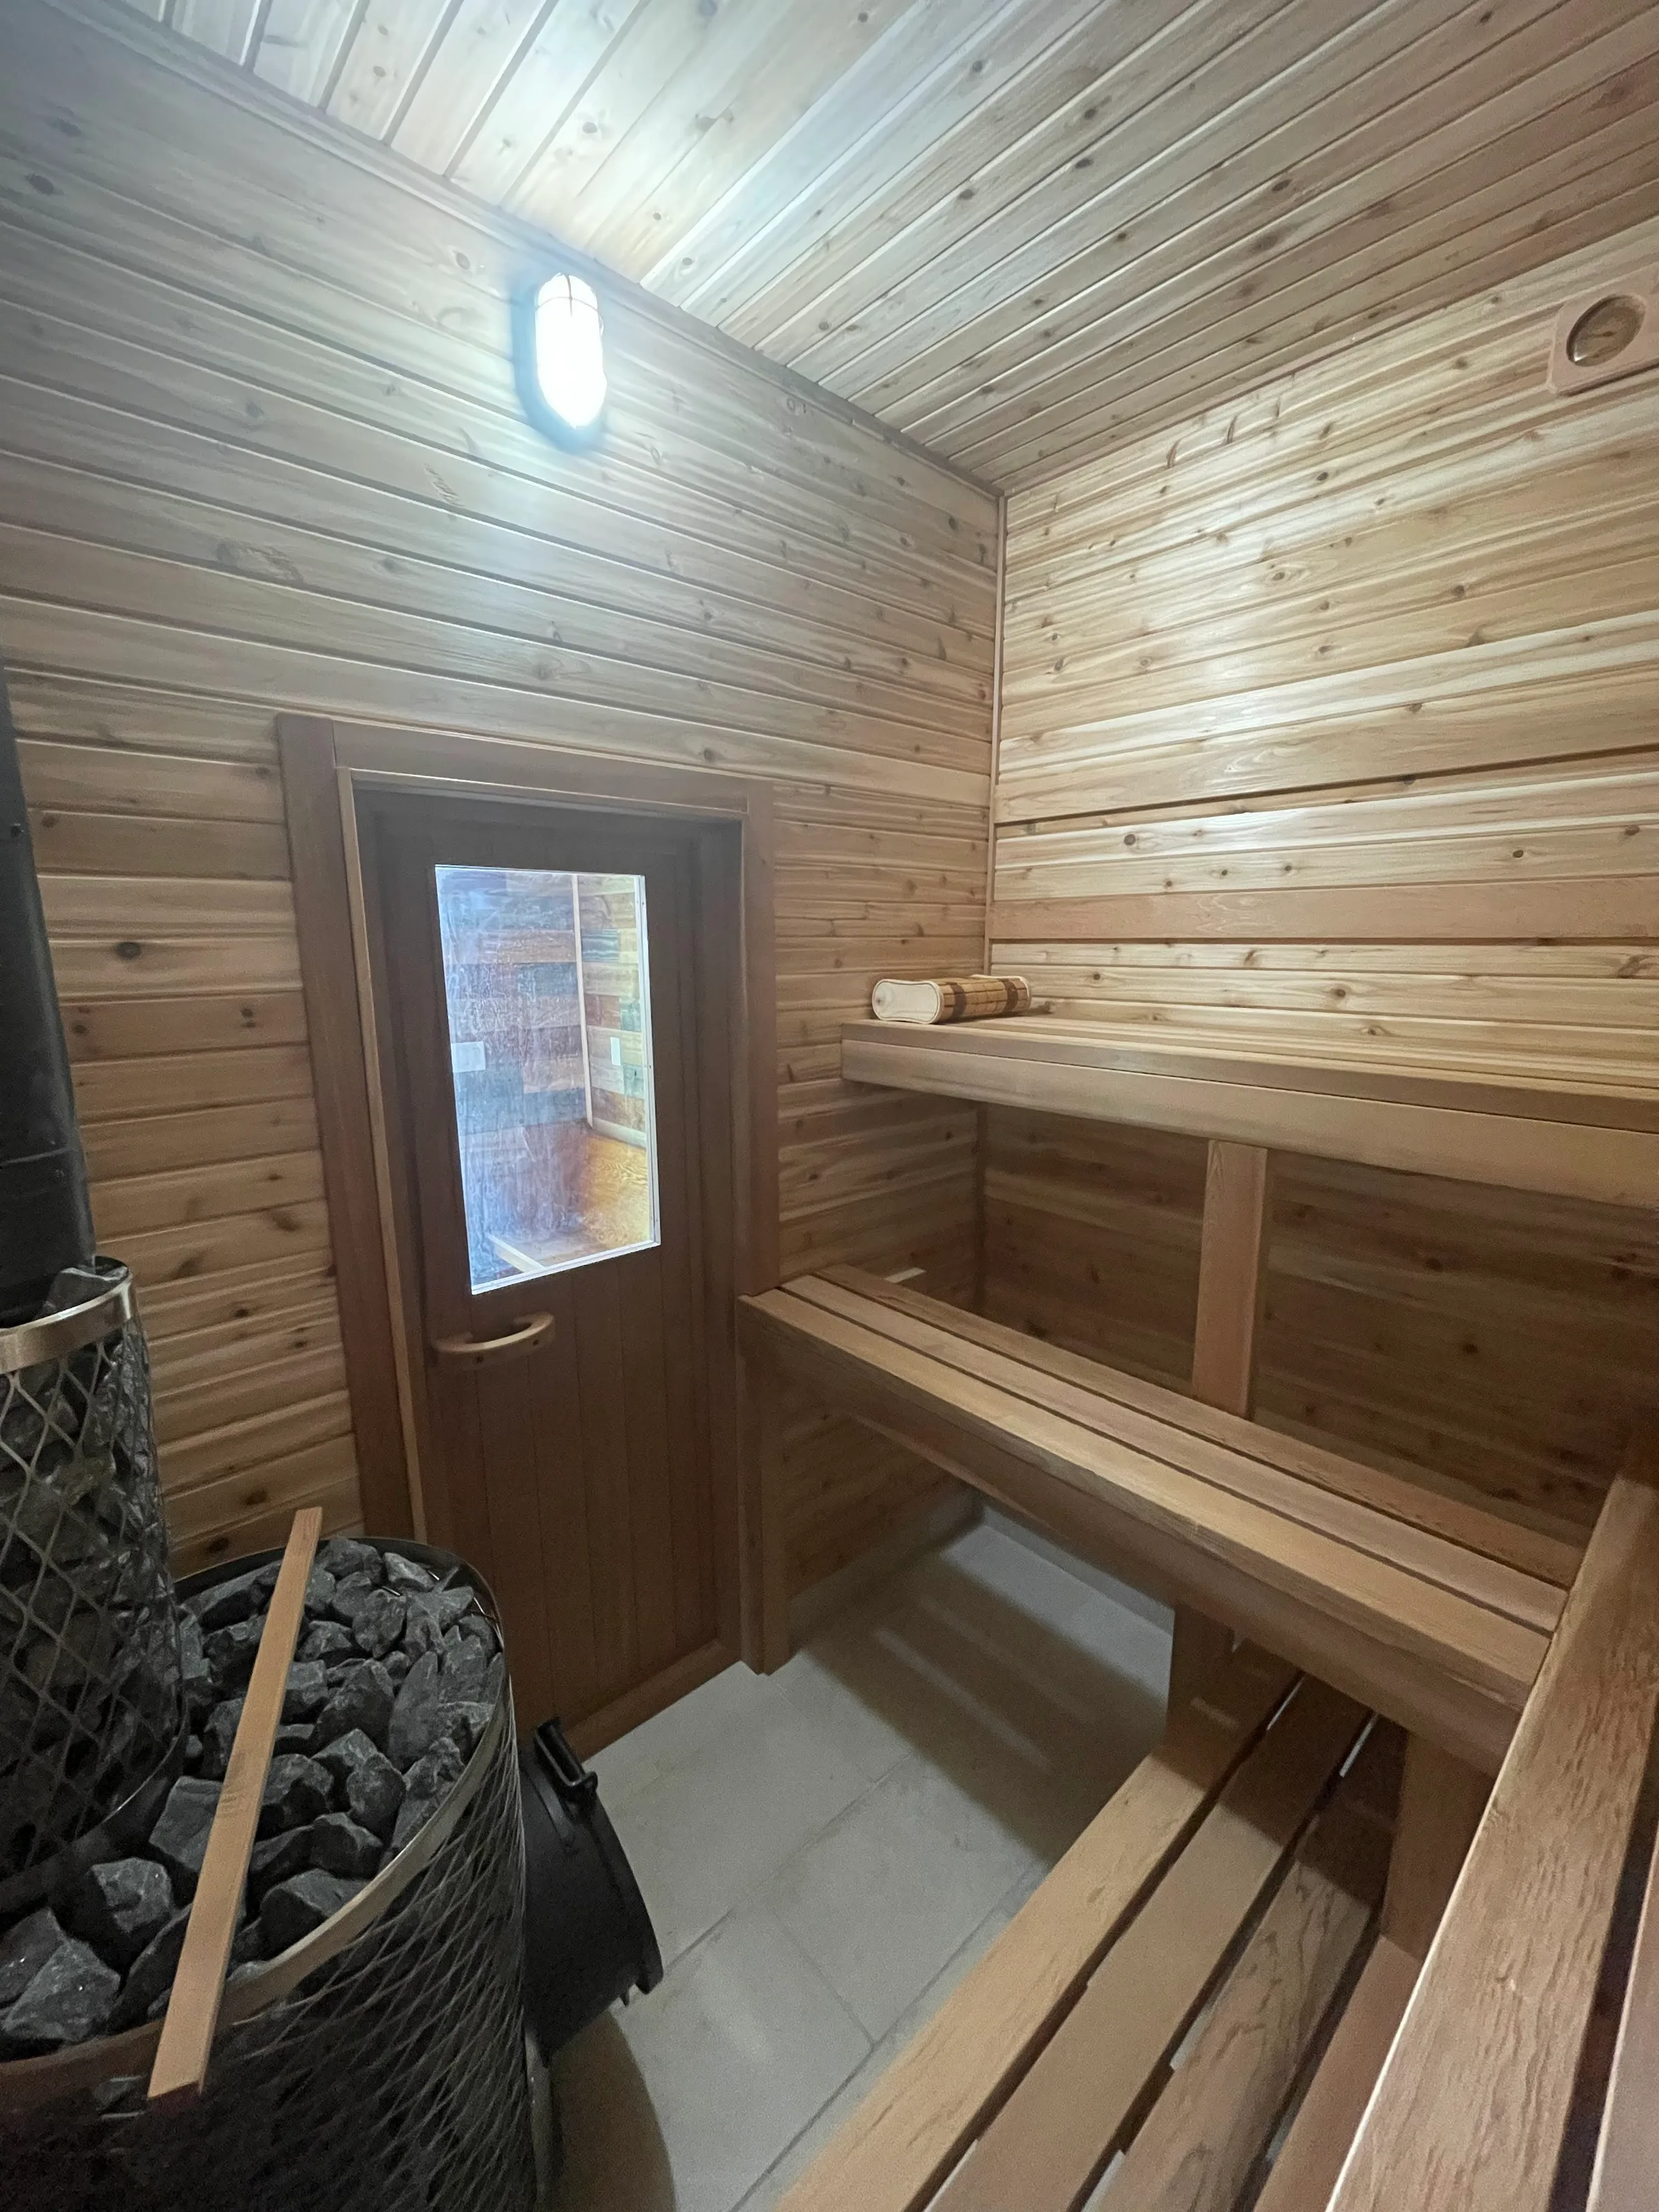
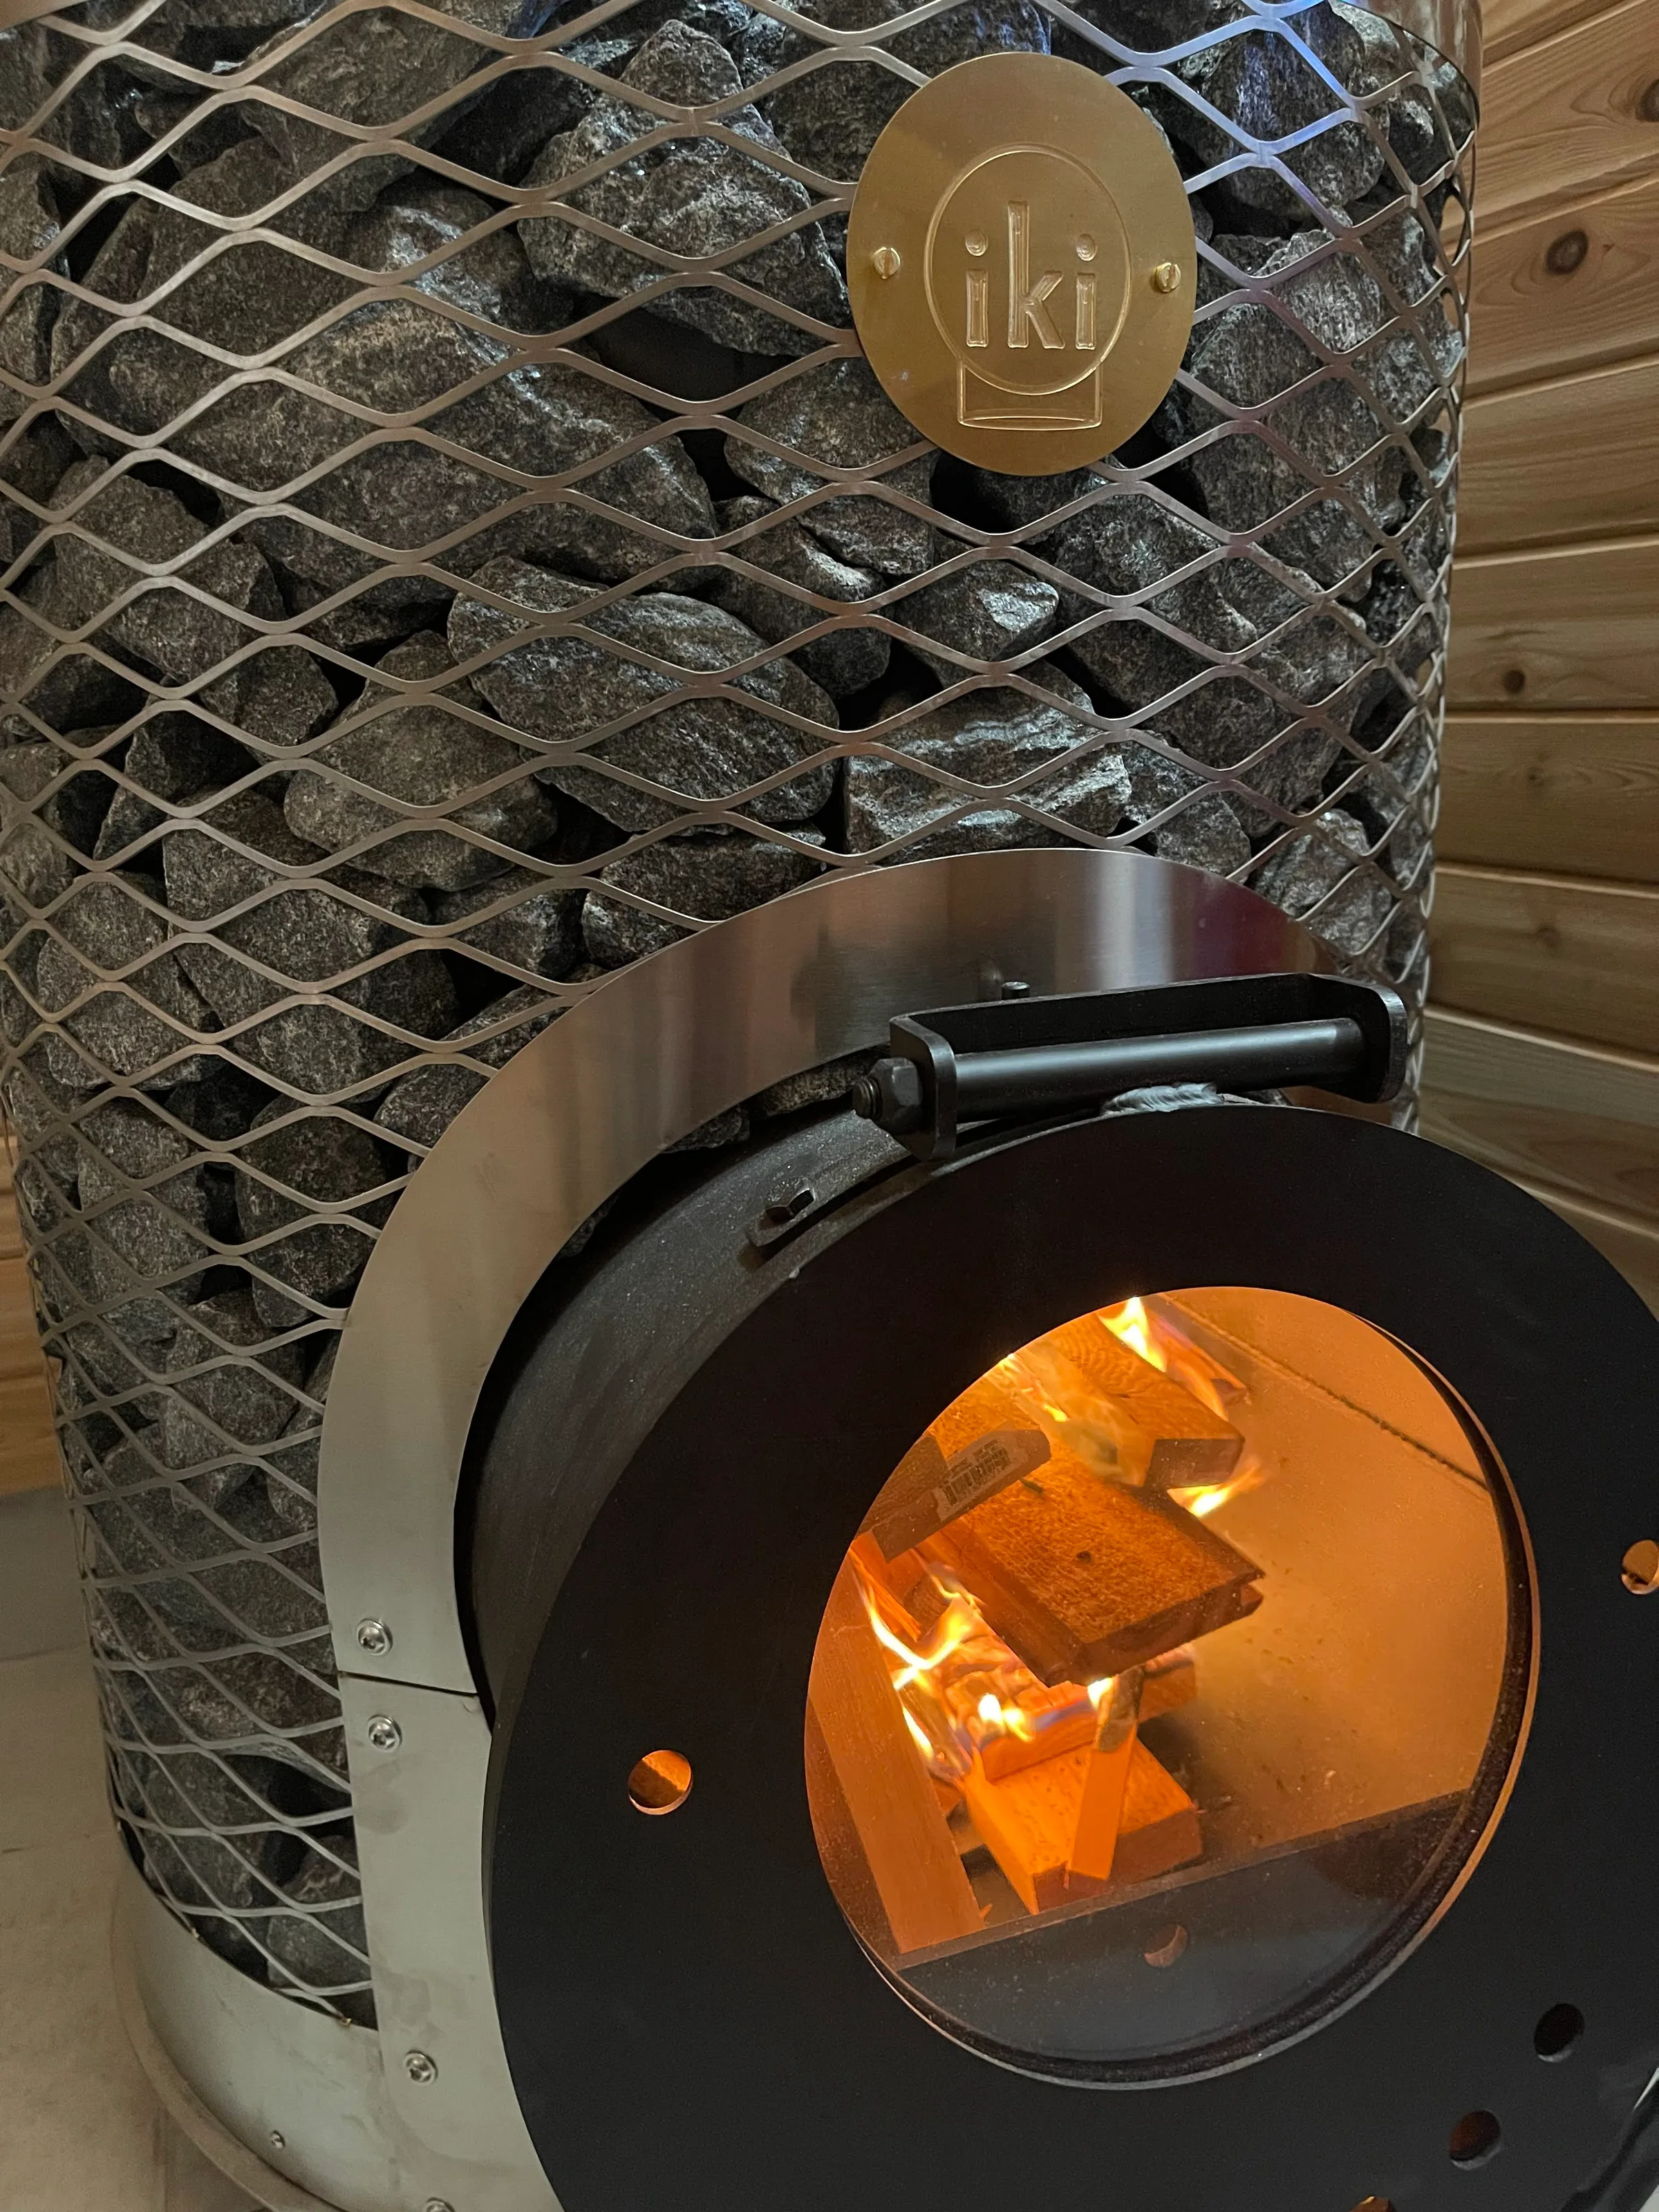
I also needed to reconnect the chimney, add the sauna stones, and do the first firing without anyone there to burn off any assembly oils. I made sure to only do about a half-power burn on the first to and to double check for any leaks, smoking in the room, temperature of the surrounding cedar, and any other safety considerations.
Performance
As expected, the first burn was pretty smelly. I checked on it often, but the off-gassing was a sickly chemical smell and it lasted for almost 90 minutes from the start of the first burn. I tried to spend as little time in there as possible other than to double check temps, clearances, etc.
The first load was all cedar cut-offs and waste so it burned really fast because of how dry it was. By 60 minutes from lighting the fire, the room was about 140°F (60°C). By 90 minutes it was about 165°F (74°C), and by 120 minutes it was about 180°F (82°C). 180°F (82°C) seems to be the max temp for the sauna with no steam and on soft wood. I'm guessing if I used some good hard wood it would go even higher. 180°F (82°C) is plenty hot enough for now and after pouring some water on the rocks the blast of steam is incredibly hot. About 170°F (77°C) I noticed the wood was pretty hot to the touch.
My thermometer is too slow to react, but I think if I added some steam a few times over a few minutes the temperature would burst to well over 200°F (93°C).
One incredible point was about 3.5 hours after the fire had gone completely out the room was still at about 150°F (66°C). I think this is a testament to the insulation and design as it's very fuel efficient and heat efficient.
The first time we used it my whole family was over and with 8 people going in and out the room never went below 165°F (74°C).
Videos & Wrap-Up
I just wanted to give a big thank-you to the online sauna community as without them my research would have gone poorly and my final result would have been far worse. Also a shout-out to my lovely wife Chris who ran the chop-saw on a bunch of evenings to help me move faster.
Also thanks to bsaunasUSA for their great customer service and support. The amount of material they sent in one-shot while getting it all exactly right was incredible. Multiple times I thought I was low on stones, or didn't get enough of the right boards, etc. only to realize later they sent exactly the right amount. They do great work and I highly recommend them.
Thanks to Yoder's Portable Buildings for building such a solid shed and increasing the height to make for a perfect sauna-size build.
Finally, a couple videos of the finished sauna... Enjoy!
Sauna Builder - 3D Model
Dennis sent me a cool tool to build and visualize a sauna in 3D. You can see and rotate the model and even throw a loyly (steam) if you want to. It's very cool. Steps to view my sauna in that system:
- Open https://sauna.gridsnap.app/ in a browser tab.
- Click Here to download
josh-haines.sauna.jsonwith the data for my sauna. - Go to the top right of the browser tab and click the 2nd to the right button for "Import design".
- Select the
josh-haines.sauna.jsonand upload it to the site. - You can drag the model to see it from different angles. You can also go to the bottom to see temperatures, or throw water on the stones. So cool!